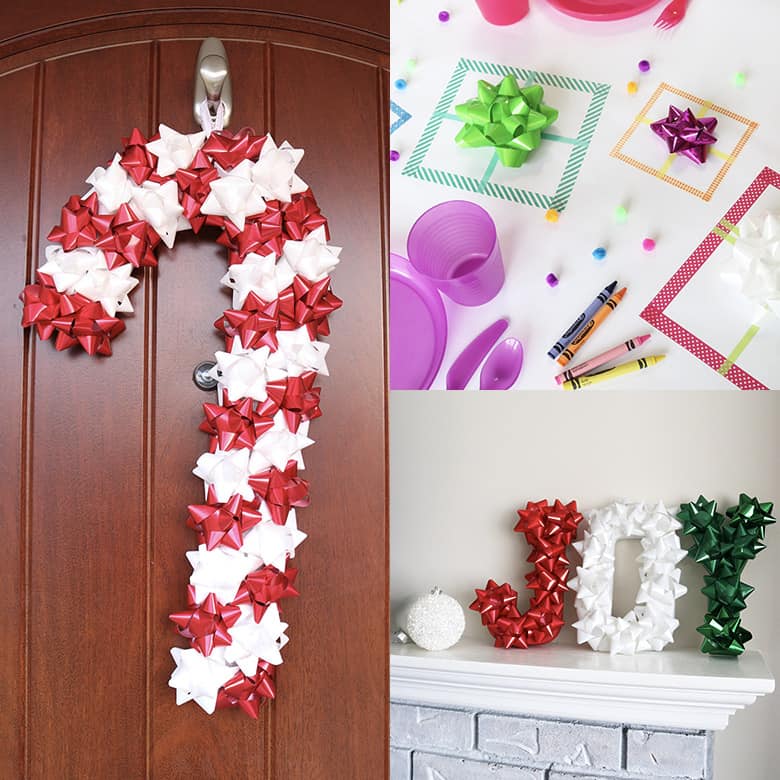
3 Creative Ways to Use Christmas Gift Bows in Your Holiday Decorating
These DIY Christmas craft ideas are a great way to use those extra stick-on gift bows you have in your holiday gift wrap stash! Learn how to make a gift bow candy cane wreath, kid-friendly gift bow tablescape, and gift bow letters.
Stick-on gift bows are such a staple of the Christmas season. Don’t get me wrong…I love the super fancy, Martha-Stewart-worthy gift wrapping. But reality is, I use the regular disposable gift bows more than anything. And if you’re not a hoarder like me (I may or may not save everything), you’ll probably be picking up a bag or two of these bows to make your gift wrapping a little easier this year.
But you should also pick up an extra bag or two for these fun craft projects! I’m all about cheap and easy holiday decor, and who knew Christmas gift bows would be the perfect craft supply for the job?!
This post is sponsored by Offray Ribbon, all thoughts and opinions are my own.
More posts you’ll like:
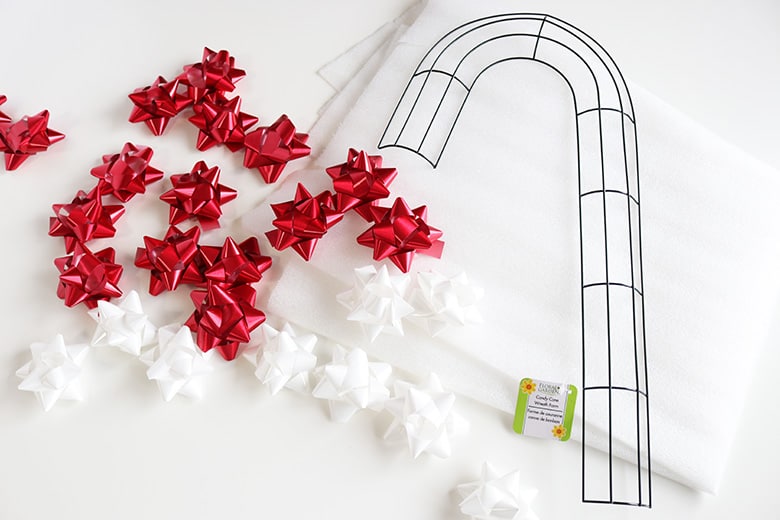
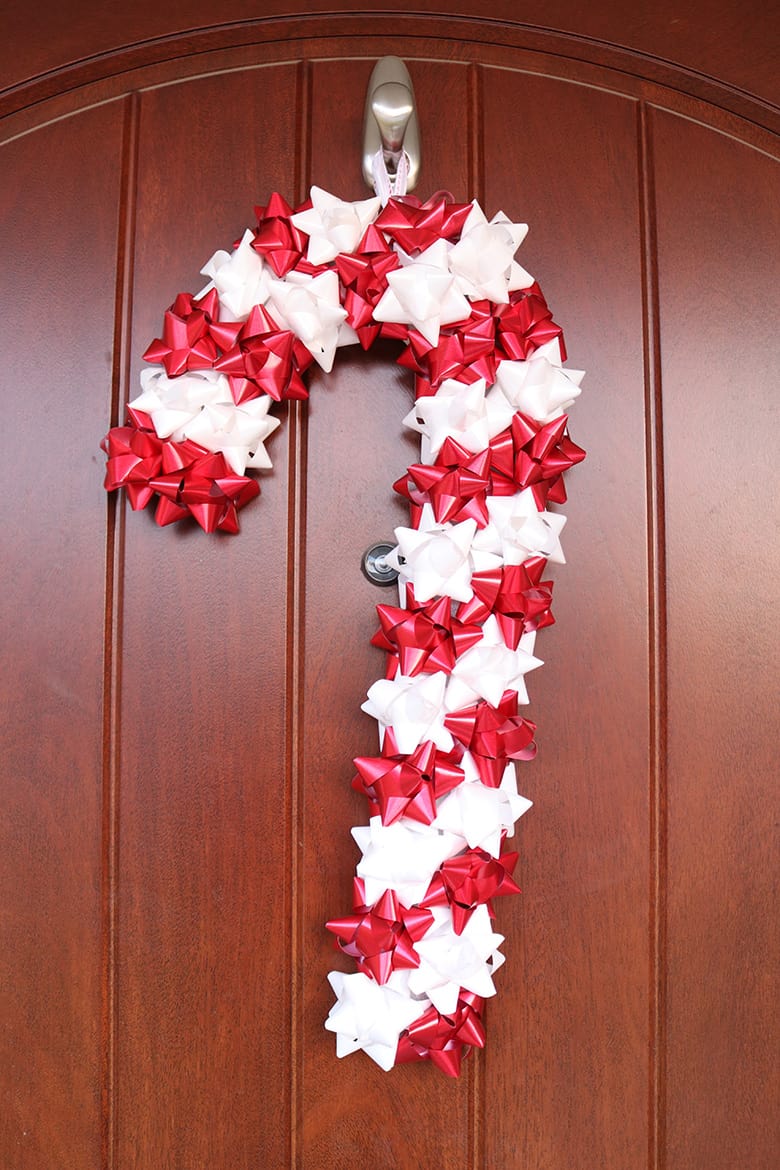
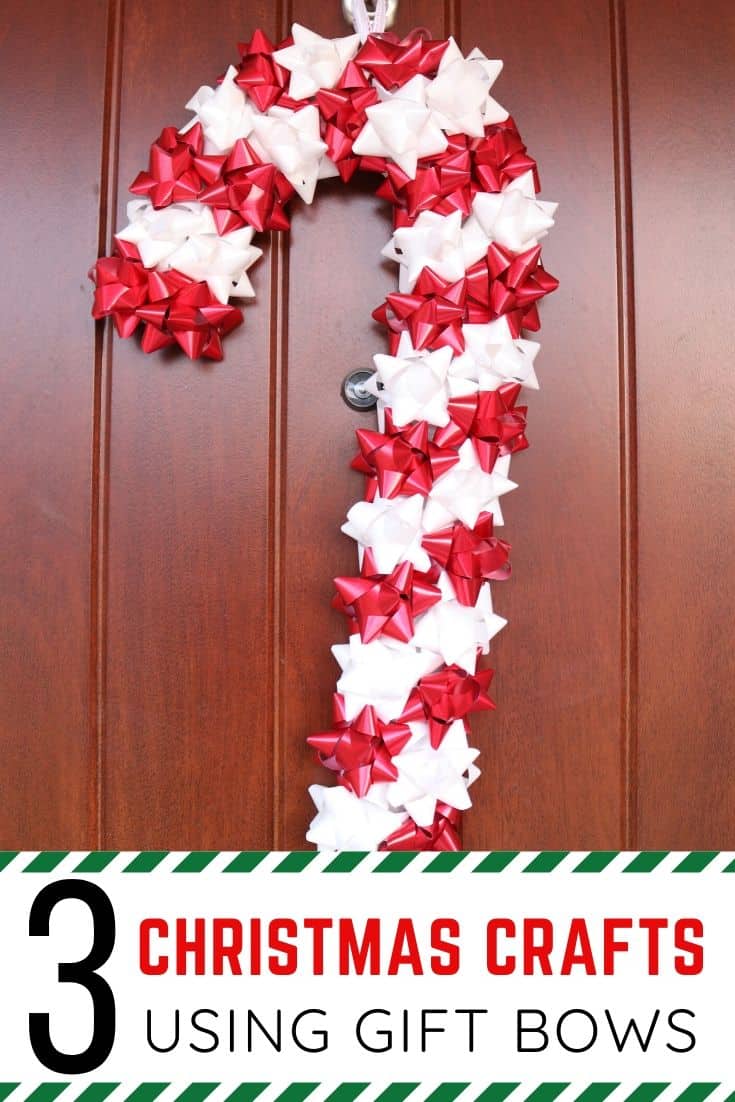
How to make a candy cane wreath with stick-on Christmas gift bows
You will need:
- a candy cane wreath form–I found mine at Dollar Tree, but you can also find them on Amazon
- packing foam, fabric, or ribbon (for wrapping the wire wreath form)
- hot glue, or possibly E6000 glue
- duct tape
- 2 feet of ribbon (for the door hanger)
- red and white Christmas bows
Steps:
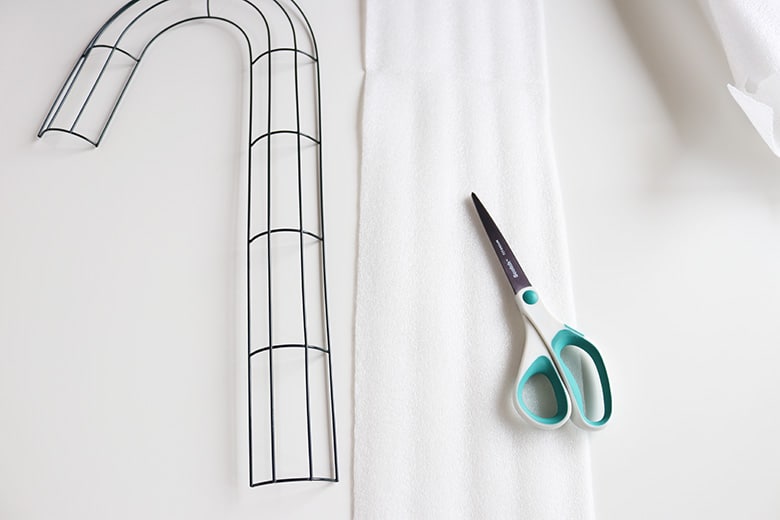
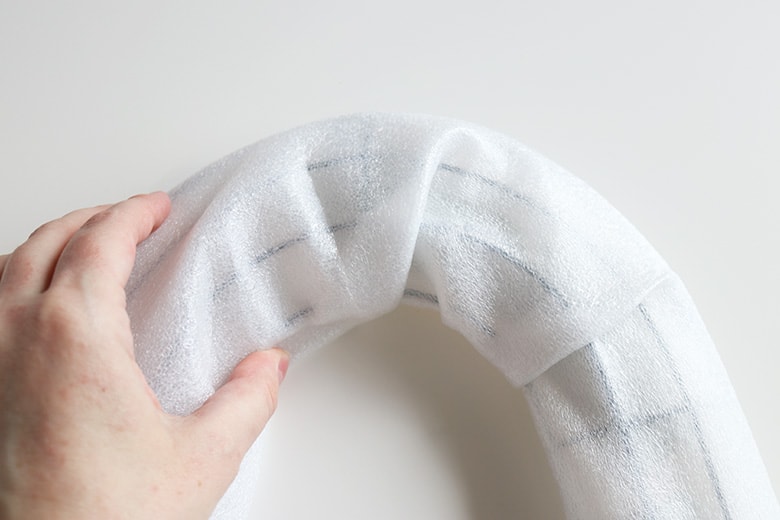
First, cut a long strip of packing material that measures about 6.5″ wide. This will be used to cover the wire wreath form to give more surface area for adhering the bows.
(I actually really struggled for awhile to figure out how I was going to make a wire wreath form work for this project–a foam wreath form would’ve been so much easier but I couldn’t find one big enough. The packing foam is the thin, flexible kind and actually gives the wreath form the perfect amount of structure. You could also wrap the wreath form with fabric or ribbon if you prefer. And I’m totally open to suggestions if you have a better method for doing this! Feel free to comment at the end of the post!)
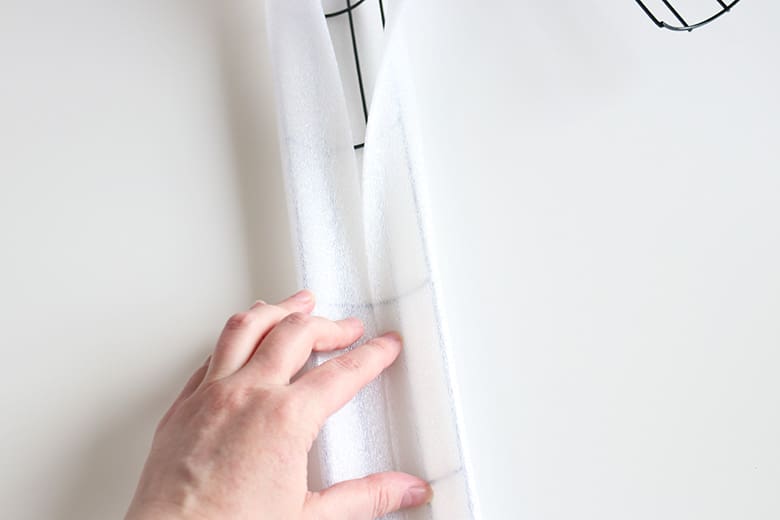
Center the foam over the front of the wreath form and wrap each side tightly around the back.
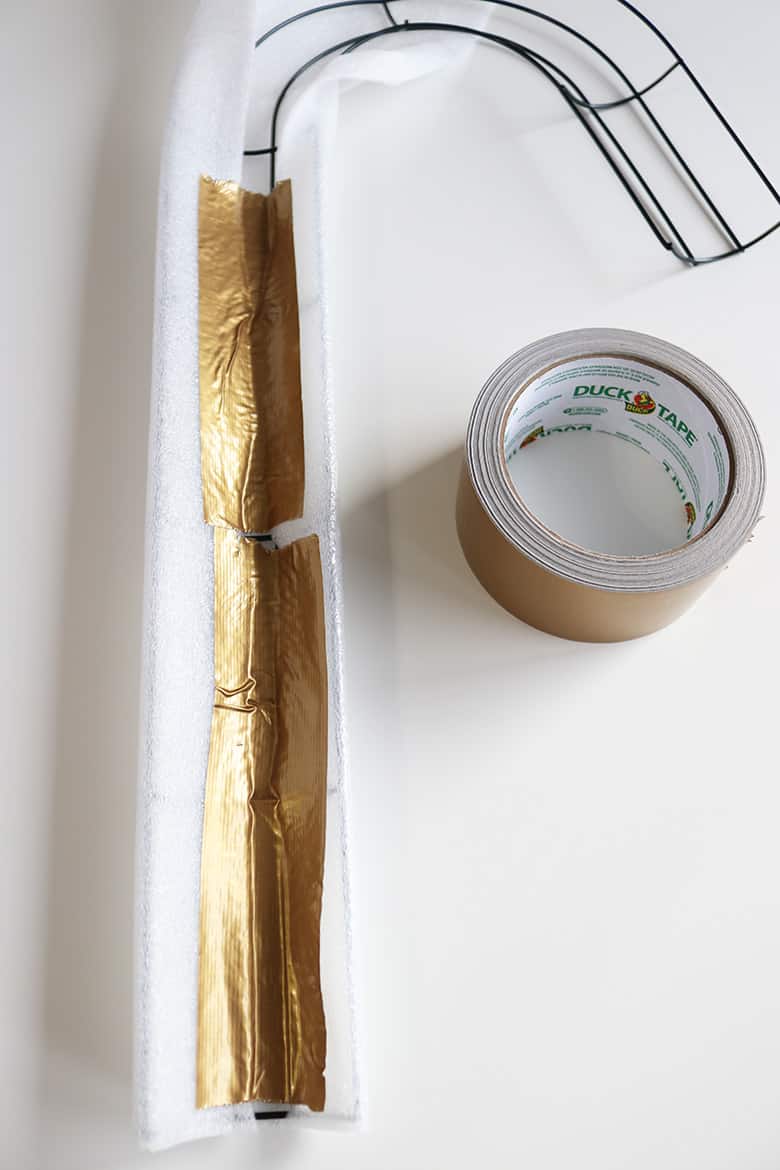
I learned that hot glue wasn’t the best adhesive for the foam–it melts right through. So I turned to some ugly, yet trusty, duct tape (leftover from this year’s Halloween costume).
As you get to the top of the wreath form, shape the strip of foam around the curve as shown, overlapping the foam as needed.
Trim the ends of the foam so it just meets each end of the candy cane. Now you’re ready to adhere the bows.
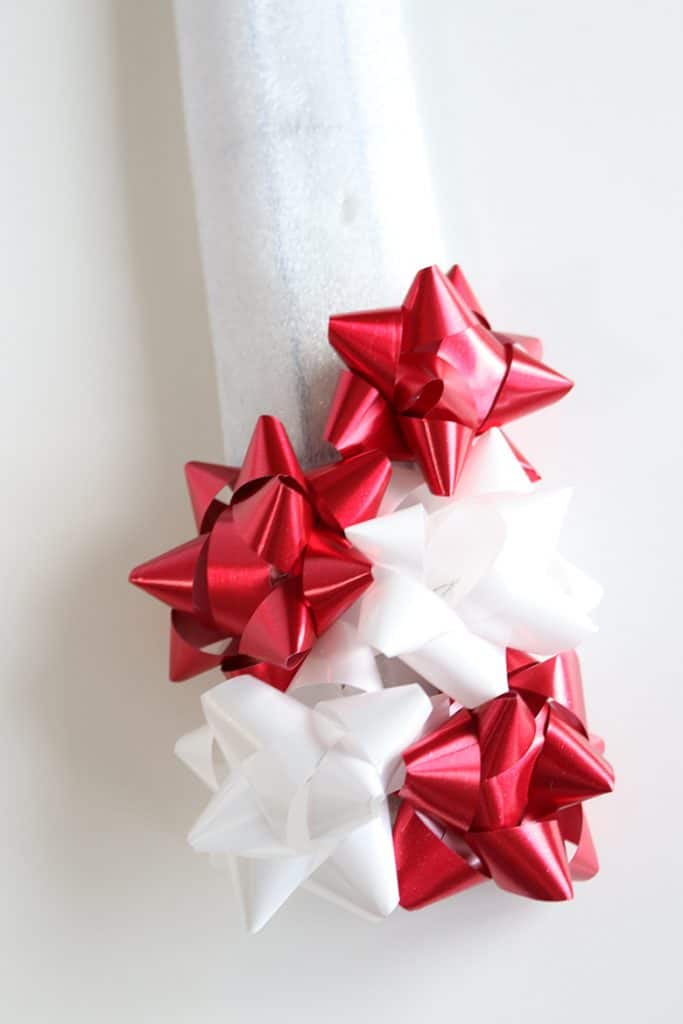
How you adhere the bows depends on what material you’ve used to cover the wreath form. *see below for updated tips* If you use foam like me, I found that the sticky tabs already on the bows were actually sticky enough and I only needed hot glue in a few places. Remember that hot glue melts the foam, so use sparingly and carefully!
If you’re having difficulty getting your bows to stick to the foam with just the sticky tabs, I’d actually recommend using E6000 glue instead of hot glue. The downside to E6000 is the long dry time, and I was much too impatient for that.
If you use fabric or ribbon to cover the wreath form, I’d imagine hot glue will be your best adhesive–but still remove the paper backings from the tabs first so the paper doesn’t show.
*UPDATE: after having the wreath hung up for a few days, some of the bows fell off from just using their original sticky tab. I’d recommend gluing them with E6000 glue or super glue if you’re using the foam. If you’ve covered your wreath form with fabric or ribbon, you should be good to use hot glue.
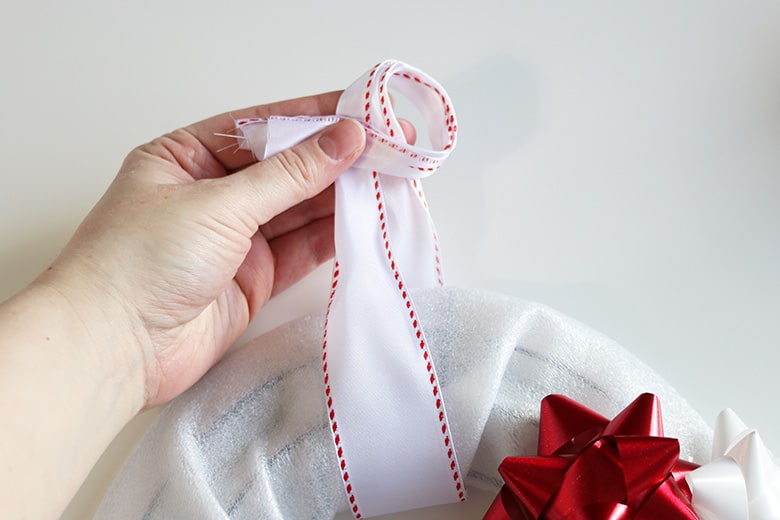
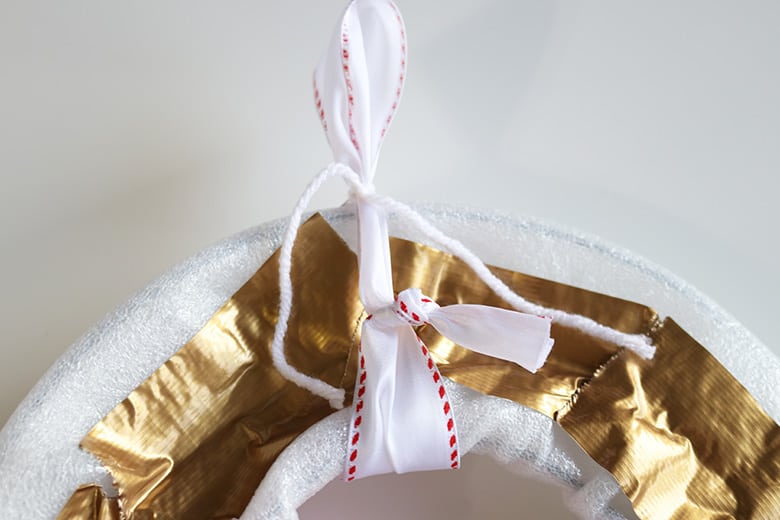
Before you cover the top of the wreath form with bows, you’ll want to add a door hanger. Because I use a 3M hook on my front door to hang wreaths, I usually just make a loop with ribbon.
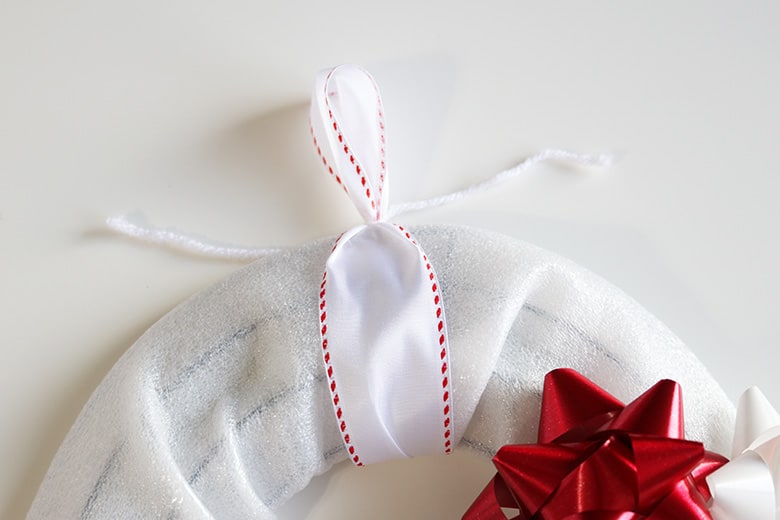
To do so, loop your piece of ribbon around the wreath form. Make a knot at the top with the ends of the ribbon. Slide this knot to the back of the wreath form where it won’t be seen and adhere with hot glue if desired.
To get my loop to lay flat, I simply tied a knot at the top with a piece of yarn and glued the ends of the yarn to the back of the wreath form.
Continue adding bows until you get to the end of the wreath form. (You may need to adjust your diagonal pattern like I did once you reach the curved part.)
And voilà! I love how pretty this wreath turned out!
How to make a kid-friendly tablescape with stick-on Christmas gift bows
You will need:
- butcher paper, poster paper, or wrapping paper
- washi tape in assorted widths and colors
- Christmas bows in assorted sizes and colors
- pom poms and crayons, optional
Steps:
Line your table with the paper of your choice. (The fun of using butcher or poster paper is that kids can draw on it!)
Next, you’ll want to lay out your dishes (and placemats if you’re using any) so you know how much room you have for the present centerpiece. (My children’s dishes are from IKEA…and I may or may not use them all the time for myself…)
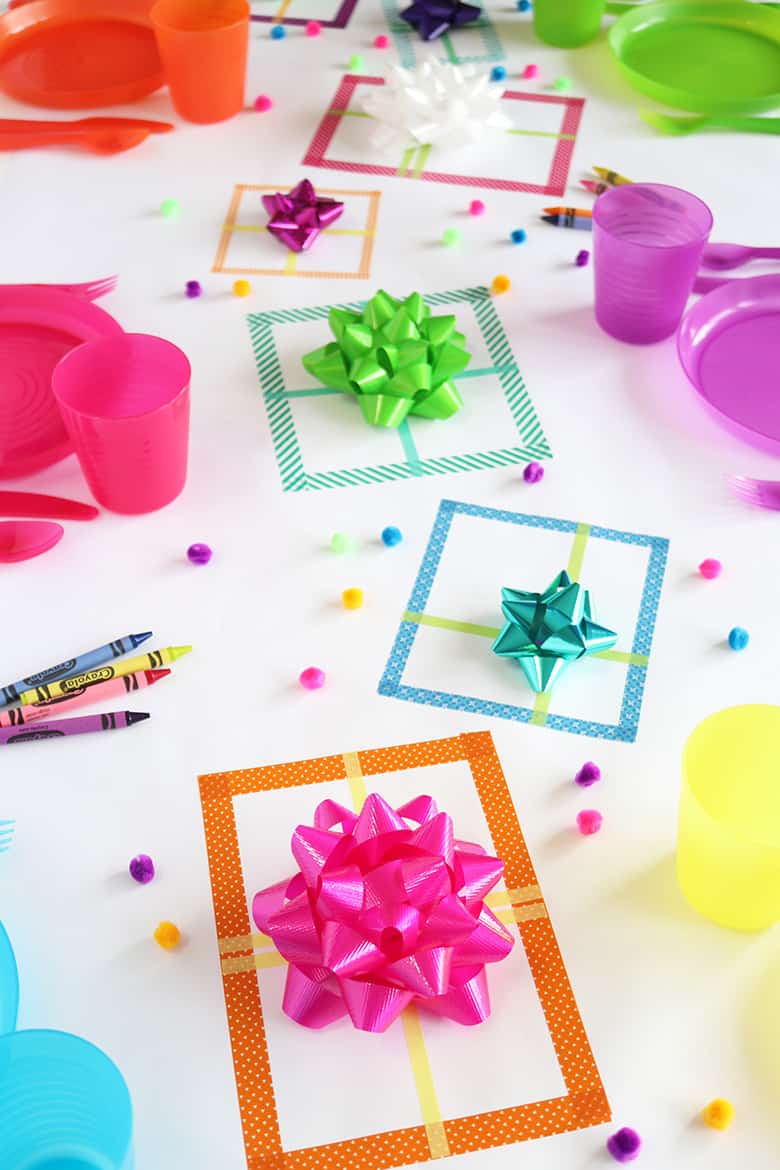
Make “presents” out of washi tape by taping squares and rectangles to the paper. Add “ribbon” by making a plus sign in the middle of each “present” as shown:
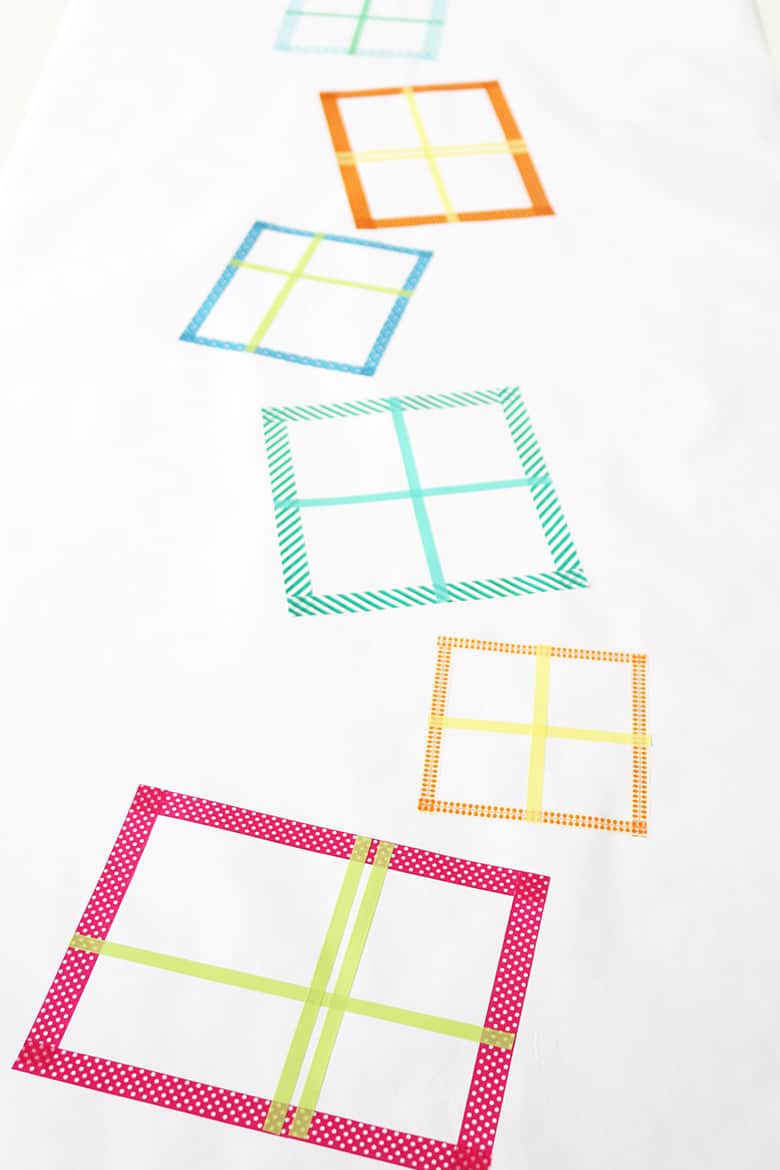
Add a stick-on gift bow to the center of each present. (I’m in love with these bright, non-traditional colors!)
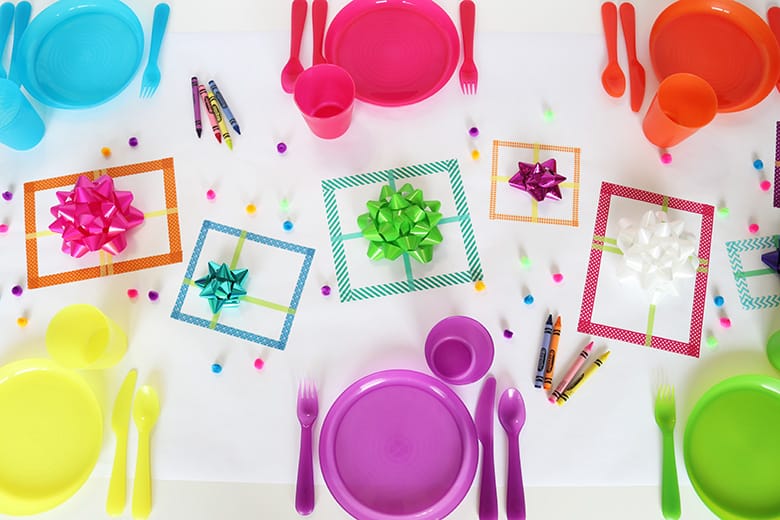
For extra fun, sprinkle pom poms across the table (or glue them down if you have really little children) and add some crayons for drawing!
This is totally the table I want to be at at the family Christmas party!
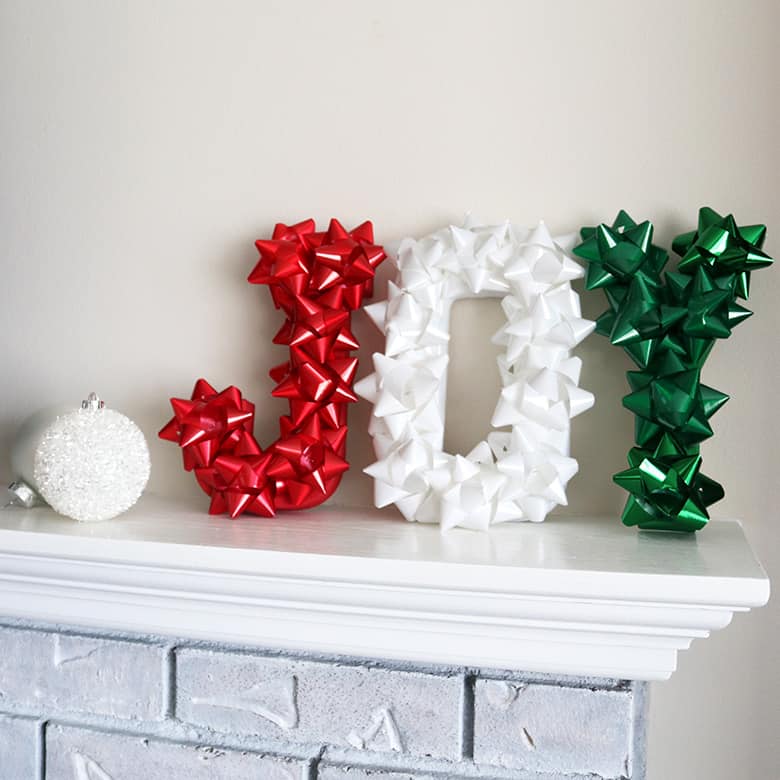
How to make “JOY” letters with stick-on Christmas gift bows
You will need:
- paper mache or wood letters (to spell “JOY” or another Christmas word of your choice)
- craft paint
- hot glue
- Christmas bows

Steps:
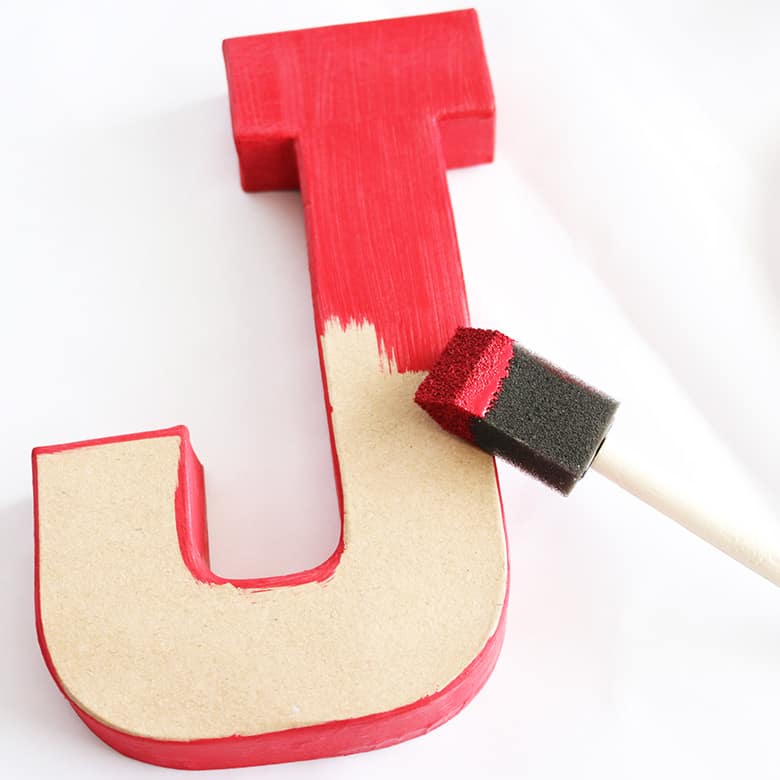
First, paint the letters to match the color of bows you’ve chosen. My paper mache letters needed two coats.
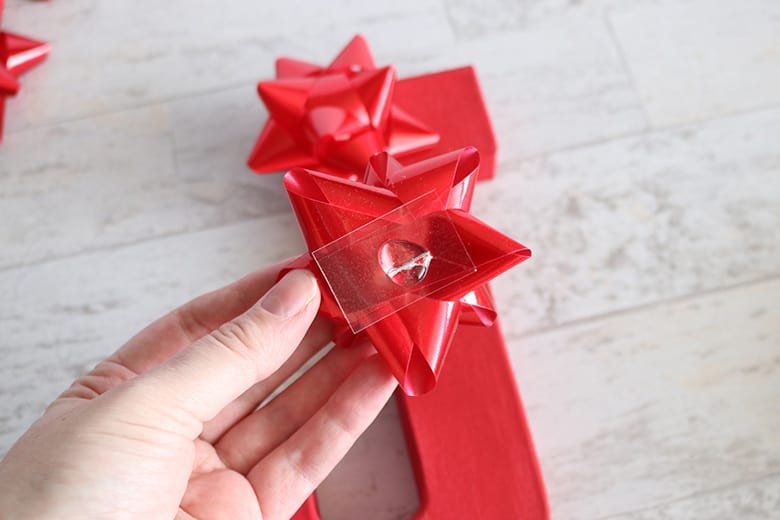
Remove the paper backings from the sticky tabs of the bows (otherwise the paper might show). Add a bead of hot glue in the center of the tab and adhere the bows to the letters.
Pack the bows closely together to maintain the definition of each letter (if it helps, you can lay out the bows beforehand to determine the best placement). You can trim any tabs or “ribbon tails” that stick out beyond the letters (if you’re OCD like me).

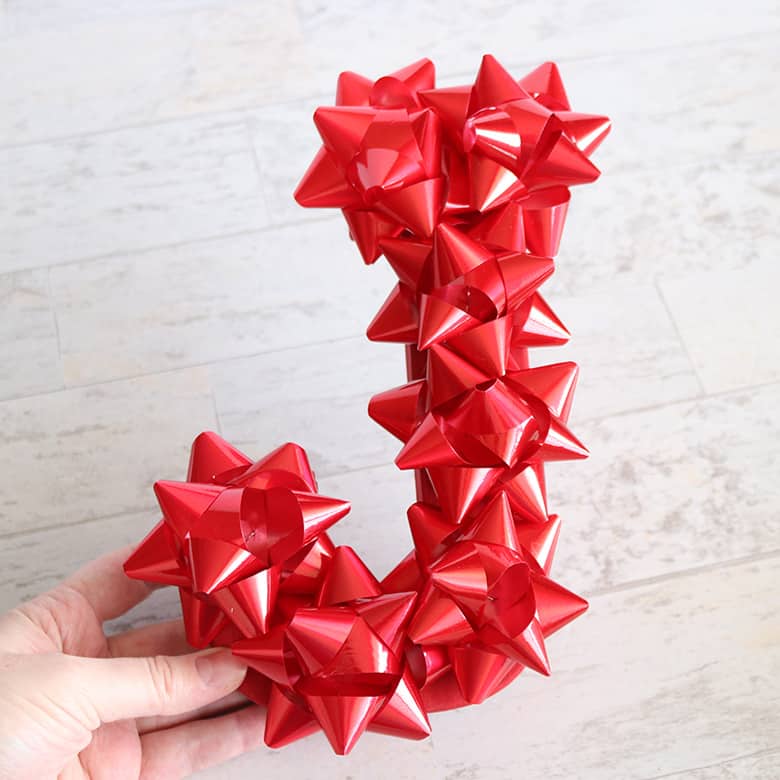
And you’re finished! So easy! I might actually have to put these letters on a wreath at some point–how cute would that be?!
Who knew that Christmas gift bows could be so versatile?! I hope you try some of these crafts this holiday season!

Don’t forget to pin and save for later!
All three of these ideas are wonderful! Thank you for the bow inspiration! I really love these.
Thanks Christina, I’m so glad you like them!