DIY Gender Reveal Stickers You Can Print at Home
Creating your own sticker labels at home is much easier than you might think. All you need is a package of blank labels, a laser or inkjet printer, and access to the Avery website for easy designing! Here, I’ve made stickers for a gender reveal party, but you can adapt this process for a variety of uses.
We announced our big news this last weekend: we’re pregnant with a baby boy! He’s due in November and we can’t wait!
I love the idea of gender reveals. But…Jared and I were way too impatient to have the doctor put the gender in an envelope for us to be surprised later.
Besides, with my medical background (and lots of googling ultrasounds), I was pretty sure I’d be able to tell what the baby was just by looking. And…I could–I called it even before the doctor did. 😂
But just because Jared and I couldn’t stand the suspense didn’t mean we couldn’t hold our families under the same suspense. Don’t worry…we only knew 24 hours before they did, so it’s not like it was that cruel.
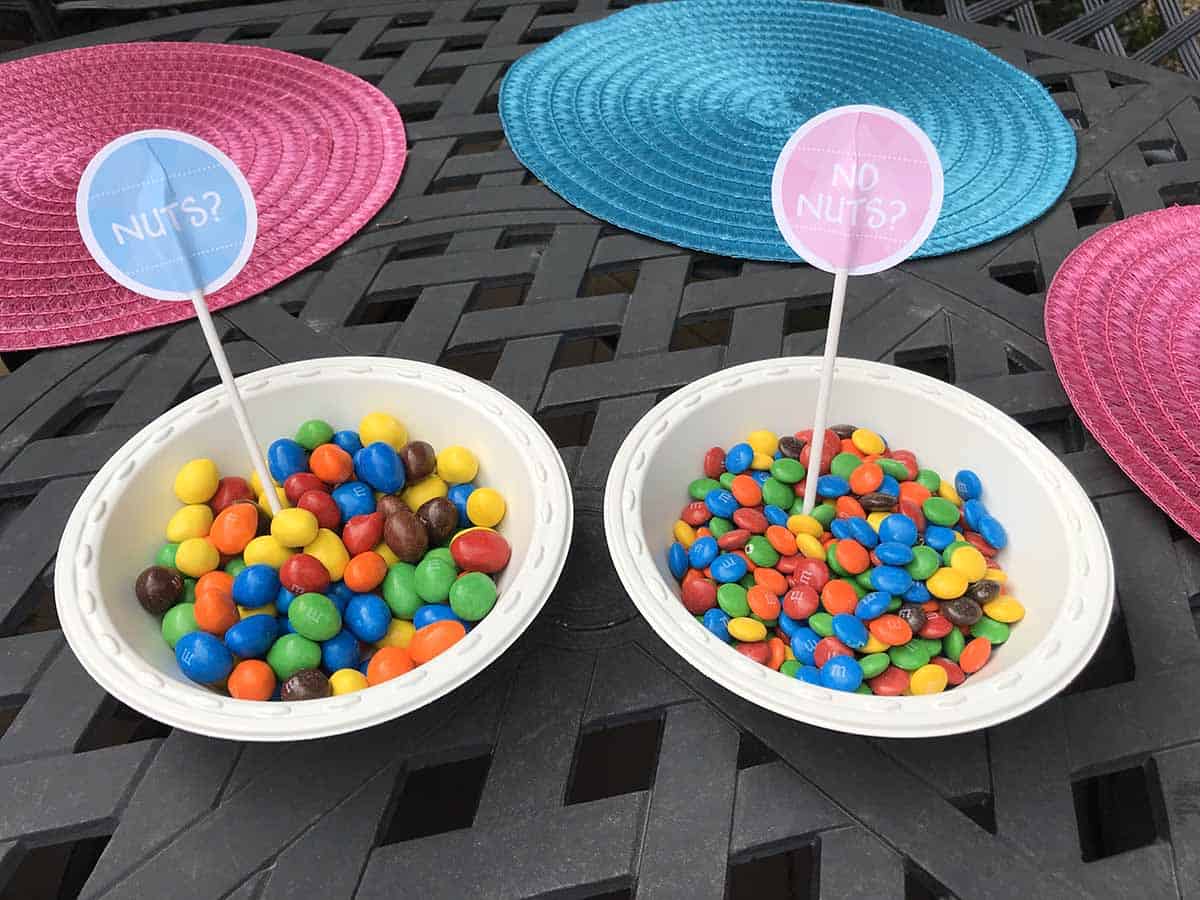
I had so much fun planning this gender reveal party to tell our families. One of my favorite parts was keeping track of the “votes”–how many people were Team Boy and how many were Team Girl (which was definitely our favorite part of our recent Disneyland trip as well).
These DIY gender reveal stickers are so easy to make! I’ll show you the step by step process below!
This post contains affiliate links. For more information, see my disclosures here.
2022 Update: This post got lost in my drafts for a couple years and I never actually posted it when it was written! I guess baby got in the way. 😉 This is still a great tutorial, and I have updated it with all the latest and correct information so you can still design your own DIY labels with Avery! (My husband surprised me with a Cricut Maker a few years ago, so now I prefer using my Cricut to make Print Then Cut stickers like these shipping stickers I made for my Etsy shop!)
Gender reveal voting ideas
There are some really cute ways to keep track of who votes for which gender at a reveal party (and how fun would it be for your child to have record of what your relatives thought he/she would be!). Here are a few ideas to get you started:
- Have jars of blue or pink clothespins on a welcome table that guests can pin to their shirts (or check out these actual button pins!).
- Make a separate “boy table” and “girl table” for guests to sit at, designated by blue or pink tablecloths, plates, cups, napkins, etc.
- Let guests wear their team color with blue or pink mardi gras beads.
- Keep a chalkboard tally–have guests simply add a tally or write their names in the appropriate column. (Don’t forget the colored chalk!)
- Make a “clothesline” that guests can hang a paper blue or pink onesie to (after writing their name on it). For an easy onesie template, trace this cute cookie cutter onto paper and cut out. The cute clothespins I linked to above would be perfect for your clothesline! (The best part about this option is that you can keep the onesies after and put them in a baby book if you want.)
- Make your own “team boy” and “team girl” stickers. I’ll show you exactly how to make your own gender reveal stickers below!
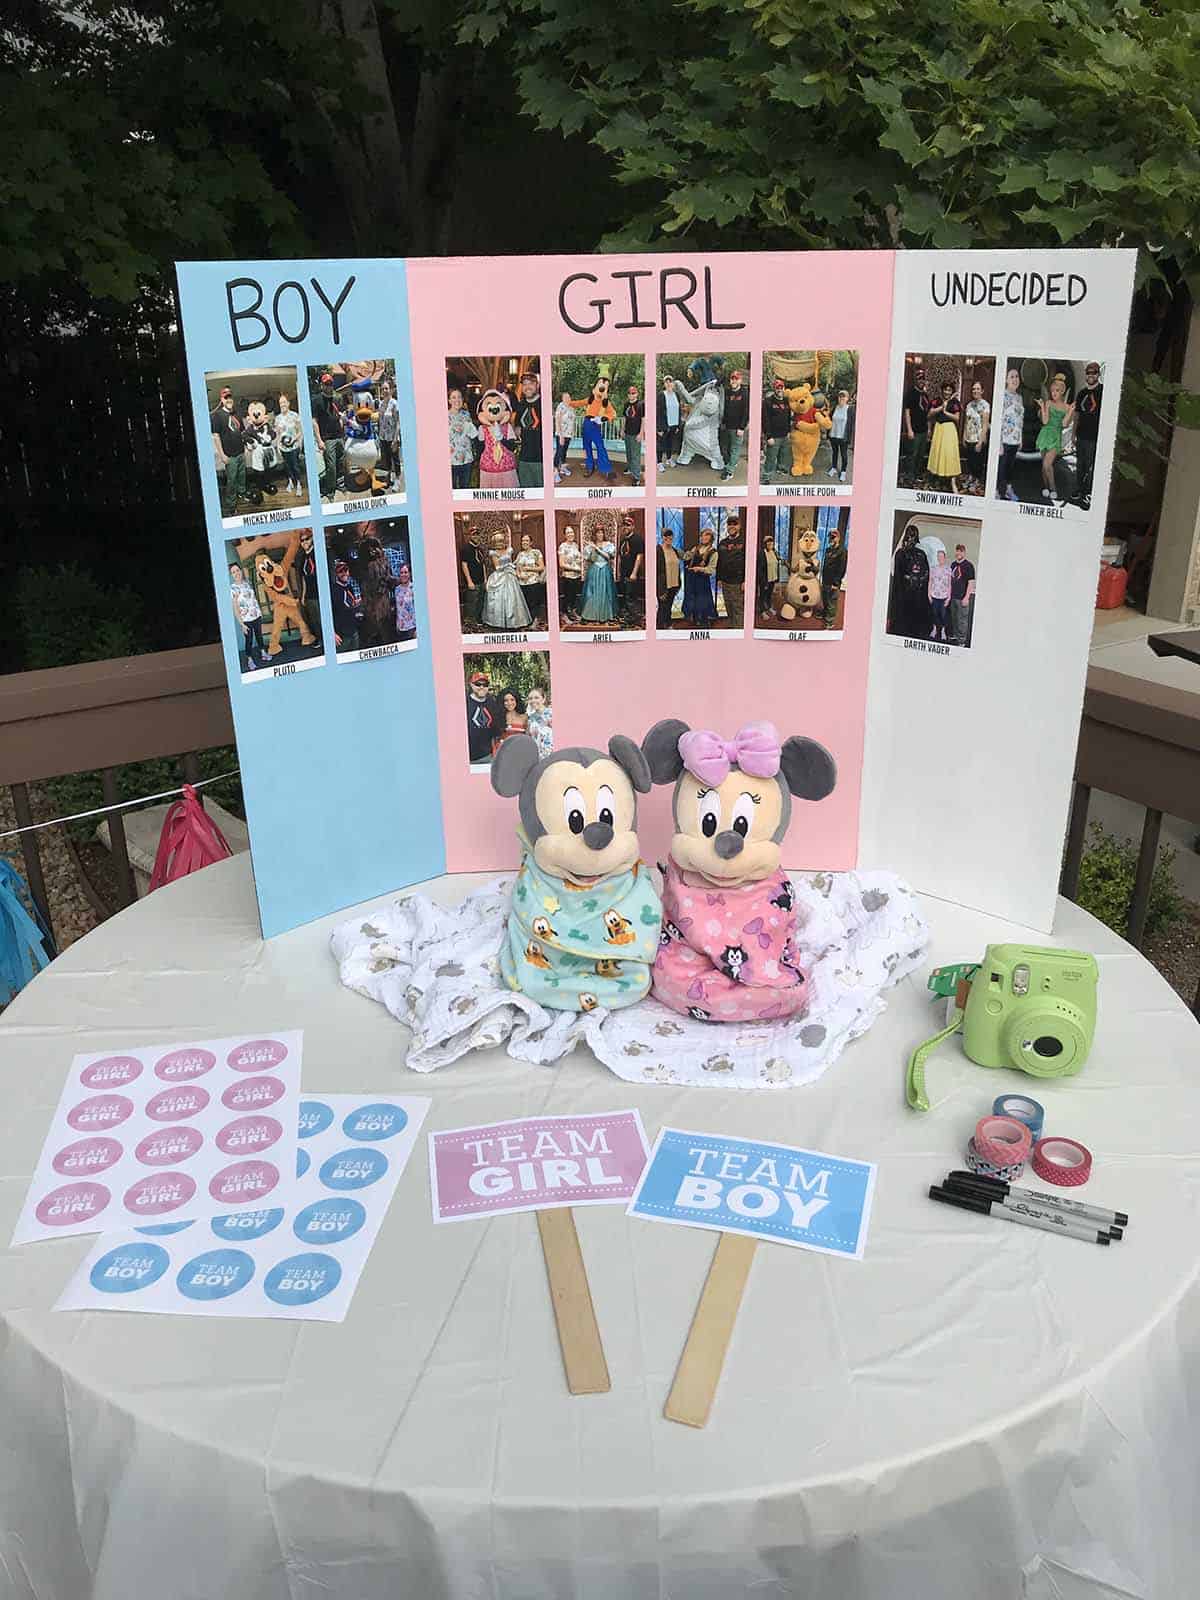
However you decide to hold the voting, don’t forget to take pictures and/or write down who guessed what! (I made everyone wear their sticker, hold one of the team signs, and take a selfie with my Instax camera. I’ll eventually put those pictures into a baby book.
What you need to make your own sticker labels at home
- self-adhesive labels: I purchased my white Pen + Gear labels from Walmart, but they don’t seem to be available anymore. Luckily you can get the Avery brand ones on Amazon! Or these kraft paper labels from Walmart are also super cute, just slightly larger.
- a laser or inkjet printer (mine is a color inkjet and I was so impressed by the print quality on the labels, despite it being a very old/cheap printer)
- access to the Avery website for designing your label
If you want to skip the designing process and just want to use my exact labels, you can get the PDF files for free here (keep in mind that this will only print correctly for 2″ Avery labels!):
Open the PDF, then follow these instructions from Avery for printing:
- Select the correct Paper Size and be sure Scale is set to Custom and 100%
- For laser printers, select Print using system dialog and use printing Properties or Preferences to change the Paper or Media Type to Labels or Cardstock
How to make custom labels with Avery Design & Print
Go to the Avery website
(No, this post isn’t sponsored by Avery, but it should be. 😜)
Your package of labels will have a product or template number, enter that on this screen. (The Avery product number for the 2″ label is 22807 or 22817, depending on the package). Select the “Start Designing” button.

Create an account
Next, you’ll be prompted to create an account with Avery. I highly recommend doing this so you don’t lose your work (especially if you need to stop and come back later). Also, you’ll be able to access your past designs again in the future if you want to make more labels.
Choose a free label template
Once you’re to the “Choose Design” tab (at the top of the screen), you can select a blank label to create a design from scratch or choose from over 1800 Avery templates.
Um, unless you’re like an Illustrator pro or something, go with one of their templates because a) there are some really gorgeous ones, b) they’re actually super easy to customize (you can even change the colors), and c) it’s a huge time-saver.
For my design, I knew I wanted a simple background, but not quite solid because that’s boring. If you search “blue” in the Quick Search bar and scroll don’t a little, you’ll find the template I chose.
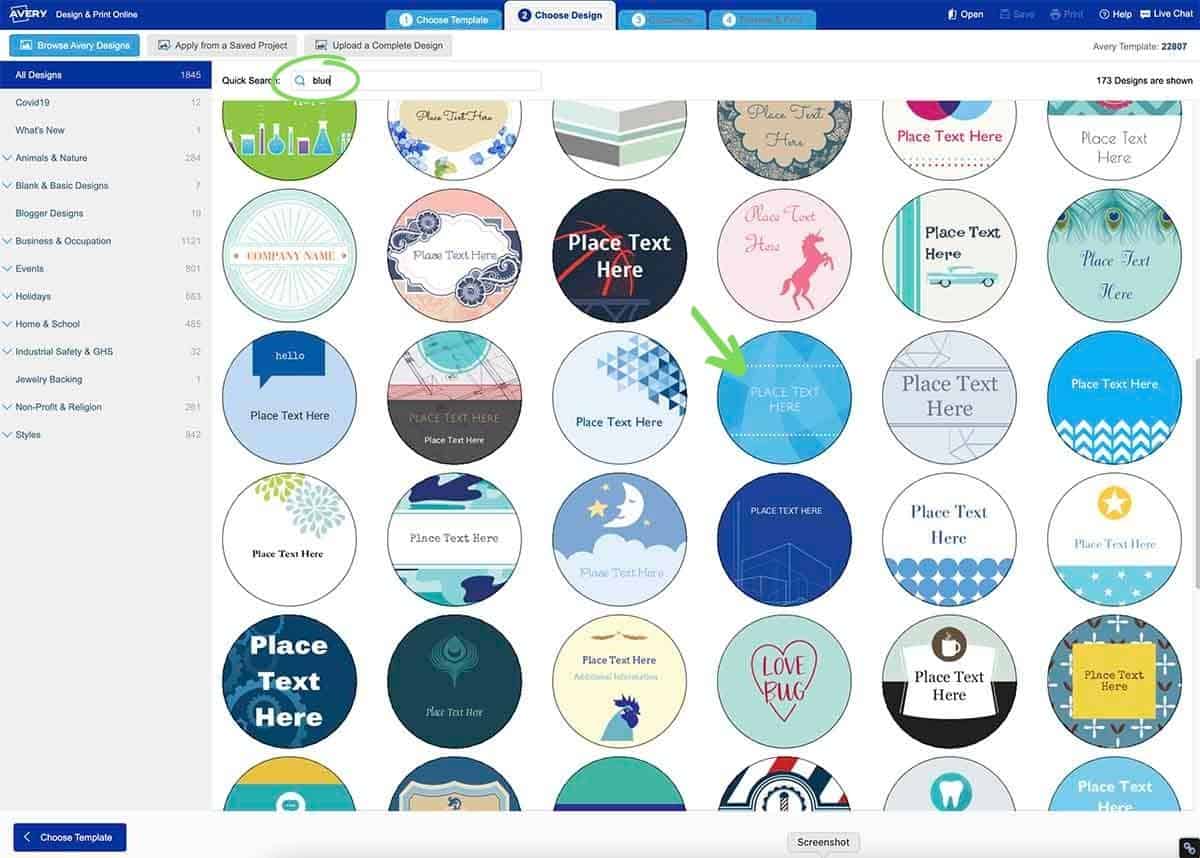
A couple tips when choosing a template: I recommend finding one that’s as close as possible to your desired label–pay attention to the background images, size of the text box (sometimes you can edit this, but sometimes it’s part of the background image), and colors (if the design is really complicated, has tons of colors you want changed, and the image is more watercolor-y/less digital-looking, you’re going to have a harder time editing it). Don’t worry about the font of the sample text: you can easily change the style, size, and color of fonts.
Customize your template
Once you’ve selected your template, click “customize” to take you to the next screen. The menu on the left-hand side is where you can edit text, images, shapes, and a few other fancy things I didn’t use. There is a smaller menu at the top underneath the “customize” tab that gives you a few more options.
The “navigator” box on the right-hand size allows you to choose if you want to edit all the labels on the sheet at once (choose this if you want multiple copies of one design) or one at a time (choose this if you want every label to be different).
I edited all since I knew I’d want all my boy stickers to be the same and all my girl stickers to be the same (each one was saved as a different design). If you know you want your stickers to be mostly the same but say you’re only changing up the text on each one, choose “edit all” first, make all your main changes, and then choose “edit one” to make the final individual customizations.
(You will also have the option when you print to print a “custom selection,” meaning you can choose whichever or however many labels on the sheet you want to print. You can then send a half-printed sheet of labels back through your printer to print a brand new design on the rest–no wasting of labels!)
Play with the customization options–it may take a second to orient yourself, but it’s pretty straight-forward if you’ve done anything like this before. And here are a few customization ideas that I utilized in my design process:
Text
To edit text, click on an existing text box, drag the corners to change the size of the box, highlight the text to change the font, or delete the box altogether if desired. You can also add new text boxes from the menu. Use the “align” button in the top menu to center your text boxes.
Image
You can add images to the design, either from the Avery gallery, from a file on your computer, or from a social media account.
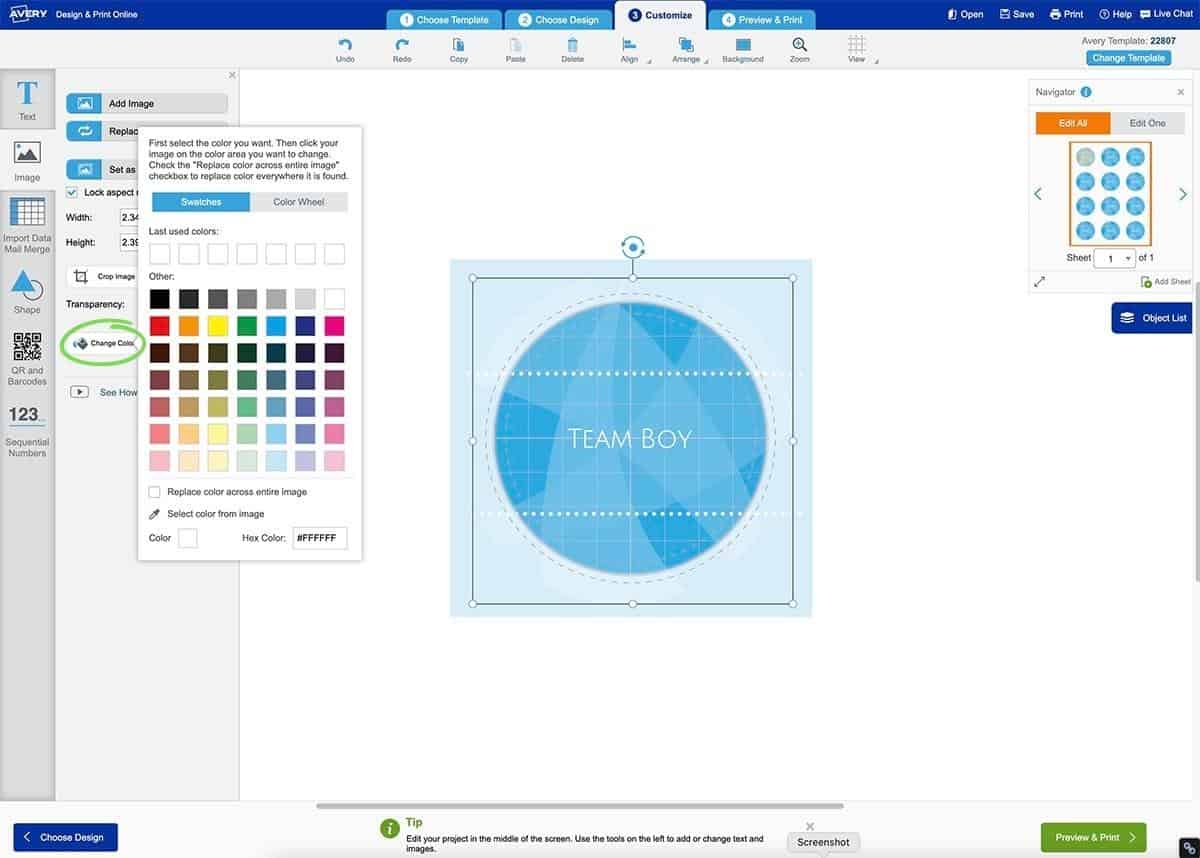
This is where you can also edit existing images in the design (for example, to change the colors of an image). To do so, click on the image in the label. Usually, the image takes up the entire label, so clicking anywhere on the label will show you a large square bounding box. However, some templates have more than one image. Mine did and it took me forever to figure out why I couldn’t edit all the colors: I needed to click further outside the label to find the larger image!
Once your image is selected, you can choose “change color” from the menu. Select a new color (either one of the swatches, a new color from the color wheel, or a hex code if you know one). Then, with your color selected, click on the part of the image you’d like to change. You might understand now why I recommend a simpler template when editing colors or just using a template as is!
For some images, changing the color may be as simple as changing the “fill” color. Or, you might be able to simply change the background color from the menu above, depending on the template.
Undo/Redo
These options from the top menu are super handy to quickly fix a mistake or test out different color and font options. I used them a ton until I figured out what I was doing!
Save
If you’re leaving your computer for a bit or want to continue your design at a different time, don’t forget to save! This button is in the top right-hand corner.
Preview and print your beautifully-designed DIY labels!
When you’ve finalized your customizations, click on “preview and print.” Since we’re DIYers, click on “print it yourself.” You can change the fill direction (if that matters to you) and the print range. The print range is where you can make a custom selection of which labels on the sheet you’d like to be printed with your design. Or, just leave as is and print the whole sheet!
Click on “get PDF to print,” at which point you might be prompted to save your work if you haven’t already.
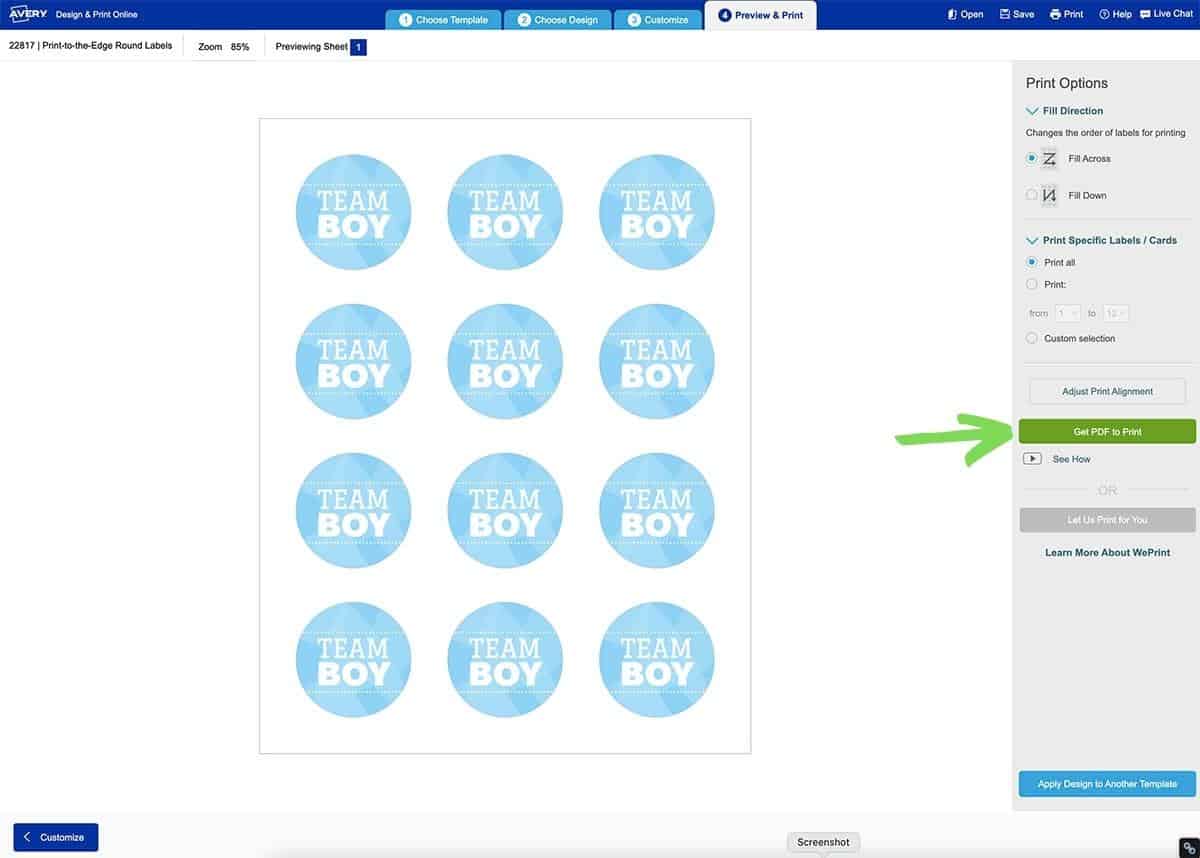
Next, read the printing tips (at least the first time you do this) to make sure you understand how the labels will print. Then, click “open pdf,” which is what you’ll be printing from. Ctrl or Cmd “P” to print (or find and click on the printer icon). On my mac, I then choose “print using system dialog” to tweak my printer settings as needed (mostly so I can tell my printer to print from the rear tray where I’ve inserted a blank sheet of labels*).
*SUPER IMPORTANT!
Print a test copy on regular printer paper before printing on your labels. Make sure you’re happy with the colors and text before wasting a sheet of labels. I did this several times to find the perfect shades of blue and pink I was looking for.
If you don’t know which way your printer prints from the rear tray (which side is the top, which is the bottom), I like to write a little note at the top of the test printer paper when I send it through. That way, if I’m printing any incomplete label sheets or printing a “custom selection,” I know where it’s going to print.
How to Make DIY Gender Reveal Stickers
Ahh, and you’re done! That was a long, detailed tutorial, but it was super easy, right?! And aren’t you amazed by the print quality of these labels–that you were able to print at home, for a fraction of the cost? I loved the glossy finish and that there wasn’t any hint of smearing! I’ll admit, I was skeptical my printer could handle this, but my labels turned out better than I was even hoping for! My family was amazed I didn’t buy them. And it was so fun seeing everyone wearing their gender guesses at our reveal party!
I hope you try this at home! Leave a comment if you do, I’d love to hear how you used your labels!

Don’t forget to pin and save for later!