How to Make Paper Chain Banister Decorations–Easy Holiday Decor!
Looking for cheap holiday decorations? This simple paper chain craft makes the perfect easy decoration for your banister, staircase, or outdoor railing. If you’re searching “how do you make paper loop chains,” this tutorial is for you!
Paper chains have made a comeback in home decor, and they’re the perfect easy (and cheap!) craft to dress up your home for holidays and parties!
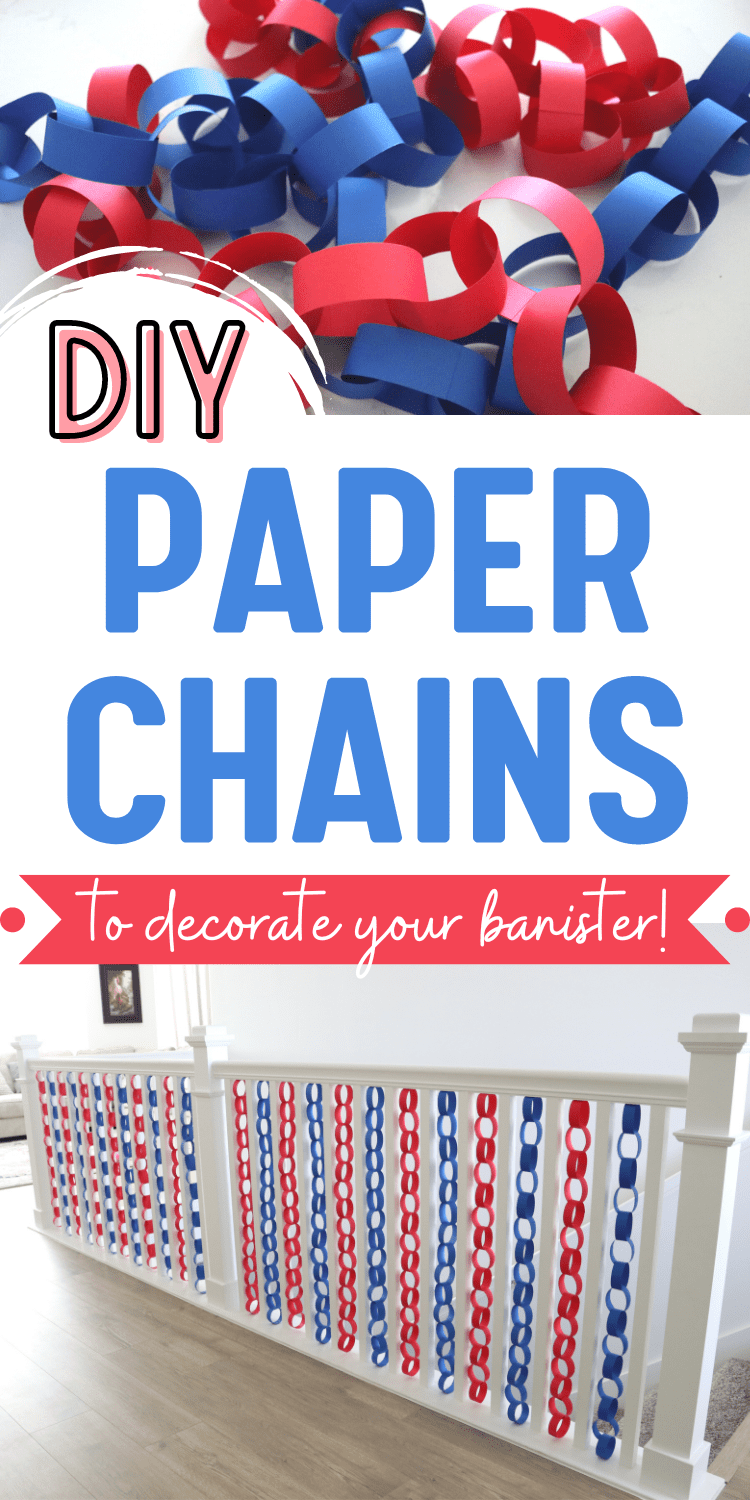
I whipped up this paper chain banister decor in an afternoon. It’s such a fun pop of red and blue for my 4th of July entryway! You can easily customize the colors for any other holiday or color scheme: orange and black paper chains for Halloween, red and green paper chains for Christmas, and pastel colors for Easter!
This is a fun holiday craft for kids and adults alike! Even my toddler loved “helping” me stick the loops together.
This post contains affiliate links. For more information, see my disclosures here.
What can you use paper chains for
When you think of paper chains, you probably think of the paper chain countdowns you used to make for Christmas as a kid. But you can do so much more with them! You can also use paper chains for:
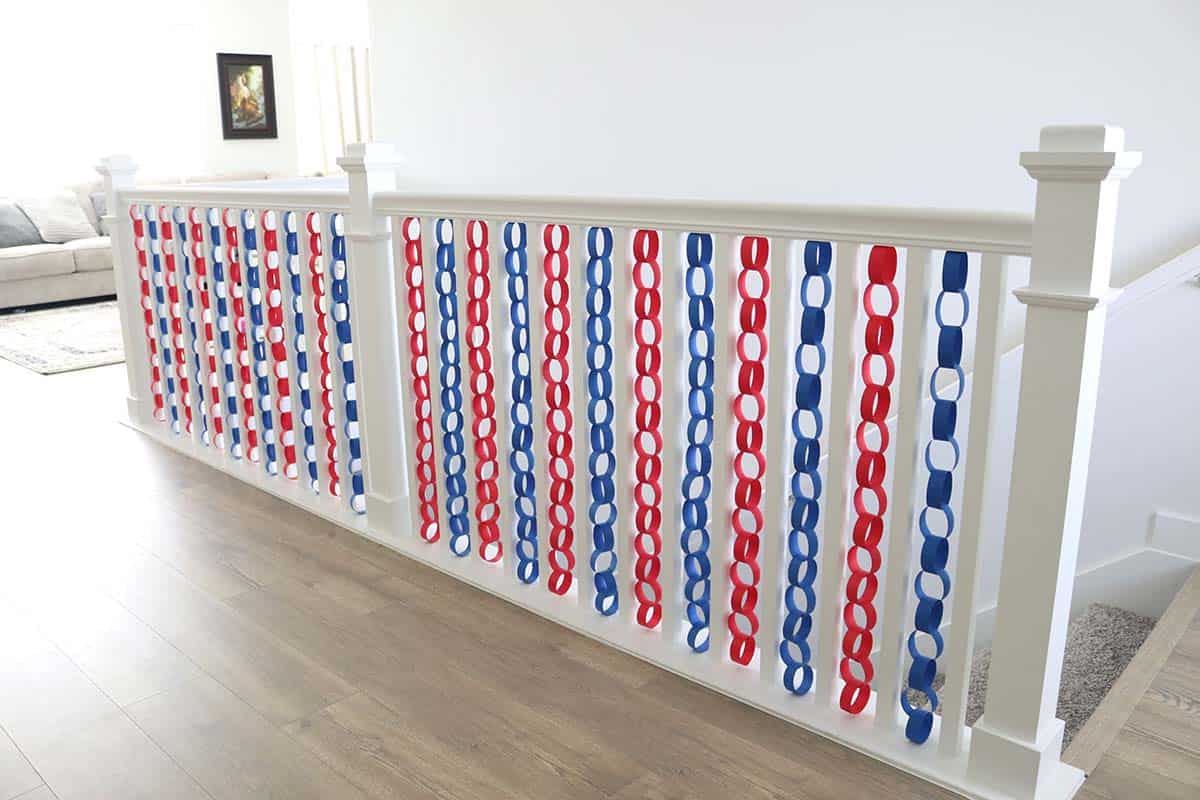
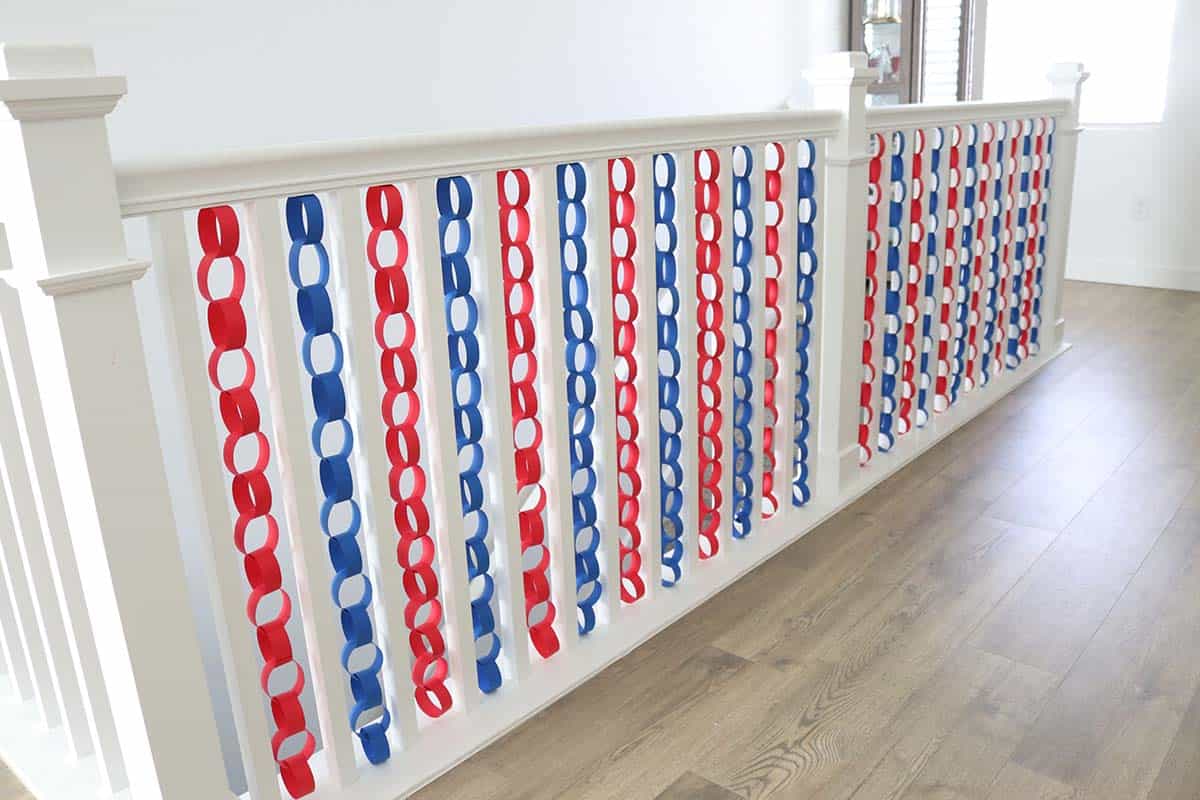
- Holiday and party decorations: hang paper chains vertically from a banister in between the balusters (like I’ve shown in this tutorial), wrap them around a banister, loop them from a ceiling or fireplace mantel, hang them from a doorway, use them to decorate a food table, or make them part of your table centerpiece.
- A photo or party backdrop: paper chain backdrops are so fun! I love the colors in this paper chain wall mural.
- Christmas tree paper chain garland: make paper chains in colors that coordinate with your Christmas tree theme–try using patterned paper, old sheet music or maps, or go classier with all white.
- A ceiling “chandelier”: hang paper chains from the ceiling starting from the center (you could use an existing light fixture as the center) and fan out in loops.
- Wall art, like this paper chain wall hanging. Such a fun pop of color to an otherwise boring wall!
- Wedding decorations: who says you can’t decorate a wedding with paper chains?! It’s cheap and fun and adds the perfect touch of playfulness to a ceremony or reception!
What you need to make paper chain banister decorations
- Paper: I used Astrobrights Primary Colors. I purchased two small packs from Target. Each 8.5” x 11” sheet of paper will give you 11 paper chain strips or chain links. For reference, I used 17 sheets of red and 17 sheets of blue for my 24 hanging banister chains.
- Paper trimmer: I used my Cricut paper trimmer, which worked great (p.s. you don’t have to own a Cricut machine to use their trimmers!)
- Glue or staples: I recommend using a glue tape runner—it’s easy, fast, and mess-free! If you plan on having your paper chains up long term or are using them outside, I might suggest something a little stronger like staples (still easy and mess-free). I just knew my toddler would eventually be tearing these paper chains to shreds and I didn’t want him getting ahold of little staples or stepping on them. And of course, you can always use regular liquid craft glue, I’m just too impatient to wait for it to dry because that’s a lot of loops!
- Masking tape or damage-free mounting putty (for attaching chains to your banister)
How much paper is needed for a paper chain
The amount of paper you need for a paper chain totally depends on how long you want to make it. I used about 5 loops per foot, so one sheet of 8.5″x11″ paper will give you roughly 2 feet of paper chain garland. I recommend just buying plenty of paper to start and make more loops as you go until you figure out exactly how much you need.
How do you make paper chains
Cut 1”x8” strips of paper
Using a paper trimmer, cut 1/2” off each sheet of paper so it measures 8” x 11”. Rotate the paper and cut 1” wide strips. I was able to comfortably cut 3 sheets of paper at a time (stacking them on top of each other before cutting), which speeds up this process a ton!
Assemble your paper chain
Apply glue (I used a tape runner, which, again, I recommend for the ease!) to one end of a paper strip. Turn the strip on itself to make a loop and glue the ends together. Apply glue to the end of your second strip. Stick the strip through your first loop, then make a second loop by gluing the ends of the second strip together. Continue this linking/gluing process until you have the length of chain you want (for my banister, I needed 15 loops for each section).
Tip: To speed this part up, lay out all your strips for each chain (15 for me) and apply glue to all of the ends. Then you can just grab and assemble without having to stop to glue again. Way faster!
Attach paper chains to your banister
I used masking tape to attach the paper chains to my banister (by looping the piece of tape on itself to make it “double-sided”), but you could also use something like these mounting squares. Whatever you choose to use, make sure it won’t damage the finish of your banister. I chose to only attach my paper chains to the top and let them float free on the bottom (which was super fun for my son who liked running past them to get them flying 😂. At least he was excited about it.)
Admire your super easy (and cheap!) holiday decor
I am so pleased with how this simple project turned out! I love the pop of color the paper chains bring to my entryway. I might just do this for every holiday now!
How to make paper chain decorations
I hope this paper chain tutorial was helpful! Enjoy your easy and fun holiday decor…or wall hanging or photo backdrop or all the other uses for paper chains!

Don’t forget to pin and save for later!