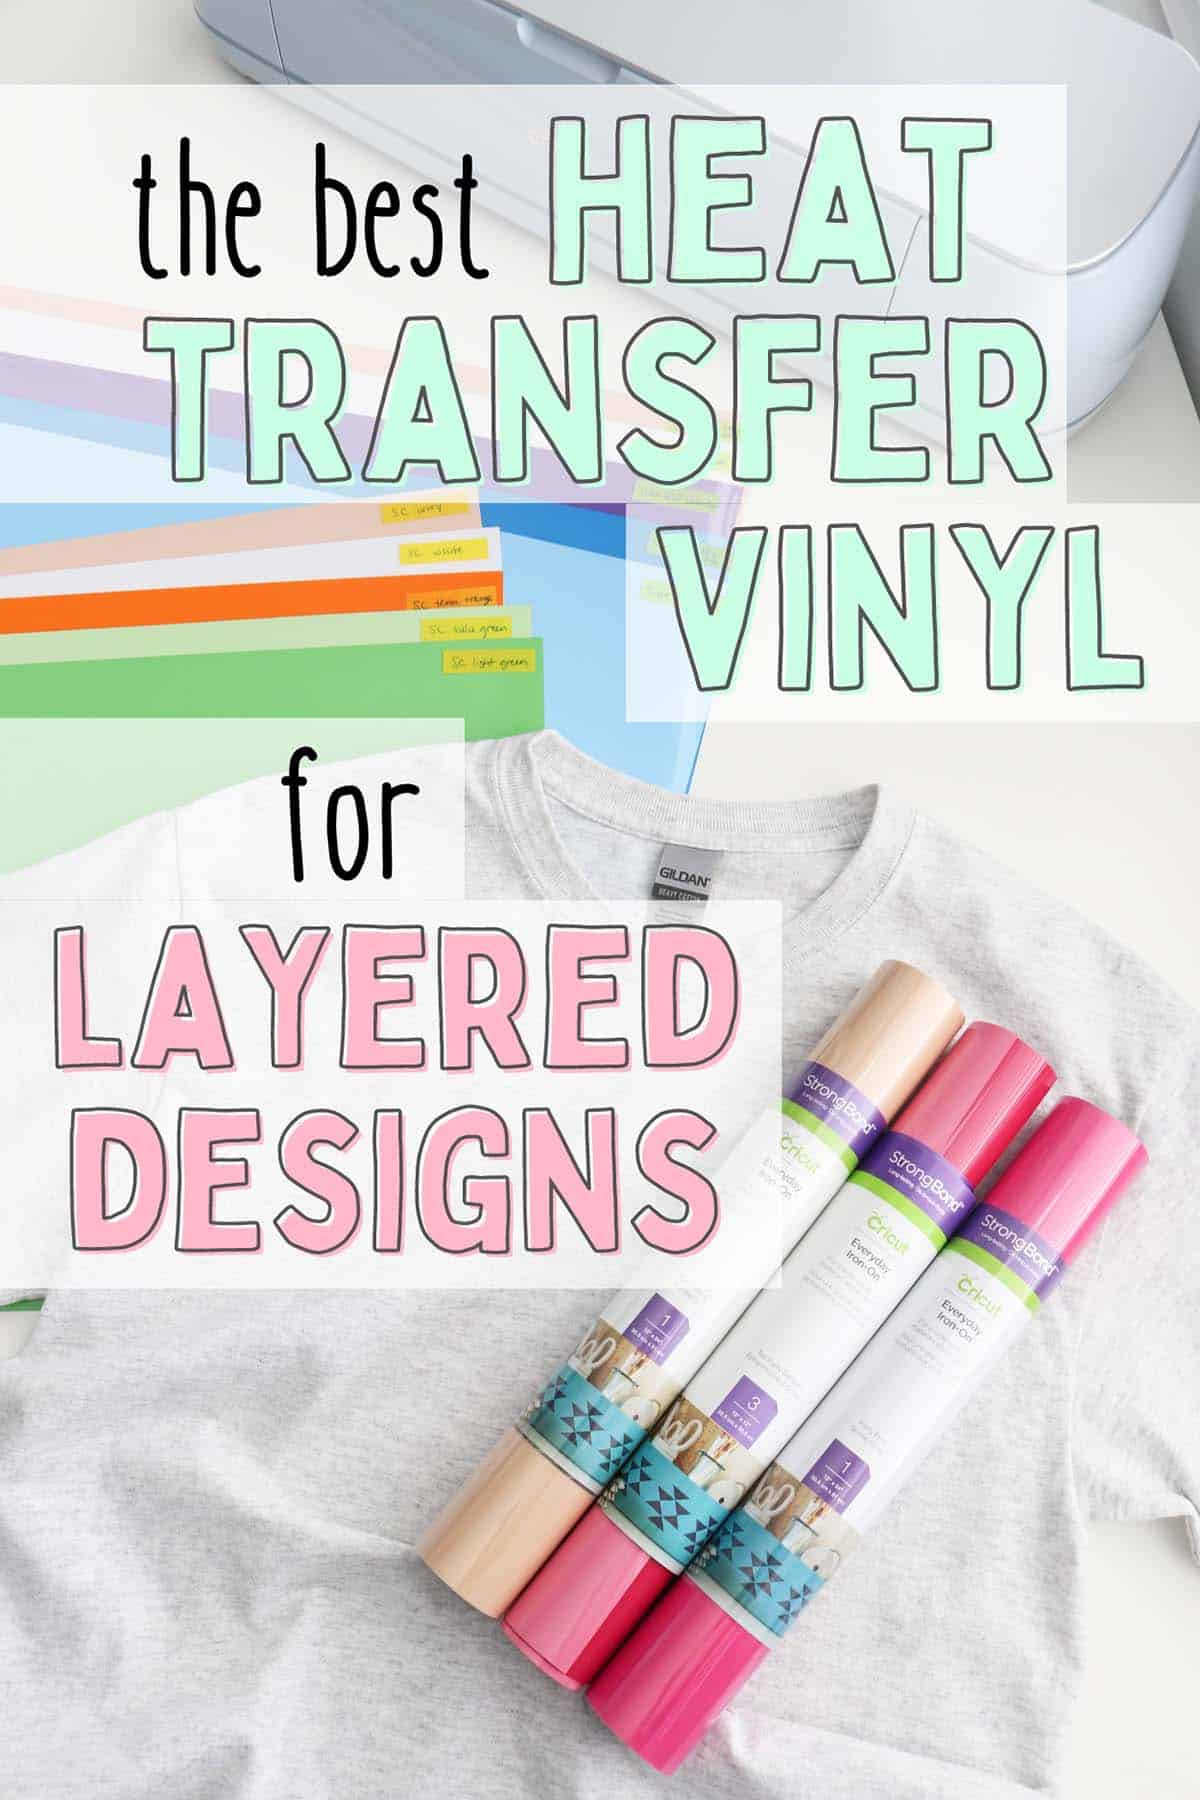
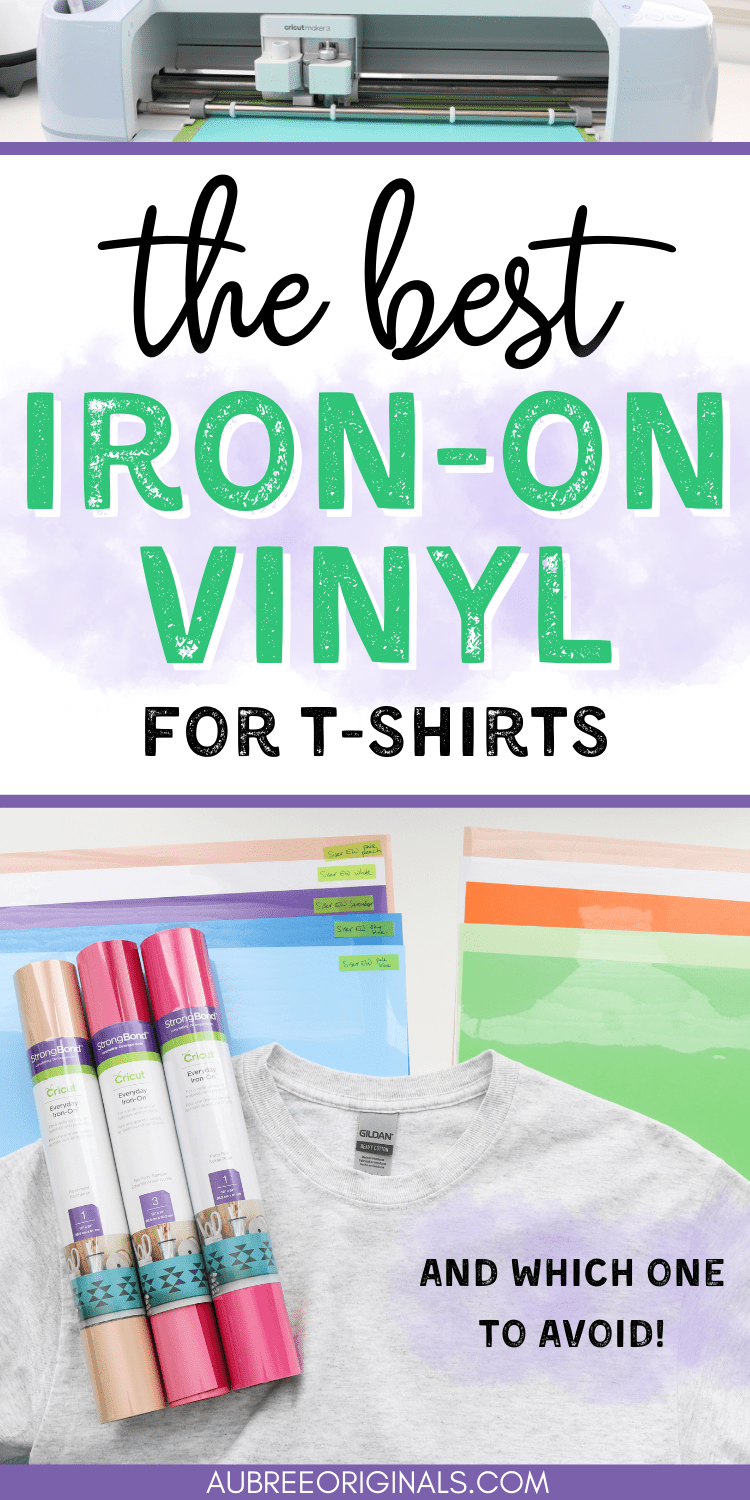
The Best Heat Transfer Vinyl for Shirts (and Layering!)
I tested four brands of heat transfer vinyl on shirts and here are my results! Plus, which iron-on vinyl is best for layering!
There are so many types of heat transfer vinyl out there and a wide range of brands! It can be hard to navigate it all as a new (or even experienced!) Cricut user.
If you’ve been wondering what is the best HTV for making shirts, you’re in the right place! I will be breaking down four different (and popular!) brands of iron-on vinyl in terms of quality, price, and ease of application. I will also be sharing my recommendations for which one is best for multi-layered designs.
This is a sponsored post written by me on behalf of Cricut. All thoughts and opinions are my own.
This post contains affiliate links. For more information, see my disclosures here.
Note: In this post, I will be using the terms iron-on vinyl and heat transfer vinyl (or HTV) interchangeably. You have probably heard both terms before, but they both refer to the same type of vinyl that requires a heat application in order to transfer it to a project.
The brands of HTV I’m comparing
For this post, I’m comparing heat transfer vinyls from Cricut, Siser, StarCraft, and HTVRONT.
I chose these brands because they are some of the most popular that I see popping up in Facebook groups and other crafting forums, as well as on social media platforms. (There are others, of course, but this is a good place to start. And even if you want to look into another brand, this post will give you some good ideas on what qualities to look for.)
I’ve chosen to make this comparison as uncomplicated as possible by choosing each brand’s most basic iron-on vinyl, which is what most people use consistently for t-shirts.
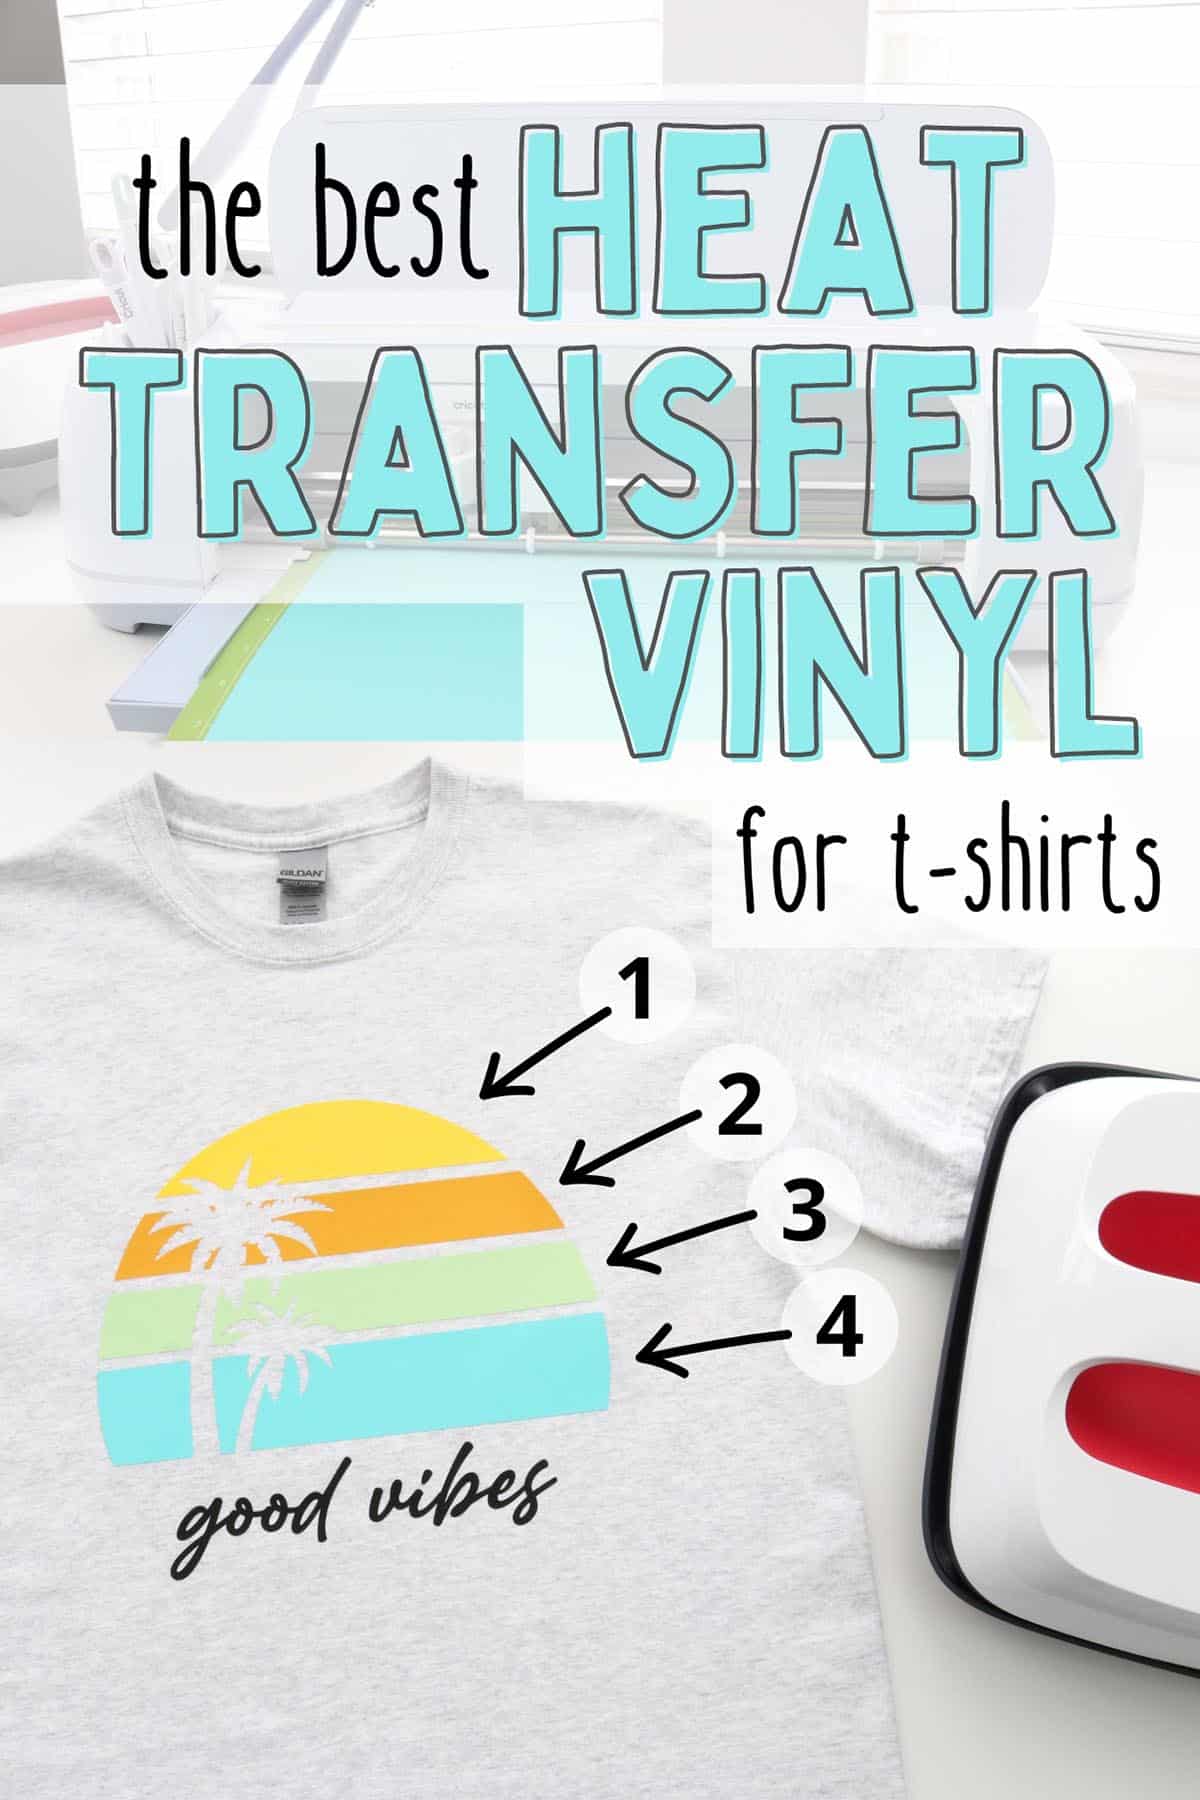
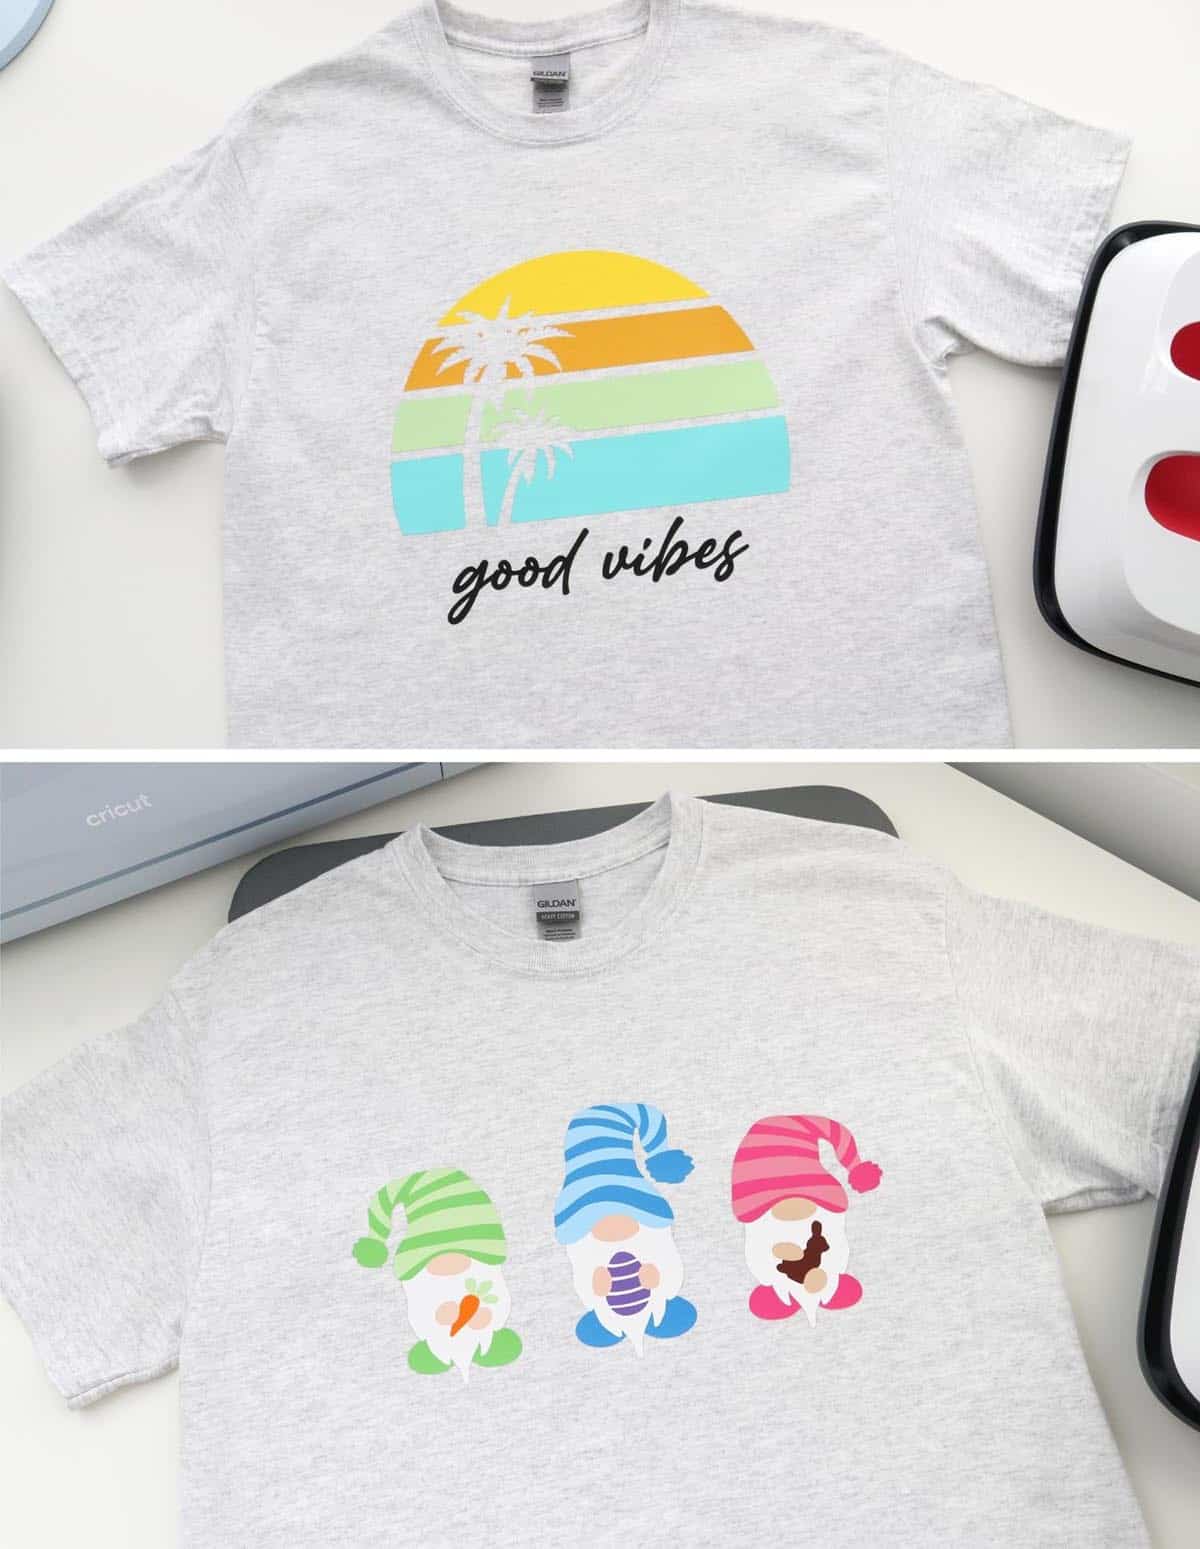
I made two test shirts: one with all 4 brands featured in the same image (the good vibes sunset shirt) and one where I tested how well 3 of the brands can be layered (the 3 Easter gnomes shirt).
What’s the best heat transfer vinyl overall?
Important disclaimer: Before this post, I had used Cricut and Siser HTV but I had never used HTVRONT or StarCraft. Even so, I went into this with a completely open mind about all brands. I even blindly asked two separate adult family members (one who crafts and one who doesn’t) for their opinions on my finished t-shirts to see which brand they preferred and which seemed like the highest quality to them—and they both came back with the same conclusions as me! So I promise these are unbiased and honest opinions!
My favorite heat transfer vinyl overall is Cricut Everyday Iron-On.

I will go into a lot more details below, but if you’re short on time, there you have it—my honest opinion is that Cricut has the best HTV vinyl.
I will say that Siser EasyWeed is also a quality HTV brand, but I just never get quite as consistent of results with it (sometimes I love it and sometimes it frustrates me—usually due to trouble with the recommended heat settings), so I’d say it’s personally my #2 on this list. And I seem to usually get better pricing on Cricut vinyl, so that tends to be my go-to in most cases.
What do you need to make iron-on vinyl shirts?
If you’ve never made a shirt with HTV, go try it right now! It is so much fun to be able to make custom t-shirts with just a few materials at home. This is what you’ll need to get started:
- iron-on vinyl
- a cutting machine: Cricut machines are the best on the market, in my opinion, and what I use in all my projects (I have both a Cricut Maker and Maker 3 and love both). I know a few people who also like the Silhouette Cameo, but I hear it’s not quite as user-friendly as Cricut (and clearly I’ve never felt the need to switch over since I’m totally satisfied with my Cricut!). (There are a few smaller brands out there but I don’t really feel they’re worth mentioning as Cricut and Silhouette are by far the most popular cutting machines.)
- a fine-point blade, StandardGrip cutting mat, and I also like the brayer tool to really adhere my material to the mat before cutting
- weeding tools: I like the basic weeder that comes in this tool set. You may also find a Cricut BrightPad comes in handy when weeding—check out my complete BrightPad review here.
- heat resistant tape: optional, but can be helpful to hold your iron-on vinyl in place when pressing. (This is totally different than transfer tape, which is for adhesive vinyl—you do not need transfer tape with HTV.)
- a heat press machine: I will always recommend the Cricut EasyPress. It comes in multiple sizes and it’s so easy to use—especially if you’re also using Cricut materials, which are tested with the EasyPress so you never have to guess your heat settings.
- pressing mat
- a t-shirt: You can use a cotton shirt, poly blends, or even shirts made of 100% polyester fabric—the heat settings may just vary slightly depending on the material. The shirts I’m using here are 99% cotton/1% polyester. With any cotton shirts, I recommend pre-washing them to pre-shrink them (and don’t use fabric softener).
- Cricut Access subscription: The images I’m using here are all found in Design Space but require an Access subscription. Check out my Cricut Access post if you’re unsure if a subscription is right for you.
Save $10 on any Cricut machine or heat press with the coupon code AUBREE-10
DIY sunset shirt with 4 brands of HTV
Customize the t-shirt design
To make this sunset shirt, I altered an image in Cricut Design Space and added some text. I adjusted the colors to match my iron-on vinyl, that way I’d quickly know at a glance which material to load when. You can access my Good Vibes Sunset T-shirt project HERE.

Just for fun, at the last minute I decided to use Cricut Smart Iron-On to cut the words—just for an extra HTV comparison.
Cut the HTV
Once I finished customizing the project, I clicked “Make It” and followed the prompts in Design Space to cut the project. Don’t forget to always mirror iron-on vinyl!! And remember that HTV should be loaded onto the cutting mat shiny side down/matte side up.

I cut all brands of HTV on the same setting: Everyday Iron-On (and the Smart iron-on on the Smart setting). Luckily, everything cut through without an issue, except for one small piece of the Siser EasyWeed—it could be that the piece was just too small, but I still might change the pressure to “more” for intricate cuts next time I use EasyWeed.
I love that with Cricut products you never have to guess at the settings since machines are pre-calibrated to be compatible with those materials. It’s probably a good idea to do a test cut with other brands first if it’s your first time using them (I took a risk this time as part of my experimentation and luckily didn’t waste any vinyl).
Weed the HTV
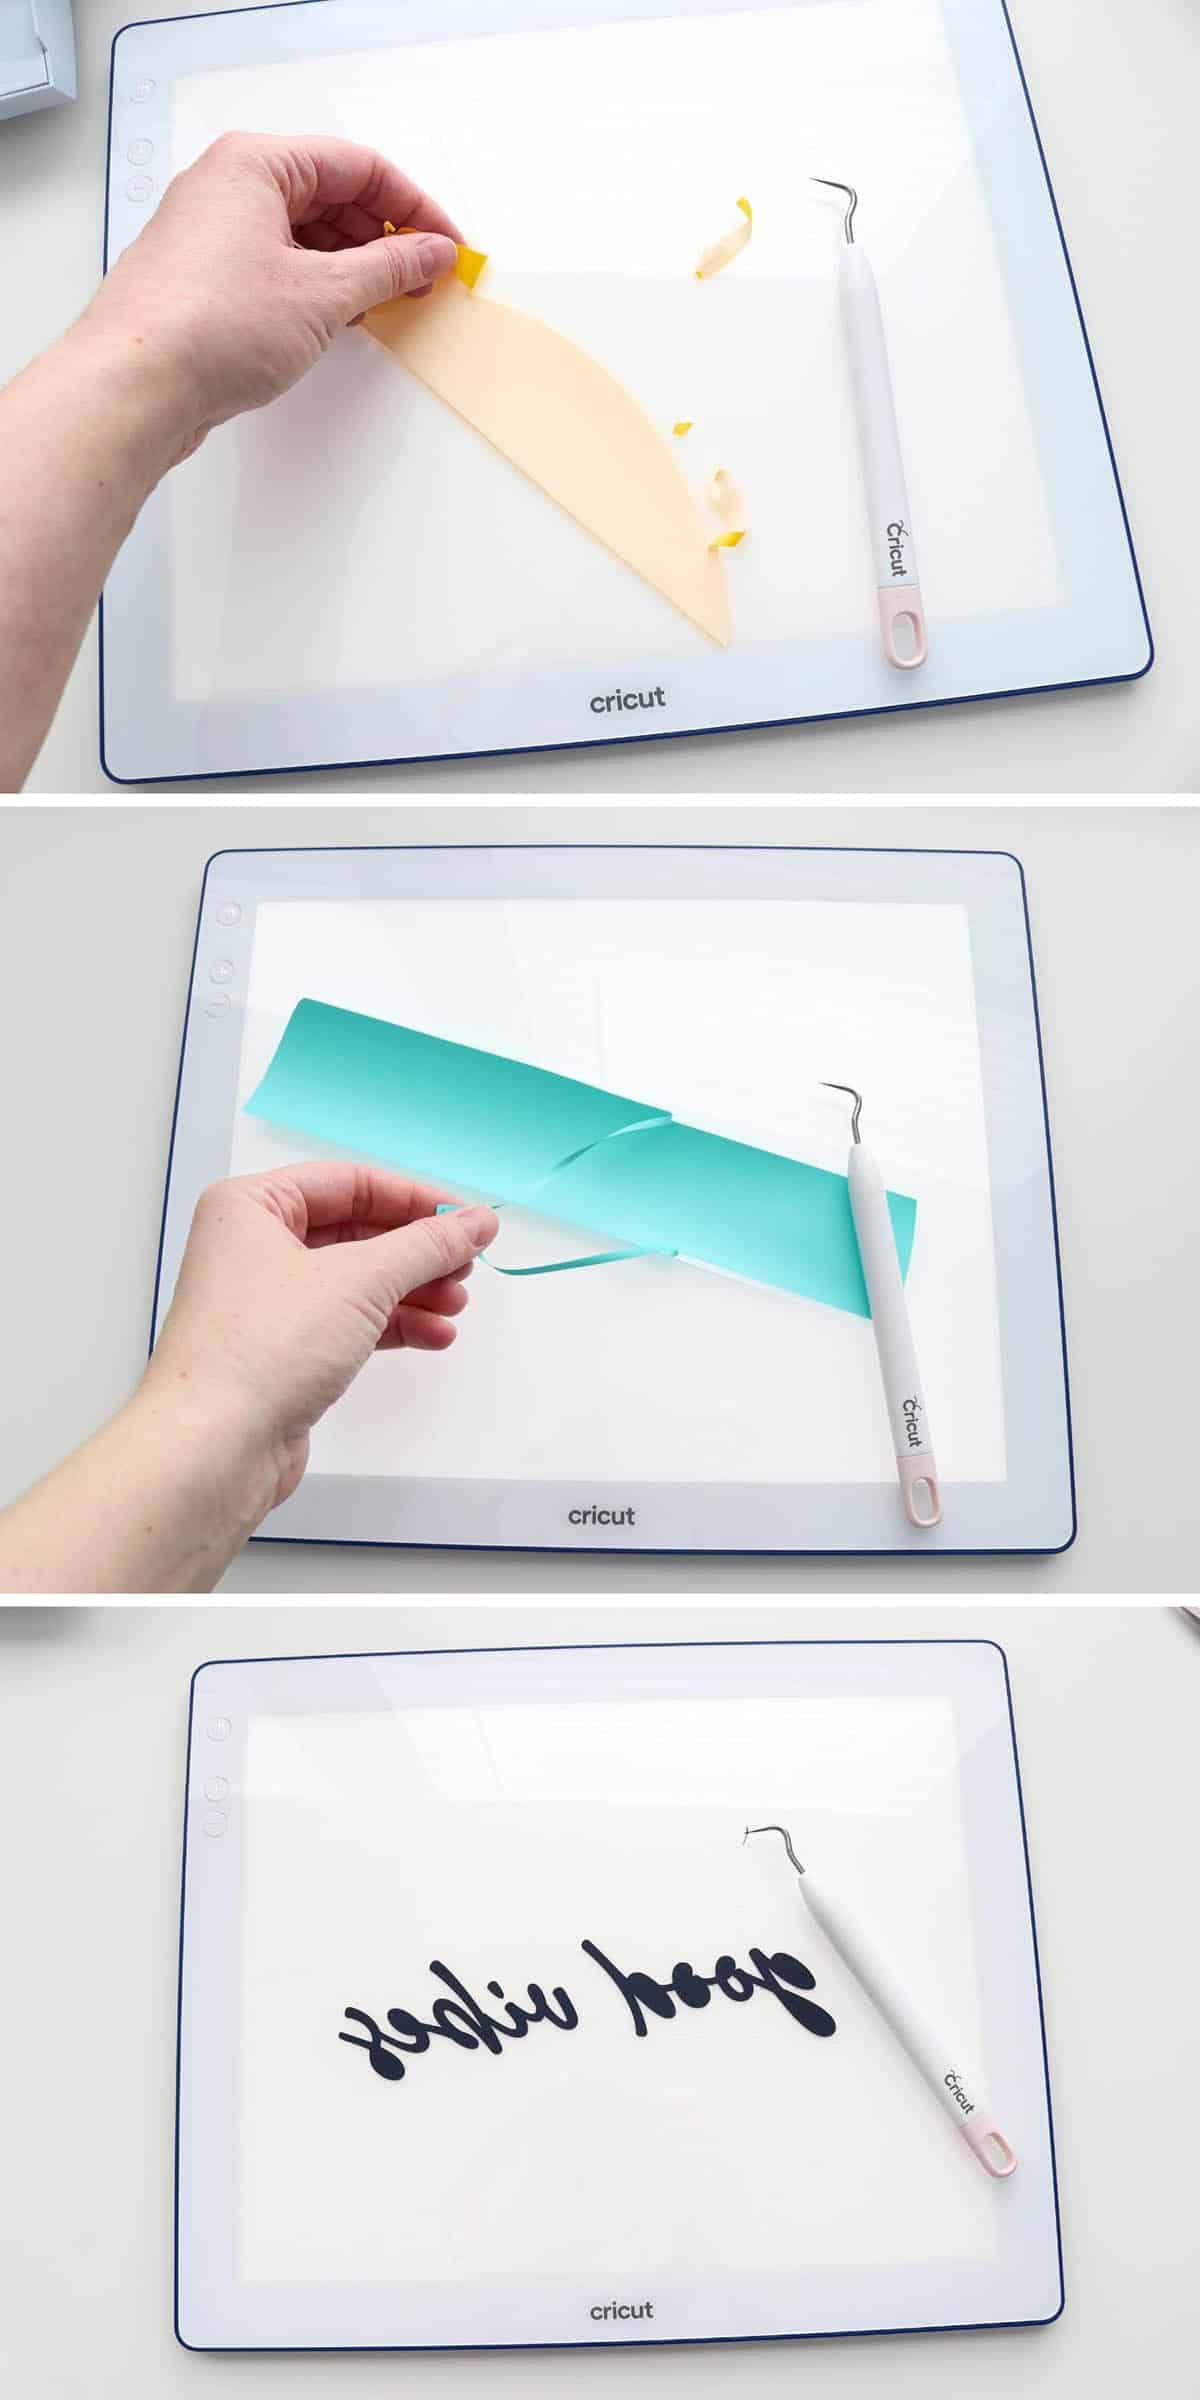
I like to save as much material as possible, so I always cut around my cut pieces with scissors before weeding. I used a regular weeding tool and my Cricut BrightPad as a base (to protect my table from scratches).
All iron-on vinyl will tear a little bit as you weed (totally normal), but these were the observations I made for each brand while weeding:
- HTVRONT/yellow: Feels cheaper, tears easily and often when weeding which I could see being annoying with anything intricate (you’re left with lots of little scraps after).
- Siser EasyWeed/orange: Like the name implies, very easy to weed. However, I lost a tiny piece that didn’t cut all the way through (more likely a cutting issue but could also be that the HTV doesn’t stick as well to the carrier sheet).
- StarCraft/green: Very stretchy but tears fairly easily while weeding.
- Cricut Everyday iron-on/turquoise blue: Definitely felt the smoothest to weed with minimal tearing (it peels away from the carrier sheet in almost one continuous piece).
- Cricut Smart iron-on/black: Very smooth texture, almost velvety. Very similar to Everyday but it possibly tears a little more while weeding.
Heat press the HTV to the shirt
Prep your shirt by lint-rolling it to remove fuzzies that could prevent the HTV from adhering properly. Fold it in half to find the center and make a crease with your hands or press for just a few seconds. Then measure from the neckline where you want the top of your design to be. I did 3″ from the bottom of the neckline, but I could’ve done a little less, actually, since this was a larger design (it looked good on the table, but I also didn’t realize this shirt was a little too long for me, so my eye-balling was kind of off).

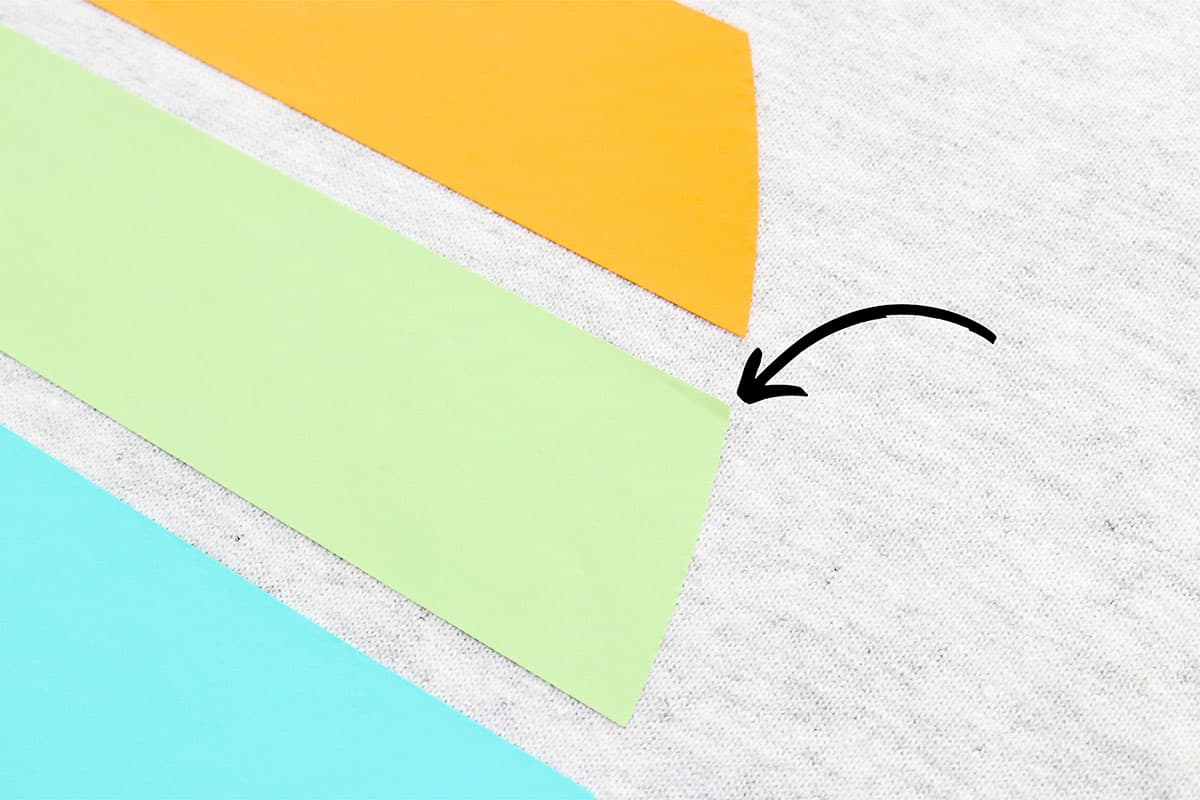
I then folded the first HTV piece in half to find its center and lined this up on the middle of the shirt. You can use heat tape to hold it in place if you want.
Lay out the remaining pieces to check that the image as a whole looks good, then remove all but the top piece.
Press the first piece in place (I’ll list all the brands’ heat settings below).
Once one layer is pressed, you can move onto the next. I usually recommend leaving the carrier sheets on until all pieces have been pressed, just in case, to protect the vinyl from heat (because you never want to use direct heat on iron-on vinyl) and because uncovered vinyl can become indented from the edges of the other pieces’ carrier sheets. But you’re probably okay either way with this design since the pieces are far enough apart.

As you can see in the pictures above, this design worked well for combining different brands of HTV (with all their different heat settings) since you’re able to press subsequent layers without overlapping previously pressed pieces. Just make sure the heat plate of your heat press completely covers the new layer but doesn’t touch the previous. (I used my 9×9 heat press for this shirt and I’m not really sure why, since the 12×10 would’ve covered the entire width of the design…oh well, maybe it was a good test to see how the vinyl holds up if you have to press it in sections.)
Since Cricut Everyday Iron-On and Smart Iron-On require the same heat settings, I actually pressed those two layers at the same time (just make sure you’ve trimmed the carrier sheets close so the vinyl is actually being pressed to the shirt, not another piece’s carrier sheet).
So…unlike cutting (where one setting works well for all, for the most part), heat press settings for different brands of HTV gets a little trickier (and it’s why I personally struggle more with non-Cricut brands).
Here are the recommended heat settings for each brand of HTV:
- HTVRONT/yellow: 305 °F for 10-15 seconds, medium pressure, cold peel
- Siser EasyWeed/orange: 305 °F for 10-15 seconds, medium pressure, hot peel or cold peel
- StarCraft/green: 285 °F for 8-10 seconds, medium-firm pressure, warm peel
- Cricut Everyday iron-on/turquoise blue: 315 °F for 30 seconds, firm pressure, cool peel
- Cricut Smart iron-on/black: 315 °F for 30 seconds, firm pressure, cool peel
Cricut also recommends preheating the shirt for 5 seconds and Siser for 2-3, so preheating probably wouldn’t hurt for the other brands as well.
But what you really want to know…how well did these brands press and adhere to the shirt?
- HTVRONT/yellow: Seemed super thin/see-through and very papery, almost like a sticker that could just be peeled up at the edges. Because of this, I didn’t feel very confident that it was adhered to the shirt well.
- Siser EasyWeed/orange: Pressed smoothly and is a little thinner than Cricut, which some may prefer for a t-shirt vinyl. Can be pretty sensitive to overheating, though.
- StarCraft/green: Wrinkled when I pulled the carrier sheet off and seemed like it would peel off easily. Required a second press.
- Cricut Everyday iron-on/turquoise blue: Smoothest application on the first try with no need to press again. After waiting for a cool peel, the vinyl doesn’t wrinkle when you pull the carrier sheet away—it remains totally smooth, which seems indicative of a higher quality material.
- Cricut Smart iron-on/black: Very smooth application, only had to press one corner again that didn’t get enough pressure. This seemed the most resistant to overheating and least likely to dimple out of all the vinyls (but the dark color would also hide that better).
Okay…I will be totally honest. I had a couple pieces of vinyl that needed re-pressing, and I either wasn’t thinking or in a rush so I ended up pressing the entire design again for a few seconds…and slightly overheated all the pieces. BUT this was actually a good test to do, since most people will accidentally overheat iron-on vinyl at some point, especially if you’re just starting out—it’s a really easy thing to do!
The Cricut Smart iron-on was the least phased by my overheating and I couldn’t detect any dimpling (again, the dark color helps). Next, the Cricut Everyday iron-on had only minimal dimpling and I’d say the texture still ended up smooth to the touch (not wrinkly at all). Siser EasyWeed does dimple a lot when overheated and the texture becomes a little wrinkly, which is less than ideal. HTVRONT dimpled but I didn’t really care because I’ve passed that off as a super cheap non-contender at this point. StarCraft was the most sensitive to overheating and dimpled the most, which is annoying since it was one of the ones that needed a second press.
It’s hard to tell in a photo, but you can kind of see here that the StarCraft didn’t press all the way the first time and needed more heat to get the corner to adhere all the way:
Based on this whole HTV application process, Cricut EveryDay iron-on came out ahead for me. It didn’t require a second pressing and looked beautiful after removing the carrier sheet. (Just don’t be silly like me and accidentally press a second time with the rest of the design!)
I will say that I also really like Cricut Smart iron-on. It has such a nice velvet-like texture and feels so seamless on the shirt. But…I don’t consider this Cricut’s most basic iron-on vinyl and it’s considerably more expensive with limited colors available. But if you want to use this heat transfer vinyl (and yay for being able to cut it without a mat!), I fully support you!
More details about these HTV brands
Cricut Everyday Iron-On
Cricut Everyday iron-on comes in 12″ x 24″ rolls in 36 colors. The pricing is:
Normal: $12.99 per roll = $6.50 per square foot
With 40% off sale: $7.79 per roll = $3.90 per square foot
With 40% off sale and 20% Cricut Access Premium discount: $6.24 per roll = $3.12 per square foot
There are also multiple sampler packs to choose from, usually with several different colors of 12″ x 12″ sheets in each pack.
Bulk value rolls or packs are also available when you’re looking to stock up. Bulk rolls and packs come out to $3.08 a square foot (with the same discounts above). The Bulk Everyday Iron-On Value Rolls, Basics (a Cricut Access exclusive product) is the best deal of them all at $1.42 a square foot (with a Premium Access subscription).
(A couple times a year Cricut has a 50% off materials sale, usually their Christmas in July and Black Friday sales, so watch for those for even better pricing!)
Siser Easyweed HTV
I purchase this most frequently from Expressions Vinyl and it comes in various 12″ sizes (by 12″, 24″, or 5 feet). There are 61 colors, plus 6 matte colors. Some colors are also available in 5-yard rolls. You can get the sheets as low as $3.38 a square foot, the 5-foot rolls for $2.60 a square foot, and the 5-yard rolls for $2.33 a square foot. Watch for sales and you can usually find a 15% off coupon to bring those prices down even more.
It’s important to note that, while Siser says it’s 12″ wide, it’s actually only 11.75″ wide in reality.
StarCraft SoftFlex
StarCraft SoftFlex comes in 12″ x 12″ sheets, 12″ x 24″ sheets, or 12″ x 5-foot or 5-yard rolls. There are 57 colors to choose from.
I purchased this from 143vinyl.com (I also purchased a few colors of Siser EasyWeed from them at the same time), but there are multiple online distributors you can choose from.
StarCraft SoftFlex is priced at $3.00 per square foot, but if you purchase a variety pack you can bring this price down as low as $2.76 a square foot.
HTVRONT
HTVRONT comes in 12″ x 10″ sheets or 12″ x 5-, 10-, or 30-foot rolls. There are 36 colors to choose from.
I purchased a variety pack of 18 colors on Amazon for $14.99. This comes out to $0.83 per sheet, or $1.00 per square foot.
If you buy direct from HTVRONT.com, a 36-sheet variety pack costs $24.99 = $0.69 per sheet, or $0.83 per square foot.
I was actually kind of annoyed by the 10″ wide sheets that I got from Amazon. That definitely limits you on how big your design can be and I wish they had just been a standard 12×12″ size to maximize the size of my cutting mat.
Which HTV is best for quality?
Winner: Cricut Everyday Iron-On
#2: Siser EasyWeed
#3: StarCraft SoftFlex
#4: HTVRONT
Based on my testing, I would say Cricut brand iron-on vinyl is the best quality, with Siser Easyweed being a close second.
Then I would say maybe StarCraft SoftFlex third (though I still wasn’t a fan). And I’d probably avoid HTVRONT altogether if possible—it had the cheapest, paper-like quality of all the vinyls and felt almost like I was applying a sticker to the shirt.
But, man, I love Cricut iron-on vinyl! And I didn’t even realize how much until doing this post.
Which HTV is best for price?
If I had to guess, I would say that most people use 12×12″ size sheets of HTV most regularly, especially when needing a variety of colors (I’m assuming most casual crafters don’t buy bulk rolls in anything except maybe white and black—feel free to prove me wrong), so here are the price rankings based on that:
Winner: HTVRONT ($0.83-$1.00 per square foot—but still not worth it, in my opinion)
#2: StarCraft SoftFlex ($2.76-$3.00 per square foot)
#3: Cricut Everyday Iron-On ($3.12-$3.90 per square foot)
#4: Siser EasyWeed ($3.38 per square foot)
Prices are really hard to compare, though, because each company may have different sales at different times of the year that can change these prices, and some may offer bulk or special box pricing. For example, I often buy Cricut mystery boxes that include iron-on vinyl and that brings the price down considerably (to about $2.50 a square foot, depending how you want to estimate it).
Cricut and Siser are pretty comparable in price, so I’d say definitely go for one of those if you can afford it.
If you’re on a tighter budget, I’d choose StarCraft over HTVRONT (I’m sorry to all the Amazon-vinyl-purchasers, but I think you’re just sacrificing too much quality with HTVRONT). StarCraft is a little better if you’re going for budget, but that’s probably the only reason I’d choose StarCraft—to save money (maybe for bulk or one-time-use projects?).
You really get what you pay for with HTV. As expected, you lose a lot of quality with the cheaper brands. I will personally never be disappointed in buying Cricut, especially with my Premium Access discounts and the ease of purchasing through their website!
Which HTV is best for color variety?
Winner: Siser EasyWeed (61 colors)
#2: StarCraft SoftFlex (57 colors)
Tied for #3: Cricut Everyday Iron-On and HTVRONT (36 colors)
Siser EasyWeed has the best color selection of all the iron-on vinyls. (By the way, Expressions Vinyl has color sample kits you can purchase with samples of all the colors they offer on a keychain, which is super handy when figuring out which colors to order.)
BUT…I will say that Siser EasyWeed is the only one of the four vinyls that has a shiny/non-matte appearance. It catches the light more and stands out against the other vinyls which are all pretty smooth/flat. This might not bother you, but I’d definitely try to not combine Siser EasyWeed with other brands on the same shirt in the future.
Even though HTVRONT has the same number of colors as Cricut, HTVRONT isn’t nearly as high-quality, which means the colors suffer. The yellow HTVRONT layer on my shirt was so thin and papery that you could see the heather pattern of my t-shirt through it—I can only imagine how the color would suffer even more on a dark shirt. If you want vibrant colors, I would not choose HTVRONT!
Which HTV is best for adhesion and durability?
Right away from the weeding and pressing process, I could tell that HTVRONT was not a high quality material and I did not like the way it adhered to the shirt (just too thin and papery).
StarCraft felt better but needed a second heat application to get all the edges and corners adhered properly (which then overheated the vinyl and caused it to dimple).
Both Siser and Cricut seemed to adhere great up to this point.
Now, after washing…
Actually, none of the vinyl layers seemed to be lifting (on either shirt) after the first washing*. So that’s good news!
I have had a couple shirts made with Siser EasyWeed that peeled up after only a few washes, and one of them needed almost the entire design to be pressed again before it could be worn. I’m trying to think of an instance where I had Cricut iron-on peel up, and I can only think of one shirt made with their glitter iron-on that needed to be pressed again after washing—the Everyday iron-on has always been great. (Side note: I made a shirt for my son with Cricut foil iron-on and even layered it when you’re not supposed to and it’s never peeled up, after countless washes!)
I would say that it’s fairly normal for any brand of HTV to start lifting after enough wear and washes, though. When that happens, you can usually just follow the application instructions again to reapply the vinyl to the shirt (just be sure you’re not using direct heat—I always save large scraps of carrier sheets for this reason).
For best results, be sure to follow each brands’ care instructions after application: Cricut recommends waiting 24 hours before washing, to wash and dry inside out, avoid bleach, and only iron from the back of the shirt if needed.
I actually try my best to skip the dryer altogether and line-dry my HTV projects. I also try to remove my vinyl shirts from the washer promptly and then shake out the shirt or even smooth the vinyl with my fingers before hanging to dry. All vinyl will crease or wrinkle a little bit in the washer, but I will say that Cricut vinyl is the most resistant to this of the four vinyls I’ve tested in this post!
*Update: After washing and air-drying (many times now), I still think the Cricut vinyl looks the best (it wrinkles but doesn’t crease as bad as the others and no noticeable peeling). Siser EasyWeed is starting to peel a little at the corners. StarCraft actually hasn’t had any peeling but, funny enough, it’s stained from something I spilled on my shirt…I think that’s just my clumsiness, though, and that may or may not happen with any of the vinyls (I haven’t tested that). I still hate HTVRONT…it feels like you’re wearing a candy wrapper.
Which HTV is best for layering?
Winner: Cricut Everyday Iron-On (my opinion, as well as both of my family members)
Close second: Siser EasyWeed (I also thought this one turned out decent and was kind of torn between this and Cricut for different reasons)
I also tried layering StarCraft on my test t-shirt, but decided to skip HTVRONT altogether as I knew how much I already disliked it in my previous testing.
Layering iron-on vinyl is a skill and one I’m still working on perfecting. When layering HTV, you want to press the first layers for just a few seconds to “tack” them to the shirt, only applying the full press time on the last layer. I also think you shouldn’t use the full temperature on the first layers (I recommend about 15-20° less), otherwise your pieces will start overheating and dimpling too soon. You can always apply more heat if you go to peel and the vinyl isn’t releasing from the carrier sheet, but start with less (a lower temperature and, seriously, only like 1 or 2 seconds for Siser EasyWeed! Cricut will require more time since it has the longest press time overall).
I created this cute gnome shirt for Easter. You can access the project in Design Space HERE.

Each gnome is a different brand of vinyl (I highly recommending sticking to one brand of vinyl within a single layered design so you’re not wrestling with different temperatures and trying to find a happy medium—in my experience, there isn’t one and something will always be overheated or underheated).
You’re not really supposed to press more than four layers of iron-on vinyl in a layered design, so I was kind of stretching it with this design (I was able to combine a couple layers and press them at the same time, though).
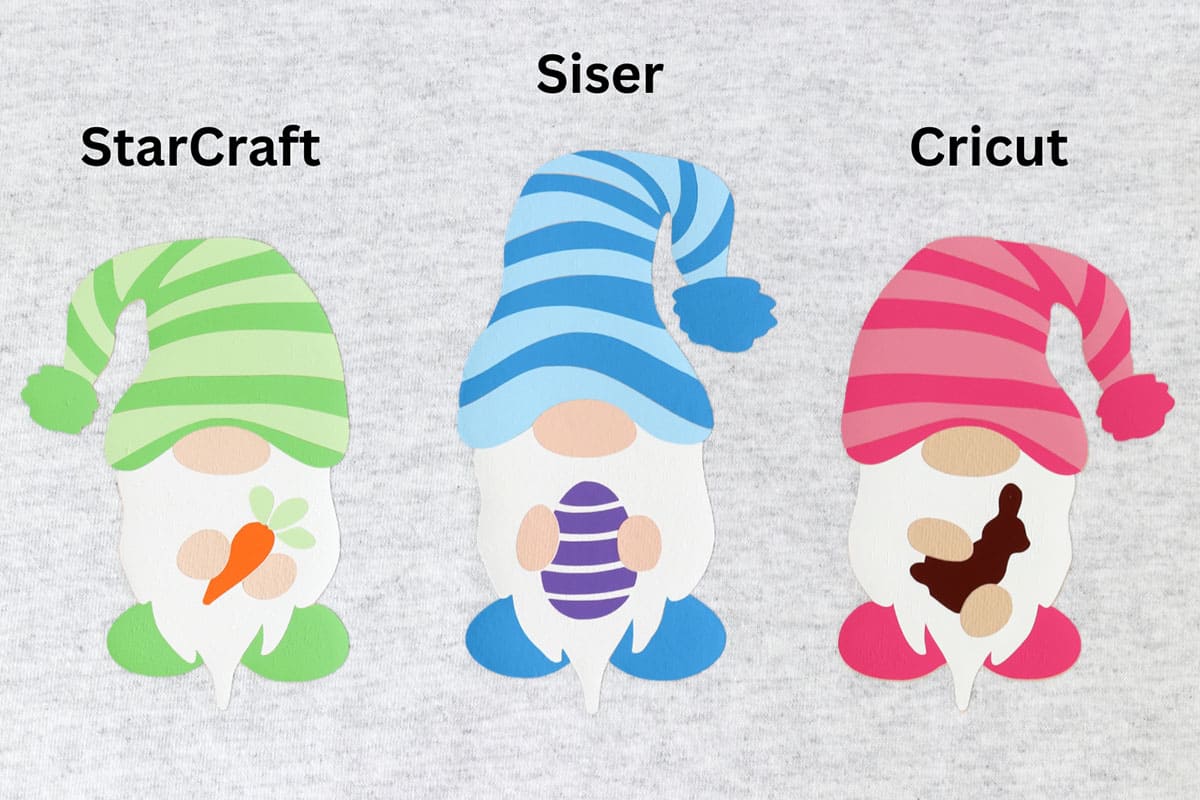
My observations and results after layering:
StarCraft/green gnome: The recommended temperature was too hot for the first layers, so it was already dimpling on the second layer. Next time I might try even less time, maybe one second before seeing if I can remove the carrier sheet. The vinyl shrunk from the heat: the white beard shows around the carrot piece but it’s actually supposed to fit perfectly. You can see a little bit of shiny adhesive around the edges which I believe is caused from overheating, where the adhesive melts out a little bit. Overall, I don’t think this HTV had quite as nice of texture as the other two in the final result and most pieces were dimpled/wrinkly.
Siser Easyweed/blue gnome: I learned from the previous gnome and only pressed for one second on the first layer (which is all it needed). But the recommended temperature was too hot and the vinyl was already dimpling on the second layer. I turned the heat down to 285° and continued pressing. There was minimal shrinkage of the vinyl and no shiny adhesive around the edges, which I think is important in the final result.
Cricut Everyday iron-on/pink gnome: I really learned my lesson this time from the previous gnomes and turned the temperature down a bit and pressed for about 5 seconds, waited for a cold peel, and then moved on to the next layers. There was a little dimpling on that first layer but not nearly as bad as the other gnomes. I want to say there was no shrinkage of the vinyl because the chocolate bunny fit perfectly in the gnome’s hands…but I actually had a pretty hard time getting the hat pieces to line up, so something must have overheated somewhere. And you can tell, because this gnome had the most shiny/melted adhesive edges of all of them. BUT, even if it overheated, the texture didn’t suffer nearly as much! This gnome ended up with the smoothest texture of all of them, which both my family members agreed was more important/noticeable than the shiny edges.
Ahh…I’m a little torn, though. I agree that the Cricut vinyl feels the smoothest and highest-quality of all of them in the final result. But those shiny edges bother me in certain lights. Also, if you’re making a lot of shirts, it’s going to get really annoying having to wait for a cold peel on each layer (and for best results, you really do want to wait for it to cool completely!).
I love that you can peel the carrier sheet almost right away with Siser EasyWeed—that makes the whole layering process so much more enjoyable. But, then again, that dimpled texture…not my favorite. Also, the Siser layers seem more pronounced than Cricut: when you run your fingers over it, the edges of each layer feel more noticeable than the Cricut one, which feels quite smooth all the way across.
Nope, I’m sticking with my choice: Cricut still wins for me for layering. But it’s okay if you choose something else, too, I’d understand. Definitely pros and cons here.
Why I reach for Cricut brand almost every time
There are some decent heat transfer vinyl brands out there (I’d say only 2 of the 4 in this post), but I still can’t help being partial to Cricut brand, and for good reasons.
One, I love not having to worry about how Cricut materials are going to cut or press since they’re specifically tested to work with Cricut machines and presses—taking that guesswork out saves time and headache when I don’t have to re-do my project due to settings that might be slightly off (a little too much heat on iron-on vinyl can make a big difference in the final result!).
Two…you just can’t beat Cricut quality, in my opinion! It has a lot to do with the reason I just mentioned, where the final result ends up so clean and professional because the heat settings are perfect for Cricut vinyl. But it’s also a thicker, stronger vinyl than most, making it easier to weed and more durable as well.
As far as cost…I love having a Cricut Access subscription for the Design Space images, but the 20% off materials purchased from Cricut.com (and the occasional $10 off coupon!) is a huge perk too, making these materials that much more affordable.
My only qualm with Cricut vinyl is the lack of colors: 36 colors isn’t bad and probably great for most projects, but when you’re working with more complicated or very specific designs, I often have to find another brand to fill in the gaps in shades. Cricut did just add 3 new colors (mint, coral, and rose gold), so I’m hopeful that they’ll add more colors in the future!
The longer heat pressing times of Cricut iron-on and the need to wait for a cool peel can be annoying too, but I’ve just gotten used to it, so this is further down on my list.
Specialty heat transfer vinyl
As I mentioned earlier, I wanted to keep this post straight-forward for those looking for just a standard, high-quality heat transfer vinyl that works well for t-shirt applications. But don’t let that stop you from experimenting with other specialty vinyls!
I have made shirts with glitter iron-on, foil iron-on, patterned iron-on and more, and loved the results. I use primarily Cricut brand (for the reasons I talked about earlier) but each brand will have slightly different types of vinyl so go experiment and have fun!
Glitter iron-on
Okay, I lied, I think I will share just a few notes on glitter iron-on since it’s the specialty vinyl I use the most. I made this shirt recently with both Cricut and Siser glitter iron-on so I could make some comparisons and this is what I found:
- The Siser sheets are 1/4″ smaller than Cricut, which is just a little annoying when they’re still advertised as 12×12″ sheets (and I really appreciate that Cricut vinyl is always exact and fills the cutting mat from edge to edge).
- Siser may be slightly thinner, but just barely. It also seemed like the cut lines were harder to see, but that could just be the color of vinyl I was using (and all glitter iron-on is notoriously difficult for seeing cut lines, which is why I recommend the Cricut BrightPad).
- Siser is a smoother glitter, while Cricut seems a little chunkier/rougher.
- When weeding, Siser doesn’t peel away as cleanly, it feels like, and it also doesn’t stick to the carrier sheet as well so you have to weed slowly. (I have heard mixed things on this, so it may have just been the particular sheet I had or the way it cut—maybe it needed more pressure.)
- I appreciate that you can peel Siser glitter iron-on hot or warm—having to wait for Cricut vinyl to cool is a minor nuisance.
- If it bothers you, Cricut has a longer press time: 30 seconds versus 10-20 for Siser, but I’m annoyed that I can’t find an exact press time for Siser glitter HTV! Their website says 15 but other vendors’ recommendations vary. With Cricut’s heat guide and their extensive testing, I know I can always trust the settings and times.
I didn’t notice a very big difference in quality between the two brands of glitter HTV (both while wearing the shirt and again once the shirt was washed and dried): you could have told me the glitter htv was all the same brand and I’d believe you. So I think it really comes down to ease of use (I’d choose Cricut for some of the reasons above), price (just depends on the vendor and what sales you can find—Cricut glitter iron-on is probably pricier, unless you get it in a mystery box), and color selection (if you have a very specific project, Siser will have more options).
There are other brands of glitter iron-on vinyl, too, that I haven’t tried so you’ll have to let me know if you have a different brand you prefer!
Is glitter heat transfer vinyl good for shirts?
I think glitter HTV is absolutely gorgeous on shirts! It definitely catches people’s eyes and the sparkle is so fun.
Glitter iron-on, however, is thicker than regular iron-on so it can feel stiffer/heavier while wearing the shirt. And if you have a large vinyl design, the shirt won’t breathe well and you’ll probably sweat more under that part on a hot day (the same goes for thick layered HTV designs—my family learned this when we made Disney vacation shirts with a design that had 4+ layers of regular vinyl, oops).
Also, the texture of glitter iron-on can cause it to stick to certain materials: I found this out one day when I was wearing a shirt with a large glitter iron-on design and it kept sticking to the sleeve of my husband’s microfiber-ish/soft textured jacket when I got too close to him. He was not amused…but it made me giggle. (Siser and Cricut glitter HTV are equally “sticky”.)
These are just a few things to keep in mind. But, hey, we sacrifice comfort for beauty all the time, and I would have to say glitter iron-on is still worth it. 😉
The Best Heat Transfer Vinyl
I hope you found this post helpful, especially if you’re still figuring out which iron-on vinyl is your favorite! I don’t think it hurts to shop around and find the HTV that works best for you, and hopefully this gives you a starting place so you know what to look for. The absolute best heat transfer vinyl is the one you love and have consistently great results with time after time!
For me personally, I’m going to stick with my Cricut iron-on (and occasionally Siser EasyWeed when I need a wider range of colors). I know everyone will have their own personal preferences (I’ve seen this become a pretty touchy subject in Facebook groups and other forums), but I’m just genuinely happy and excited that you’re crafting and using your Cricut at all! You’re amazing and creative and you’ll figure all of this out for yourself the more you experiment and play with different materials!
Happy crafting!

Don’t forget to pin and save for later!
Sorry, I don’t like Cricut HTV at all. I still have rolls that I won’t use because when first time I used them, I wasn’t satisfied. They seem to wrinkle after washing and don’t last.
I understand that. I also get wrinkling after multiple washes, but I think most vinyl does that over time (my shirts with Siser EasyWeed are just as bad and actually peel away from the shirt more). I haven’t updated this post, but I will say I’ve had some bad luck with Cricut’s new vinyl (still called Everyday Iron-On, but the new kind comes in boxes, not in the tubes). Unfortunately, I think they’re cutting corners and going to cheaper materials that are lower quality (I wish they would bring back their old cardstock, too!).
I am wondering which of the brands feels less stiff? It seems with some heat transfer vinyls that they almost “melt: into the fabric and it looks great and other just sit on the fabric like a big sticker and just look and feel bad. Is that something you have noticed?
Hey Brittney, great question. All HTV will do this to some extent. This is why I especially didn’t like HTVRONT–it definitely feels like a big sticker. The least sticker-like is Siser EasyWeed, which is very thin and smooth. It’s much less noticeable than the other brands and does seem to mold to the fabric better. I also think Cricut Smart iron-on vinyl is smoother/thinner than regular Cricut.
If you’re using a different brand that’s thicker, I might recommend designs with only a single layer or designs with smaller lines instead of a big block of HTV (especially if you’re making shirts for hot weather…I made Disney shirts with a layered design one year for our vacation and we were all sweating under that decal! Oops.).
Thank you for such a detailed and well-tried out comparison. I’m new to HTV and you definitely saved me from wasting time and expenses on some new work-related shirts that I am creating.
I’m so glad it helped, Kim! I hope your shirts are successful!
This was cool! Love it! Will try it out this weekend definitely! Thanks for sharing
Curious after you wash which you like the best? Does one stay on better after washing and drying?
Hey Stephanie, great question, I’ll update the post! After washing and air-drying (many times now), I still think the Cricut vinyl looks the best (it wrinkles but doesn’t crease as bad as the others and no noticeable peeling). Siser EasyWeed is starting to peel a little at the corners. StarCraft actually hasn’t had any peeling but, funny enough, it’s stained from something I spilled on my shirt…I think that’s just my clumsiness, though, and that may or may not happen with any of the vinyls (I haven’t tested that). I still hate HTVRONT…it feels like you’re wearing a candy wrapper.
If you machine-dry your clothes, you may see the vinyl peel up sooner but I’ve had shirts made with Cricut vinyl that have held up with many washes doing that. You can always re-press your shirt lightly/briefly when that happens.
Hi. extremely helpful.
Do you have best heat settings for dri-fit/polyester shirts?
Hi Mitzy, you can use Cricut’s heat guide to find the best settings for your material. I hope that helps!