My Secret to Making Fluffy Pom Poms Every Time (with Any Kind of Yarn)
In this tutorial, I’ll show you my secret trick for making super fluffy pom poms–even when you use cheaper, coarser yarn. This trick only takes a couple minutes and makes all the difference!
In my previous post, I taught you how to make pom poms that don’t fall apart. But what if you get to the end of that and still have a less-than-fluffy pom pom? In this tutorial I’m going to share my secret, easy trick to get a fluffy pom pom every time (no matter what kind of yarn you use)!
This post contains affiliate links. For more information, see my disclosures here.
More posts you’ll like:

How to Make Super Fluffy Pom Poms
If you learn best by watching someone else first, you’ll find this fluffy pom pom tutorial video super helpful. Or, keep scrolling for the full step-by-step below.
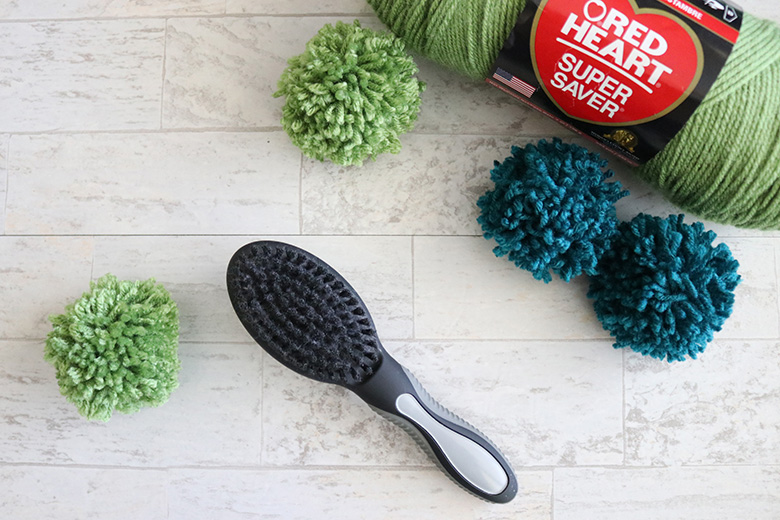
What You Need to Make Fluffy Pom Poms
- pom poms: you can see how to make yarn pom poms here (I use pom pom makers and I promise you will never make pom poms any other way!)
- bristle hair brush or pet brush (hey, I’m all for using what you already have on hand!)
- scissors
Before we get to my secret trick, there are a few things you can do first to get the look of a full, fluffy pom pom:
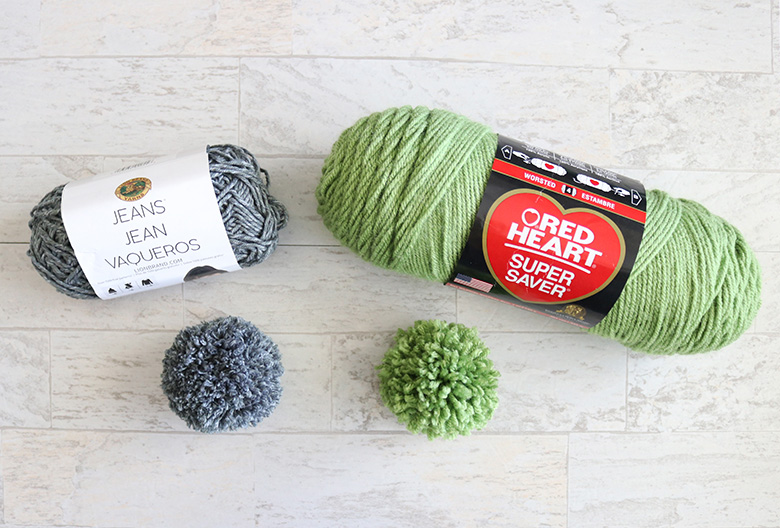
Start with a softer yarn
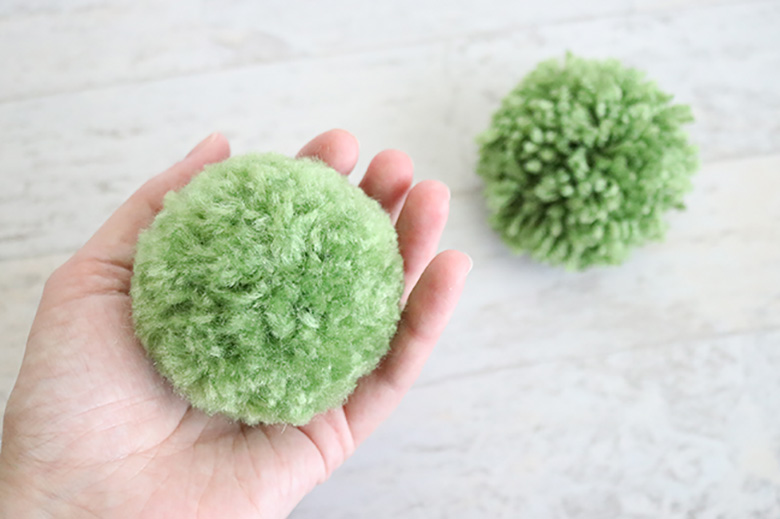
Soft yarn will naturally give you a fluffy pom pom, and you probably won’t even have to do anything extra. I’ve had really good luck with this brand and I believe this yarn is the exact one I use in my videos. But there are tons of soft yarns out there, so experiment and find what works for you.
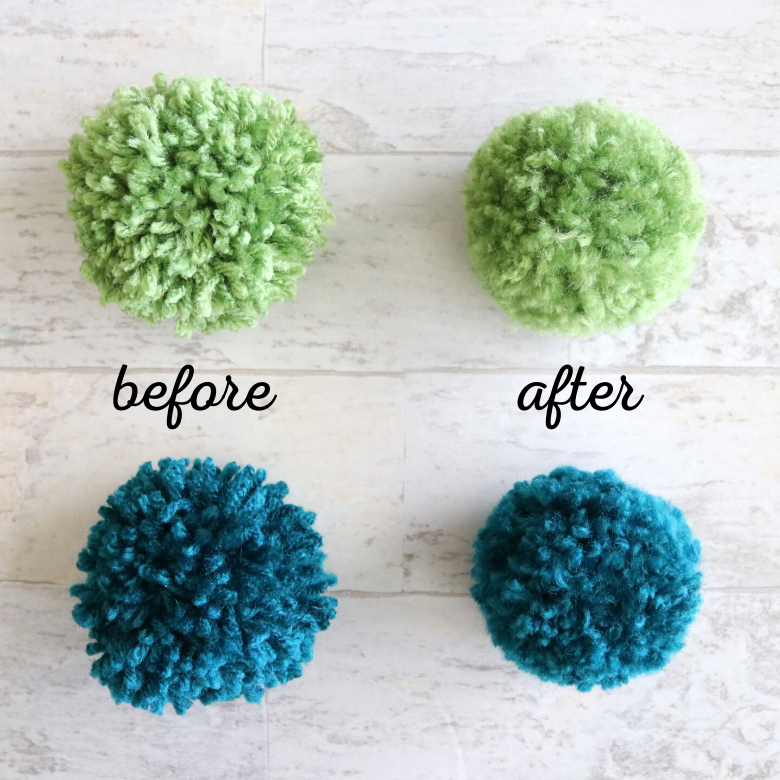
In the picture below, you can see the difference between a softer yarn on the left and Red Heart Super Saver yarn on the right. (But stay tuned for how I make that pom pom fluffy, too!)
Fill your pom pom maker with a lot of yarn
The more yarn you fill your pom pom maker with, the fuller your pom pom will look. Just make sure you can still close the pom pom maker, otherwise you may have to unravel a bit.
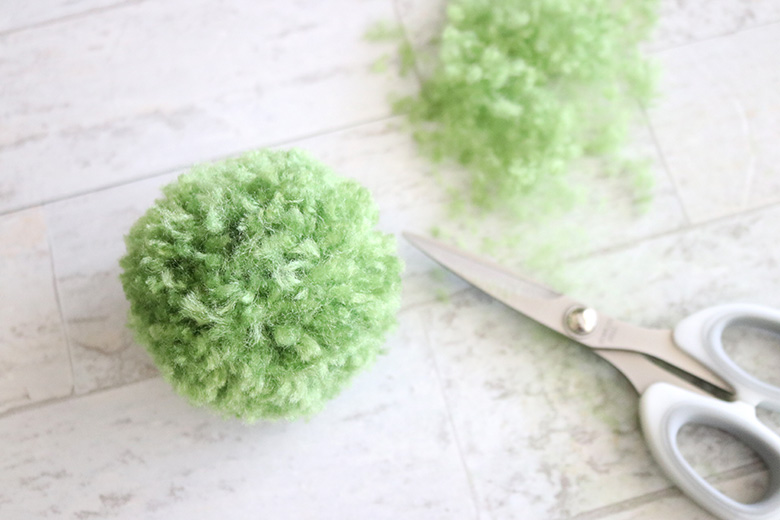
Trim your pom pom a lot
When you’re done making your pom pom, trim it a LOT. Yes, your pom pom won’t be quite as big as you originally started out with, but the end result will be a thicker, fuller—and rounder—pom pom. If you’re worried about losing some of the size, start with a bigger pom pom maker.

Okay…but what if none of those steps are working, or what if you want to use the bulk yarn that’s cheaper, but also tends to have a coarser texture? Keep reading for my simple trick!
My Secret to Making Fluffy Pom Poms Every Time
Before doing this step, you will want to reinforce your pom pom with the technique I showed in this pom pom tutorial. Doing that will add a little more security so your pom poms don’t fall apart as you do this step.
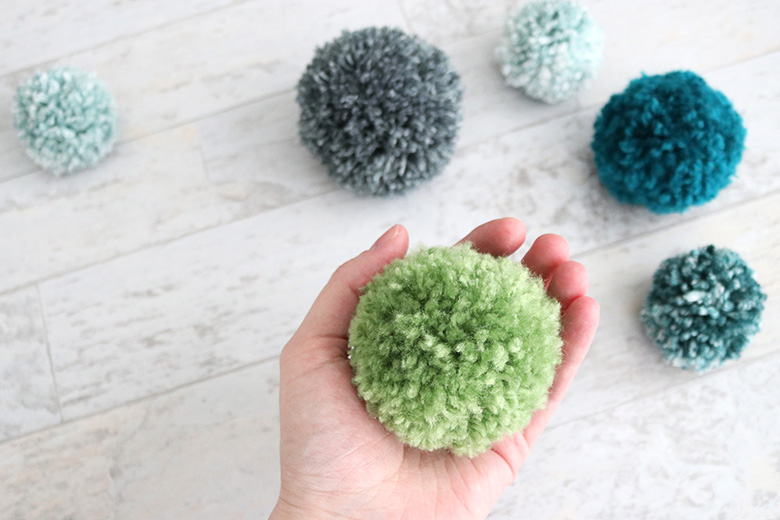
Ready for the secret trick? Take your bristle brush and…brush your pom poms!
Brushing them with a bristle brush breaks up and separates the yarn fibers, resulting in a super fluffy pom pom.
To do this, hold the pom pom securely in the middle with one hand while you gently brush with the opposite.

A few tips for brushing pom poms:
- Sometimes wiggling the brush back and forth a bit can help break up the fibers.
- If you notice that the brush is only separating the yarn on the surface of the pom pom, spread it open with your fingers so you can brush the yarn near the center.
- The more yarn you can separate and brush out, the fluffier your pom pom will be.
- If you happen to see pieces of yarn coming loose from the pom pom, you’re either brushing too hard or your pom pom wasn’t reinforced enough.
Keep brushing until you’re satisfied with your pom pom. Then trim it with scissors so it’s nice and round. If needed, brush and trim some more.
Brushing will change the shape of the pom pom a bit so there’s no need to do any trimming until you’re done brushing (but it’s not a big deal if you’ve already trimmed your pom pom before this step–just give it a quick trim at the end, too).
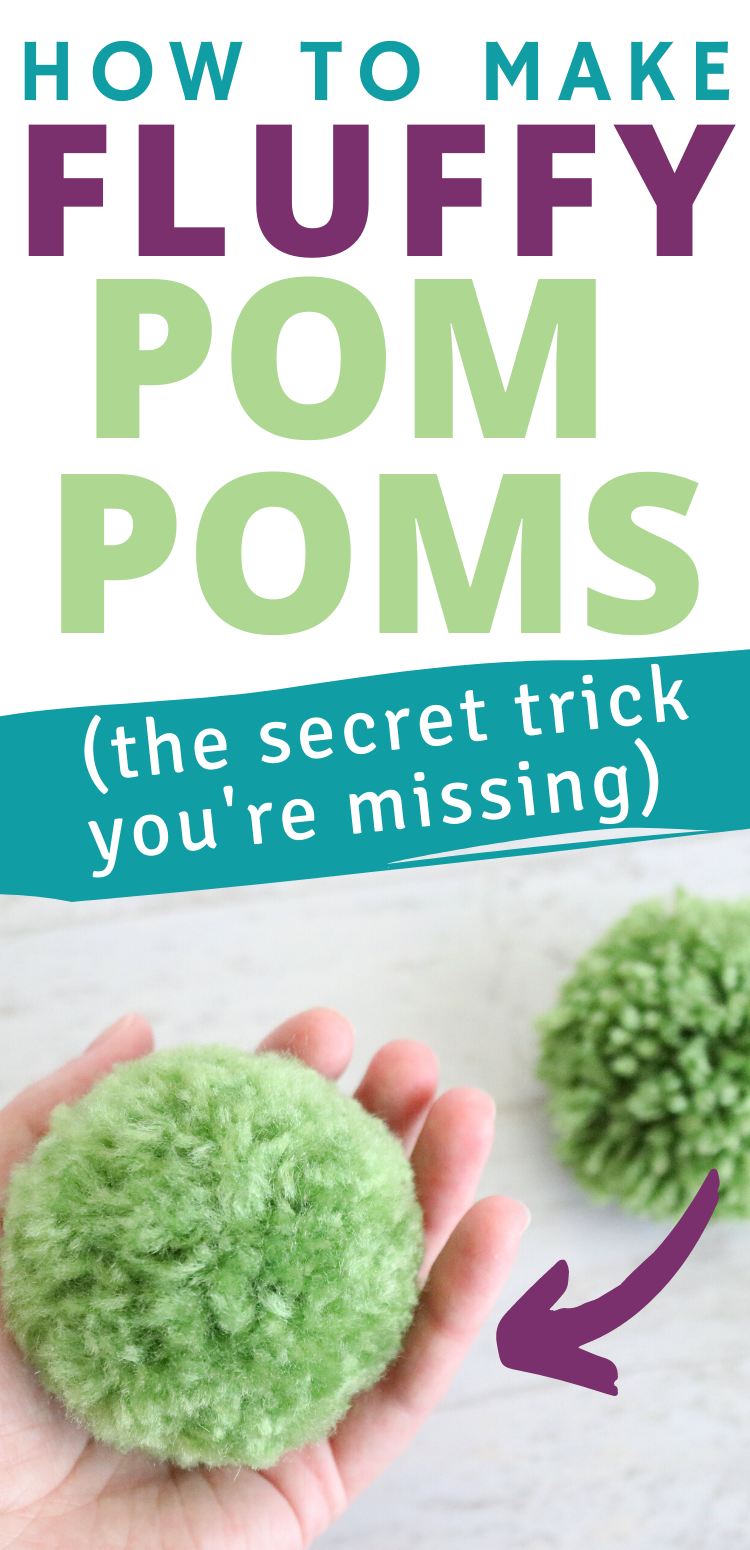
How to Make Fluffy Pom Poms Every Time
And now can you see the difference? Brushing is a super easy last step to make pom poms fluffy! I promise it’s worth the extra few minutes.

Don’t forget to pin and save for later!
Thank you for your videos and instructions they showed me an easier way to do my pom pom and how to make them fluffier
I’m so glad it helped, Cynthia! Enjoy!
I’m having a hard time getting all of my poms the same size when I trim. What’s your advice?
Hi Theresa, sorry for my slow reply! There really isn’t a perfect way to get them all the same size, I suggest trimming off small amounts at a time and rotating the pom pom as you trim. I usually just eye it, but if you need more specific sizes, you could always measure them with a ruler/measuring tape and use one that’s the size you like as your guide to match the rest to.
I usually “just eyeball” them, however, I’m making pom earrings to sell and need them as close to the same size AND shape as I can get them. Thank you.
Thank you so much for the CLEAR, EASY TO UNDERSTAND directions! Yours are one of the best of any of the many I’ve ever seen during my travels down the Pinterest “Rabbit Hole.” I bought some of the Clover pom pom makers but found they were falling apart. I love the idea of using the brush for fullness, too. In fact, prior to seeing your video, I was contemplating doing that to the yarn prior to wrapping it. Have you ever tried that? I even found a 2-pack of mini pom makers at Dollar Tree! I was so excited! Can’t wait to give your tips a whirl. Thanks again!
Hi Lori! Thank you for your kind comment, you made my day! I haven’t tried brushing the yarn before wrapping it but you could definitely give it a try and see if it’s easier. Have fun with your pom pom crafts! 🙂
Great information here…The Pom Pom maker is a game changer! I purchased a two pack at my local craft store for a sunshine pillow project and it was awesome! Better Pom poms, quick and easy to use, and rather inexpensive to buy. Love the brushed out look of yours!
Thanks Tamra! Yes, I love my pom pom makers–so easy to use! Thanks for reading. 🙂
TOTAL GAME CHANGER. Thank you.
I’m so glad it helped! Thanks April!
You are very welcome Aubree!!! But you make my day every day because of your content!!!! It’s the highlight of my day, so thanks to you, I am a happier person every day!!
This is so useful!!!! Thanks so much for sharing!! Hope you come up with more creatively awesome ideas!!!! 🙂
Hi Joy! I’m so glad you found this helpful! Thank you so much for your comment, you made my day! 🙂
wow!! thats so cool. i hope that this works perfectly though… (its a project from a strict teacher…) but im sure it will work! thanks!!
I hope so! Good luck, MJ!
Hi Aubree . My name is Christina . I also love diy crafts but asre a bit shy to the thinhs i make. I would love to make for my two yorky babys clothing do you maybe have a patern fot me
Hi Christina, I don’t have any patterns like that but I’m sure you could find one if you did a google search. Good luck!
Clever. After reading this post, all I want to do is make thousands of different size pom poms. Forget dishwashing, laundry, cooking. Pom poms in every room are all I need. Thanks for sharing!
Haha, I love it! Yes, chores can wait. We have priorities here. 😉 Thanks for reading, Monica!
One can soften even coarse yarn with fabric softener. The skein(s) can be soaked ( cheap softener is fine) or finished articles. Then wash thoroughly in gentle detergent. Fabric softener also tames out of control doll hair.
I would have never thought of this! Thank you for sharing, Belle, I will have to try this sometime!
How many poms can you make from one pack of yarn?
Hi! That’s a great question, and it depends on a lot of things: how many yards in the pack/skein of yarn, the weight and texture of the yarn, how big of pom poms you’re making (what size pom pom maker), and how tightly you wrap the yarn (how full you like your pom poms to be).
I did a project earlier this year and got 6 3-inch sized pom poms from a 180-yard pack/skein of yarn (you can check how many yards on the package label). However, that yarn was a little more dense and a different texture from most yarn I use so it may have taken more yarn per pom pom.
If you’re needing a lot of pom poms, I’d recommend going with the bulk yarn (like Red Heart Super Saver). Or just buy one pack/skein to start and see how many pom poms you can get out of it and then buy more as needed. I hope that helps!