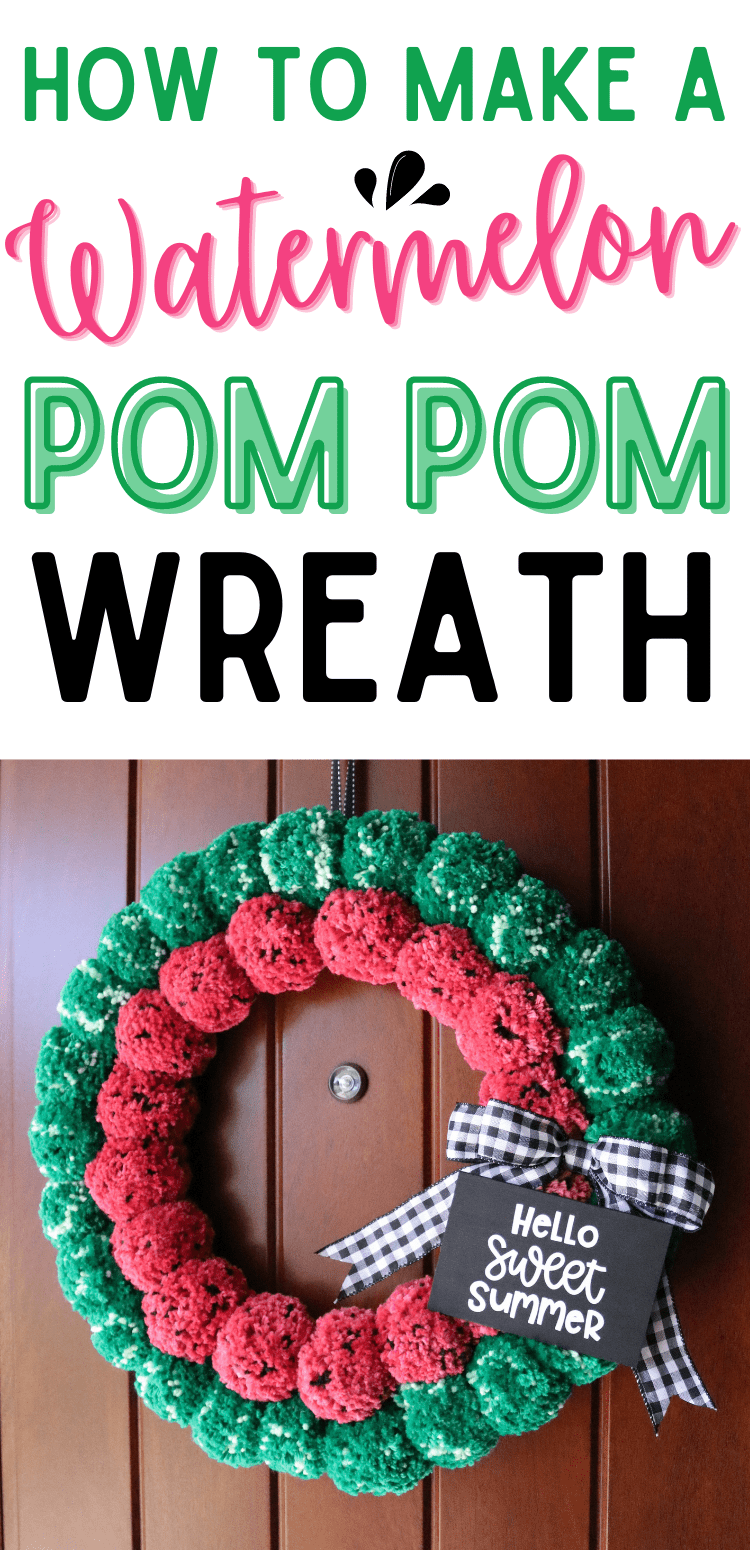
How to Make a DIY Watermelon Pom Pom Wreath
Learn how to make a fun watermelon wreath from striped and polka dot pom poms in this detailed tutorial–with video! This is a perfect DIY wreath for summer!
I have been in need of a fun, summery wreath to put on my door once the patriotic holidays are over and before I put up my fall picture frame wreath. I love how my 4th of July clothespin wreath turned out from a couple years ago, so I considered making another one–I have seen both watermelon and sunflower themed clothespin wreaths that are so cute!
And then I thought…you know what I’ve never seen done? A watermelon pom pom wreath! So, for the record, this is the very first one…ever. Let it be known.
This post contains affiliate links. For more information, see my disclosures here.

What You Need to Make a Watermelon Pom Pom Wreath
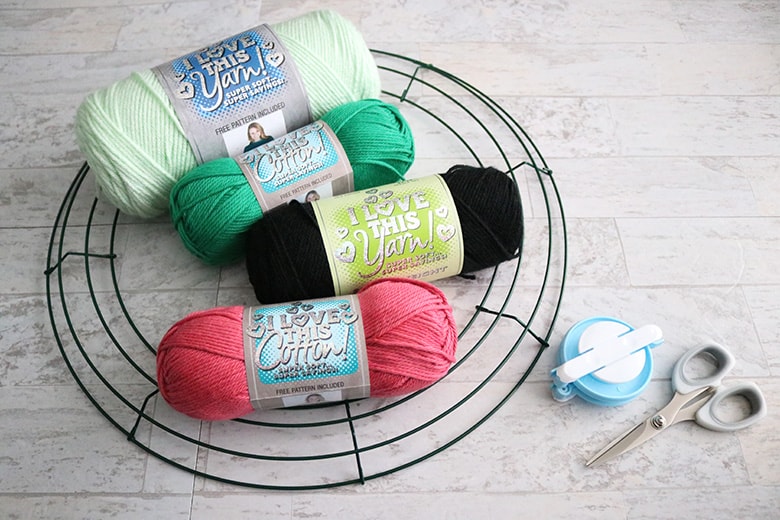
- wire wreath form (I prefer 16″)
- yarn*: you will need pink or red, black, and two shades of green (I prefer medium weight yarn)
- pom pom makers
- sharp scissors: in my pics and video, I’m using a couple different random pairs I already had, but I’ve heard great things about these scissors (they’re very high on my wish list!) and Fiskars has several options worth trying as well
- ribbon or chenille stem for a wreath hanger
- optional: a sign, ribbon, or other decor additions (this is my favorite place to buy ribbon for wreaths!)
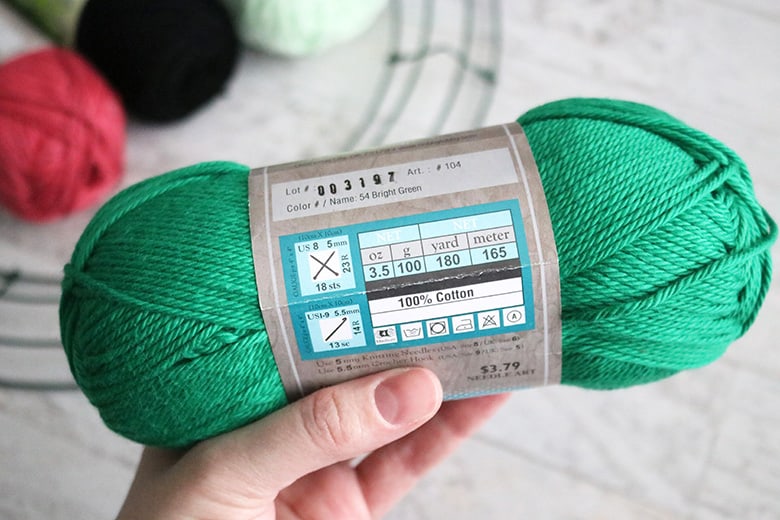
*I bought my yarn at Hobby Lobby. The pink and dark green are “I Love This Cotton!” in Rosey II and Bright Green. The light green and black are “I Love This Yarn!” in Menthe and Black.

How much yarn do you need to make a pom pom wreath?
The pink and dark green colors pictured above were 100% cotton, which actually gave the finished pom poms a different texture than I’m used to (it was kind of a dense yarn and they were difficult to cut at the end). It also seemed like a thinner yarn (even though it was medium weight) so it took longer to wrap the pom poms and may have taken more yarn overall.
For reference, I was able to get about 6 pom poms from each 180-yard skein. So, I used 4 full skeins of the dark green and 3 of the pink. (One skein of light green and black is plenty and you’ll probably have some leftover.)
I recommend you get an extra skein or two to make sure you don’t run out of yarn. Also, try to purchase your yarn all at the same time so you can match the lot #s (each dye lot will have slight variations in color–which may or may not bother you).
I chose my yarn purely on color (I was very particular what shades I was going for). But if you can, I recommend getting the bulk yarn because you’ll save so much money! Pom pom wreaths take more yarn than you might think!
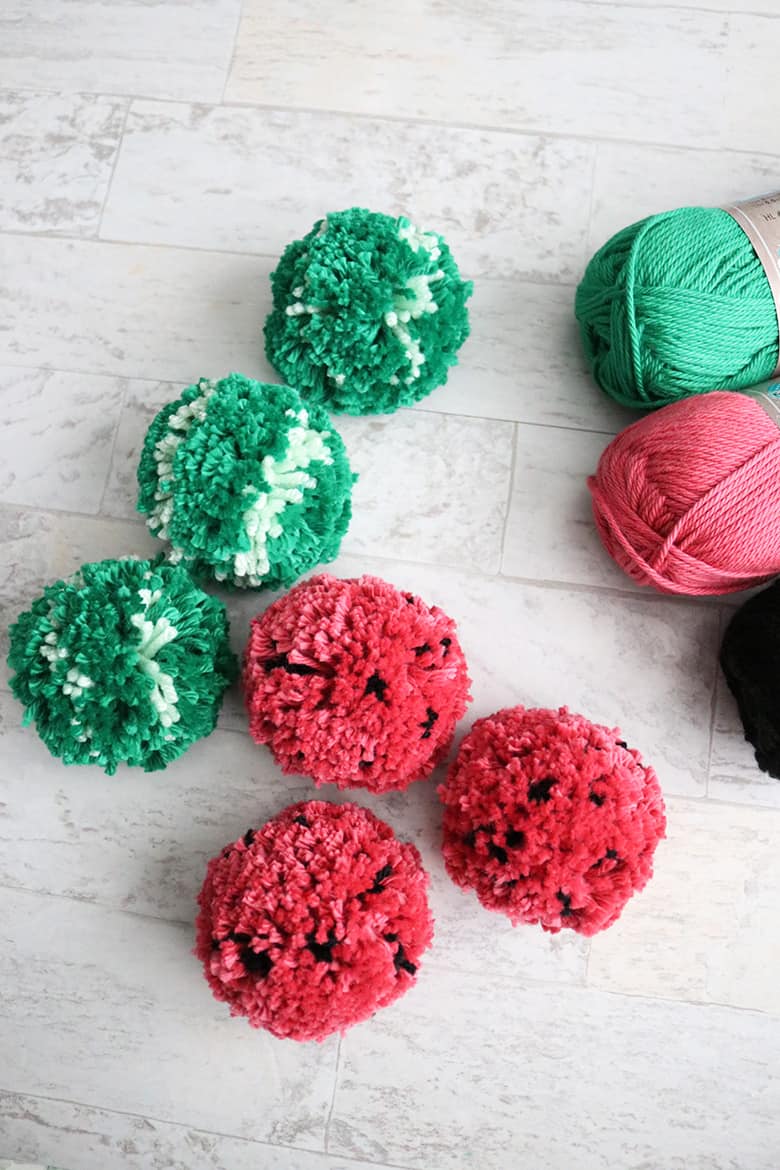
How to Make Pom Poms for a Watermelon Wreath
Because I’m the nicest human ever, I put together a very detailed YouTube tutorial for you on how I made this wreath! (I think the tutorial maybe took me as long as the actual wreath…and that’s saying something, haha.) Be sure to subscribe to my YouTube channel here!
First, you need to make pom poms. A lot of them. If your wreath form has 8 sections like mine and if you’re using a similarly-sized pom pom maker, you will need 24 green/striped outer pom poms (3 per section) and 16 inner pink/polka dot pom poms (2 per section). It’s a lot, I know. Turn on a show, recruit your kids to help—whatever you need to do. I believe in you. 😉
How to Make Polka Dot Pom Poms
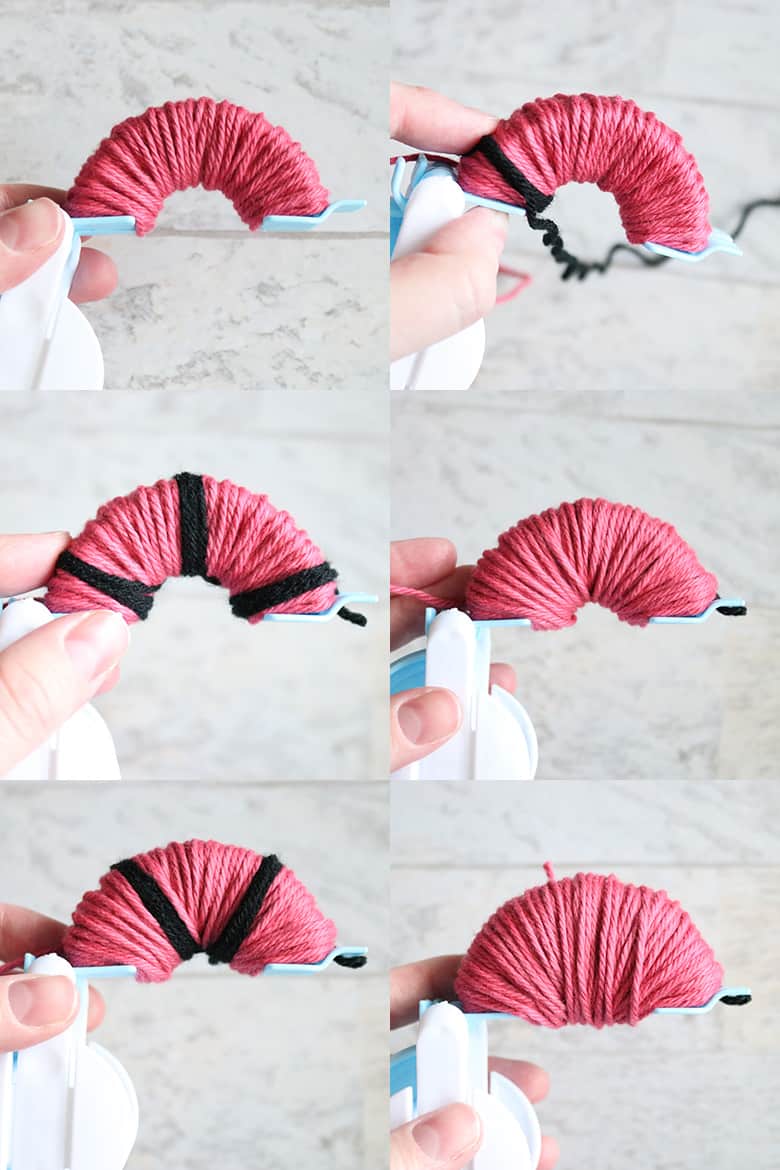
Start the pom pom the way you normally do (see my regular pom pom tutorial if you’ve never made pom poms before) by pinching the end of the pink yarn against the first half of the pom pom maker and wrap it around while moving back and forth. Do this about 3 times. You do NOT need to trim the pink yarn here, just move the end if you need to so it’s out of the way.
Starting on the left side, lay the end of the black yarn on the top of the pom pom maker (just barely over from the edge), pinch it with your fingers, and wrap it in the same spot 4 times. Move to the middle of the pom pom maker and wrap 4 times, and then move to the right side and wrap 4 times. I like to slide the end of the yarn through the slit in the pom pom maker, just to hold it in place, and then trim it.
Now, wrap the pink yarn around the pom pom maker twice, which should just about cover the black you’ve just added.
With a new piece of black yarn, start wrapping slightly over from where we started the last time—this will help to stagger the polka dots. Wrap 4 times. Mirror that on the right hand side and wrap 4 times. Slide the yarn into the slit and trim it. Now finish wrapping the pink yarn around the pom pom until it’s full.
Trim the yarn and then fill in the opposite side of the pom pom maker. Because only half of the pom pom will be seen on the finished wreath, doing the polka dots on the second half is optional—I just filled in that side completely with the pink yarn.
Cut the yarn along both sides of the pom pom maker, going up the middle. Cut a piece of pink yarn about 12 inches long and wrap it around the pom pom maker. Tie several knots, then slide the yarn around to the opposite side and tie a couple more knots. Remove the pom pom maker.
Holding onto the yarn ties, shake the pom pom out and trim it to make it more round. But DO NOT cut the ties (we’ll be using them to tie the pom pom to the wreath form).
Only 15 more to go. 😜
How to Make Striped Pom Poms
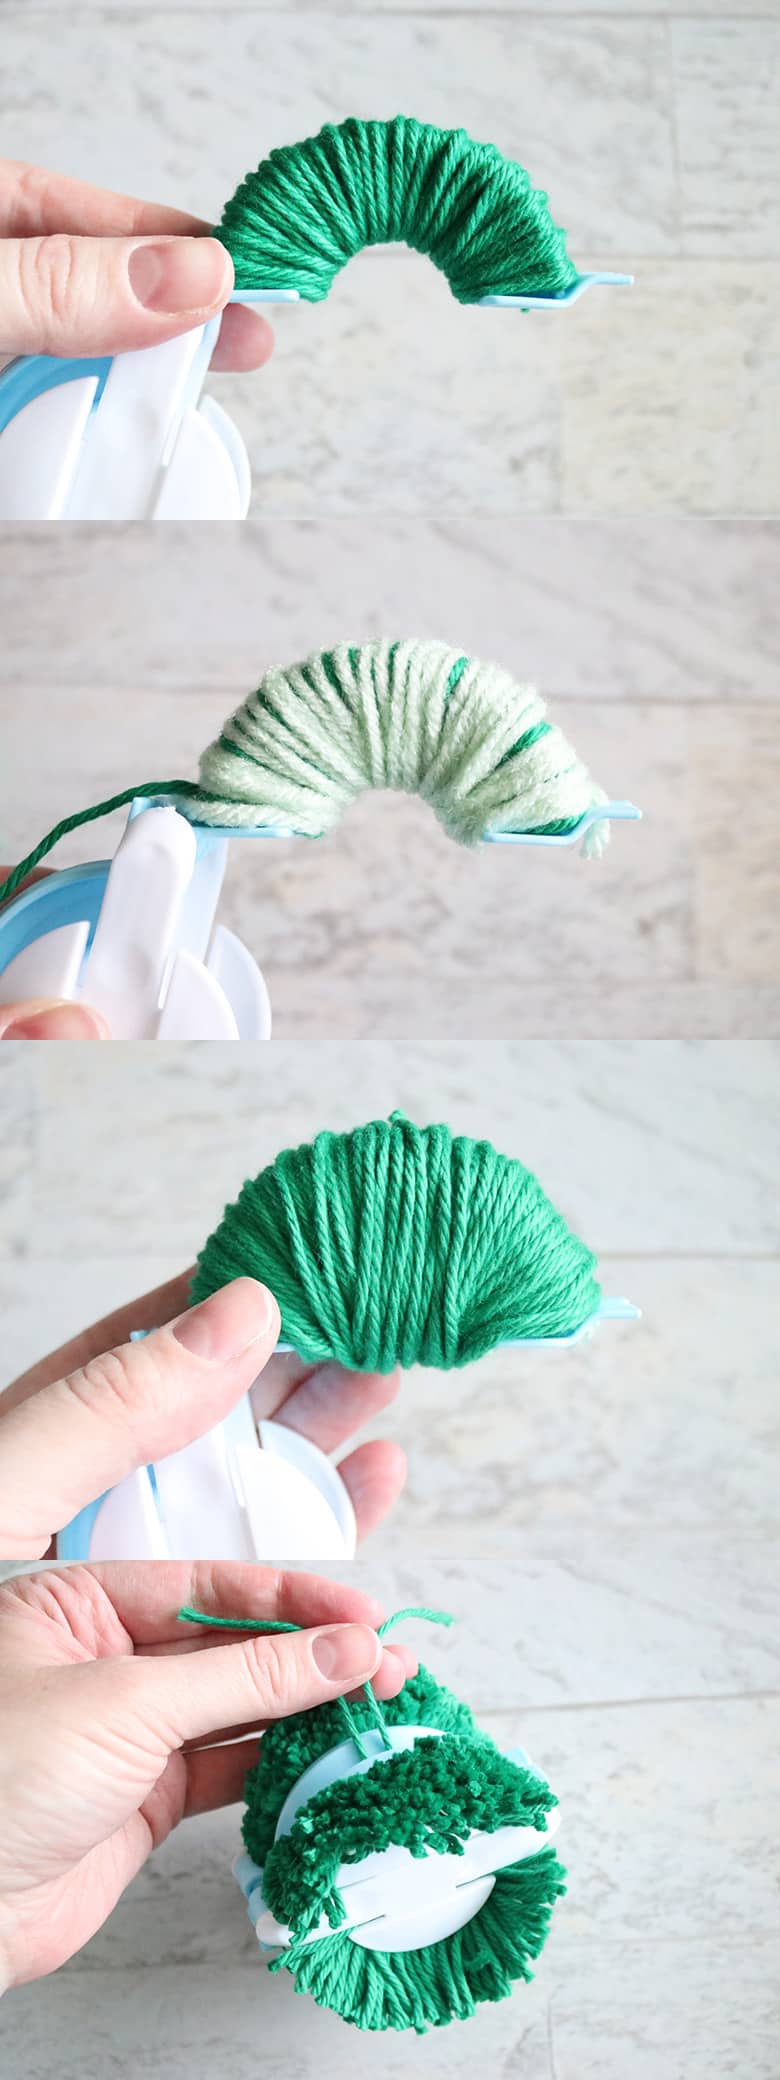
Starting with the darker green yarn, wrap the pom pom maker 3 times. Again, do not cut the yarn, just move it to the side so it’s out of your way. Grab your lighter green yarn and lightly wrap one time. (The closer you wrap the light green yarn, the more continuous your stripes will be. The more you overlap the yarn, the thicker your stripes will be. Play with it and see what you like.) Finish wrapping the pom pom maker with the dark green yarn until it’s full.
Trim the yarn and then fill in the opposite side of the pom pom maker. Just like with the polka dot pom pom, because I knew that only half of the striped pom pom was actually going to be seen on the finished wreath, I just filled the second side in with the dark green yarn. But you’re welcome to make it striped on this side as well.
Repeat all the same steps as before to finish off the pom pom. Don’t forget that you need the ties for later, so don’t trim them when you’re shaping your pom pom!
How to Make a Pom Pom Wreath
Tie the Pom Poms to the Wreath Form
Once all of your pom poms are made, you can tie them onto the wreath form. Tie the green pom poms to the ring second from the outside. Tie the pink pom poms to the ring second from the inside.

You are looking at the back of the wreath form in these images. I tied a double knot…and then tied it once more just to be sure. Make sure you’re tying your knot as tight as possible so your pom poms have minimal sliding (they’ll still wobble some, but having all the other pom poms attached will help keep them in place). Trim your ties short (or to the length of the pom pom yarn pieces).

If your wreath form only has three rings, you can choose which rings you want to tie your pom poms to (whatever makes sense and looks the best to you, even alternating rings if you choose).
Continue until all your pom poms are tied to the wreath form. If your wreath form is like mine, you will have 3 green and 2 pink in each section.
Make a Sign
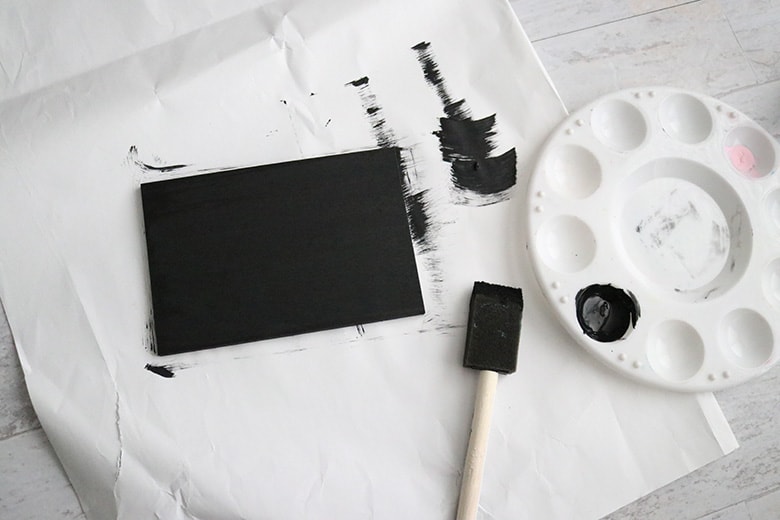
I painted a simple unfinished wood plaque from Michaels and added a vinyl saying (#MC4BF9E1 in the Cricut Design Space library—you have to be an Access subscriber, but if you’re wondering, I LOVE my Access subscription!). Glue a chenille stem to the back with E6000 glue so that you can attach the sign to the wreath form (I tried hot glue first but it melted in the sun from my west-facing door, so definitely go with a stronger glue). It helps to prop your chenille stem up with some small objects (I’ve been using rolls of ribbon) while the glue dries, and I usually let it dry overnight. Also, be sure you’re in a well-ventilated room for E6000 glue.
When you’re ready to attach your sign to the wreath, choose where you want it to go, stick the chenille stem through the wreath form around the two inner rings, and twist it in place a few times. Trim the ends of the chenille stem and tuck in the edges so they don’t scrape your door.
Make a Bow

For the bow, cut 4 pieces of wired ribbon: two 16″ pieces, one 11″ piece (I say 12″ in the video, but I think it may have been 11″—just personal preference though), and one 3″ piece. You will also need a chenille stem and hot glue. You can see exactly how I made the bow near the end of the video (it’s a lot easier than explaining…and I don’t feel like writing out the instructions at the moment, haha).
Attach your bow to the wreath with the chenille stem, following the sign instructions above.
Make a Door Hanger
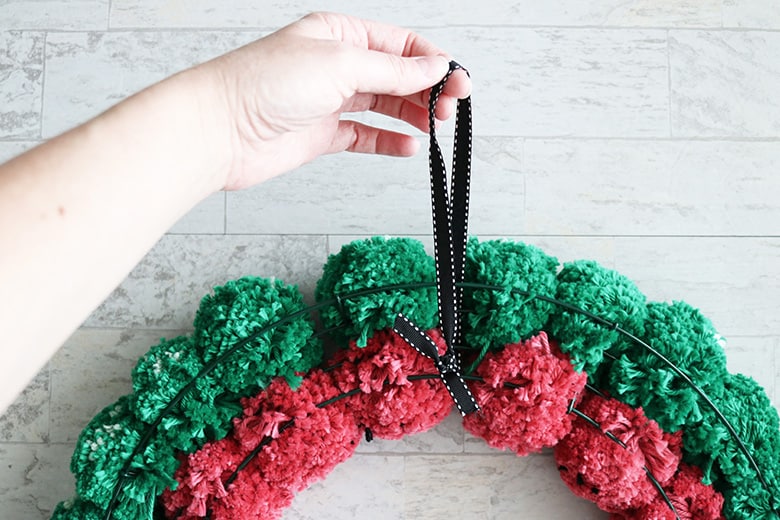
You can make a door hanger from either a chenille stem or a piece of ribbon. I demonstrate both options in the video but ultimately liked the ribbon better since you’ll see the wreath hanger with this wreath. I used an 18″ piece of ribbon for this.
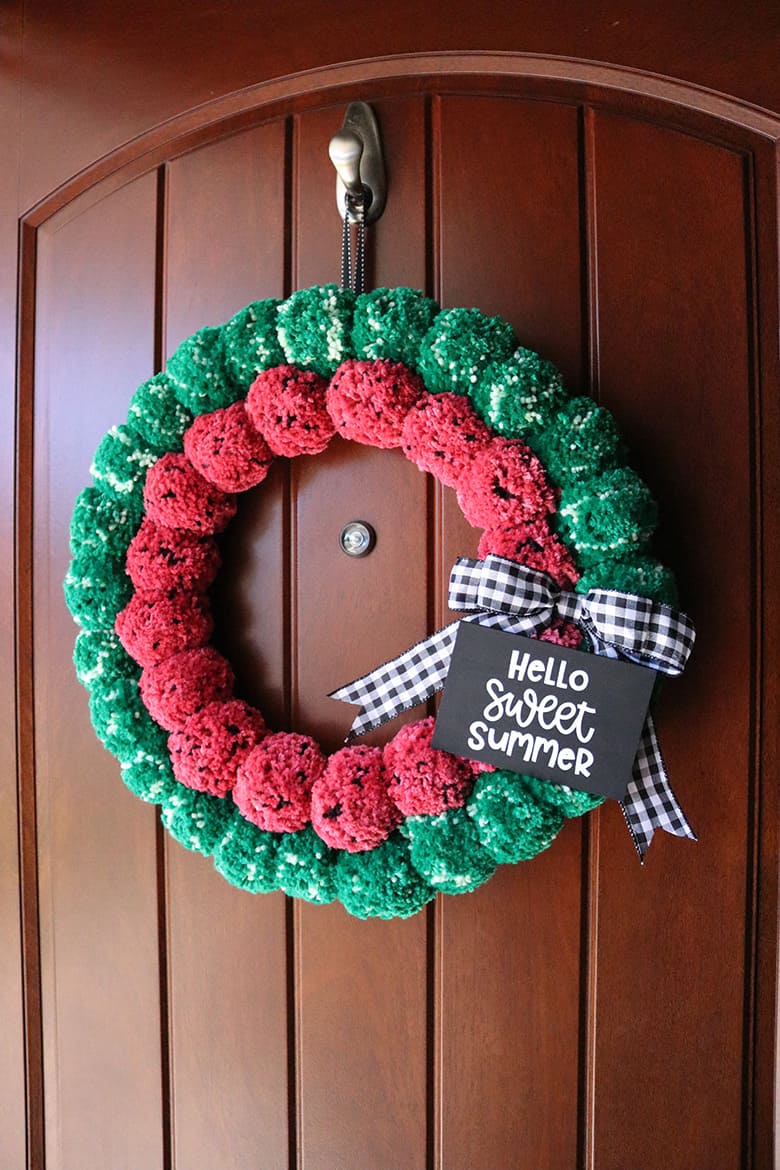
DIY Watermelon Pom Pom Wreath Tutorial
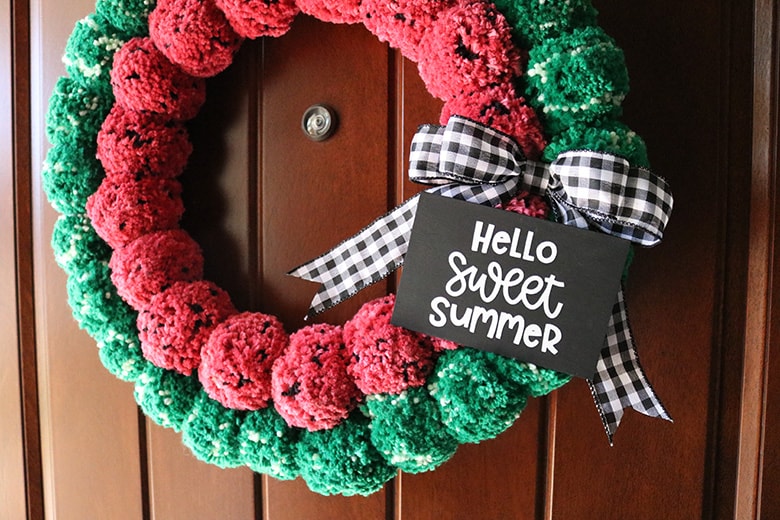
Ta-da! And there you have your completed watermelon pom pom wreath!
I’ll be honest, this wreath didn’t turn out exactly as I imagined it…and I’m pretty sure this is the only instance where it’s acceptable to have a fuzzy watermelon (otherwise I think you call that mold). But I still think it’s fun and unique, and also solved the problem of My End-of-Summer Gap of Wreaths for my front door.
What do you think, would you make this wreath? Tell me in the comments below! (I’m totally not offended if you just think this looks like a giant caterpillar wreath…because that was my first thought too. 🤣)

Don’t forget to pin and save for later!