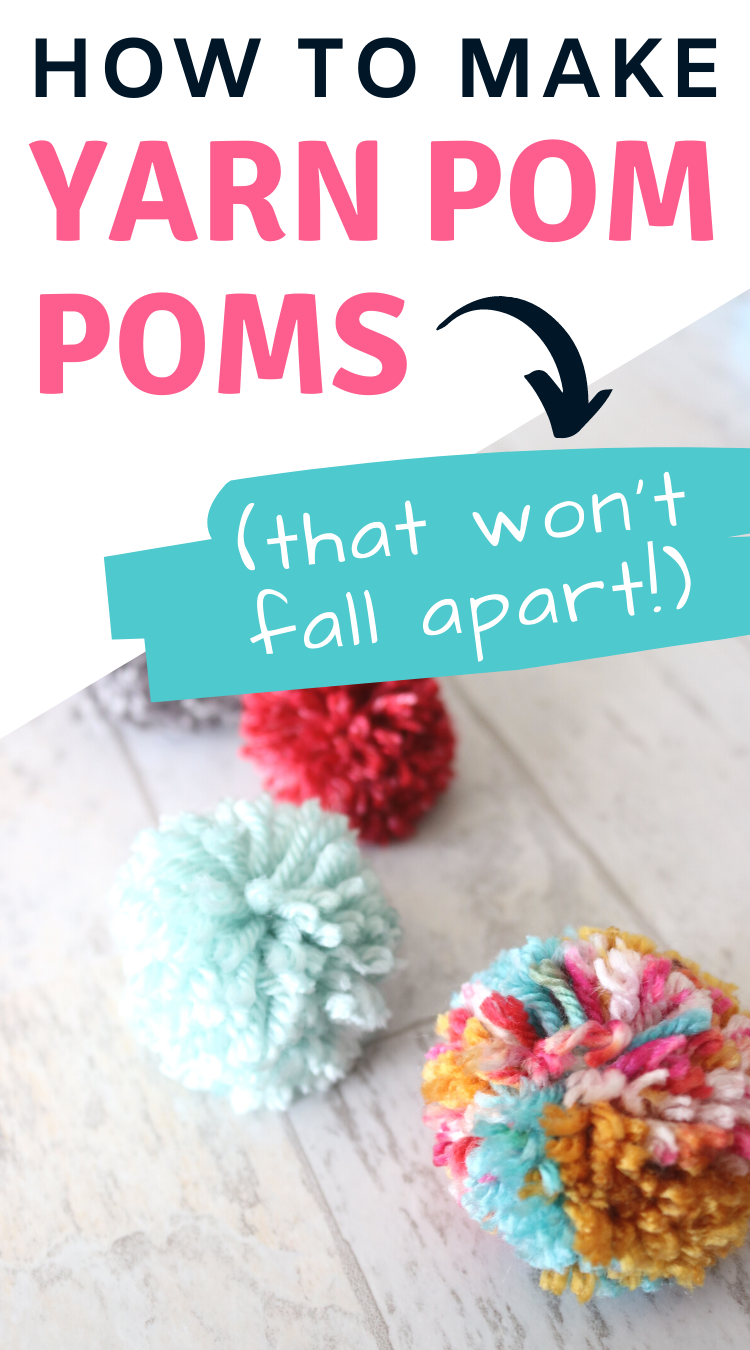
How to Make Yarn Pom Poms (that Don’t Fall Apart)
This simple tutorial will teach you how to make yarn pom poms using a super handy (and inexpensive) pom pom maker! Plus, I’ve included some great tips for how to make pom poms that won’t fall apart!
Pom poms are my favorite and I’m pretty sure they’ve become a staple for a lot of crafters. Seriously, they’re so cute and once you nail down this easy pom pom making technique, you’re going to want them everywhere–in a wreath, strung up as a garland, sewn to your sweater, tied on a keychain, glued to a tote bag–really, all the places.
I’m going to show you the easiest way to make perfect, fluffy pom poms out of yarn. And if you’ve been struggling with pom poms falling apart, I’ll show you how to fix that, too!

This post contains affiliate links. For more information, see my disclosures here.
How to Make a Pom Pom–the Easy Way!
Once upon a time, I tried to make pom poms with a fork. I’m sure you’ve seen the tutorials. And, yes…it works… But it’s very limiting as far as sizes go and kind of a hassle.
And then I discovered actual pom pom makers, and my life was transformed. Cue the heart eyes emoji.
I absolutely love my pom pom makers, and that is what I will be using in this tutorial today. They are inexpensive and I promise you they’re worth the investment!
If you’ve never made pom poms before, you’ll find this video super helpful. For even more details, keep scrolling for the written step-by-step tutorial.
What You Need to Make Yarn Pom Poms
- pom pom makers–the exact pom pom maker set I originally purchased is not currently available, but this pom pom maker set looks identical to mine (the colors just might be different)*
- yarn (see more on this below)
- sharp scissors
- tapestry needle
- needle threader (I use flexi needle threaders similar to these and love them)
*I’ve seen the Clover brand pom pom makers at craft stores, but the knock-off versions work perfectly, so save yourself the money…so you can buy more yarn, obviously.
The Best Yarn for Pom Poms
Well…in my opinion, the best yarn for pom poms is the yarn you have on hand.
But if you’re buying new from the store, choose a higher-quality, soft yarn. Soft yarn will naturally give you fluffy pom poms so I prefer this over the cheaper, coarser yarns (like Red Heart Super Saver).
But, you can still definitely use the coarser yarns and get a fluffy pom pom–go to this post to see my secret trick for making fluffy pom poms every time! And, of course, if you’re going for a coarser pom pom (where all the yarn fibers are separate and defined), by all means choose a cheaper option.
If you’re not sure what constitutes a “soft” yarn (or whether it will yield a fluffy pom pom), it might just take some experimenting. Or go down the yarn aisle and do everything you tell your kids not to and touch every skein. I’ve had really good luck with this brand and I believe this yarn is the exact one I use in my videos.
As far as weight goes, I prefer medium weight yarn (and definitely don’t go smaller unless you want to be wrapping yarn forrrever).
I would stay away from any of the fancy decorative yarn, like the scrubby yarn, eyelash yarn, fur yarn, or blanket yarn. While pom poms are possible with these, I find they shed a lot and don’t turn out nearly as full or fluffy.
Oh, and don’t shy away from multi-colored yarn! I have made pom poms with this exact yarn and love how they turn out.
How To Use a Pom Pom Maker
First, choose the size of pom pom maker that is right for your project. If you’re a visual person, these are the sizes of pom poms that this set of pom pom makers will make:
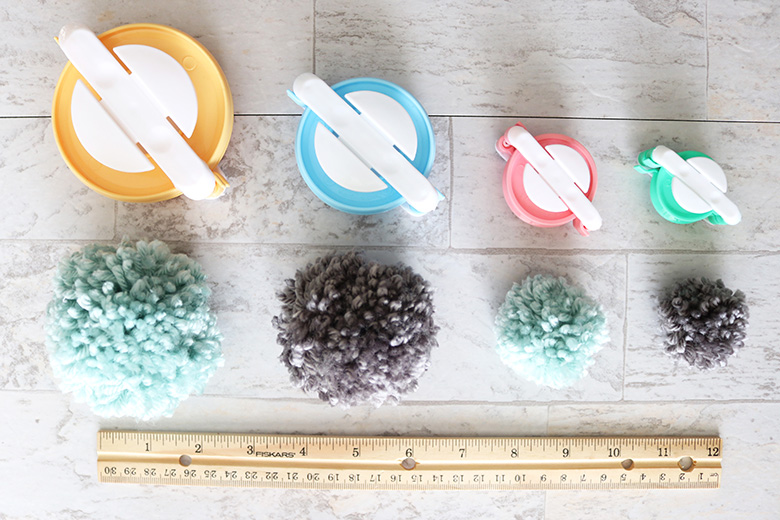
Or, just test a few (because how much yarn you use also plays a factor) and keep some extra made-up pom poms on hand for reference.
The pom-pom maker is made up of two halves connected by a small metal piece. (Be aware that the little metal piece isn’t glued and can sometimes pop out–just pop it back in if it does.)
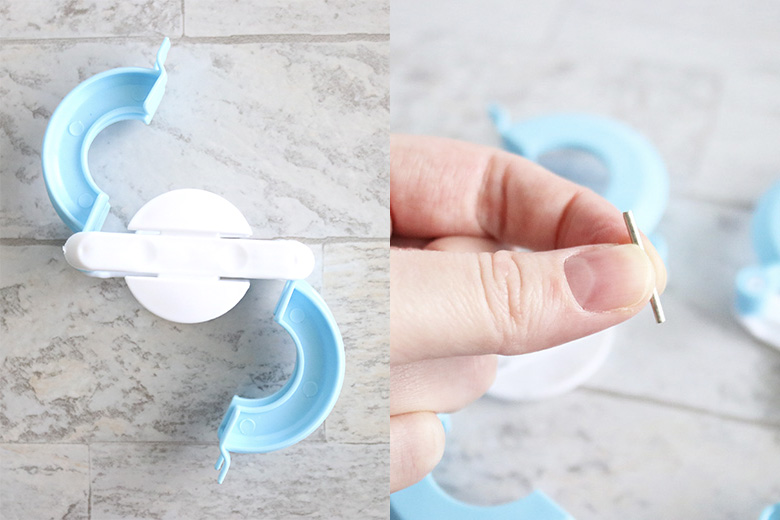
Start by opening one side of the pom-pom maker, lining up the two halves.
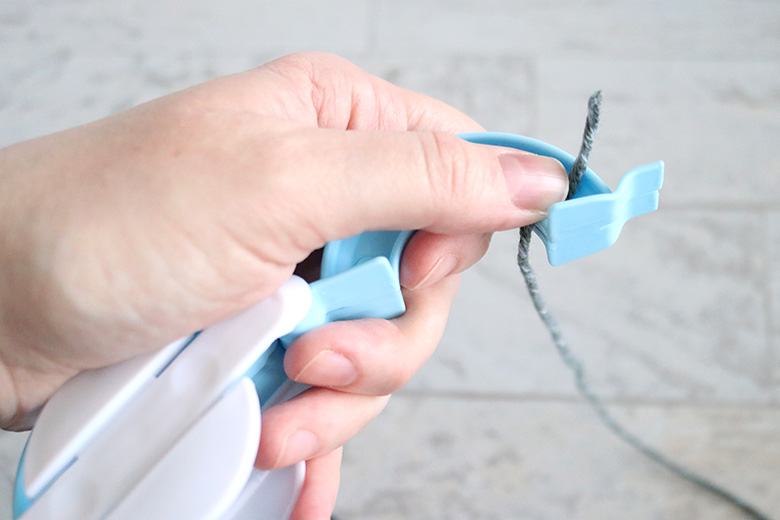
Pinch the end of your yarn with one hand while beginning to wrap the yarn with your other. Overlap the pinched piece a few times to secure it.
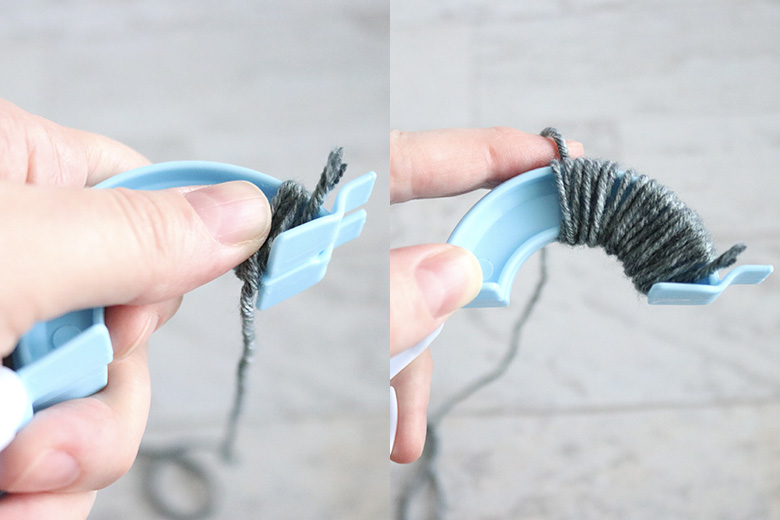
Continue wrapping the yarn from right to left on the maker (or the opposite way if you’re left-handed). Once you get to the left hand side, start making your way back to the opposite side. Continue going back and forth until your pom pom maker is filled.
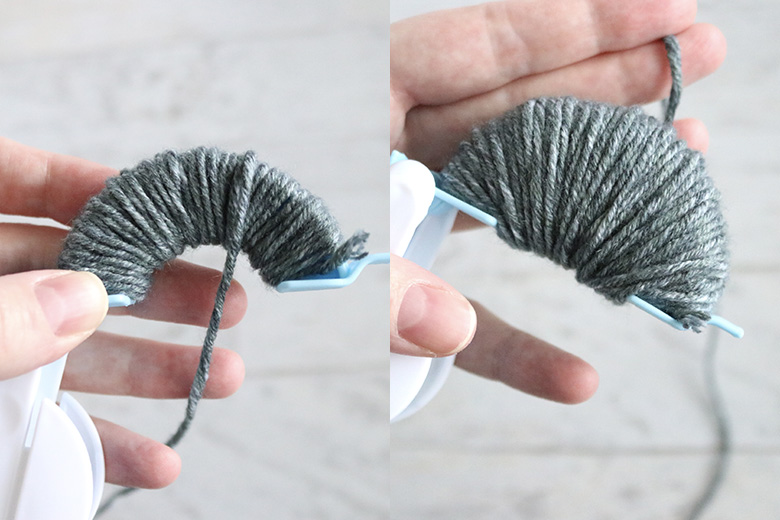
I like to fill it until the yarn lines up with the pom pom maker. You’ll also know it’s filled enough if it fits snugly when you close the pom pom maker. (If the pom pom maker can’t close, you might have too much yarn so unravel a bit.)
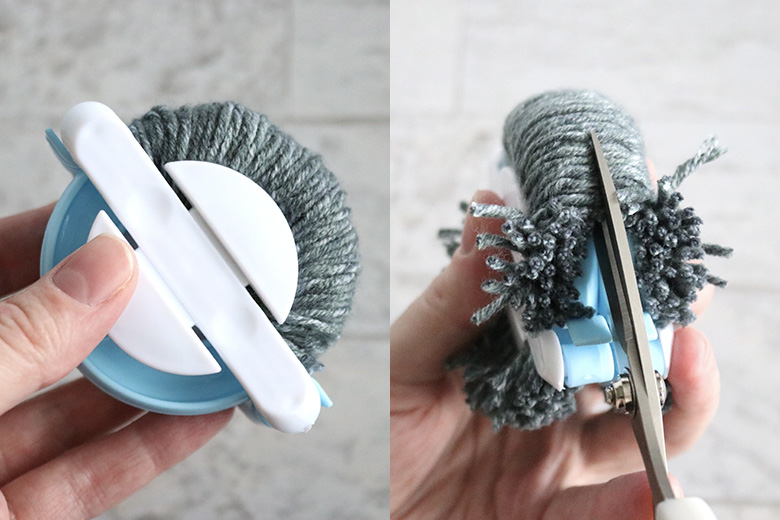
Trim the yarn and close the pom pom maker. Open the other half of the pom pom maker and repeat.
Cut the yarn with sharp scissors, going up the center of each side.
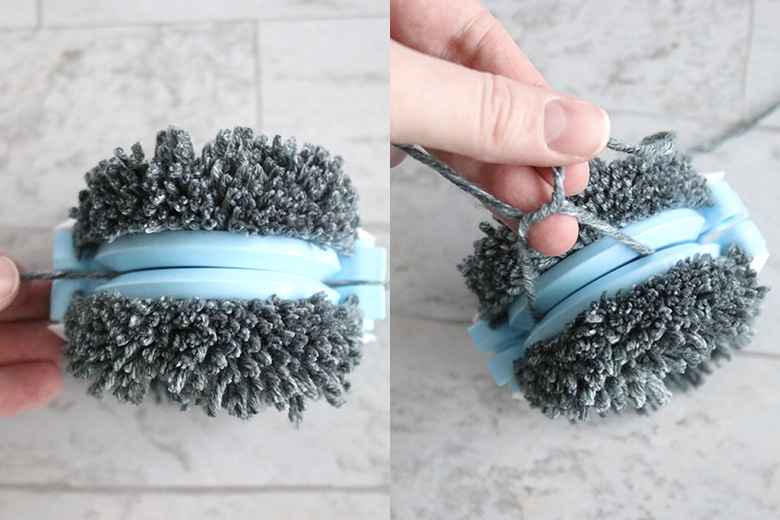
Before removing the pom pom, take an 8-12″ piece of yarn (length will depend on the next steps, as well as how you intend to use your pom poms) and wrap it around the center. Tie a knot. Then wrap the pieces around the other direction and tie another knot.
Open the pom pom maker and remove the pom pom. (DON’T trim the ties yet!)
How to Make Pom Poms that Don’t Fall Apart
Now for the reinforcement. This step is optional, but important if you intend to use your pom poms on clothing or anywhere where they’ll get a lot of traffic or handling.
(And don’t worry if your pom pom looks a little messy at this point, we’ll get to that part in a minute.)
Take one of your long yarn ties and thread it through the loop of a needle threader.
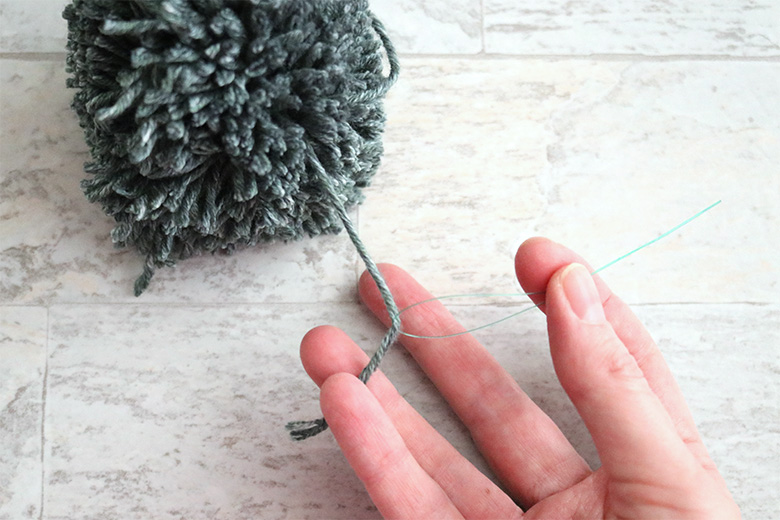
Then thread the needle threader through the eye of the tapestry needle. Pull the needle threader all the way through, and voila, your needle is threaded with the piece of yarn!
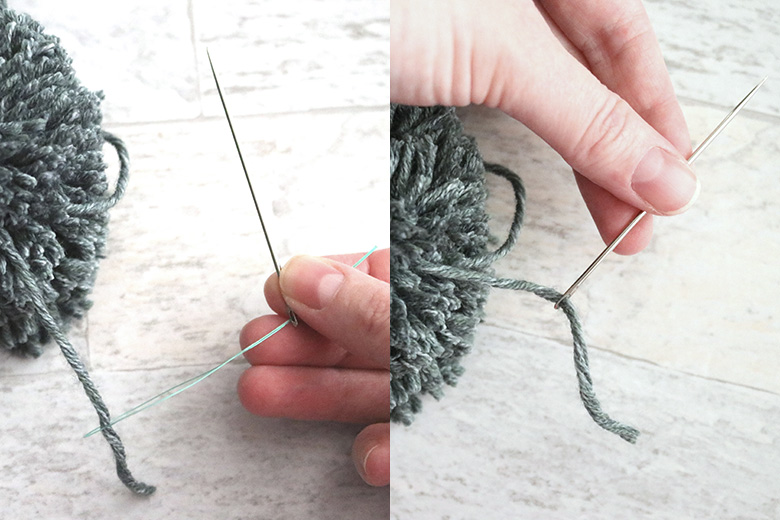
Push the needle back through the pom pom, close to where the tie originated (but not through the knot since that’d be a little difficult) and pull it out the other side. If your pom pom is really thick, you can use pliers to help pull the needle out. Your object here is to catch the tie itself and as many of the small pieces of yarn as possible to secure everything together.
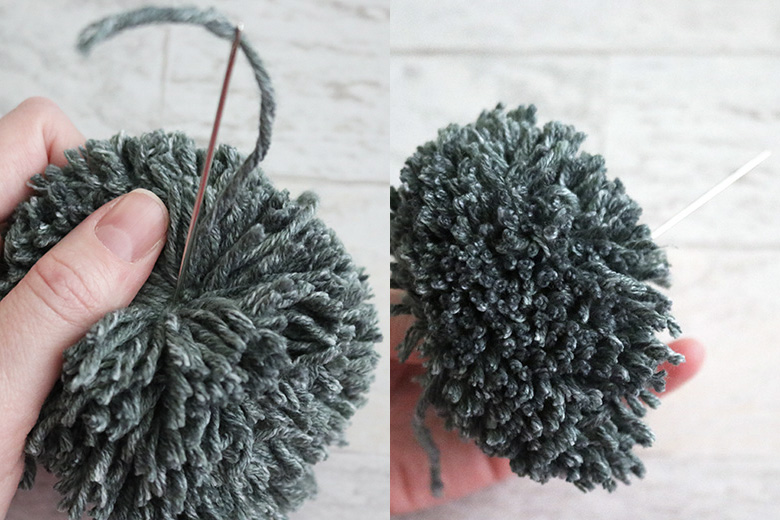
Keep making these “stitches” in and out of the pom pom, alternating direction, until you feel your pom pom is secure. You can even give your pom pom a gentle tug to make sure no pieces of yarn can be pulled out.
Though this reinforcement is an optional step, it only takes a few minutes, so I highly recommend doing it. (The only time I wouldn’t bother would be for projects where the pom poms will be glued to something, like a wreath that no one will be touching or playing with.)
Depending on how you intend to use your pom pom, you can leave the ties or trim them.
Your pom pom will look kind of messy at this point and possibly not even circular, so now it’s time to give it a haircut. Trim as much or as little as you want, but I tend to trim quite a bit.
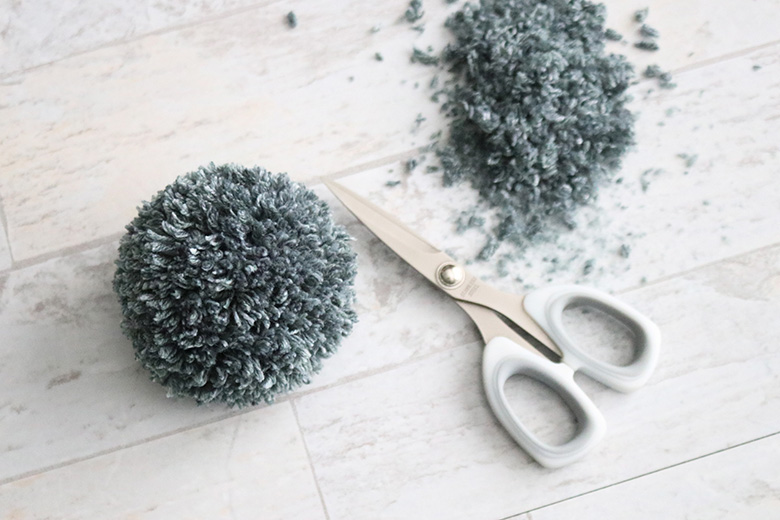
Once you’re happy with how your pom pom looks, you’re ready to use it in your project!
Or, head to this post if you’re looking for more tips to make pom poms extra fluffy!
How to Make Yarn Pom Poms
Now that you’ve made up a bunch of pom poms (because I know you found it therapeutic and semi-addictive), go make something awesome!
Are you sold on pom pom makers or do you prefer another method of making pom poms? Tell me in the comments below!

Don’t forget to pin and save for later!
I’ve just made a lovely pom pom using two carboard circles but I am definitely going to buy some pom pom makers for the next ones I make. My problem with the one I’ve just made is that it’s quite big, and I’m having difficulty getting it really secure on my knitted beanie hat. Do you have any tips please?
Hi Karen. I don’t usually make pom poms for apparel so I’m not sure the best way to secure it. I know some people run a line of hot glue around the very middle sometimes if the knots aren’t holding. If you can do that so it’s not visible and you can’t feel the hot glue, I might try that.
I like the pom-pom maker but would like to see another way to get thick n fluffy poms.
thank you so much I really appreciated your help.
…Gloria
Hi Gloria! If you don’t want to use pom pom makers, I know some people have been successful using a fork or a cardboard template (you can find tutorials online or on Pinterest). The thickness and type of yarn will also impact how thick/fluffy the pom pom is. If you haven’t already, check out my Fluffy Pom Poms post to see how I brush them out to get them extra fluffy!
Great techniques, I just use the diy cardboard rings method but I think there would be less waste with the actual pom-pom makers. I use hot glue in the middle of my pom-poms to keep them from falling apart. I just sort of inject a few pumps into the middle from 5 or 6 different angles to keep it together but the sewing way is genius too. My favorite trick is to cut out 2 circles of cardboard the size you want your pom-poms to be, you can use any round object to trace perfect circles as long it is the right size like a glass or a vitamin bottle lid. Then once you remove the pom-pom from the pom-pom maker you sandwich it evenly between the 2 cardboard circles, take care to make sure the yarn is laying as flat as possible and is evenly distributed between the 2 cardboard circles and then use them as a guide to cut off any excess yarn (make sure you don’t accidentally cut the tie if you need it for whatever your project is). Then turn the pom pom 45 degrees and sandwich it between the 2 circles again and repeat once more until you get a perfect circle. I also like to make the pom-pom way bigger and cut off a lot of excess yarn because that makes the fullest pom-poms possible. I just wrote the word pom-pom more times than I think I have ever said it in my life lol.
Those are amazing tips, Chelsea! I love the idea of a cardboard template for trimming perfect circular pom poms. I’m going to try that! And yes, hot glue is a great way to reinforce, depending on your project.
Thank you for this! Making a tail for a stuffed bunny for a baby so needed a solid pompom and could not seem to get one that wouldn’t pull apart.
The yarn was a slightly thick and curly homespun and I think it was so thick that it wasn’t going all the way to the center of the pompom maker when I went to tie the knot so it wasn’t coming out as tight as it should.
What ended up working was doing the pompom with the curly yarn, then tying the middle with a thinner yarn of the same color, which helped a lot, and then your idea of reinforcement with a needle was perfect to get it really solid!
Yay, this makes me so happy! I’m glad I could help! And the stuffed bunny craft sounds so cute. 🙂