DIY Black and White Painted Pumpkins
These fun geometric painted pumpkins are easy and inexpensive! The simple colors and designs are perfect for any decor style!
I love little pumpkins. And I especially love painting little pumpkins. They’re the perfect mini canvas for fall and Halloween. (Check out my painted monster pumpkins from last year. How cute are they?!)
I was in need of some fun Halloween table decorations but a little short on time, so I opted for simple geometric designs on these pumpkins!
The black and white color scheme is super versatile, but feel free to change up the paint colors however you like!
This post contains affiliate links. For more information, see my disclosures here.
What you Need to Paint Pumpkins
- pumpkins: real or fake–I’m using real because they’re cheap and the perfect size for what I want
- paint: I’m using regular acrylic craft paint–see the notes below for more on this
- paint brushes, stencil brushes, q-tips, dotting tools, etc.
Easy Geometric Designs to Paint on Pumpkins
The possibilities are endless when it comes to geometric designs you could paint on pumpkins. I chose five patterns (because that’s how many pumpkins I had) and I think they compliment each other really well.
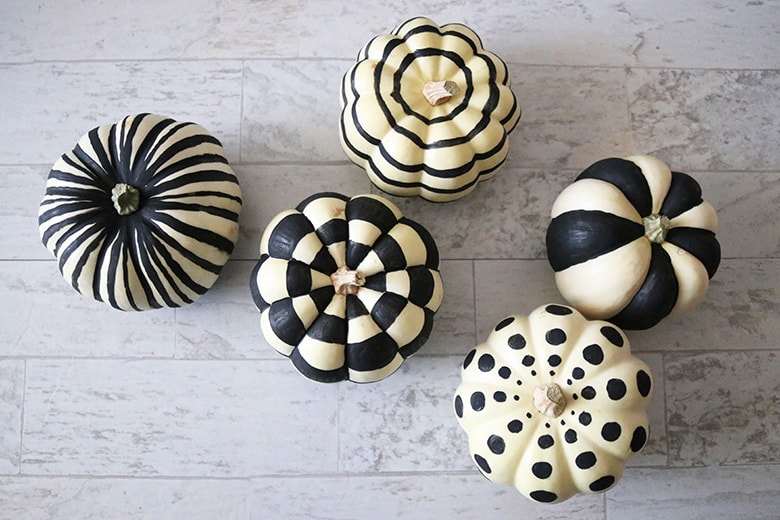
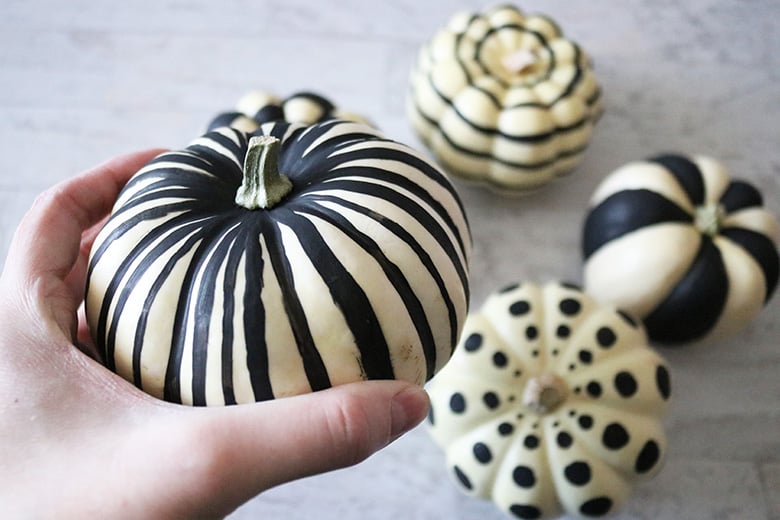
Vertical Stripes
Start by painting a vertical stripe down each groove in the pumpkin. For thin stripes, use a very small paintbrush (or even a q-tip or toothpick). Add more stripes in between the first set of stripes and continue adding stripes until you’re happy with the spacing.
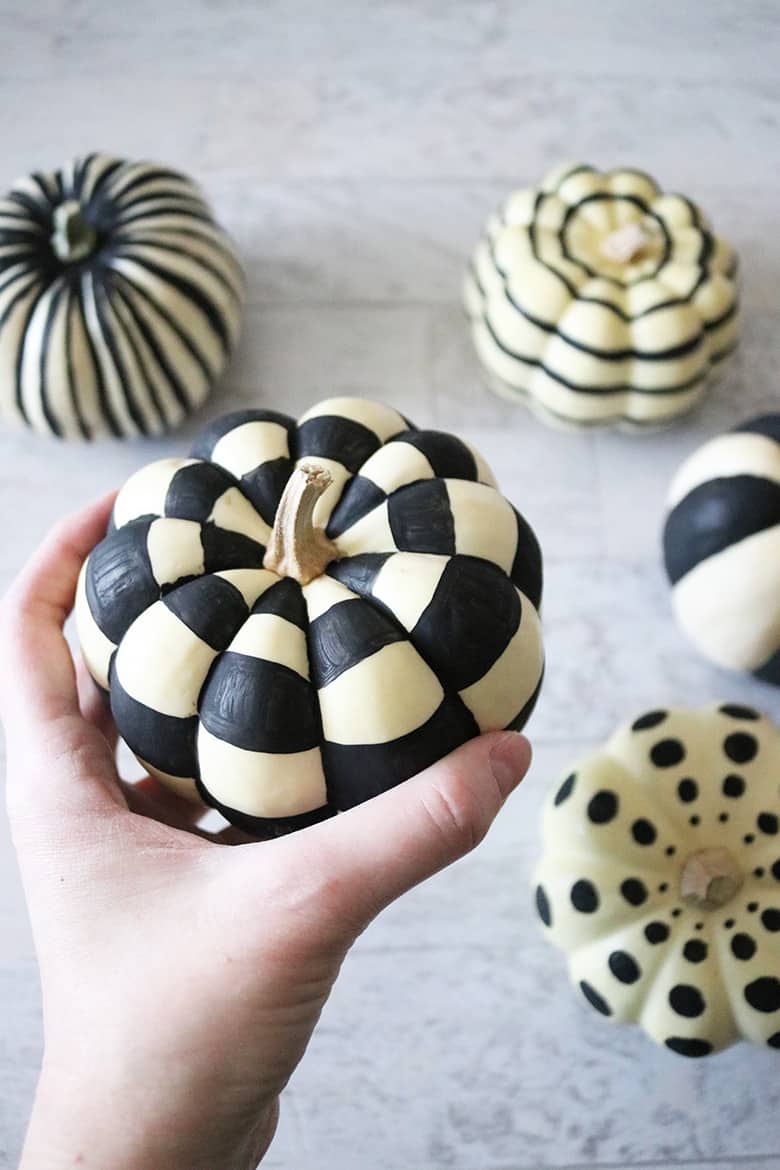
Checkerboard
Starting at the top of the pumpkin near the stem, paint about 3/4″ in every other “section” (sections being the spaces between the pumpkin’s grooves)–you will be painting almost a triangle shape in this first row. Next, start painting rectangles in alternating sections going down the pumpkin until you’ve achieved a checkerboard pattern.
Note: This design requires an even number of sections (all my pumpkins had 10). I’m not sure how pumpkins grow, so I’m not sure if all of yours will have an equal number or not.
Horizontal Stripes
To make horizontal stripes or rings, start about 3/4″ out from the stem and paint a thin circle around the stem (it won’t be perfect given the pumpkin’s grooves). Continue painting circles/stripes around the pumpkin, spacing them not more than 1″ apart.
Growing Dots
For this pumpkin, I started with small dots near the pumpkin’s stem, made them larger until reaching the widest (middle) part of the pumpkin, and then made them small again as I reached the base of the pumpkin. Simply paint circles down each “section.” You can use a stencil brush, q-tip, pencil eraser, dotting tools, etc. I simply eyed it and painted circles with a regular paint brush.
Alternating “Sections”
This is probably the easiest of all the designs. Simply paint every other “section” of the pumpkin (the spaces between the pumpkin’s grooves), from the stem to the base. Again, this design requires an even number of sections.
Some Basic Pumpkin Painting Tips
For all the pumpkins, you can choose how far down you want to paint the design. You can set your pumpkin on a table periodically to make sure you’re painting enough, but I generally don’t worry too much about the underside.
Acrylic paint will wash off easily if you’re using real pumpkins. Make sure the paint is completely dry before displaying and be aware that rain/snow could affect your designs if using outdoors.
The paint will also chip easily once dry. Try to keep the pumpkins separate from each other if transporting them. There is also a small chance that paint will transfer from the underside to whatever they’re sitting on: use a tablecloth or small piece of felt underneath the pumpkins to protect your surface.
And finally, real pumpkins will eventually go bad so, sadly, you’ll need to throw them away at the end of the season.
How to Paint Simple Geometric Pumpkins
I hope you enjoyed this tutorial! Hopefully it gives you some fun, easy ideas for painting pumpkins. If you try it, I’d love to see your pumpkins, so be sure to share a picture to social media and tag @aubreeoriginals!

so cute. i may have to try this for my waiting room……
thanks for sharing
Thanks Erin! Yes, they will look great in your room and they’re so easy to do!