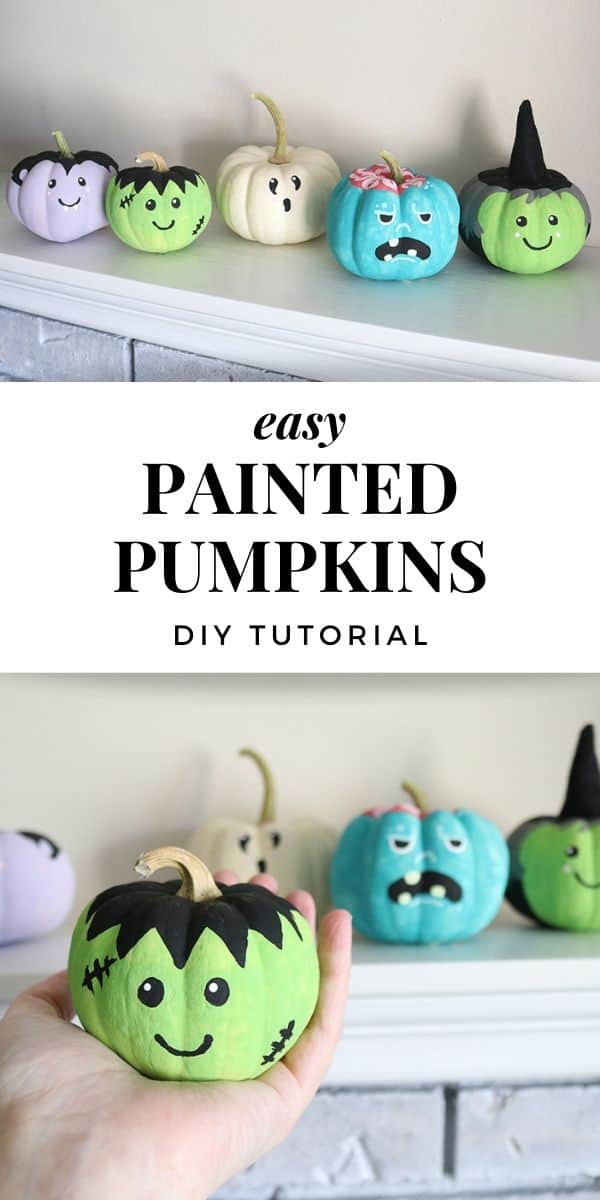
Easy Painted Pumpkins: How to Paint Simple Monster Faces
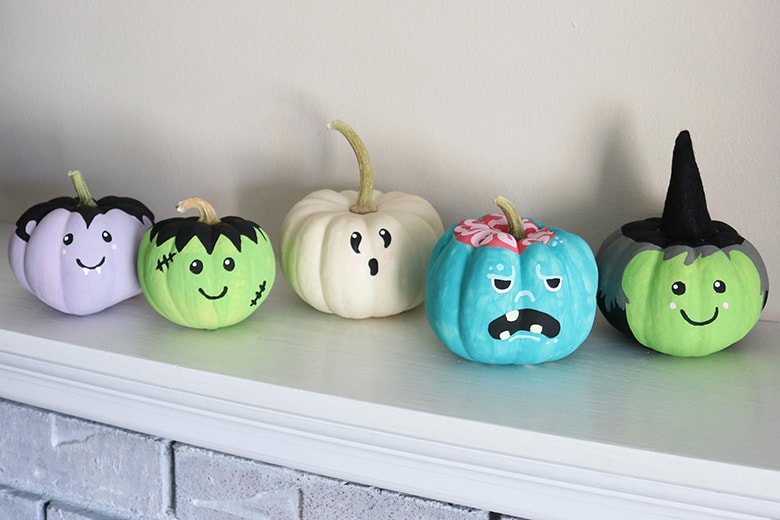
These painted pumpkins with simple monster faces make the cutest DIY Halloween decor! They are easy enough that anyone (beginning painters and kids included!) can make them!
Who knew that painting pumpkins could be so fun? And why have I not done this every year?! So much cleaner and easier than carving pumpkins. Plus, they last much longer (especially if you use fake pumpkins).
My original plan for these mini pumpkins was to paint them in simple geometric patterns and colors that would work through both Halloween and Thanksgiving. But…then I had the idea for an easy Frankenstein pumpkin, and I’m a sucker for anything Halloween…so the rest of the monsters were born. And I think they’re the cutest!
Before we get to the instructions…
Want to know my huge secret?
I can paint…but I’m not naturally gifted at it. Unfortunately, when it comes to painting and drawing, I don’t have the gift of seeing the image in my head first. So, I always have to copy something I’m looking at.
And want to know what I used for inspiration for these cute monster faces? Sugar cookie designs on Instagram! Because cookie designs are generally pretty simple, they made the perfect templates for an amateur painter like me! So, if you don’t consider yourself a painter, you can still totally do this project!
This post contains affiliate links. For more information, see my disclosures here.
More pumpkin crafts you’d like:
What you need to paint pumpkins
Pumpkins (obviously)
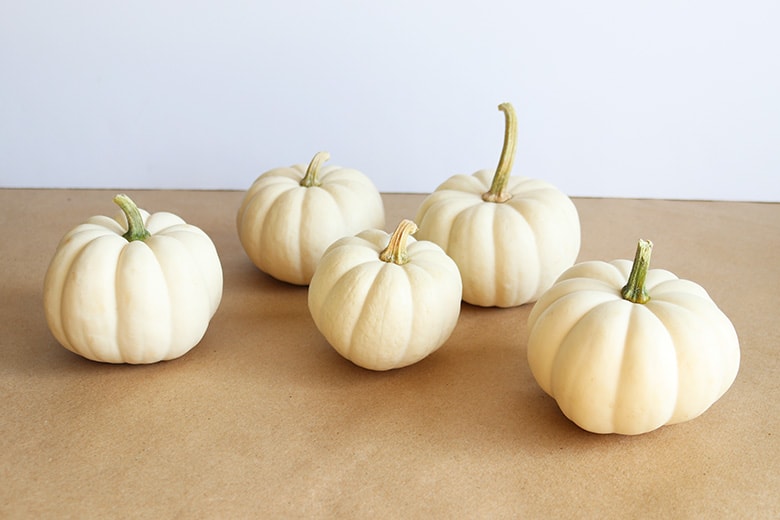
You can use real or fake. I recommend using white ones–they’ll be easier to paint over than orange. The advantage of using real pumpkins is that the paint can be wiped or washed off easily if you mess up. Also, they’re super cheap (I purchased all 5 of my white pumpkins at the grocery store for less than $3). But…the disadvantage of real pumpkins is that you’ll have to throw the pumpkins away at the end of the season before they go bad. For that reason, you may want to go with something like this.
Paint supplies
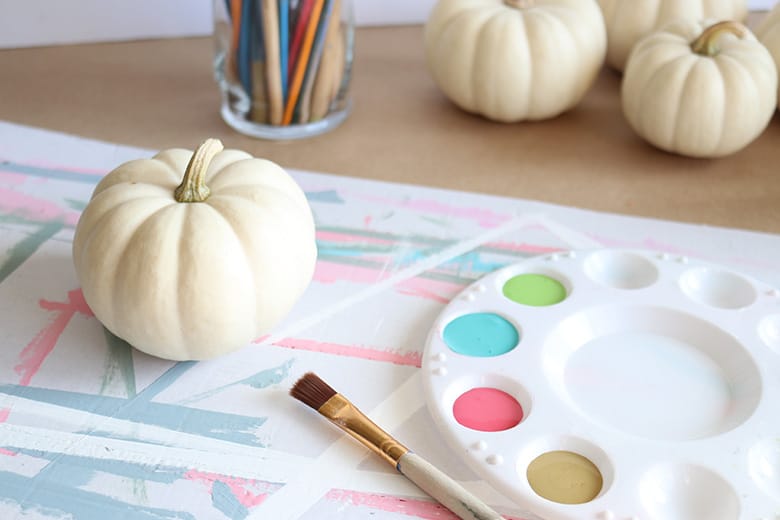
You’ll want regular craft paint, a variety of paint brushes (especially some fine, detail ones), a paint palette, and a covered work surface (I used a scrap of cardboard). I should really upgrade to something like this at some point.
Optional accessories
Felt, beads, glitter, or other things you might want to add after the pumpkins are painted (totally optional).
How to paint easy monster face pumpkins
These monster faces are seriously the easiest. In fact, you may not even need the full tutorial to be able to duplicate them yourself! But just in case, here are some step by step instructions for each monster.
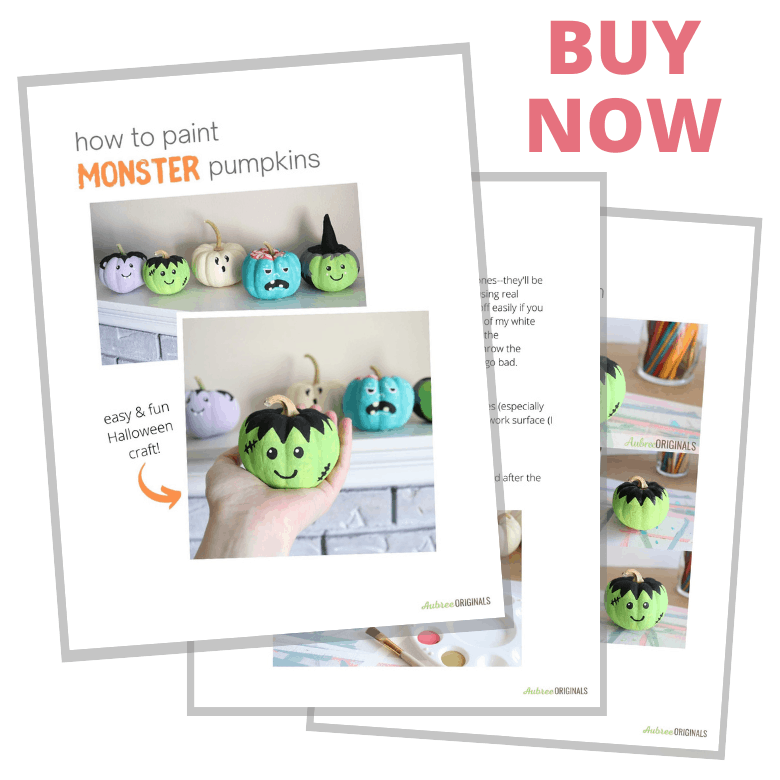
Get the PDF
All the information for how to paint monster pumpkins is in this blog post you’re currently reading (just keep scrolling to see the complete instructions below). But sometimes it’s a lot more convenient to have a printout!
If you’d like, you can purchase the PDF file here. It has the full blog post tutorial (including pictures) in a clean, easy-to-print format (or I personally like to save PDF files in my Kindle app on my phone for easy reading). That way you can have a physical copy of these instructions to refer to anytime you want. (You may find this especially helpful if you’re doing this project with children!)
How to paint a ghost pumpkin
We’ll start with the easiest! If you’re starting with a white pumpkin, you won’t need to paint anything except the face. Feel free to google “ghost faces” for inspiration, or you can copy mine exactly!

- Paint two upside-down tear shapes for the eyes.
- Paint a kidney bean shape for an open mouth.
- Using the back end of a small paint brush, paint two pink dots, one under each eye (you’re not painting so much as “stamping” the circular end of the paint brush to make a perfect tiny dot).
- Using the back end of a small paint brush, paint two white dots, one in each eye.
How to paint a Frankenstein pumpkin
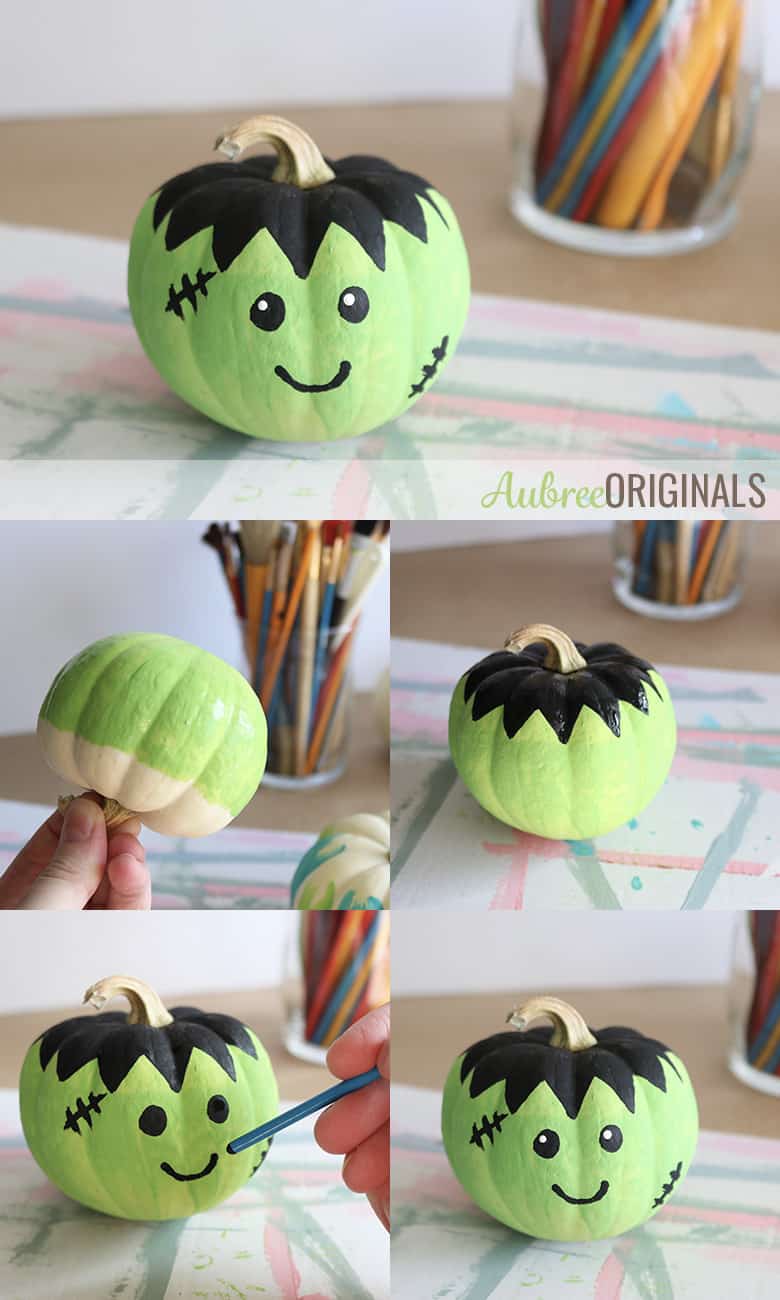
- Paint 90% of the pumpkin green.
- Paint triangle shapes or a black zig zag around the top of the pumpkin and fill it in for the hair.
- Add two black circles for eyes.
- Using your finest paint brush (or the back end of it), paint a small smile not quite the width of the eyes. Add two rows of stitches on either side of the face.
- Using the back end of a small paint brush, paint two white dots, one in each eye.
How to paint a vampire pumpkin
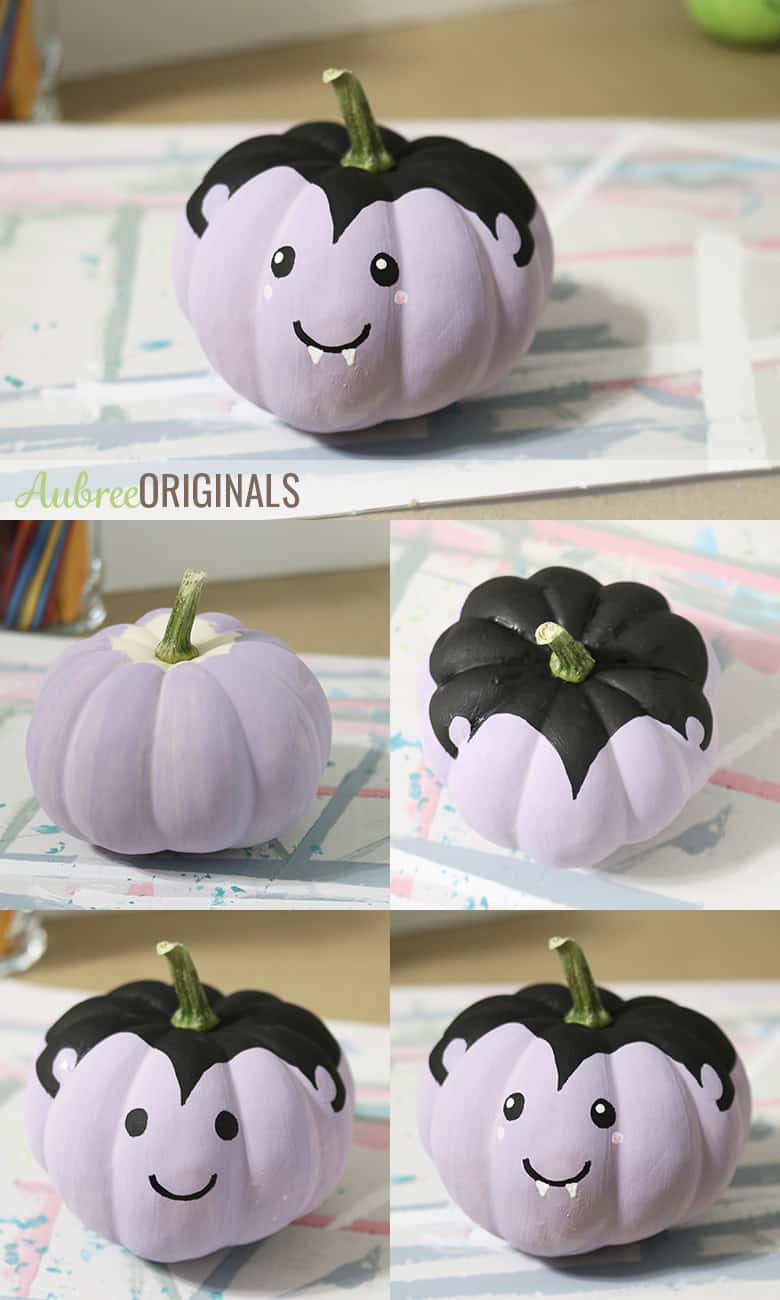
- Paint 90% of the pumpkin light purple (or whatever color you’d like the vampire’s “skin” to be).
- Carefully paint black hair: start by outlining the widow’s peak and round shapes for ears. From the bottom of the ears, paint a straight line around the back of the head. Fill in the hair. If you make your ears too small and want to fix their shape, let the black paint dry and touch up with purple after.
- Add two black circles for eyes.
- Using your finest paint brush (or the back end of it), paint a small smile not quite the width of the eyes.
- Using the back end of a small paint brush, paint two pink dots, one under each eye.
- Using the back end of a small paint brush, paint two white dots, one in each eye.
- With your smallest paint brush, carefully paint two triangle teeth.
How to paint a witch pumpkin
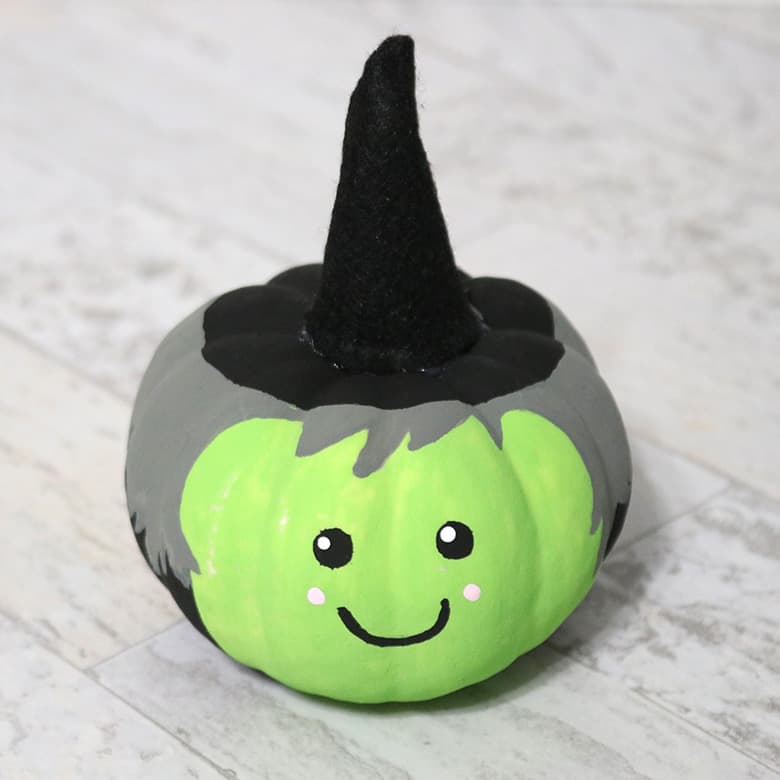
- Paint one half of the pumpkin green (one full side or enough for a face).
- Outline the hair in grey: add triangular shapes for bangs, frame the face, and continue adding a random spiky border all the way around the back of the pumpkin (about halfway down). Fill in the hair with grey paint.
- Paint a circular witch hat base on the top of the pumpkin.
- Fill in the bottom half of the pumpkin with black paint.
- Add two black circles for eyes.
- Using your finest paint brush (or the back end of it), paint a small smile not quite the width of the eyes.
- Using the back end of a small paint brush, paint two pink dots, one to either side of the smile.
- Using the back end of a small paint brush, paint two white dots, one in each eye.
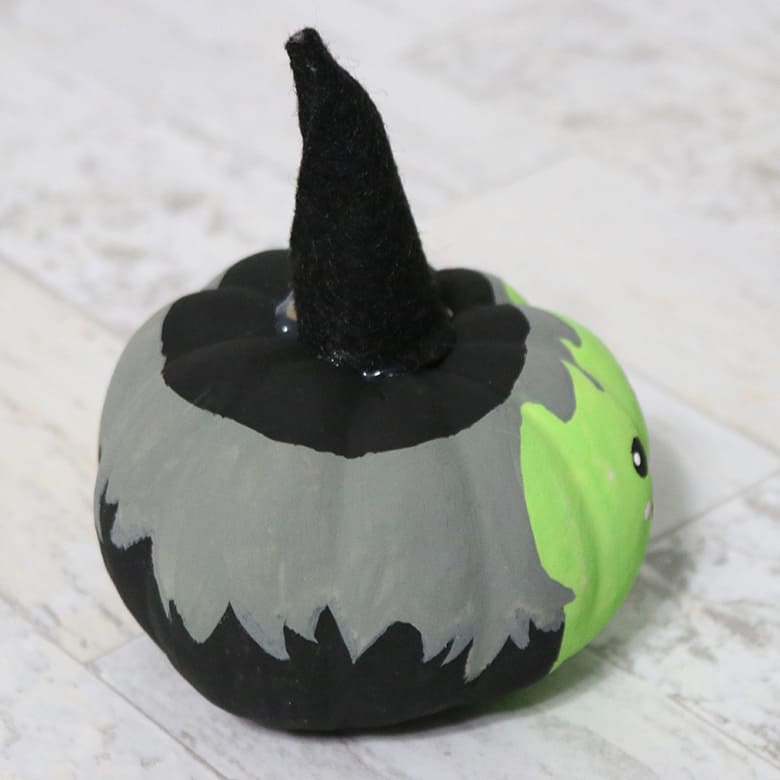
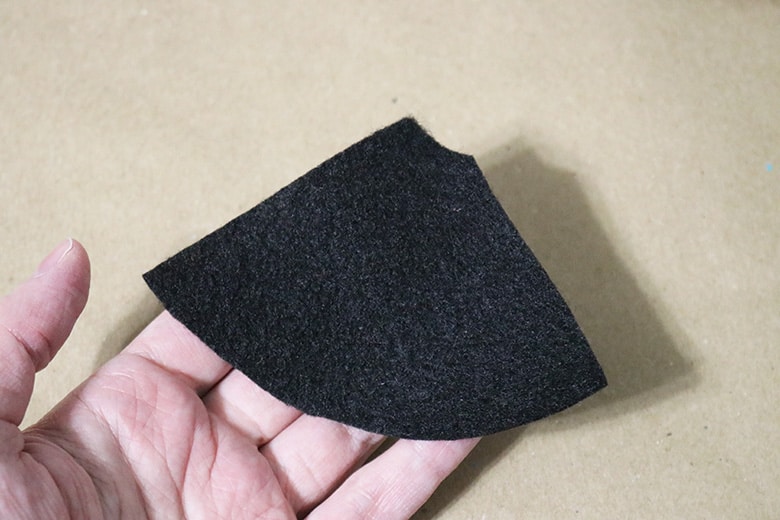
To finish the witch’s hat, cut a small quarter circle of black felt (I didn’t make a pattern for this, but you could use my gnome hat pattern in my Gnome Easter Egg post! Either the medium or large hat should work, depending on the size of your pumpkin and how tall you want the hat to be). Starting from the top, spiral the felt to make a cone and hot glue the straight edges closed. Trim the bottom as necessary for size and hot glue it to the pumpkin.
How to paint a zombie pumpkin
This one is the most complicated of the bunch to paint, but still totally doable when you break it down into simple steps!

- Paint a brain section in dark pink at the top of the pumpkin: you can make it off-center like mine or you can make it take up the entire top of the pumpkin.
- Paint the rest of the pumpkin turquoise (or whatever color you’d like the zombie’s “skin” to be).
- Paint brain “squiggles” (the technical name is “gyri”) in light pink.
- Add two half circles in white for eyes.
- Paint a large kidney bean shape for a mouth in black.
- Fill in the eyes with black, leaving a small white border.
- Add face details in light turquoise paint (just mix some white with your paint to lighten it). Add eyelid lines, a nose, a frown line under the mouth, and warts (using the back end of the paint brush).
- Paint teeth in yellow or light green paint.
Some tips about painting pumpkins
Different colors of paint might streak, show brush strokes, or go on really faintly. I recommend painting one section at a time using smooth brush strokes: start at the top of the pumpkin and go all the way down to the bottom before lifting up the paint brush. If your paint dries splotchy and you’re not happy with it, apply a second coat and that should resolve the imperfections!
When painting the main color, just make sure you paint enough of the bottom that you won’t see the original pumpkin color when it’s being displayed. Since I didn’t care what the bottoms looked like, I still set my pumpkins down on the cardboard to dry, even though the bottoms had wet paint (some of it will rub away, but it doesn’t matter).
I didn’t bother painting any of my stems, but you’re welcome to if you want!
The paint washes off easily with water! For this reason, I wouldn’t display these on a porch where wet weather could wash off the paint. However, the fact that the paint washes off so easily is great news for us perfectionists who mess up the paint job and need to start a section (or the whole pumpkin) over!
The paint chips easily once dry.* Don’t display your pumpkins where they could bump into each other and be careful when setting them on hard surfaces that the paint doesn’t transfer to anything else. If you’re worried about marking your surface, you can easily hot glue a circle of felt to the bottom of each pumpkin.
*Note: you could possibly add a coat of Mod Podge once you’ve finished painting to protect the surface from chipping. However, I didn’t feel this was necessary for my pumpkins. I was also worried that running a wet paint brush of Mod Podge over the painted surface would smear the paint and didn’t want to risk it. I’m not sure if that would happen or not, so test this at your own risk!
And finally…the pumpkins, if you used real ones, are still real! You’ll need to throw them away at the end of the season, sadly. So, again, if you want to use fake pumpkins for this project, I totally understand!

I hope you love your new monster pumpkin family!

Don’t forget to pin and save for later!
What an awesome idea! I featured your monster face pumpkin tutorial on Crafts on Display today. It’s the perfect no-carve project for Halloween!
Will these designs work on small orange pumpkins? I don’t have white ones!
Yes, for sure! I would definitely give it a shot. If you’re struggling with the orange showing through, you may want to prime the pumpkins white first or use two coats of the colored paint.
Thanks for the inspiration! Did two faces on a conjoined pumpkin and it turned out so cute.
I love that idea, Jean! Two on one is a great idea!
Hello, Just wanted to say that I love these pumpkins! I have included them in a round-up on my website. If you don’t want me to include your tutorial just let me know and I will remove it.
Thanks,
Kelly
Hi Kelly! That’s great, thanks for sharing!
I love the purple one, or lavendar. I tried it and didn’t turn out. How did you judge where to put the black? Thank you
Aw, I’m sorry it didn’t work out for you, Diane! I just eyed it/did it freehand–maybe you could try sketching it out lightly with a pencil first? I hope to make a video tutorial soon that’ll hopefully be easier to follow.
https://www.pinterest.com/pin/166562886208145954/ I ended up doing this as I painted the black too low and didn’t like it. I might try again next year.
Either way it turned out awesome! I love how you fixed it!
Would like to see the back of the lavendar pumpkin.
If I remember correctly, I just painted the vampire’s hair in a straight line all the way around the back. But you could do any hairline you like!
Just a question, because this will be my first time attempting to paint a pumpkin, do I need to prep the pumpkin in any way first? Besides the normal cleaning of dirt off first. (We actually grew a few small pumpkins this year. Lol)
Thank you.
Hi Mandie! Nope, you should be good to go after washing off the dirt! Some people like to do a bleach or vinegar bath to help preserve the pumpkins longer, but I never worry about that. If your paint seems too thin and you’re not getting good coverage, you may need multiple coats or you could try a chalk paint too. Just remember that paint is easily smeared/can be wiped off pumpkins so let it dry completely before handling. Have fun! My goal is to grow pumpkins next year too, that’s awesome!