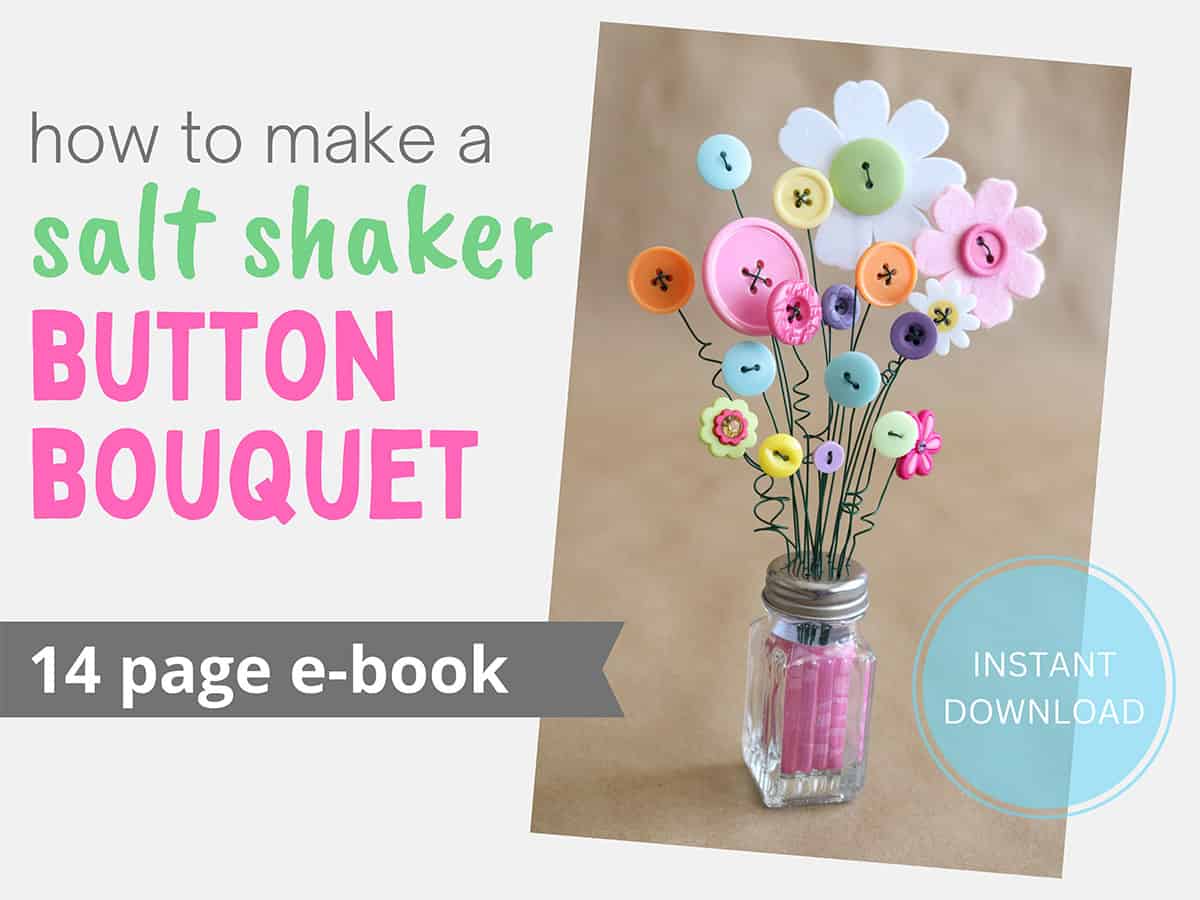
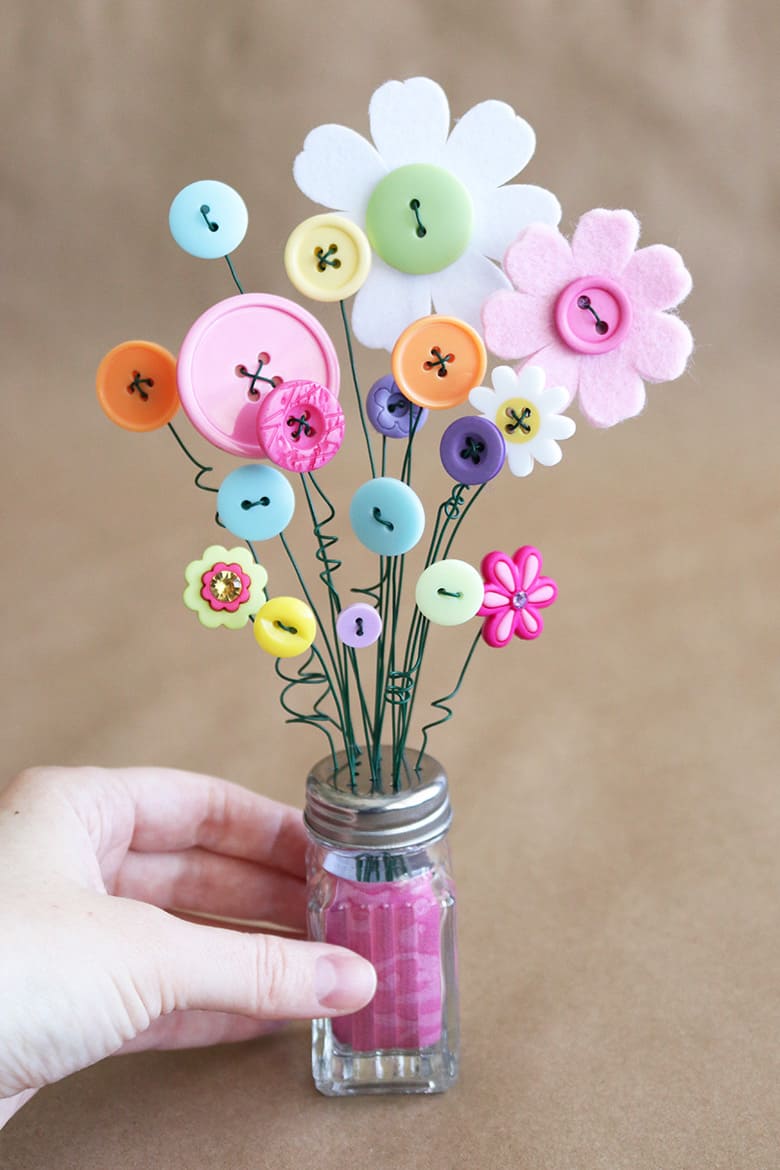
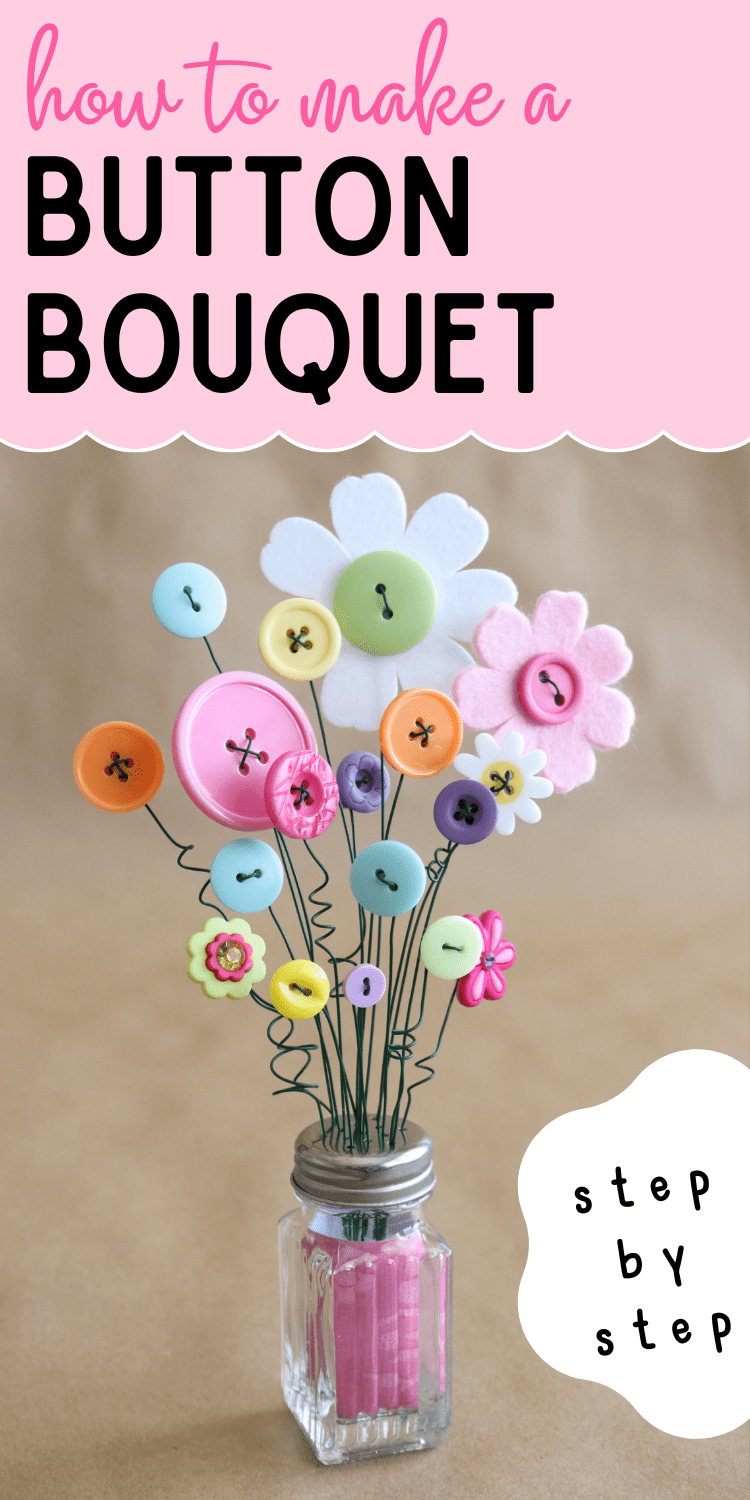
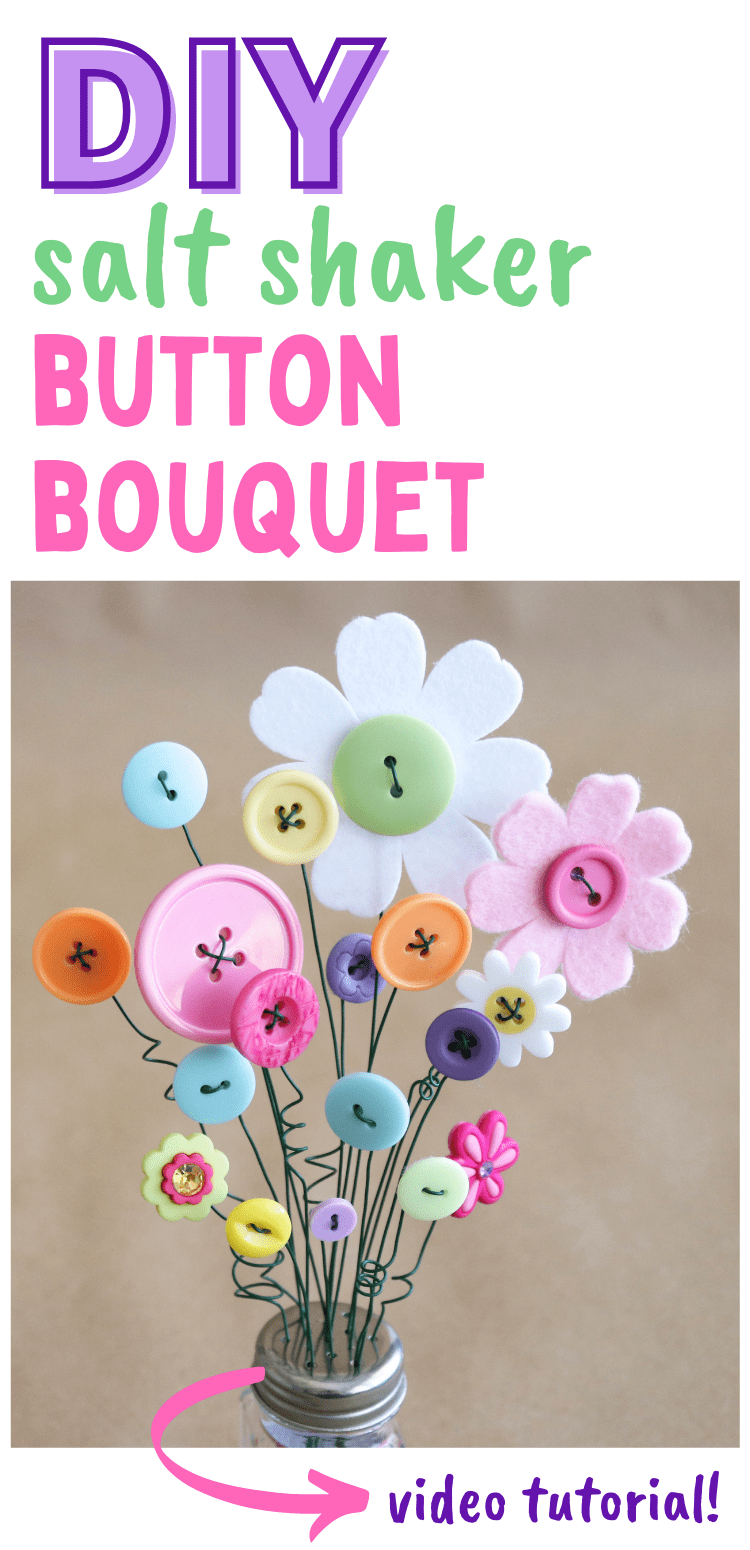
How to Make a Button Bouquet–in a Salt & Pepper Shaker!
Learn how to make a button bouquet in a salt shaker with this step-by-step video tutorial! This is a fun spring craft, and a great Mother’s Day gift! But feel free to customize for any holiday or occasion!
I’ve had this salt shaker button bouquet on my to-do list forever—I’m so glad I finally made it! It makes me happy every time I look at it.
I was originally inspired by a Halloween button bouquet I saw, which I’m totally going to make in a few months. (If the large number of Halloween crafts on my blog didn’t clue you in, Halloween is my favorite holiday!) So, be as creative as you want with this tutorial: use any color scheme you want to fit the season or holiday!
But I think this one is perfect for spring—and would also make an adorable Mother’s Day gift!

Seriously, this might be the cutest little bouquet ever.
This post contains affiliate links. For more information, see my disclosures here.
More posts you might like:

What You Need to Make a DIY Button Bouquet

- a salt and pepper shaker: I found a set of 2 small ones at Dollar Tree–can’t beat that price!
- floral wire, either green or uncoated (more details on this below)
- assorted buttons: I found some great variety packs at Hobby Lobby and the rest came from my stash
- a small piece of foam: I used some discarded packing material, but floral foam would be great too
- scrapbook paper or spray paint (to dress up the salt shaker/hide the foam)
- felt (to make flowers and to cover the button backs)
- hot glue: I’ve been loving this glue gun! (I bought the Lynn Lilly version direct from Surebonder)
- wire cutters (I have these ones), round nose jewelry pliers, and possibly also needle nose pliers (these are some of the 13 random but super useful things I keep in my craft room)
- various round objects for coiling stems: paint brush, pencil, marker, etc.
What kind of wire should you use to make a button flower bouquet?
For this project, I recommend buying floral wire as “stems” instead of coiled, that way it’s already straight.
I used green wire, but the coating kept flaking off with the twisting–not super noticeable in the finished product, but if that bothers you, go with an uncoated silver.
22 gauge is the perfect weight wire for a button bouquet: easy to manipulate but still sturdy enough to hold the buttons upright. Also, I could still fit multiple wires (up to 3) in a single hole in my salt shaker lid, so you can make your bouquet really full if you want.
Quick note: my wire is 18 inches long, so I was able to get 2 flowers out of each wire (for the most part). I recommend starting with a whole wire, attaching it to your button (instructions below), and then trimming it where you want. Or…just cut the wire in half to start with, I suppose that works too, because I’m being indecisive. 🙈
How to Make a Salt Shaker Button Bouquet
Depending on how you like to learn, there’s both a tutorial video and written instructions below. You’re welcome. 😉
If you want to see more video tutorials, subscribe to my YouTube channel here.
Want to print these instructions to refer to while making this project? You can get the PDF e-book HERE! This is super handy for classrooms, community craft nights, and more!
Select a variety of buttons
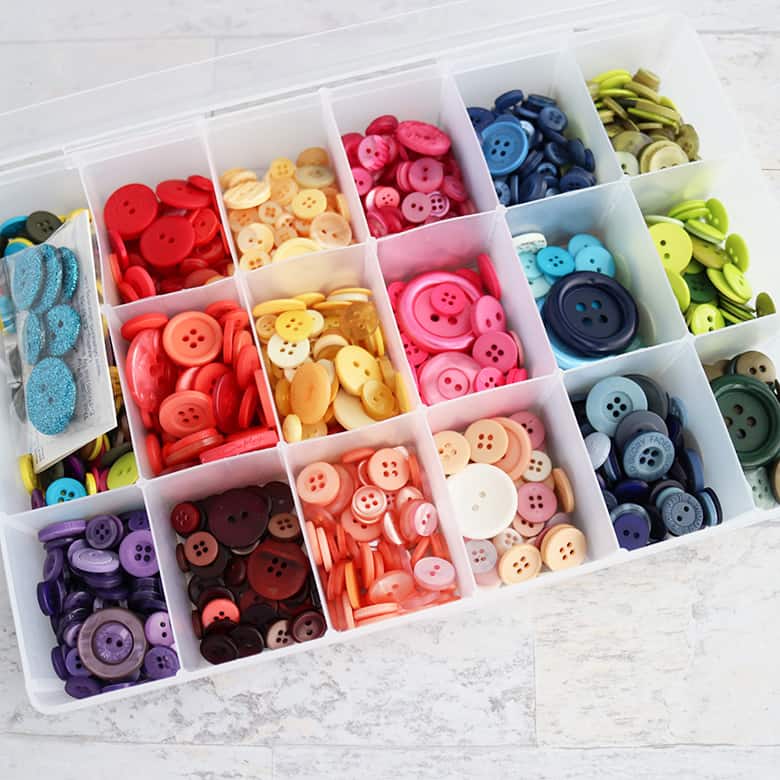
You can choose any color scheme of buttons you like for this bouquet! I’ve seen button bouquets made from vintage buttons, red white and blue buttons for the 4th of July, and black and orange buttons for Halloween. I found some fun spring button packs at Hobby Lobby and based the rest of my choices off of those.
To make your bouquet as fun as possible, I recommend a variety of different button sizes, as well as buttons with varying amounts of holes (or no holes at all and a shank–this is the loopy part on the back of buttons without holes).
Cut felt flowers (optional)
I’m lucky enough to have a Cricut Maker, so I loaded some felt onto my FabricGrip mat (that I first covered with a layer of transfer paper to protect the mat from the felt fibers), and cut a couple flowers using the felt setting.
The flower pattern I used in Cricut Design Space is #M4687B (you can type that into the search bar of the image library and it will come up). But choose any pattern you like.
If you don’t have a Cricut, no problem! Just find a flower pattern you like, trace it onto felt, and cut it out by hand.
Note: paper flowers would work great in a button bouquet, too!
Attach floral wire to each button to form a stem
If your button has two holes, stick the end of the wire through the first hole, coming from the back of the button and pull it down the other hole. Make sure you have a couple inches of wire to work with here (otherwise it’ll be difficult to twist).
Start twisting the wire together, keeping the wire as tight as possible so your button is secure (this motion is like twisting the twisty-tie on a loaf of bread, if that makes sense). Continue wrapping the small piece of wire around the stem–use jewelry pliers when the piece is too small to twist by hand. You don’t need to go crazy with the twisting, a few times will be plenty, because you also don’t want to see your twisted wire from the front of the flower.
Once you’re done, carefully cut the leftover wire (the small piece, not the big one) with wire cutters. (Cover it with your hand so the small piece of wire doesn’t go flying…or at least, doesn’t go flying quite as far.)
After trimming, you’ll probably still have a little piece of wire sticking out, so use your jewelry pliers or needle nose pliers to squish it closer to the stem and flatten it as much as possible. Finally, push the twisted wire flat against the button (you can push the button flat against a table or hard object to help, just be careful not to scratch whatever surface you’re using).
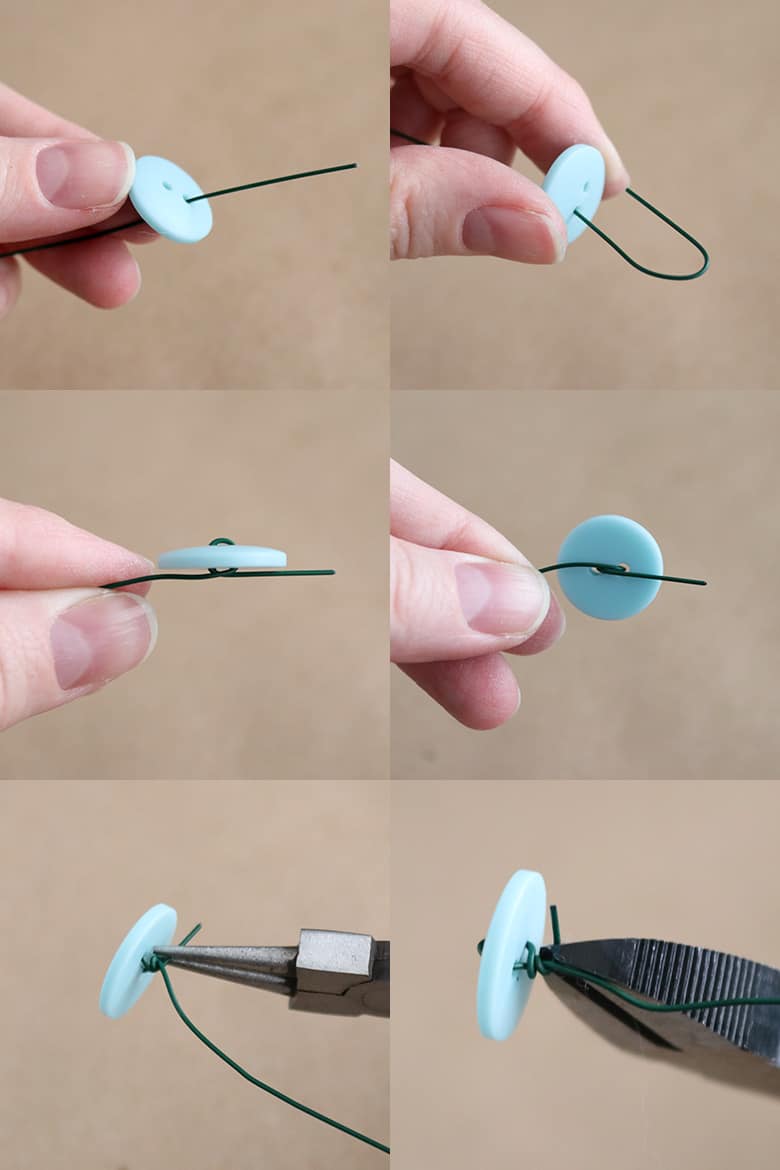
If your button has four holes, stick the end of the wire through the first hole, coming from the back of the button, come down through the hole diagonal to it, pull it as tight as possible, then bend the wire and push it through the third hole. Then use your pliers to pull the wire out while holding it tight against the button. And then do the same thing, pushing it through the final hole. This should make an “x”. Repeat the twisting process, trim it, and flatten it.
If your button has a shank, simply thread your wire through it, twist it a few times, trim it, and flatten it.
For felt flowers, choose a button for the center and mark the holes with a fine point sharpie, and then carefully cut small holes so you can get the wire through the felt. You may not need to do this, depending what kind of felt you’re using, but I used pretty thick felt so the wire didn’t want to push through it on its own and needed a little help. There may be a better way to do this that’s not so dangerous, but this worked for me. Just be careful with sharp scissors that you’re not stabbing yourself! (I love these fine point scissors for things like this. But I might have to try this piercing tool from Dollar Tree next—that might be a lot easier!)

Test the holes to make sure the wire can be pushed through, then line up your button and attach the stem the same way as the other buttons.
Cover button backs with small circles of felt
After attaching the stems to the felt flowers, I decided the backs were kinda ugly, so I cut a circle of felt to cover it and it looks so much cleaner (and, bonus, it covers up any sharp wire pieces you may still have–which is why I ended up doing this to all the buttons).
For this, I simply free-hand cut a small circle from felt, applied hot glue to the perimeter of the circle, and pressed it to the back of the flower.
When you’re doing the button ones, just make sure your circle of felt is smaller than the button so that you can’t see the felt from the front. Also, don’t use too much hot glue or else it’ll seep through the button holes (so try to just apply hot glue to the perimeter of the circle).
For buttons with a shank, because the shank sticks out farther from the button, you can actually cut a slightly larger circle of felt than you think. Then, when you go to glue it, just press it around the shank.
(At this point, feel free to cut some leaves from felt and hot glue them to your stems, but I decided to do without for my bouquet.)
Prepare your vase (aka, salt shaker)
Depending what kind of salt shaker you use, you have a few different options to decorate it. The main purpose of decorating it is to hide the foam insert, but a pop of color is nice if your salt shaker is boring like mine.
You can spray paint or chalk paint the exterior, Mod Podge scrapbook paper to the outside, or simply line the inside with a piece of scrapbook paper (which is what I did). One more idea I just thought of: you could wrap fabric or felt around the outside (you might need a little hot glue) and tie a ribbon bow around it (that would’ve been easy and cute!).
If you’re doing the rolled-up scrapbook paper like I did, cut a piece of scrapbook paper that’s wide enough to go almost all the way around and that’s the height of the salt shaker. Then roll it up and push it inside, using your finger to spread it out.
Next, cut a piece of foam roughly the size of the interior of the salt shaker and push it inside–it’s okay if it fits snugly, so cut bigger and trim it down as needed. Just make sure you can’t see any foam poking out the top (for me, I made sure my paper insert completely hid the foam). Finally, screw on the lid.
Assemble your bouquet
This is somewhat a matter of preference, but I like to put the bigger taller flowers at the back—so, if you have felt flowers, kind of make those the focal point—and then fill in with smaller button flowers.
I used a total of 18 button flowers in my bouquet—so each hole in the salt shaker lid had at least one stem in it and some had 2 or 3 stems. Feel free to make your bouquet as full as you want.
You may have to play with the positioning to get all your buttons to face forward. Try straightening the wire or reinserting it into your foam in a different spot, or even wedging more stems into the same hole so they can’t move and twist as easily. Just play around with it to see what works for you.
Adjust stem heights by trimming or coiling them
As you’re assembling your bouquet, you can trim some of the stems with wire cutters to give your flowers different heights.
Or, another way to shorten your stems is to coil the wire. Wrap the stem around a pencil or other round object a few times (I used a skinny paint brush for some and a wider marker for others). And then stretch out the wire as needed to achieve the look and height you’re going for.
Coiling the wire adds so much dimension and personality to your bouquet, so don’t skip this step!
DIY Button Bouquet Tutorial
And there you go! All finished! I love how cute this turned out!
(I guess Happy Mother’s Day to me, because I’m not parting with this one. 😆)
Let me know if you make this! I’d love to see your variation of this button bouquet!

Don’t forget to pin and save for later!

These were so easy and fun. I work at a retirement community and had some of the ladies help make the flowers and they enjoyed it. I had some pre-made flowers so I just glued them on the button. I didn’t put felt on the backs because I didn’t think it was necessary. I have them on the tables as center pieces. I would post a pic but don’t see that I can ☹️
I love that, Phyllis! I’m sure the residents loved it! I agree, felt isn’t always necessary. You’re always welcome to post a picture to your social media and tag AubreeOriginals. 🙂
I made mine with clear, see thru buttons, various colors. looks awesome!!
That sounds so pretty Charlene! I wouldn’t have thought to do clear, great idea!
Get the shredded paper and it works.
the result is so beautiful and delicate. I loved that you shared everything in detail, thank you very much.
You are so welcome, Pamela! I’m so glad you enjoyed this!
I Love you buttons that the things you made!!
Thanks Linda! I’m so glad you liked it!
I had the most fun making these button bouquets. Thank you for sharing the idea.
That makes me so happy, Marilyn! Thank you for your kind comment. 🙂
DOLLARAMA has the small version and the glue sticks.
Oh, good to know! Thanks Lorraine!
I made one of these for a coworker. Needless to say, she LOVED it. She has lots of plants and flowers. I found these adorable Flower shaped buttons at Walmart. I filled the shaker with SALT. I found the shakers (already had a decal on them) at a Tuesday Morning store.
Hi Tammy! That’s so fun! And I love that you filled it with salt–for some reason, I would’ve never thought of that. 😆
Thank you for another way to use buttons!!
You’re welcome! I’m glad you like it! 🙂
Such a cute project. I ca see so many uses, and yes, Mother’s (or GrandMother’s) Day would be a great day to honor somebody special with this gift.
Do you have a PDF with step-by-step instructions by chance? I watched the video on YouTube.
Thank you so much for sharing.
Thanks, Kathy! Yes, there is a PDF with the written instructions in my Etsy shop here. I hope that helps! 🙂
Seriously considering this craft for my “littles” to make on Mother’s Day. (I’m a nanny). I’m just wondering if an empty salt shaker has enough weight to keep it from toppling with all those buttons, felt flowers, etc. at the top. Just a thought. I always make the craft at home before I try it with the little ones.
Thank you for sharing your ideas!
Hi Su, I think it’d be worth trying. The only reason I put the styrofoam inside is so I can arrange the flowers to face the same direction. Lighter-weight flowers and buttons might make it just a little more stable, though.
I am very new to crafting and I need to know the best place to get a glue gun as I don’t make a lot of money working and live in Canada, any idea’s 🙂 Thanks so much in advance …
Hi Jacie. I’m not too familiar with craft stores in Canada, but you should be able to find a glue gun at a lot of different places–Walmart or your local hardware store or Amazon will all have them. I like the Surebonder glue guns, but I actually use an old off-brand glue gun most of the time and it works great! For this project, you could also probably make superglue work if that fits your budget a little better. Hopefully that helps!
I wonder if since I’ve already made a bunch of button flowers if I could glue the felt flower on the back, hiding the wire and giving the flower petals. Ever tired? Got the felt yesterday, cutting it with the Cricut this weekend. We will see!
I’m sure you could! I would definitely give it a try. I really like the idea of making the felt backing bigger for petals!
It’s so cute…I love it…I will make these for my friends 💓
Thanks for reading, Susan! Have fun crafting!
Hi. Was thinking of using colored sand. We will see how that works.
Hi Cheryl, you’ll have to let me know if it works! That would look so good!
I love this. I tried it with pipe cleaners, and it’s not strong enough so make sure you use the floral wire!
Oh, good to know! I wonder if you twisted a couple pipe cleaners together if it would make it stronger? Either way, I agree, I think I’ll stick to the floral wire. Thanks for reading, Patty!
Absolutely love this idea and will try making a few to donate to patients in hospitals or on hospice care. Although I’m not really crafty, I think it is worth trying, especially with all the holiday themes.
I love that idea to donate them, Bev! I think it’s a pretty fun project, even if you’re not crafty. Enjoy! 🙂
Great job with the tutorial. Thanks for doing it in 2 versions, really pretty!
Hi Deb! I’m so glad you liked it, thank you for your comment! 🙂
I have made several of these. I used gift bag filler in my vases. I have made these for every holiday. They are so cute. They make a nice little gift for whatever occasion you are celebrating. Halloween is magical. I used glow in the dark paint and little skull heads with spiders and bats. Christmas is very easy. I loved all the ones I made.
That’s so fun, Desiree! I haven’t had a chance to make any other holiday/themed ones yet but it’s definitely on my list–and I’m totally going to use your Halloween suggestions! And how fun to give them away, I’m sure the recipients love them!
Does the gift bag filler work in place of the foam to keep the flowers from shifting?
Do you mean tissue paper? I think that could definitely be worth trying! I’d imagine if you crumpled it tightly it would keep the wires in place. You’ll have to let me know if it works for you!