Easy Conversation Heart Wreath
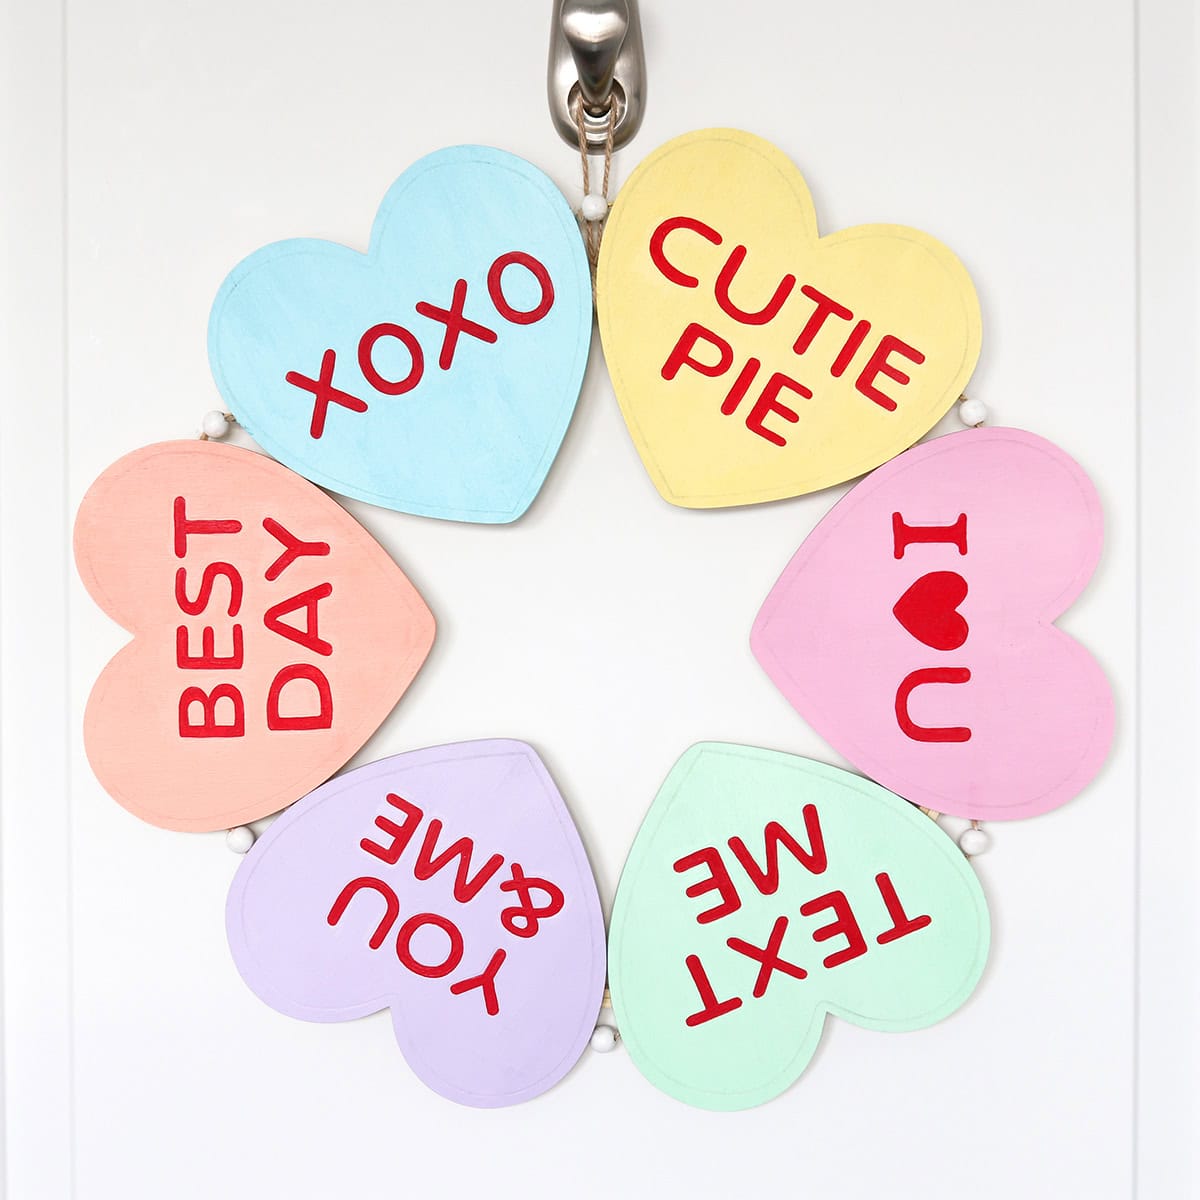
This easy conversation heart wreath is made from a wood garland and makes the cutest Valentine’s Day decoration!
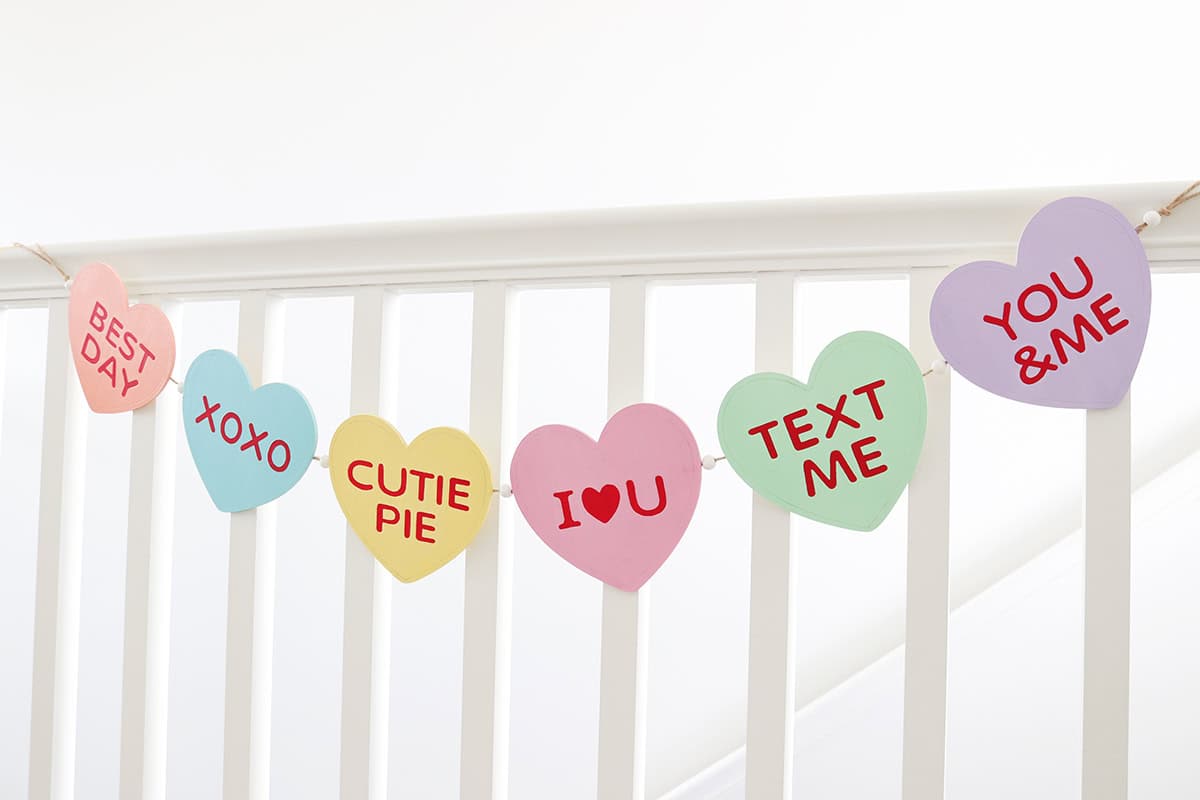
I love scouring the seasonal aisles at the craft store for potential craft projects. Sometimes I buy the unfinished wood items for my son to paint, but this time I bought this cute conversation heart garland for myself. It’s so cute as a Valentine’s garland, but it also can be turned into this fun wreath.
You may not be able to find the exact craft garland I used, so I’ll give you suggestions below on how to duplicate this conversation heart wreath for yourself. It’s a fun and relaxing Valentine’s craft project and I love the pop of color on my door!
This post contains affiliate links. For more information, see my disclosures here.
What you need to make a wood conversation heart wreath
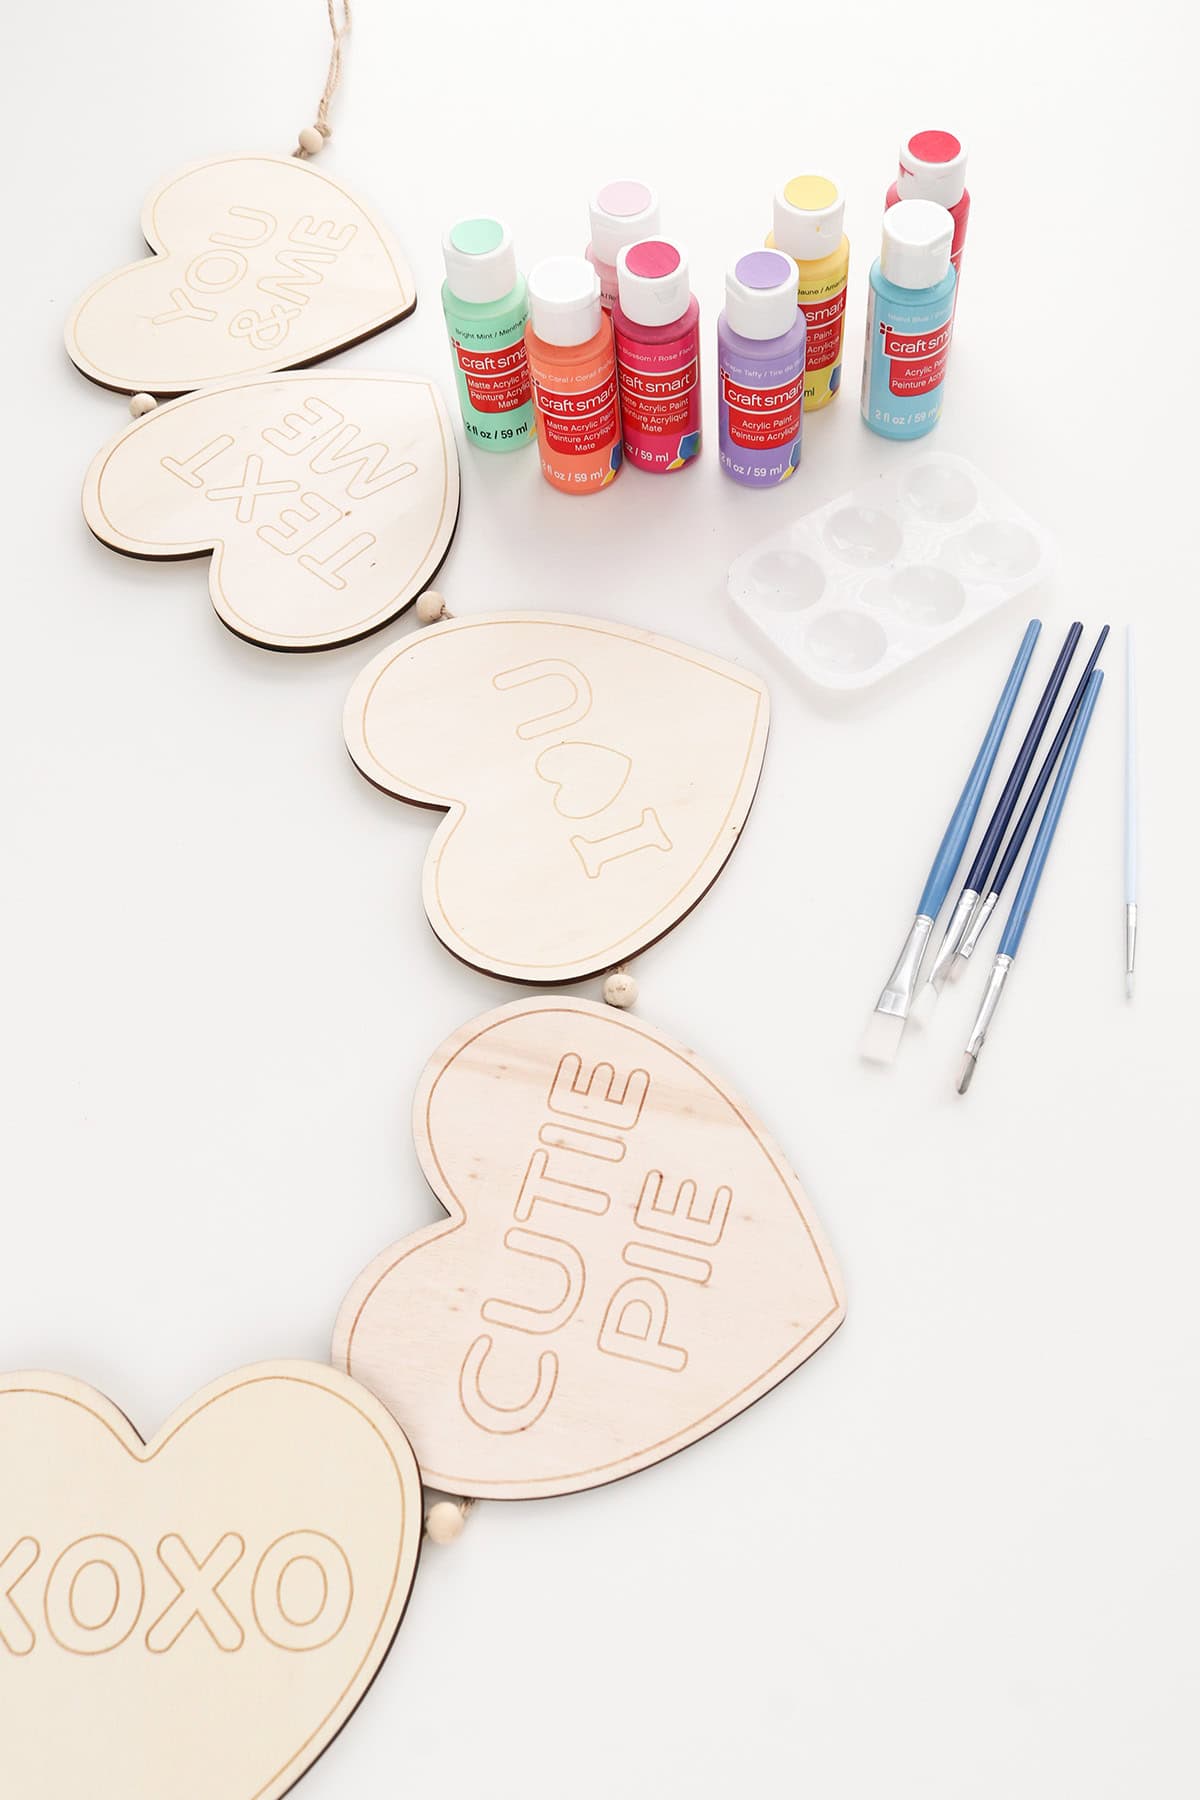
- unfinished wood heart garland: I found my unfinished conversation heart garland at Hobby Lobby. You don’t have to use a garland, though. Unfinished wood hearts like these will work just as well (they’ll actually be easier to paint).
- craft paint in various pastel colors: I used Craft Smart paint from Michaels (see specific colors below)
- paint brushes, including some very fine tip paint brushes if doing letters by hand
- acrylic sealer, optional (I just like to protect the painted surface a little and it makes the paint feel less chalky)
- red vinyl and a Cricut machine, optional: If your wood hearts don’t have the conversation heart sayings on them, you could cut the words out of vinyl with your Cricut machine. Permanent vinyl may work, but if you’re having a hard time getting it to stick to the painted surface, you could actually try iron-on vinyl. (Yes, you can use iron-on vinyl on wood! I would just test it out first to make sure it doesn’t affect the paint finish.)
- red letter stickers would also work for the words
- 12″ embroidery hoop or 12″ flat ring wreath form
- hot glue
- ribbon or string for a wreath hanger (I just repurposed one of the garland ends for this)
What paint colors to use for conversation hearts
Conversation heart candies come in very light pastel colors of pink, orange, yellow, green, blue, and purple (and white if you need an additional color). I had to tone down my paint colors with a lot of white to get the shades light enough–which makes touch ups a little harder, but I think I was able to match my previous coats well enough.
These are the paint colors I used:
- Pink Blossom
- Deep Coral
- Yellow
- Bright Mint
- Island Blue
- Grape Taffy
- Red (for the words)
How to make a wood conversation heart wreath
Paint the wood hearts
I left my heart garland in tact while painting, which was slightly trickier to keep the paint off the twine in between hearts, but doable. I mostly wanted you to be able to see how this garland looked if you left it as a garland, but keeping the hearts attached actually made it easy to attach them to a wreath form after, too. (Of course, if you’re only making a wreath from wood hearts, you don’t need to do anything to attach them.)
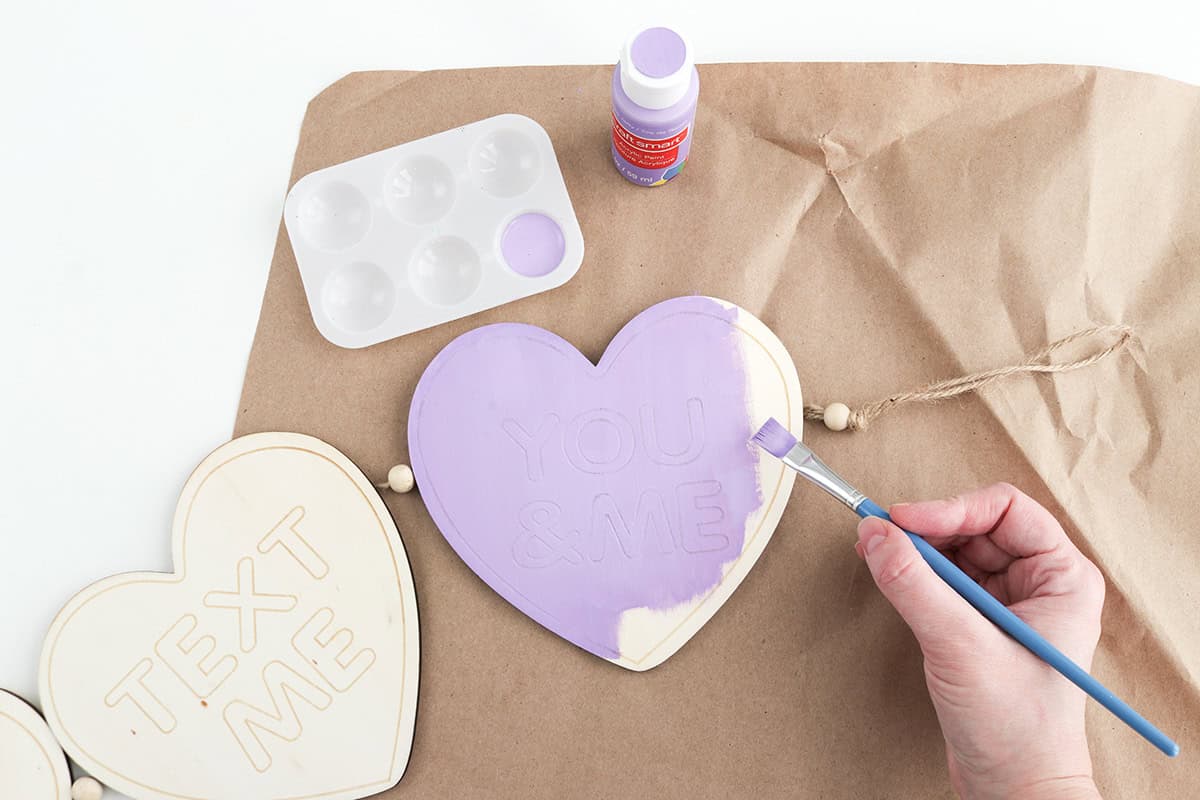
Lay some scratch paper on your table (I save clean shipping paper that comes in my Amazon or Cricut packages for paint projects!). Paint each heart a different pastel color resembling candy conversation hearts (see my exact paint colors above–but remember that I added in a lot of white).
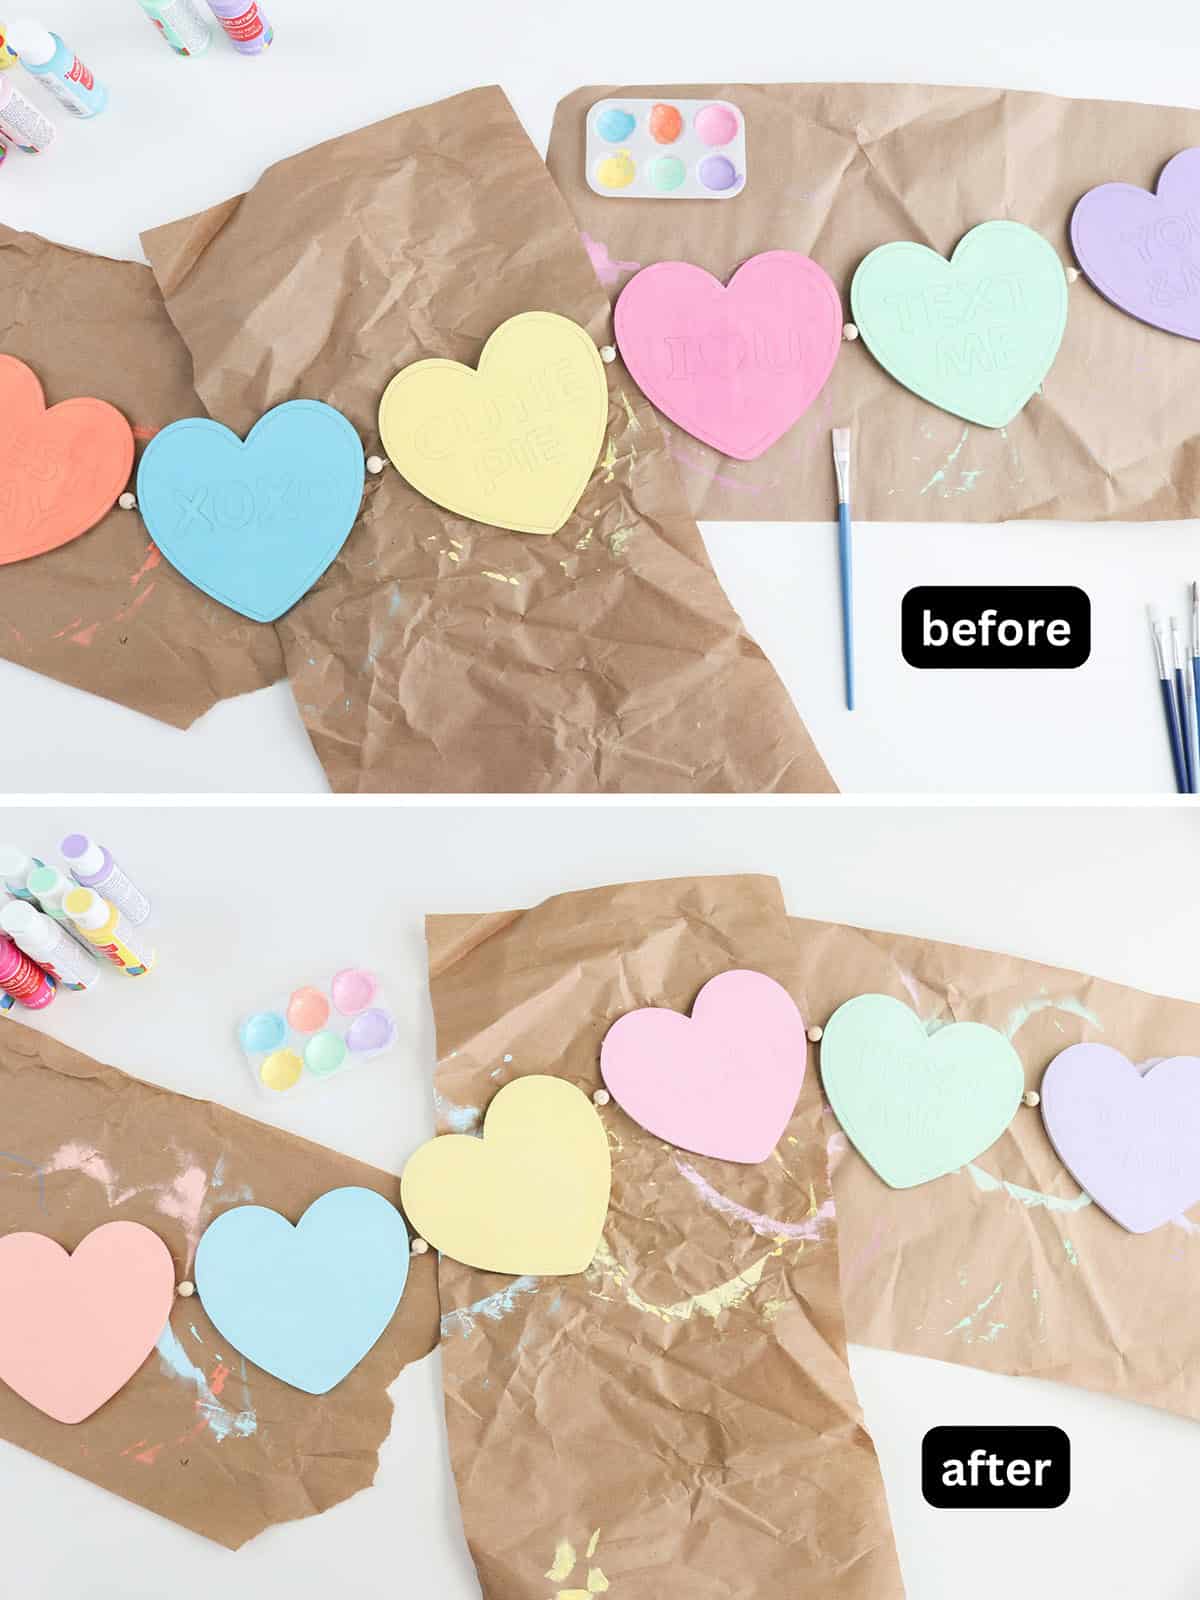
Below you can see the difference between the paint colors as is (no white added) and then the much-preferred (in my opinion) pastel colors after mixing in a lot of white paint for the next coat. Either way is fine, but the pastel shades are much truer to candy conversation hearts.
My garland had 6 hearts, each measuring 6.5″ wide, and this was perfect for a 12″ embroidery hoop. This also worked out to have one heart of each pastel color (excluding white). You may need to duplicate colors if your wood hearts are smaller.
I did at least two coats (probably more on the edges since laser cut wood edges don’t take the paint nearly as well). You can do additional coats as needed for full coverage.
Not pictured, but once the hearts were dry, I also painted the wood beads in between the hearts white.
Paint or apply vinyl words
My garland already had phrases on the wood hearts (with a slight impression), so I was able to paint the words red after doing my pastel coats. This was my least favorite part of this project, though, because you have to be so precise! (Well, I do anyway, since I’m a chronic perfectionist. 😜)
It was at this point that I wished I hadn’t started hand painting the letters and done red vinyl instead. Oh well. Many coats and many touch-ups later and my words looked…good enough. If you’re hand painting like this, use a very tiny detail brush so your letters don’t get too thick and go slowly!
If your hearts are plain to start with, I highly recommend using a Cricut machine and cutting red vinyl phrases to put on the hearts (again, you may have to experiment with both permanent vinyl and heat transfer vinyl to see which one adheres better).
If you don’t have a Cricut, you could also use red letter stickers.
If you need some inspiration for phrases to put on your hearts, I have a whole bunch (including some funny non-traditional sayings) in this cardstock conversation heart banner tutorial. (You could also use my Cricut Design Space project in that post for a starting point when creating your own vinyl sayings!)
Adding the red words is when the hearts start to really come together! They’re looking so cute!

(Remember that time I staged this photo and it wasn’t until forever later that I realized my tulips still had tags attached…haha, oops. You probably didn’t even notice. But here I am telling you anyway. 😆)
Apply acrylic sealer
This step is optional, but I sprayed this acrylic sealer on my wood hearts after the paint was totally dry. I believe I did two coats, letting it dry in between according to the directions. It just protects the painted surface a little and makes the texture slightly smoother.
Conversation Heart Garland:
If you want a garland instead of a wreath, you could stop right here. My hearts were already attached, obviously, but you could easily attach separate hearts to form a garland. Use a staple gun or hot glue to attach twine (or string/ribbon) to the backs of the hearts, with optional wood beads in between for extra interest. (If using staples, be sure they’re shorter than the thickness of your wood hearts. If you’re concerned, I’d go the hot glue route instead–it’s not worth messing up your painted hearts!) Make sure to leave extra length of twine on each end for hanging.
Glue hearts to an embroidery hoop or wreath form
Position your hearts on top* of an embroidery hoop or flat wreath form to get an idea of how they will fit (I think it looks the best when the tops of the hearts are on the outside of the wreath, with the points pointing to the center).
Apply hot glue to the embroidery hoop in sections, gluing down one heart at a time. The 12″ embroidery hoop was perfect for this since it sat at just the right position to be hidden from the front and also gave a nice flat surface to glue the hearts to. (If you use a different kind of wreath form, you may want to cover it first with ribbon so you don’t see the form from the front–lay it out first and see.)
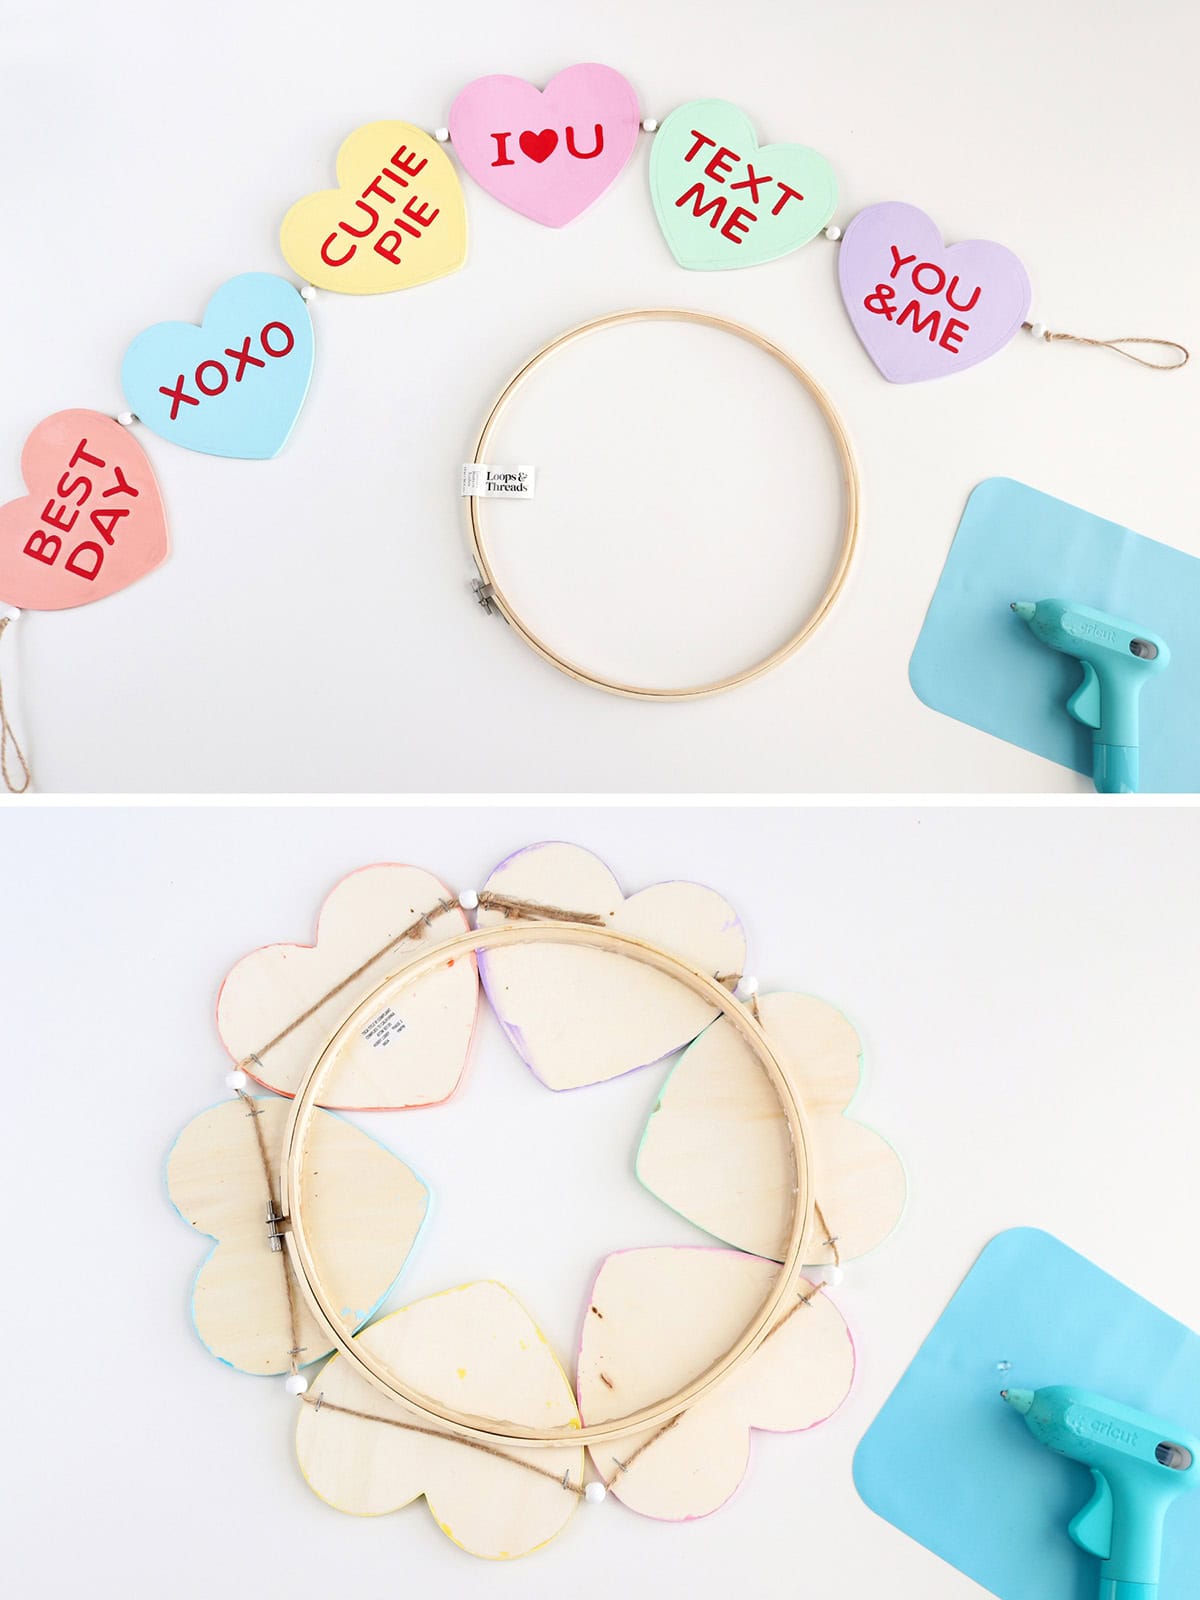
*Note: You may find it easier to glue everything upside down, with the hearts laying flat on your table and then gluing the embroidery hoop centered over the top of them. Either way is fine!
For extra security, I added some additional hot glue on the inside of the embroidery hoop after (kind of sealing the hoop to the hearts).
Since I kept my garland in tact, I also kept the wood beads in between my hearts, just cutting off one of them at the end. The beads aren’t necessary but I actually think they’re a cute addition to the wreath.
Make a wreath hanger
Cut a small length of twine or ribbon to form a wreath hanger. Decide how you’d like to orient your wreath and tie the twine around the embroidery hoop (or wreath from) in between hearts and tie a knot to secure it.

And you’re all done and ready to display your cute Valentine’s wreath!

This wreath *should* be sturdy enough to display outside if you wanted, but I’ll be using mine indoors just to keep the paint finish as nice as possible (and sometimes hot glue can melt or pop off if it’s in direct sun/weather).
DIY Wood Conversation Heart Wreath
This conversation heart wreath is so fun for Valentine’s! I hope you’ve been inspired to make a similar one, even if you use separate wood hearts instead of the garland I started with.

Don’t forget to pin and save for later!
