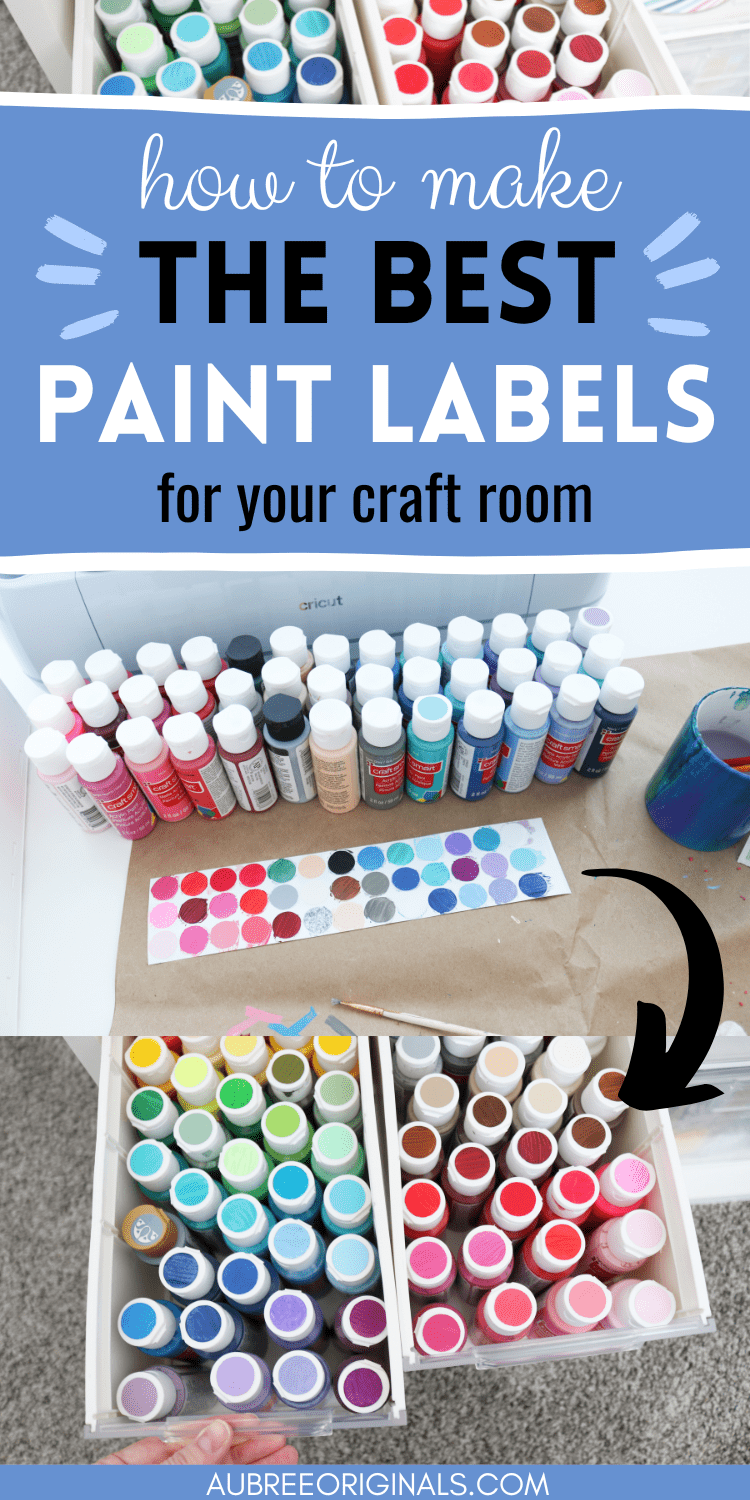
Easy DIY Labels for Craft Paint With Smart Paper Sticker Cardstock
Learn how to make these simple labels for the tops of your paint bottles so you can easily see all the colors at a glance!
This post contains affiliate links. For more information, see my disclosures here.
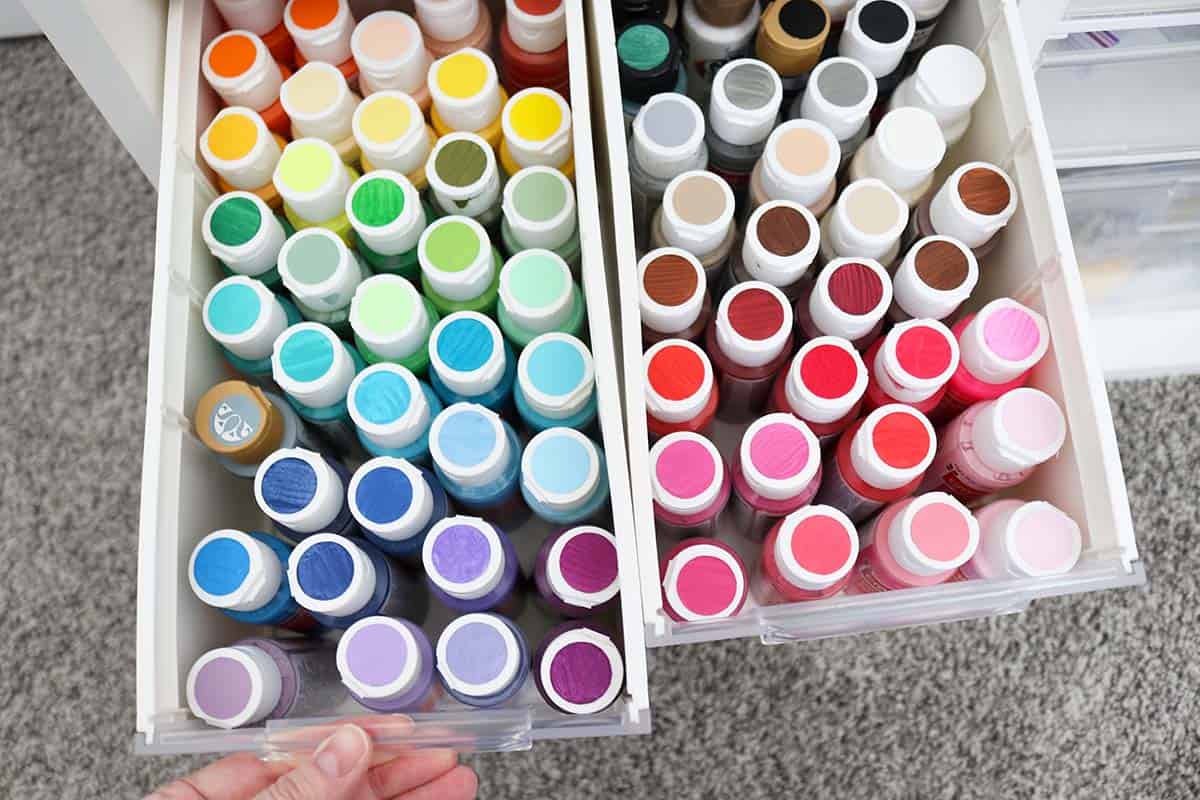
I love an organized craft room! I also love labeling supplies so you can easily see what you have on hand.
These simple sticker labels for craft paint bottles are an easy project to get your paints organized so you can quickly see the colors you need! No more pulling every single bottle out to find that one shade you’re looking for.
The rainbow color sorting doesn’t hurt my feelings either. Isn’t it so pretty?!
Yeah. It makes me happy. 😊
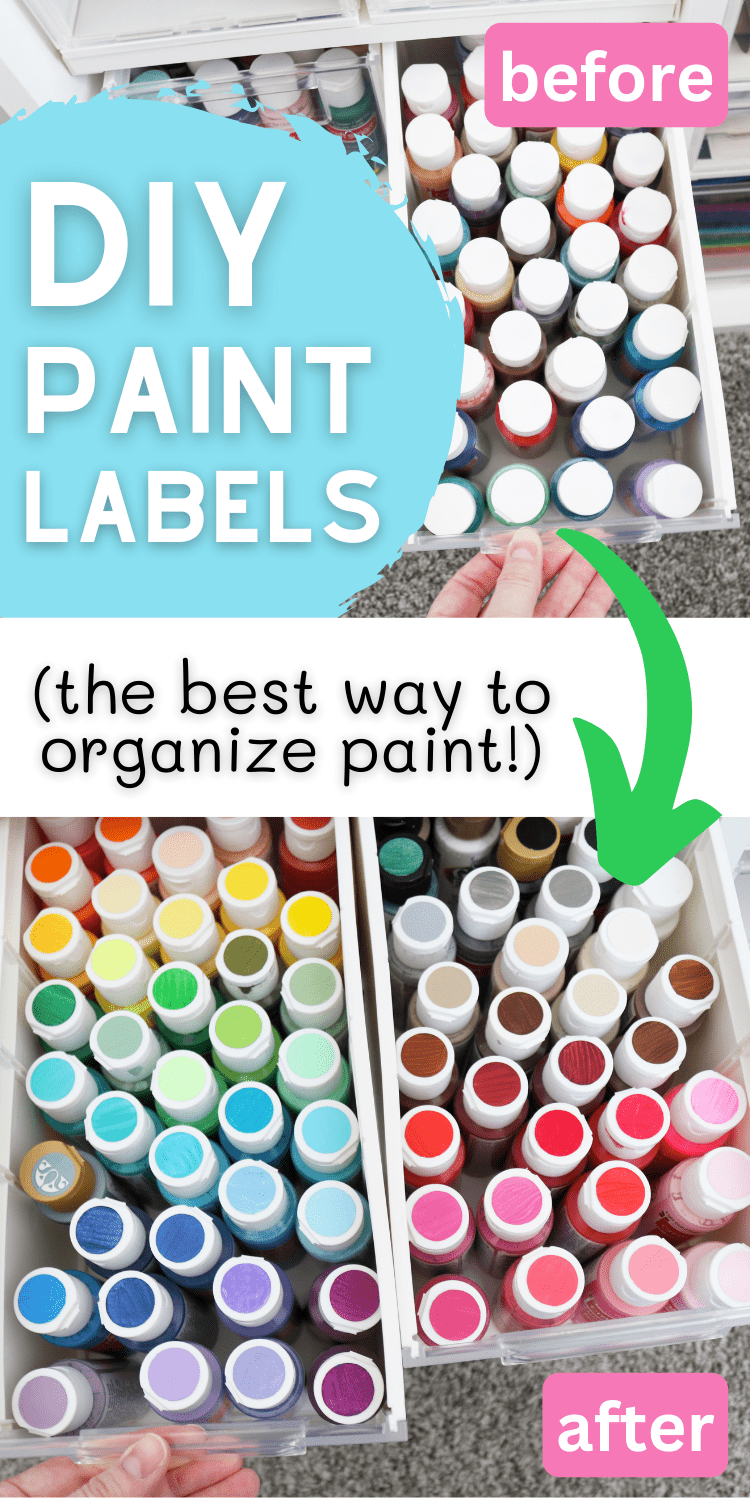
This is how my paint bottles used to look:
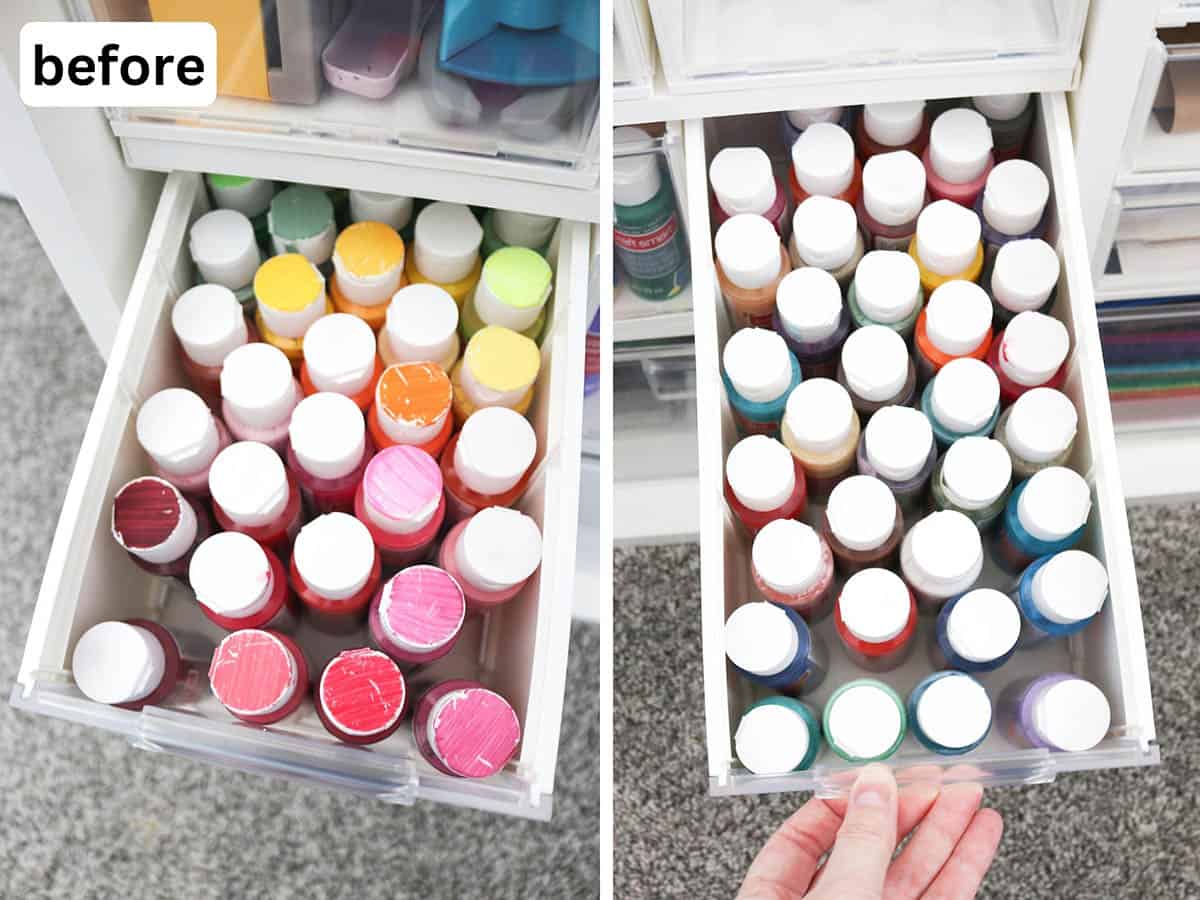
I used to paint the tops of the bottles, but acrylic craft paint doesn’t stick great to plastic, so they scratch easily and start looking messy after awhile—which is why I’m so excited about these new color labels! And I got lazy with my newest paints and didn’t do anything to the tops, so it was a pain pulling all the bottles out to see the colors.
Yay for labeling! (And bonus, while making these labels you’ll find out which paints are dried up and which ones need to be unclogged—a great way to declutter your paints!)
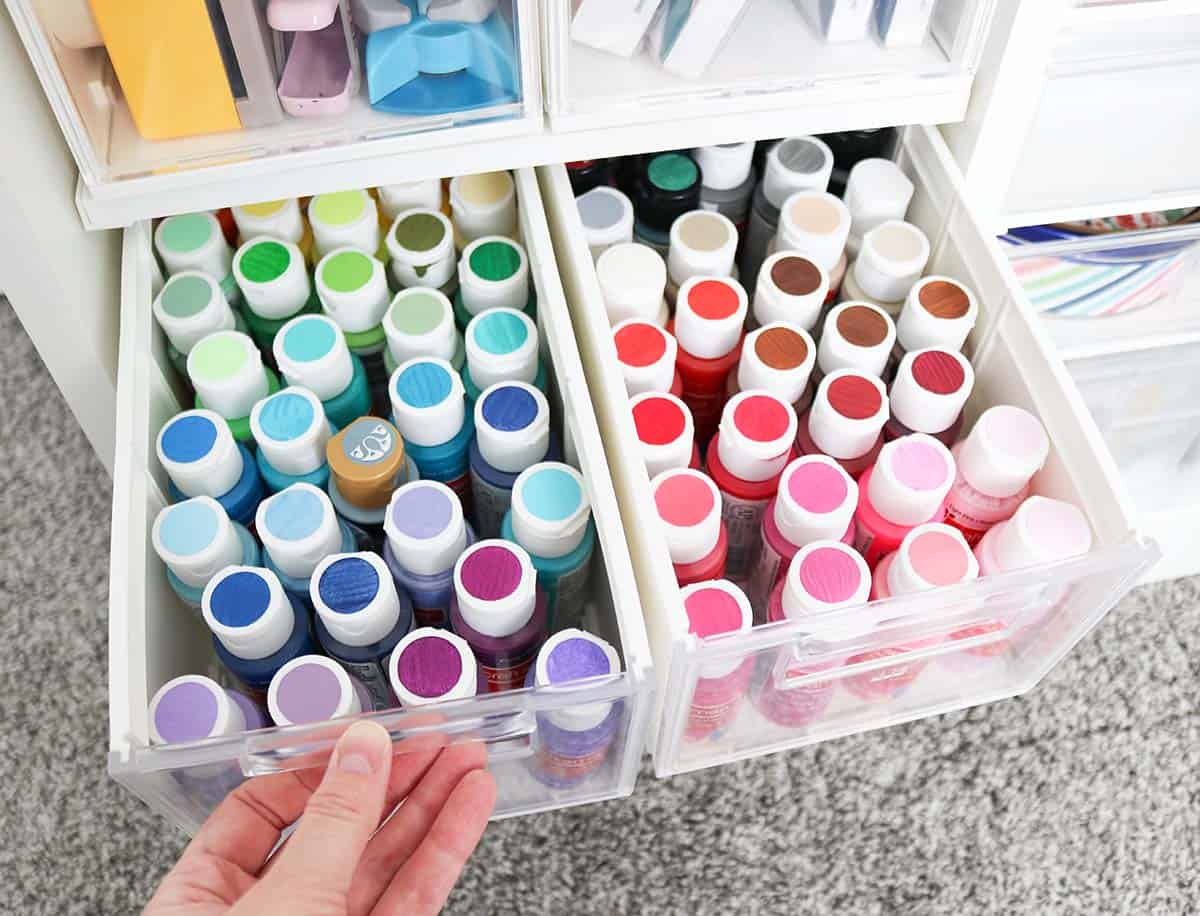
P.S. If you’re wondering what I store my paints in, these are the medium DiviDrawers of my Create Room Cubby—you can fit 38 bottles in a single drawer!
2024 Update: The Cubby is no longer available but you can still use my coupon code AUBREE for $200+ off the DreamBox or coupon code AUBREEDBC for $150 off the DreamBox Center – both great craft room storage options!
What you need to make paint labels
- Cricut Smart Sticker Paper Cardstock in white
- Cricut machine: I’m using my Cricut Maker 3 which can cut Smart materials. If your current machine doesn’t have the ability to cut without a mat, you can just put the sticker paper cardstock on a mat and cut it that way.
- craft paints (the ones you’ll be labeling, obviously)
- small paint brush
What is Smart Paper Sticker Cardstock?
Smart Paper Sticker Cardstock is a Cricut product that resembles the texture and thickness of cardstock but has an adhesive backing. It comes on a disposable carrier sheet that gets peeled away after you’ve made your cuts to reveal your “stickers”.
Because this is a Smart material, it can be cut without a mat with compatible Cricut machines (like the Cricut Maker 3 or Explore 3). And let me tell you, this feature is so convenient!
You can use Smart Paper Sticker Cardstock to make all kinds of paper crafting projects without the need for glue. I love using it to create embellishments for card-making! It also works great for labels, like these craft paint color labels!
How to cut labels with Smart Paper Sticker Cardstock
Open Cricut Design Space and create a new project (or, skip the next couple steps and just go to my paint labels project here). From the lefthand toolbar, click “shapes” and choose the circle. Resize it to 0.8″ in the top toolbar.
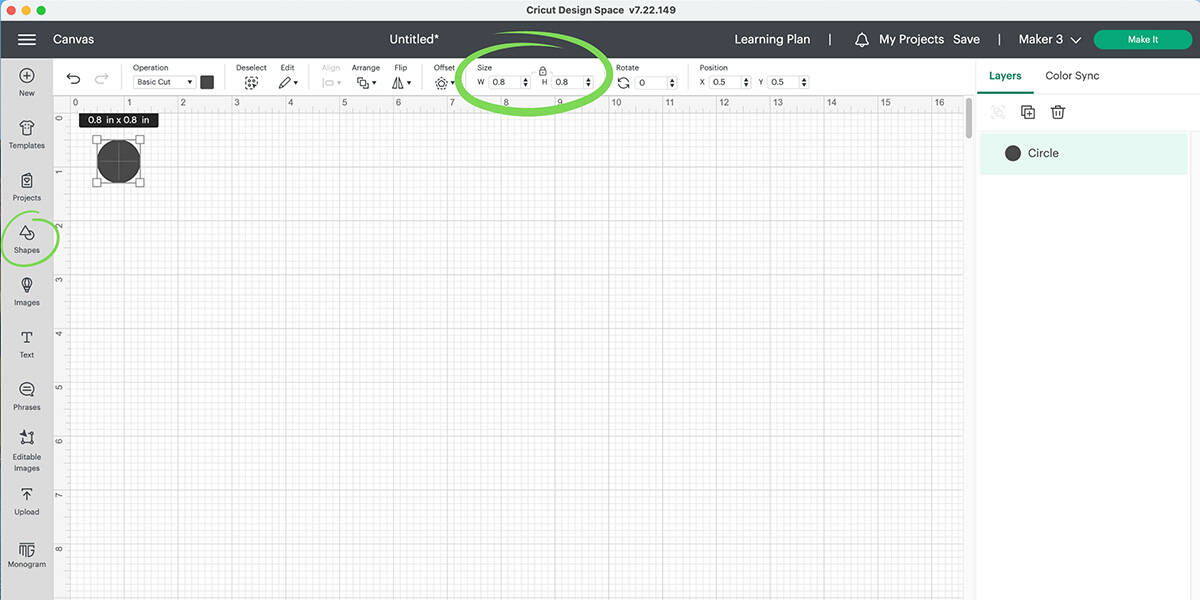
(0.8″ is the maximum size I’d suggest for the tops of regular craft paint bottles like I’m demonstrating here, but if you have smaller or larger bottles, adjust the size accordingly. Also, feel free to change up the circle for a heart or star or other simple shape if you want! I just personally like the circle since it covers the most surface area, letting you easily see the paint color.)
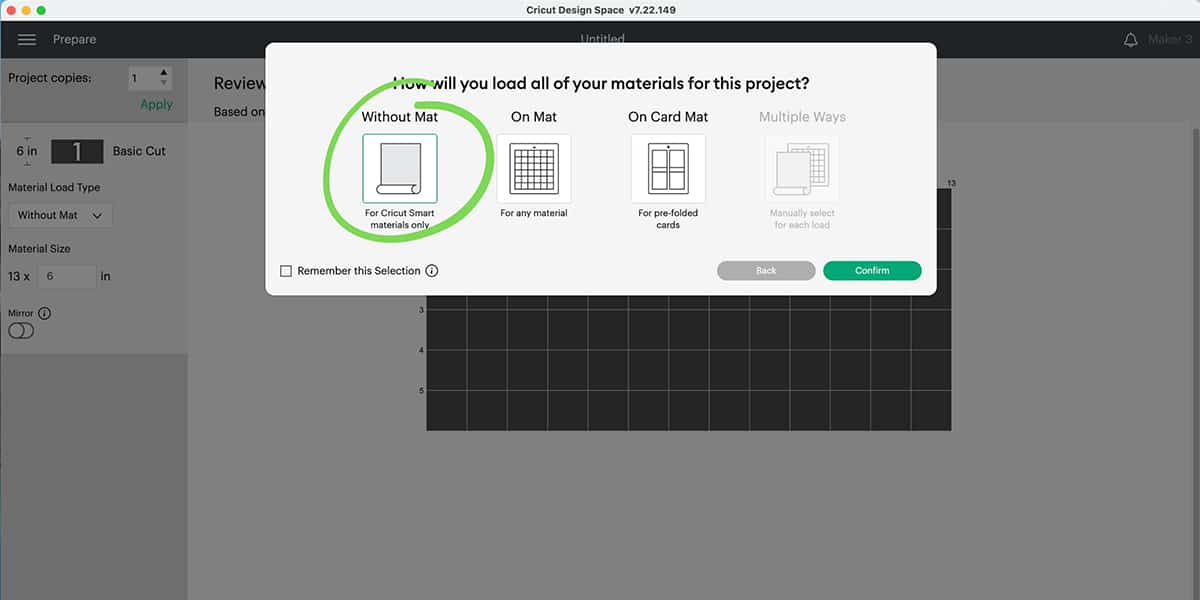
Next, click “make it” and, if prompted, choose “without mat” for your load type. Otherwise, double check that the load type says “without mat” in the lefthand panel.
Change the number of project copies to however many labels you need (it’s not a bad idea to make a few extras to keep on hand for if/when you get new paint bottles, you could also make double if you want to keep a set of stickers in a “craft supplies inventory” type binder).
To maximize the use of your Smart Paper Sticker Cardstock, especially if you’re cutting without a mat, I’d recommend using up the whole row (otherwise the material on the end gets kind of wasted since your machine requires you to use the whole 13″ width when cutting without a mat).
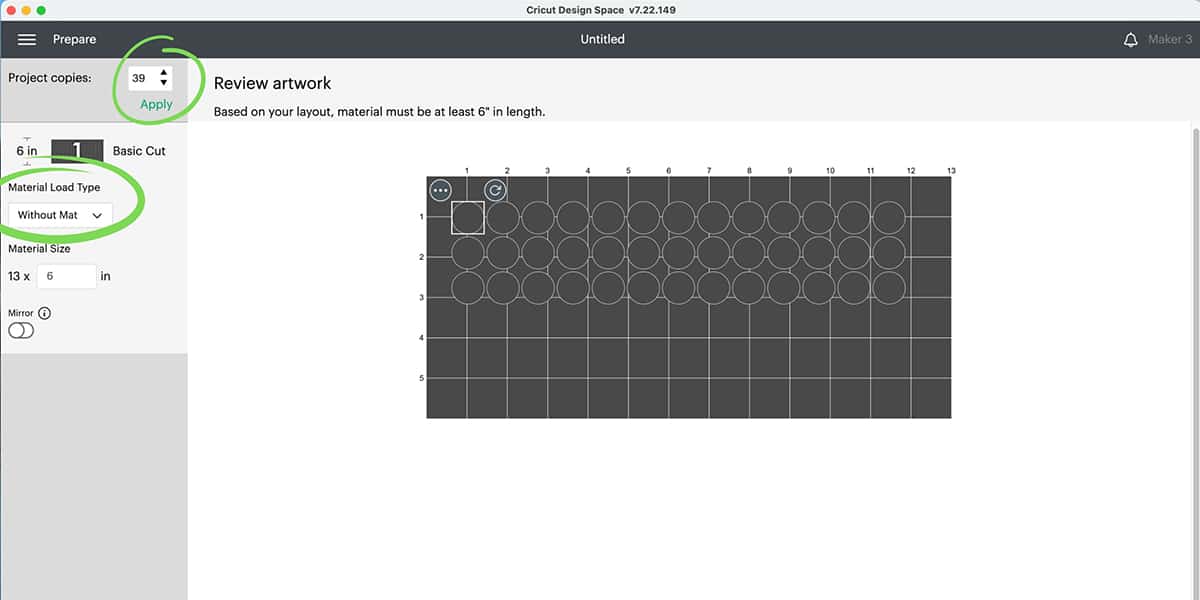
I chose 39 copies at a time because I was using up the end of a sheet of cardstock and three rows of circles is what I had room for.
Click continue and set Smart Paper Sticker Cardstock as your base material (if you want to easily access this later, you can click the little star next to it so it shows up in your favorites next time!).
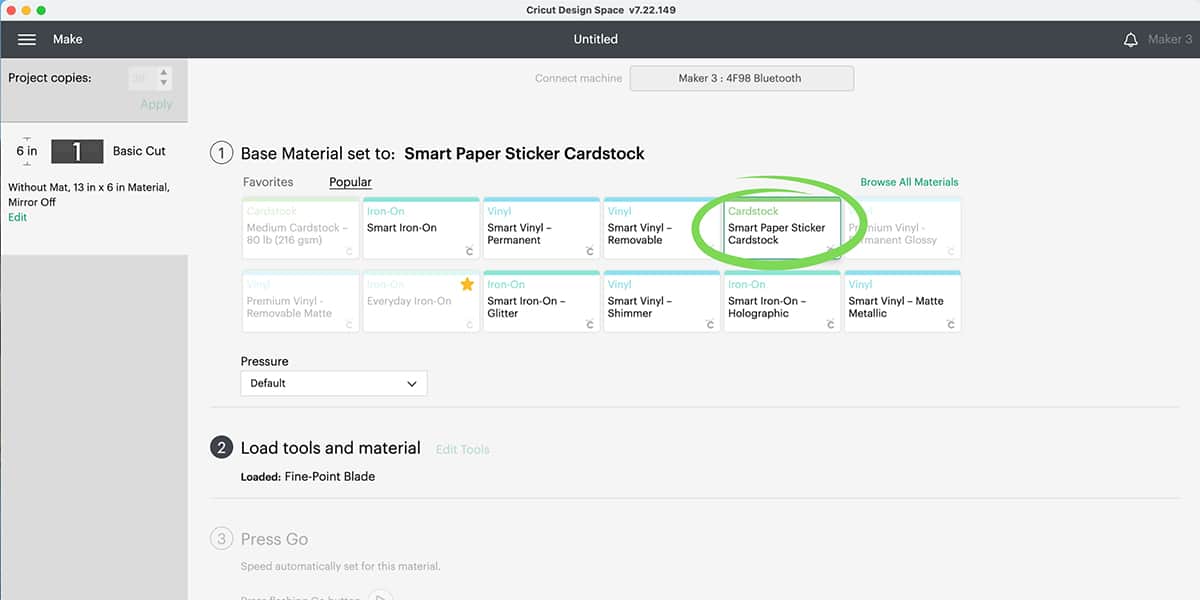
Then load your machine with your cardstock and follow the prompts to let your machine cut the labels. So easy!
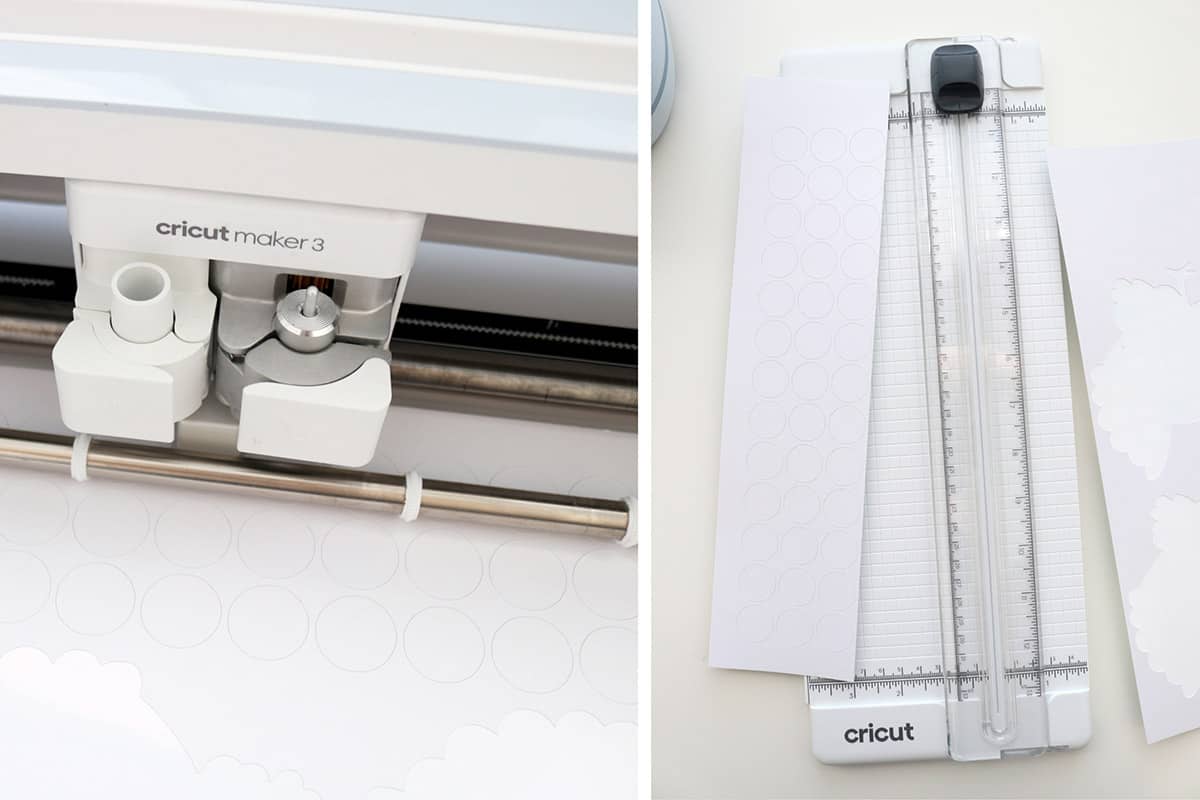
I used my trimmer to cut off the excess cardstock. Leave the extra cardstock around your circles until you’re all done painting (I removed it for my first set of labels before painting them, but it’s actually easier and cleaner to leave it on until you’re all done).
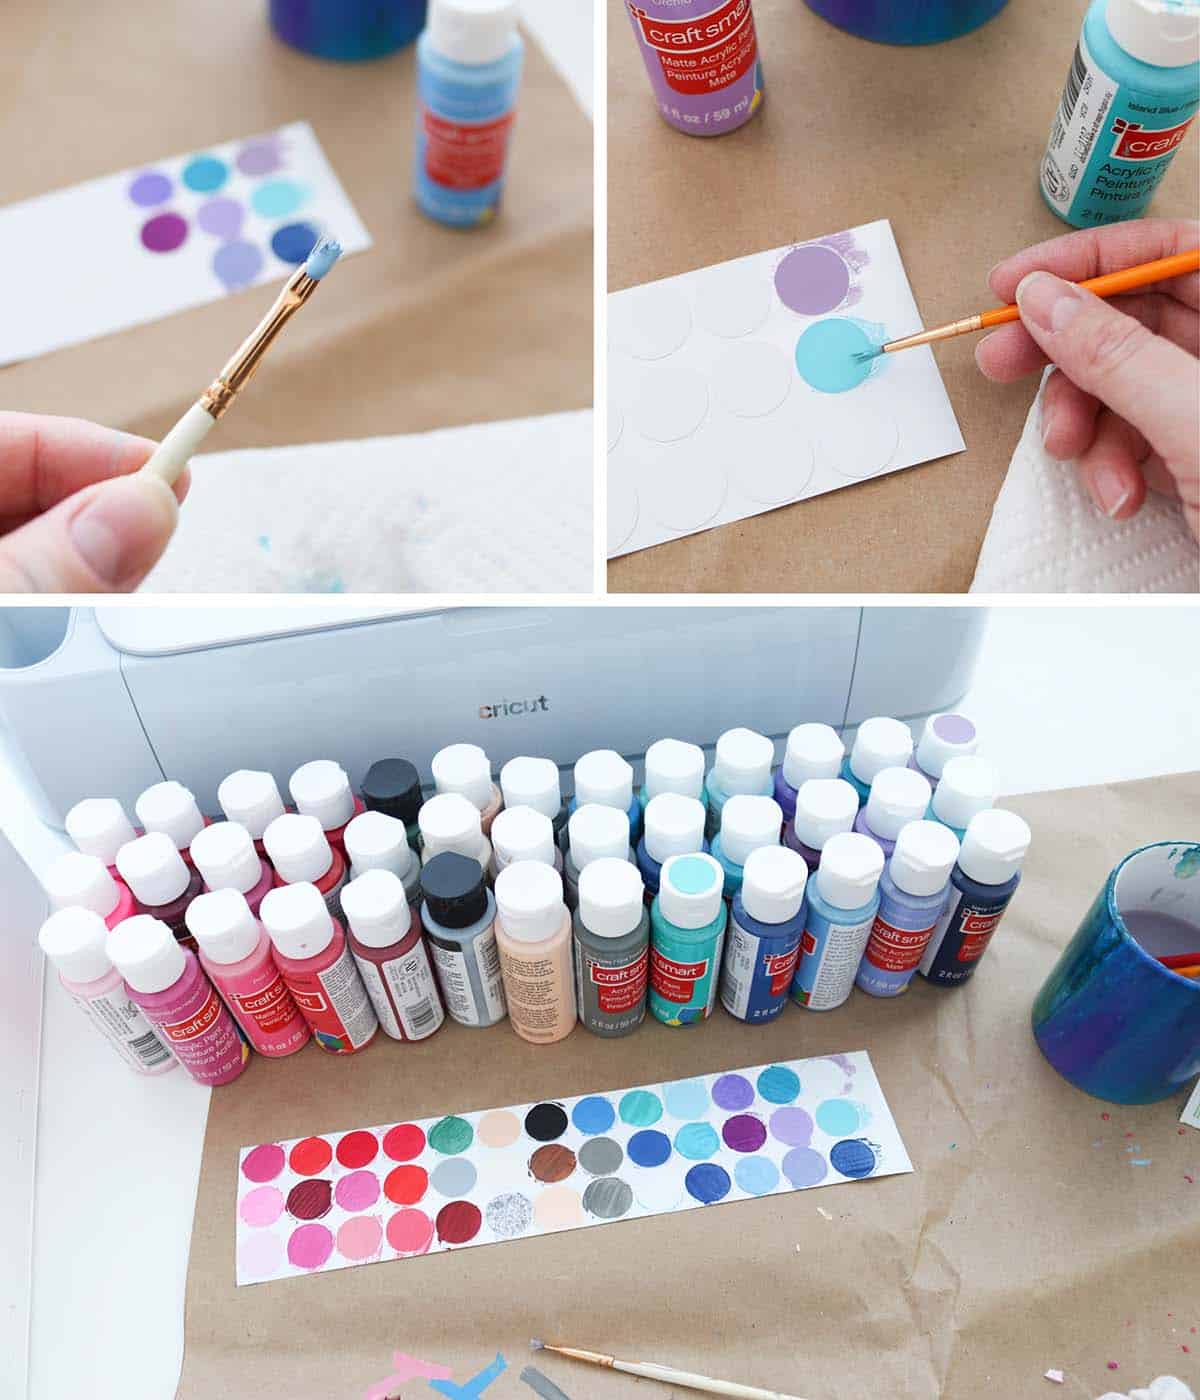
Paint your labels
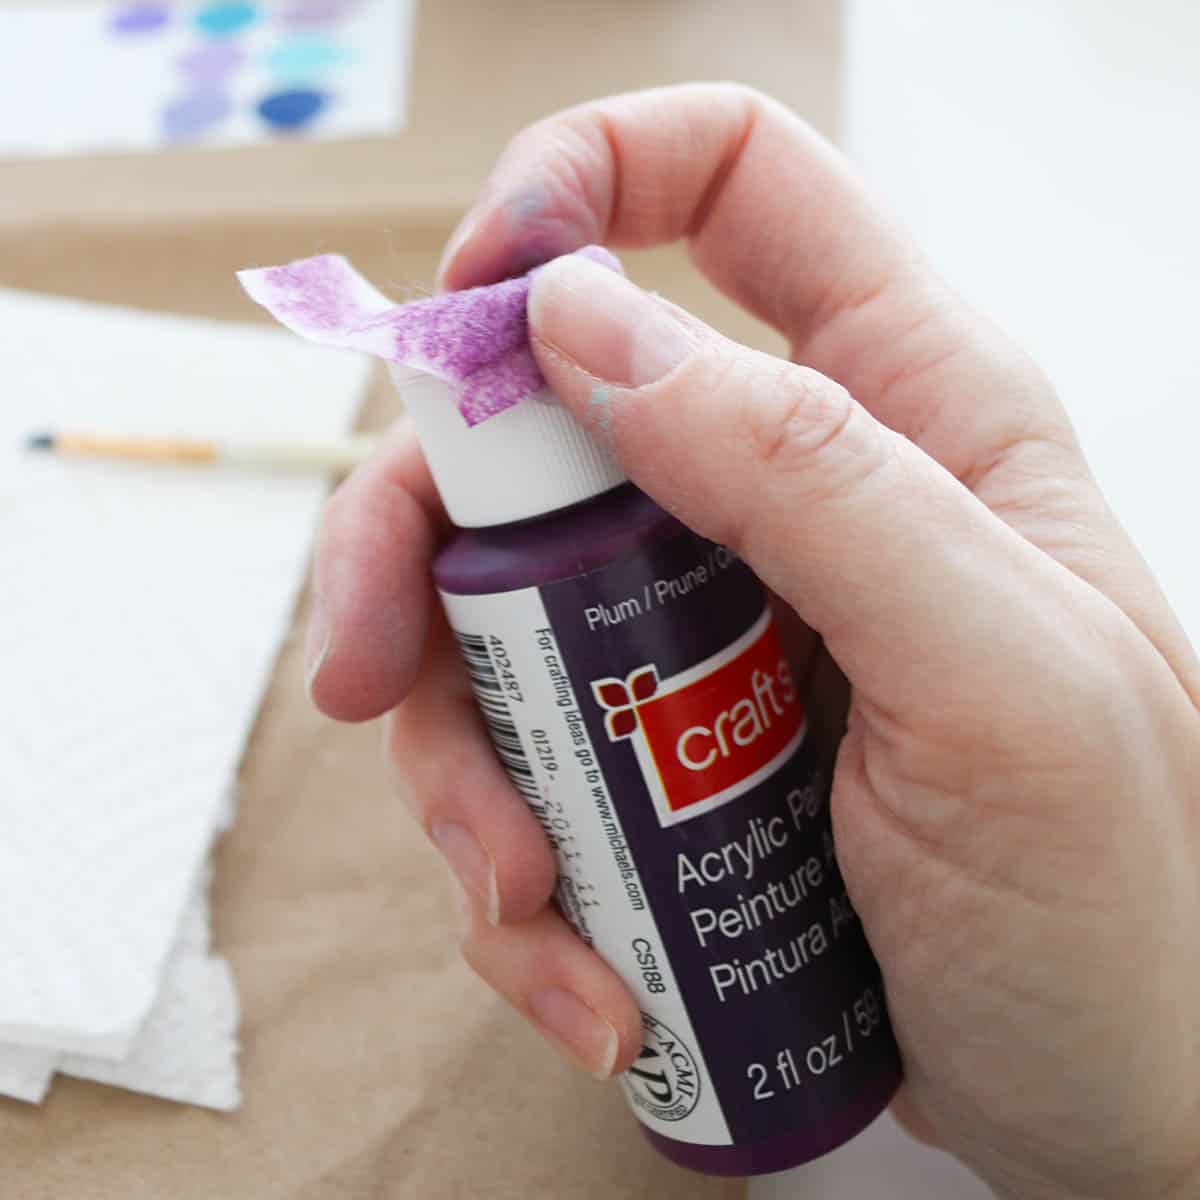
Now you’re ready to start painting the labels! For each paint bottle, squeeze a tiny dot of paint onto the tip of your paint brush (this is all the paint you’ll need for a little circle label!). Paint the circle and let dry, moving onto the next color.
As you’re working, arrange your paint bottles in the order of your labels so you know which label goes to which bottle.
prep your paint bottles for labels
This step may not apply to you, but if you’re like me and you did paint the tops previously, you’ll want to remove that paint before putting a label on. As scratched up as some of my tops were, I was surprised they were kind of tricky to remove. If your paint is stubborn like mine, you can soak the top with an alcohol wipe to get it going. Wipe as much as you can off with the wipe, then use a wet paper towel to finish removing the rest. Good as new!
Stick your labels on the tops of the paint bottles
Once the labels are dry (the first ones will be dry by the time you’re done painting all the rows), you can remove the outer cardstock material (it just makes it easier to pull the stickers up) and stick the labels to their corresponding bottles. Carefully center them and press down firmly to adhere.
And there you go! The easiest and most professional looking paint labels ever! (Not to mention accurate since you’re using the actual paint and it’s not a computer-generated color label like some craft paints come with).
DIY paint labels with Cricut
I hope this simple tutorial was helpful! Now go make some easy labels for your craft paints and enjoy your new organization!

Or, you could store your paint bottles bottom up and save yourself some time
You definitely could do that, Laura! The only reason I don’t is because I don’t want paint getting everywhere on the off chance that a lid isn’t on all the way. Also, once the paint bottle is nearing empty, the bottom won’t necessarily show the paint color.