Easy DIY St. Patrick’s Day Art
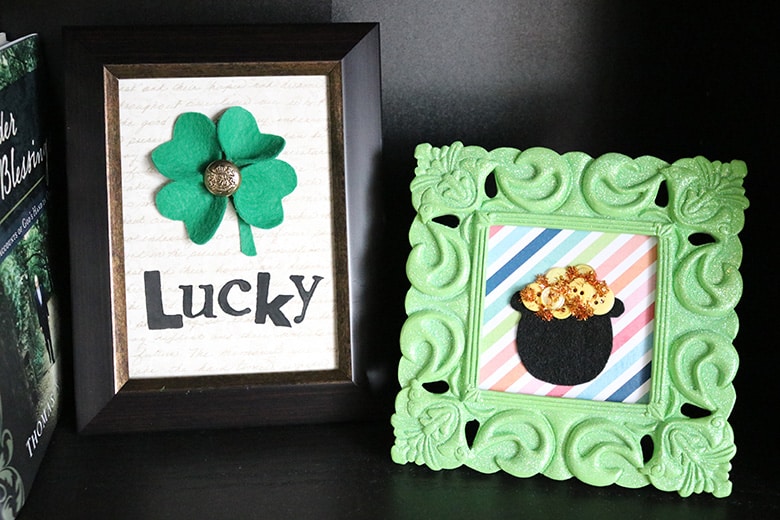
Make easy framed St. Patrick’s Day art with 3-D felt shamrocks and a glittery pot of gold buttons. Fun, unique decor pieces, perfect for a St. Patty’s Day mantel!
I’ve never been one to decorate for St. Patrick’s Day, but not because I haven’t wanted to. In fact, I would decorate for every single holiday if I could–and go all out, because holidays are the best! But I’ve had a hard time finding affordable St. Patty’s decor that I actually like.
So, naturally, it was time to make some of my own!
These little St. Patrick’s Day art pieces are super easy to make and are perfect for dressing up a bookshelf or mantel for the holiday! I love the pop of green color. Plus, they perfectly compliment my St. Patrick’s Day shamrock pillow!
This post contains affiliate links. For more information, see my disclosures here.
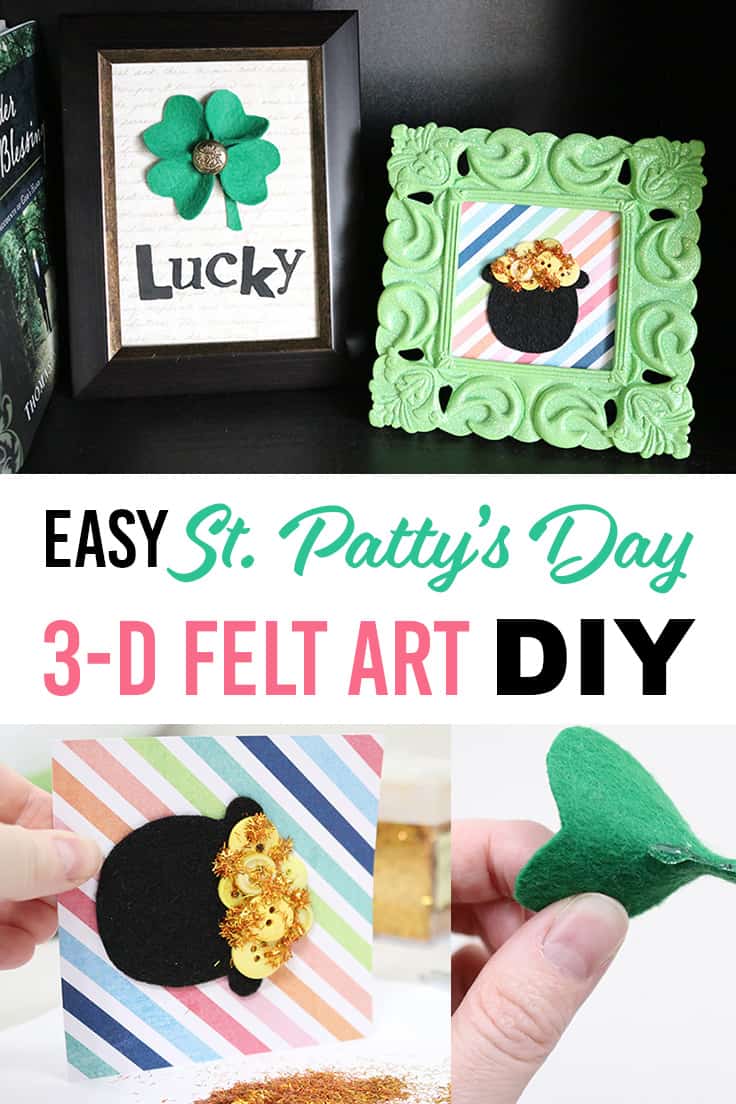
How to make an easy 3-D felt shamrock art piece for St. Patrick’s Day
Supplies Needed
- scrapbook paper
- letter stamps or stickers
- paint
- green felt
- sharp scissors (I love these scissors for detailed cutting!)
- hot glue
- vintage button
- picture frame
Steps
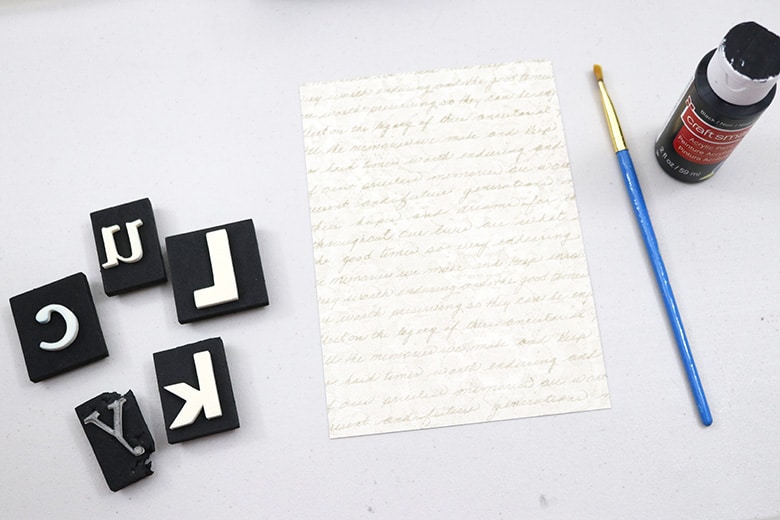
First, remove the glass from your picture frame as you won’t be needing it. Measure and cut your scrapbook paper to the size of your frame (and double check that it fits, because I ended up having to trim mine down just a little bit more).
(I highly recommend a paper cutter like this one!)
Next, stamp your phrase on your paper. I used foam stamps and paint for this, but you can also use letter stickers and save a few steps!
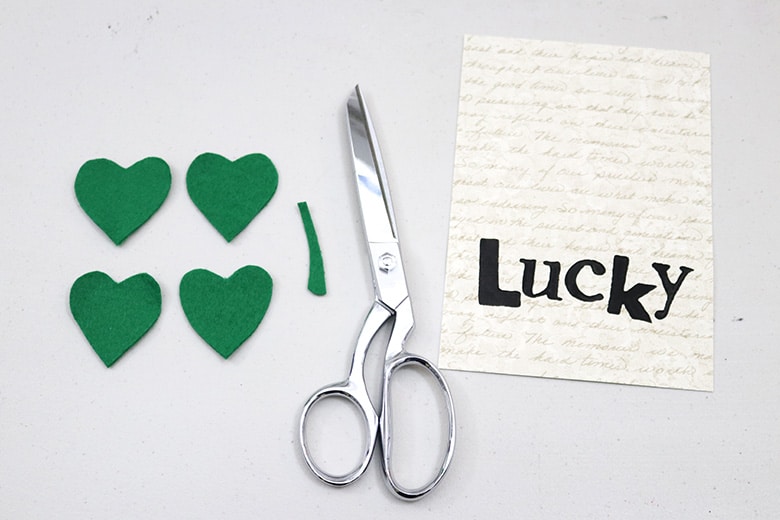
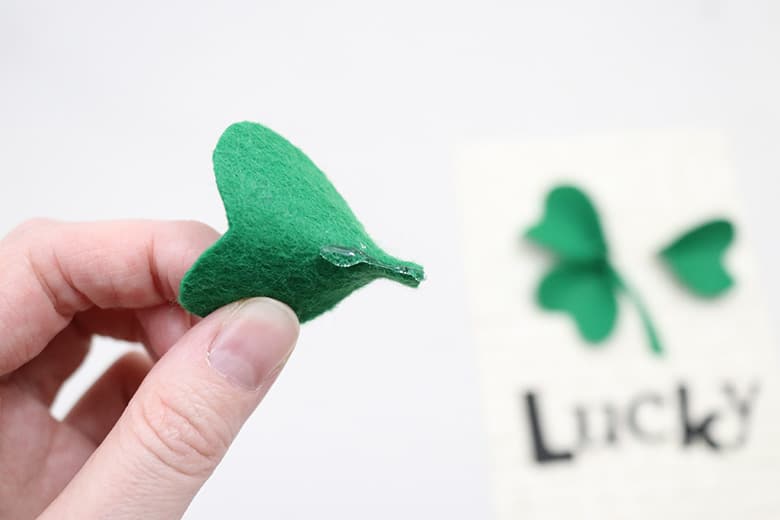
To make your shamrock shape, cut four hearts (petals) and one stem from green felt. I simply free-handed these, but you’re welcome to print an actual shamrock to copy and trace.
(Use these scissors for even betting precision cutting!)
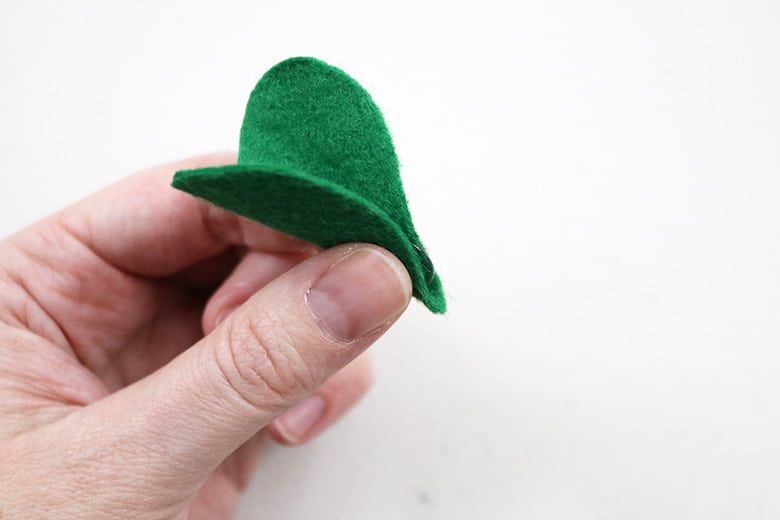
To give the petals a 3-D shape, fold and glue at the base as shown below, using a small dot of hot glue.
If you accidentally use too much glue and make a mess…because I may have done that…just wait for the glue to dry and trim off the excess with craft scissors.
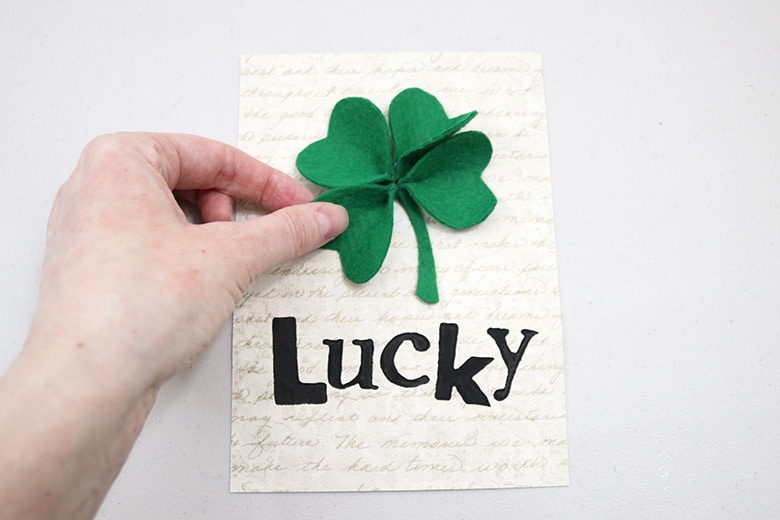
Next, arrange the hearts and stem on your paper where you would like them.
Glue the stem down (either with hot glue or something like this).
Glue each of the hearts down, using a small strip of hot glue on the back of each. Remember, you want this to be 3-D, so you don’t want to completely flatten the hearts!
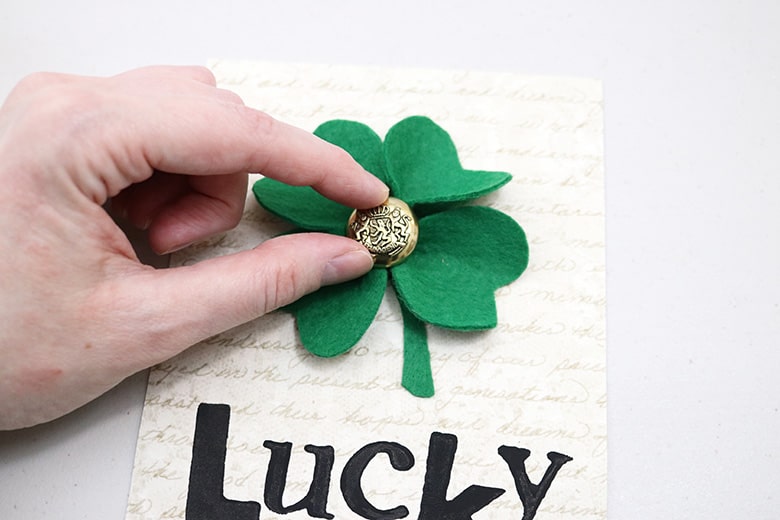
Finish your art piece by hot-gluing a vintage button (or any button you have on hand!) in the center of the shamrock.
How easy and fun was that?! Simply frame your picture and display!
Here’s my framed shamrock picture next to my majestic garden gnome on my mantel:
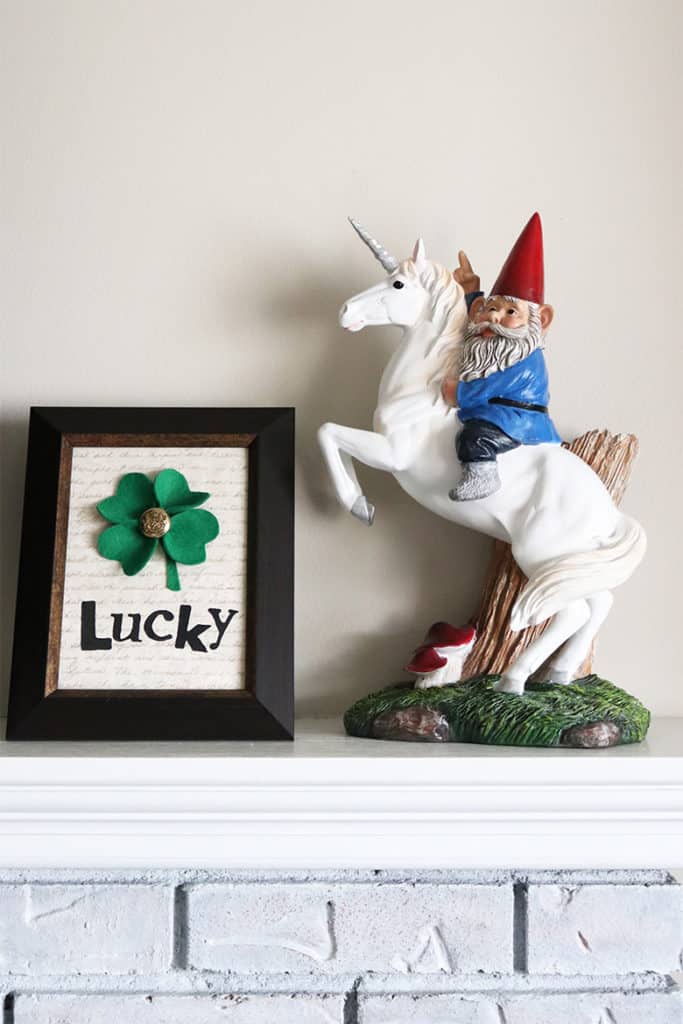
I know you’re jealous of my gnome on a unicorn, so you can get your own here! Hands down my favorite item on my Amazon wedding registry!
Keep reading for the next easy art tutorial!
How to make an easy pot of gold art picture for St. Patrick’s Day
Supplies Needed
- scrapbook paper
- black felt
- yellow buttons
- gold or yellow glitter
- hot glue
- picture frame
Steps
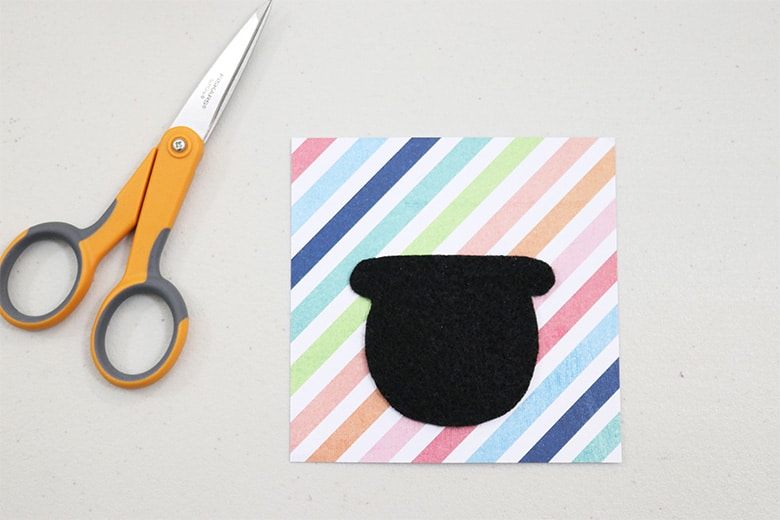
Cut your scrapbook paper to fit your picture frame.
Cut a “pot of gold” from black felt–again, I just free-handed mine. Glue to the paper with hot glue.
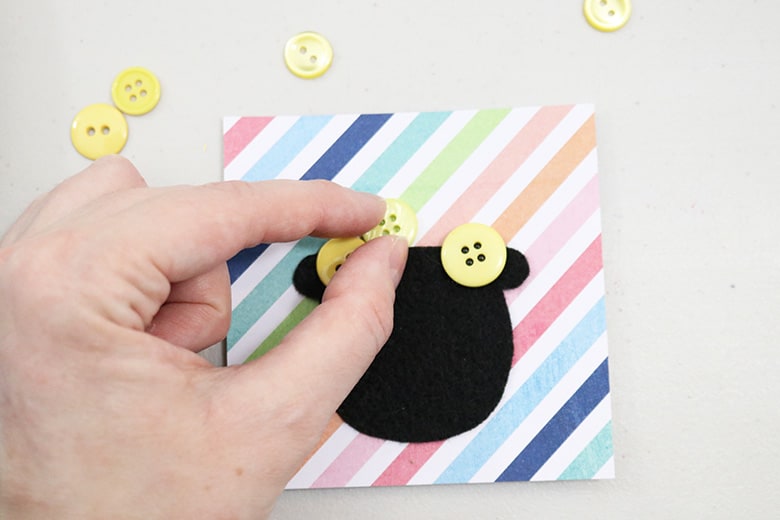
Hot glue yellow buttons to the pot to make the “gold.”
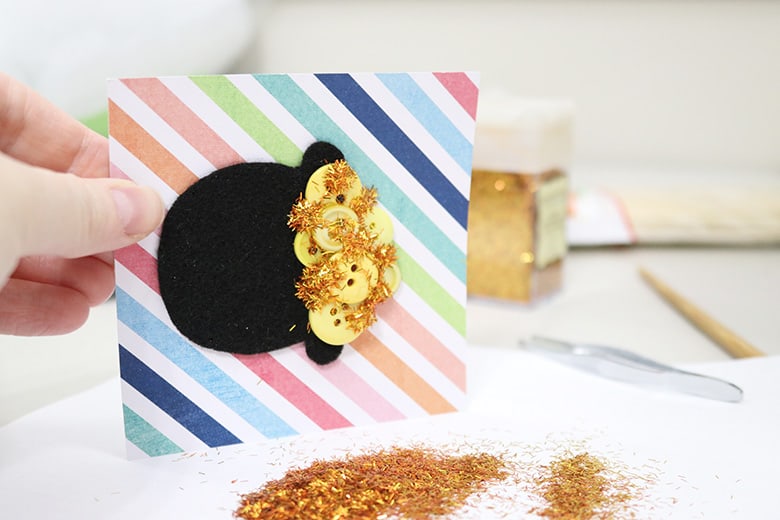
If you want to add glitter, do this after all the buttons are glued down.
Using the hot glue gun, make dots of hot glue across the top of the buttons, and then quickly shake glitter over the top of the glue.
Note: to make it easier to shake off the glitter after, try your best not to dump glitter directly on the black felt! I use a small pair of tweezers to pick out what I can’t brush or shake off.
Obviously, you could also use regular glitter glue to get the “shimmery pot of gold” look (I’m just too impatient for any kind of drying time).
Or just use glitter buttons to begin with!
However you end up making this, I am all about using what you already have on hand and making it work!
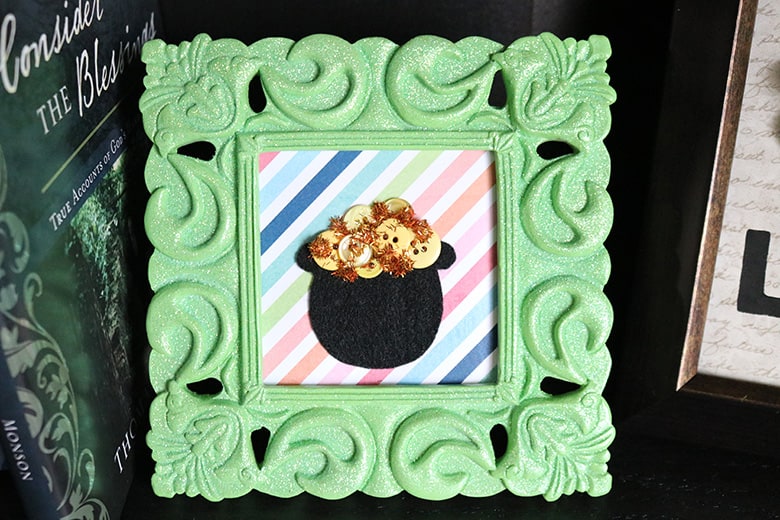
I love how this little “pot of gold” turned out! See, DIY holiday art doesn’t have to be expensive or complicated!
Hopefully this has inspired you to go out and make your own easy DIY St. Patrick’s Day art (or shop for some!). Let me know how you’re decorating for St. Patrick’s Day in the comments below! I’d love to see what you’re making!

Don’t forget to pin and save for later!
I love that you decorate with a garden gnome!!!
I love it! (my husband doesn’t…) And I have the gnome you gave me on one of those bookshelves right now, too!