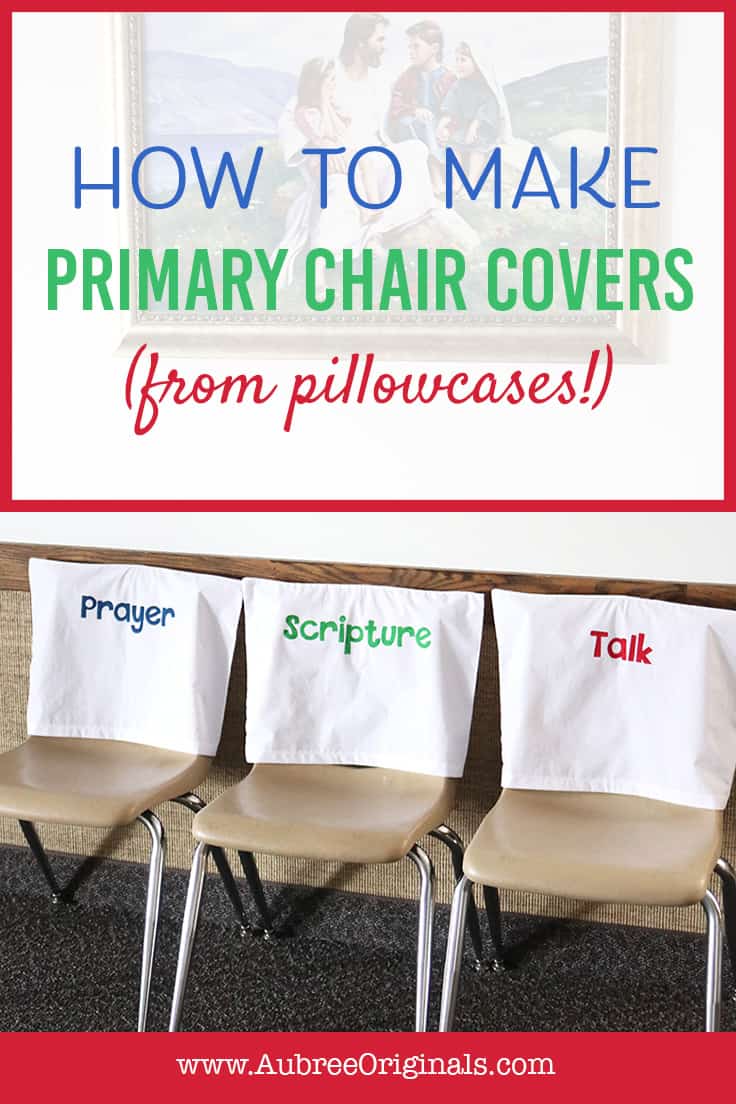
How to Make Primary Chair Covers (from pillowcases!)
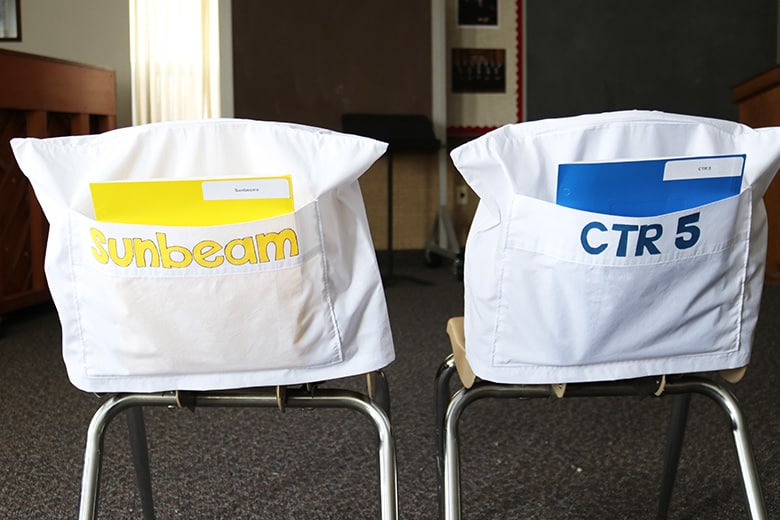
These chair covers made from pillowcases were the perfect way to start off the new year in our ward’s primary! Having a built-in pocket for each class to put the rolls in has been super handy.
I was recently put into my ward’s primary presidency, and I’m loving it! (You can learn more about The Church of Jesus Christ of Latter-day Saints primary organization here.)
I made these chair covers this last week as a solution to two things: 1, we needed a better/easier way to keep track of the attendance rolls for each class. And 2, we needed some sort of chair sign to indicate where the classes would be sitting in opening exercises for the new year.
These chair covers turned out perfect–and they’re making our lives as a presidency so much easier!
I’ll be honest…they’re a little time-consuming when you have to make one for each primary class. But…it’s a one-time project, and then you’ll have them for years to come! So I think it’s definitely worth the time!
This post contains affiliate links. For more information, see my disclosures here.
The easiest way to make chair covers with pockets
Want to know the secret? Pillowcases! One of the ladies in my presidency had a value pack of inexpensive pillowcases that she donated for this project. The fact that I simply had to cut them to size and sew one seam made this go so much faster!
Also, the leftover pillowcase fabric was perfect for the pockets. And, again, having one edge already finished was so helpful!
I was in such a rush to get these all sewn in time for church on Sunday that I didn’t grab pictures of this part, but I’ll do my best to explain. Leave me any questions in the comments, though!
How to turn a pillowcase into a chair cover with a pocket
Determine your chair cover measurements
First, measure your chair back. I took my measuring tape over to the church one night to do this (the perks of also being an organist and having church keys).
After measuring, I knew I wanted each chair cover to be about 13.5″ in height.
For the width of the chairs covers, I decided it would be fine to leave the pillowcases as is and not worry about fitting them perfectly to the chairs.
I made the following diagram to help you visualize this next part.
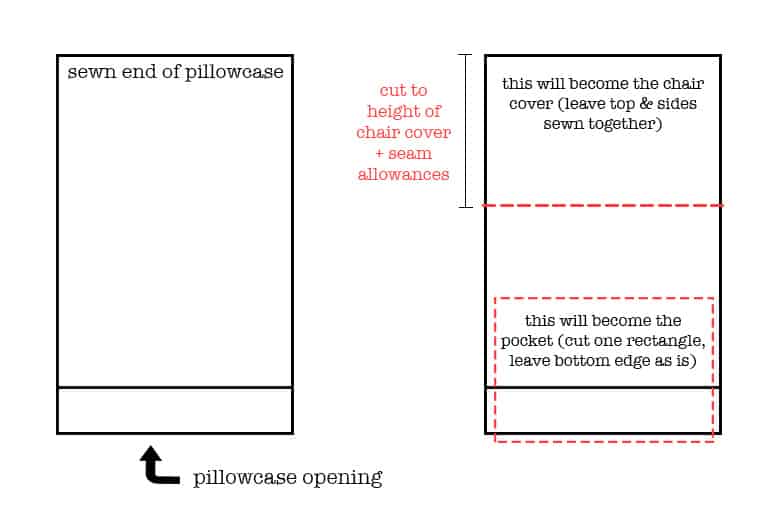
The pillowcases were about twice as long as I needed them to be, which was perfect. I decided to make the chair covers out of the top of the pillowcase. That way, I’d only need to finish the bottom edge of the chair cover.
Because I wanted 13.5″ chair covers and I needed a little extra length to serge and turn under the bottom edge, I needed to cut this top part at 15″.
Determine your pocket measurements
Use your attendance roll folders as a guide for how big to make the pocket. Then, add enough extra length and width to serge the three unfinished edges and turn them under.
Don’t worry, there’s no “perfect” pocket size, just as long as your folder fits inside!
The cut dimensions I used for the pockets were 15″ x 10.5″. If you look at the diagram again, you’ll cut this from the bottom of the pillowcase (where it opens).
Cut your chair cover and pocket from the pillowcase
Using the measurements you determined above, cut your chair cover from the top of the pillowcase. To get a straight cut, I used my cutting mat, Omnigrid ruler, and rotary cutter. I highly recommend investing in these if you don’t have some already!
From the remaining pillowcase, cut a rectangle pocket piece measuring 15″ x 10.5″, keeping the bottom finished edge intact. If it’s easier, you can cut the pillowcase by the side seam before you cut the rectangle. Again, use the cutting mat, ruler, and rotary cutter for the straightest cuts!
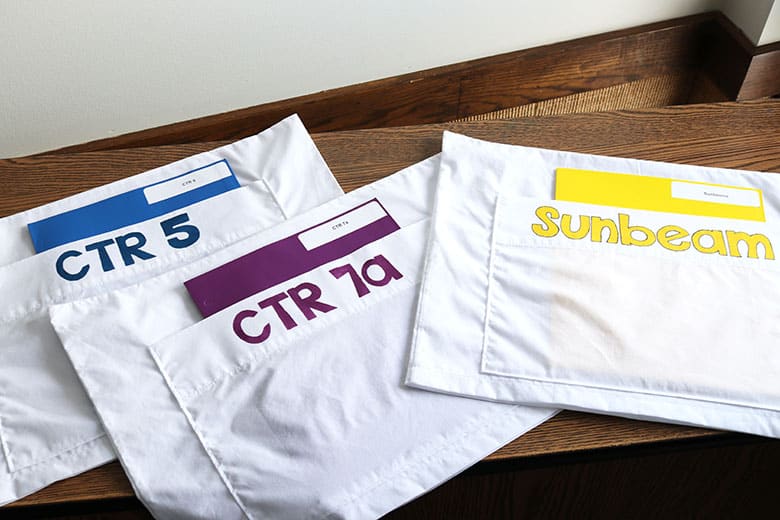
Note: Now is the best time to add any details to your pockets, before you sew them to the chair covers. This is when I made freezer paper stencils and painted the class names on. Of course, if I had a vinyl cutting machine, I totally would have done that instead. One day I’ll get a Cricut Maker and projects like these will be so much easier! But until then…paint works great!
See my freezer paper stencil tutorial here.
Serge and finish your edges
Serge or zigzag the bottom edge of the chair cover. Using a seam gauge, turn under the edge about 1″ (so your chair cover is now the desired height), press, and stitch a straight line all the way around. (Of course, any way you want to hem or finish this edge is perfectly fine!)
Serge each unfinished pocket edge. Turn the serged edges under 1/4″ and press.
Sew your pockets to the chair covers
Finally, sew the pockets on to finish the chair covers.
Using a seam gauge again, position the pockets so they are centered on the chair cover. (I decided to make the finished edge–the edge that was originally the bottom opening of the pillowcase–the top edge of the pocket.) Pin in place. Sew around the sides and bottom, securing the pocket to the chair cover.
Yay! Finally done! Don’t they look so good?!
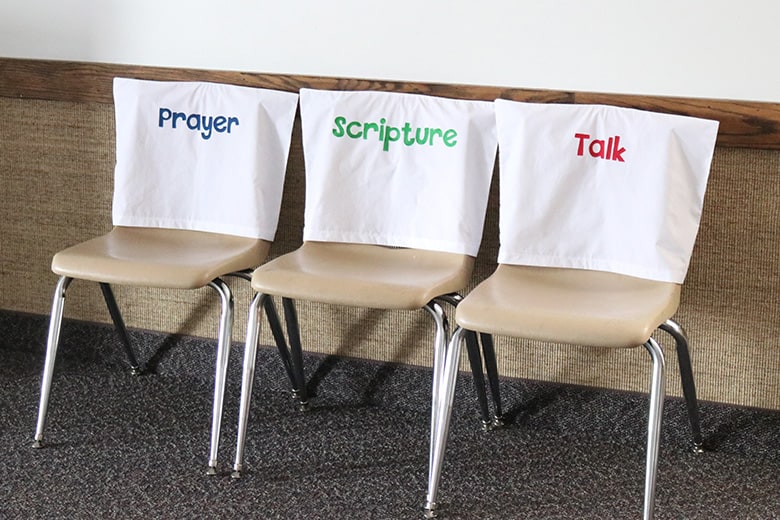
These were totally worth the time it took to make them. We love them in our primary room!
Let me know if you have any questions about this tutorial in the comments below. And, if you end up making your own chair covers–whether for a primary, a classroom, or anywhere else–I definitely recommend starting with a pillowcase!

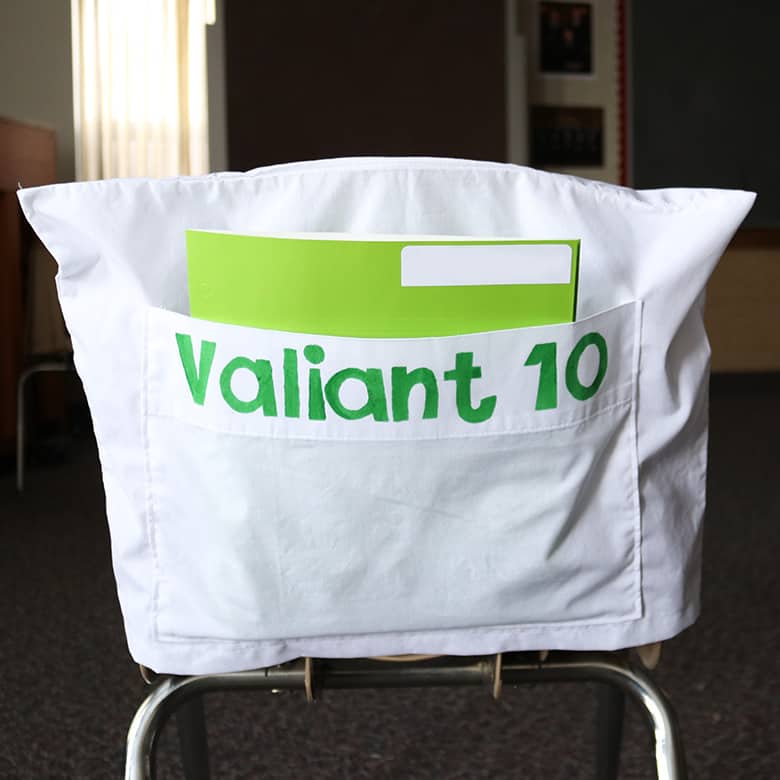
Can you post a picture of your valiant classes?? I can’t decide if I should spell it out or shorten it.
Hi Samantha! Sorry for my delay, I’ve updated the post with a picture. I spelled out Valiant but you could also abbreviate if that fits better for you. Either way is great. 🙂 Let me know if you need anything else!
What size pillowcases did you use to make these?
Hi Rachel, these were standard pillowcases, so about 20 inches by 26 inches (or just slightly smaller than that). Chair covers could be made from any size pillowcase, I’d just make sure it slips over your chair easily before using them. I do think you’ll waste less material by going with a standard pillowcase, though. 🙂