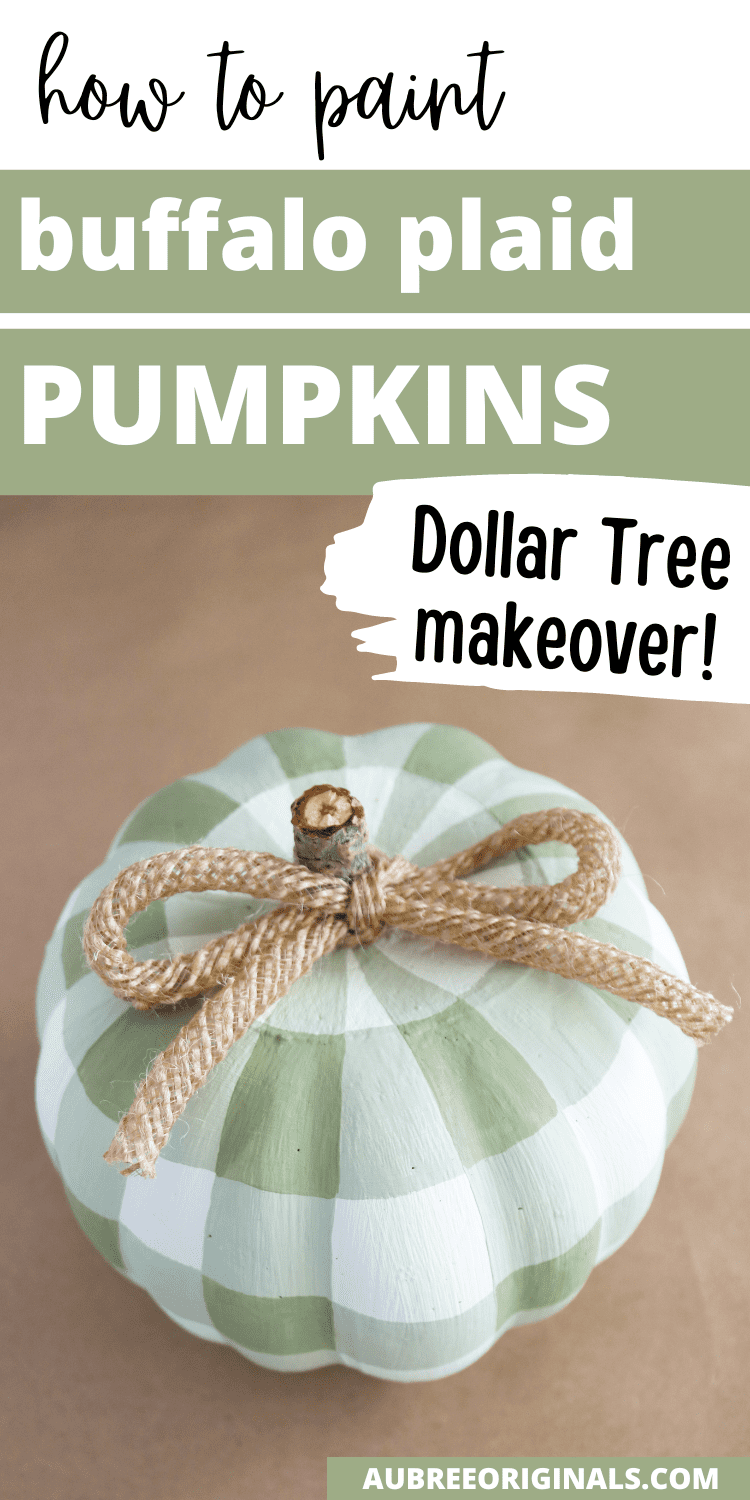
How to Paint Buffalo Plaid Dollar Tree Foam Pumpkins
Turn tacky dollar store pumpkins into cute fall decorations! How to paint buffalo check pumpkins step by step!
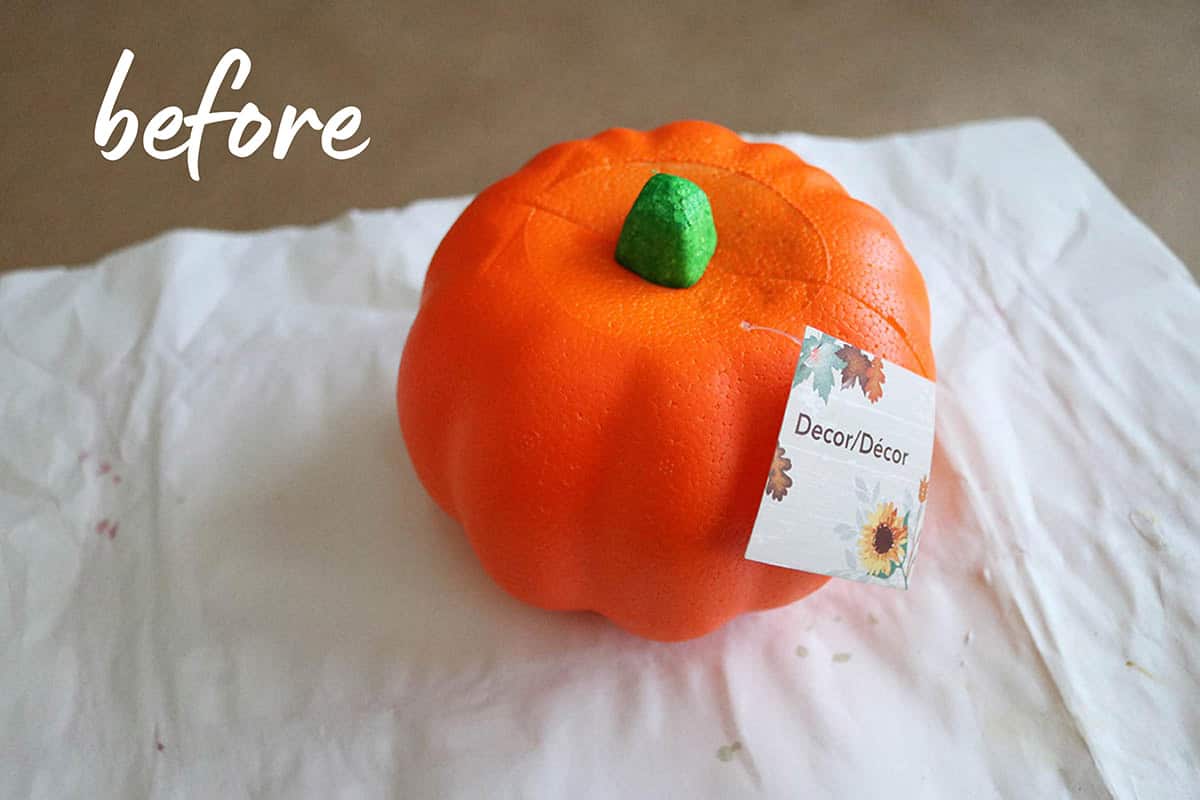
I used to always bypass those bright orange foam pumpkins at Dollar Tree because they were just so ugly! But then I realized they can be transformed into beautiful fall decorations with a little paint and love.
These buffalo plaid pumpkins are so fun and easily customizable with any color to match your fall decor! Finish it off with a stem and some decoration and you wouldn’t even know this pumpkin is made of styrofoam!
This post contains affiliate links. For more information, see my disclosures here.
More pumpkin crafts you’ll love
DIY Chalk Painted Dollar Tree Pumpkins
What do you need to paint Dollar Tree pumpkins?
To make these buffalo plaid foam pumpkins, you will need:
- a foam pumpkin from Dollar Tree
- white chalk paint: this is the paint I used (and it’s going to last me for many more projects!)
- acrylic craft paint in a color of your choice (I chose a dark olive green for my pumpkin—note that the finished color is going to be lighter)
- something for a stem: I found a stick outside in my yard that was the perfect thickness, but you could also use a cinnamon stick or a wooden dowel
- hot glue
- ribbon or mesh tubing (I always stock up on the burlap mesh tubing from Dollar Tree when they get it in stock—it’s only available in the fall!)
What do you do with dollar tree foam pumpkins?
Paint them! Decorate them! Cover them with fabric! So many options, but definitely do something with them because they’re pretty tacky-looking the way they come from the store.
What is the best paint for foam pumpkins?
Chalk paint is my favorite paint for covering foam pumpkins (and covering up that ugly orange that they usually come in!). Chalk paint adheres really well, allows you to layer multiple coats on, and gives you a nice matte finish. If you choose to use acrylic craft paints, I’d recommend a base layer of chalk paint first or tinting chalk paint with the acrylic paint.
Though I haven’t tried it yet, I’m sure you could also spray paint foam pumpkins with good results, but that doesn’t really work for this tutorial since we’ll be hand-painting the buffalo check pattern.
How to make your own chalk paint by tinting it
This is one of my favorite tricks to getting all sorts of shades of pastel chalk paint but for way cheaper than buying them each individually: buy a can of white chalk paint and tint it with acrylic craft paint! I used this trick in my other Dollar Tree mini pumpkin makeover and the colors turned out gorgeous!
How to paint buffalo plaid on a foam pumpkin
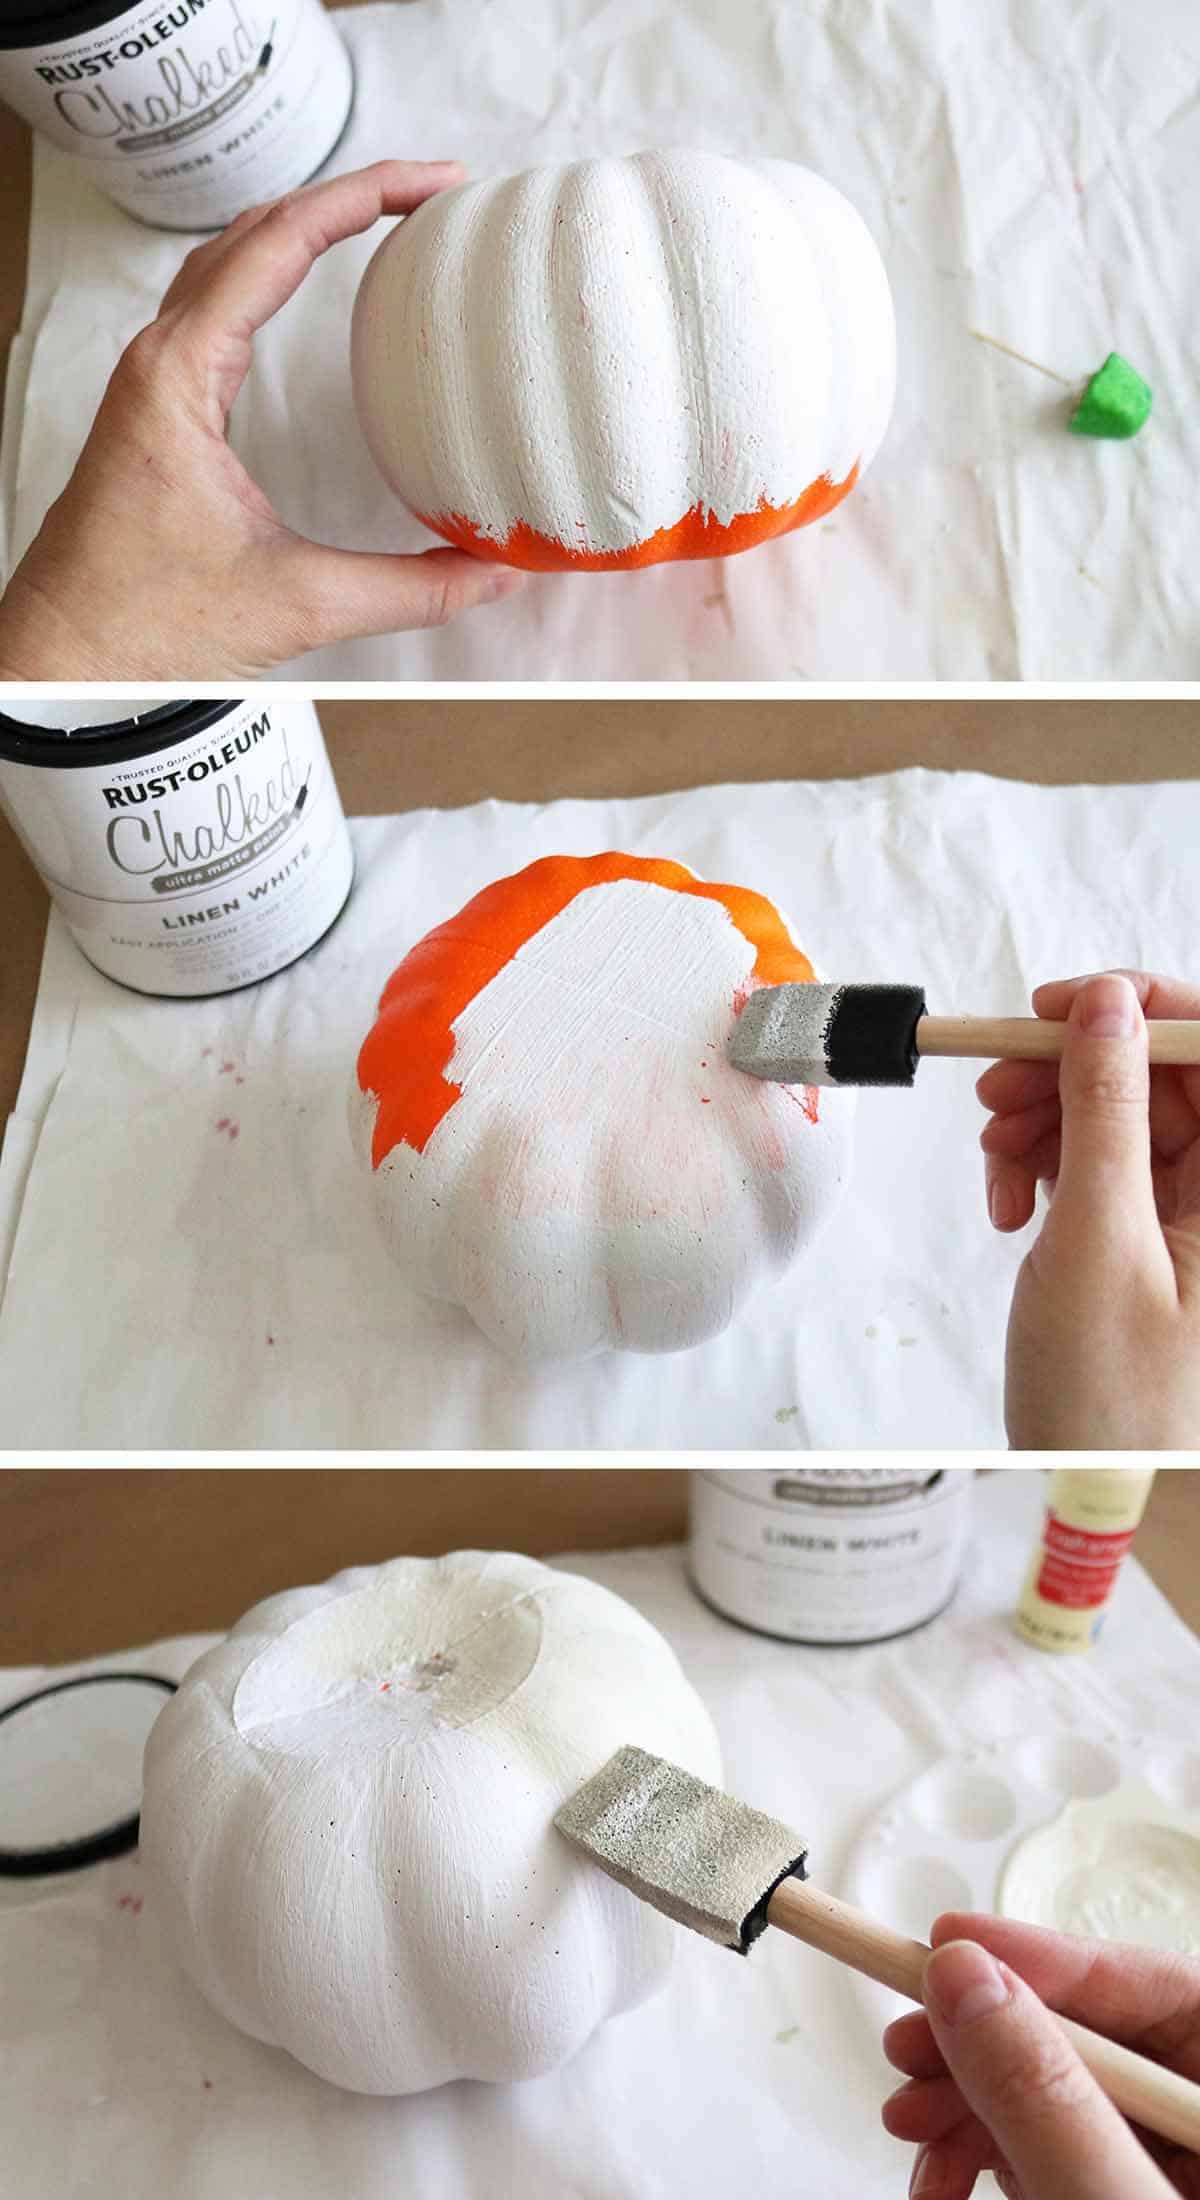
1. Paint the pumpkin white or cream
First, remove the stem (it’s most likely stuck in with a little toothpick and it should twist right out when you pull it). Throw the stem away because it’s dorky looking and there’s way better options for stems. I’ll tell you how I really feel.
Paint the pumpkin in the lightest color first (white or cream). I painted a coat of white chalk paint but decided it was too bright, so I added a second coat of chalk paint tinted with some yellow craft paint. Let the paint dry completely before moving on.
2. Paint three horizontal stripes on the pumpkin
Tint some chalk paint with acrylic paint to create a light shade of whatever your main pumpkin color is (for me, green). Paint three horizontal stripes, starting at the top (I used the pumpkin’s ring marking as a guide). Paint the second stripe in the middle of the pumpkin and the third stripe close to the bottom.
I used a wide paint brush to get most of the color on in one motion, then a detail paint brush to clean up the edges after. It’s not going to be perfect and that’s okay! Just do your best to keep the lines as straight as possible.
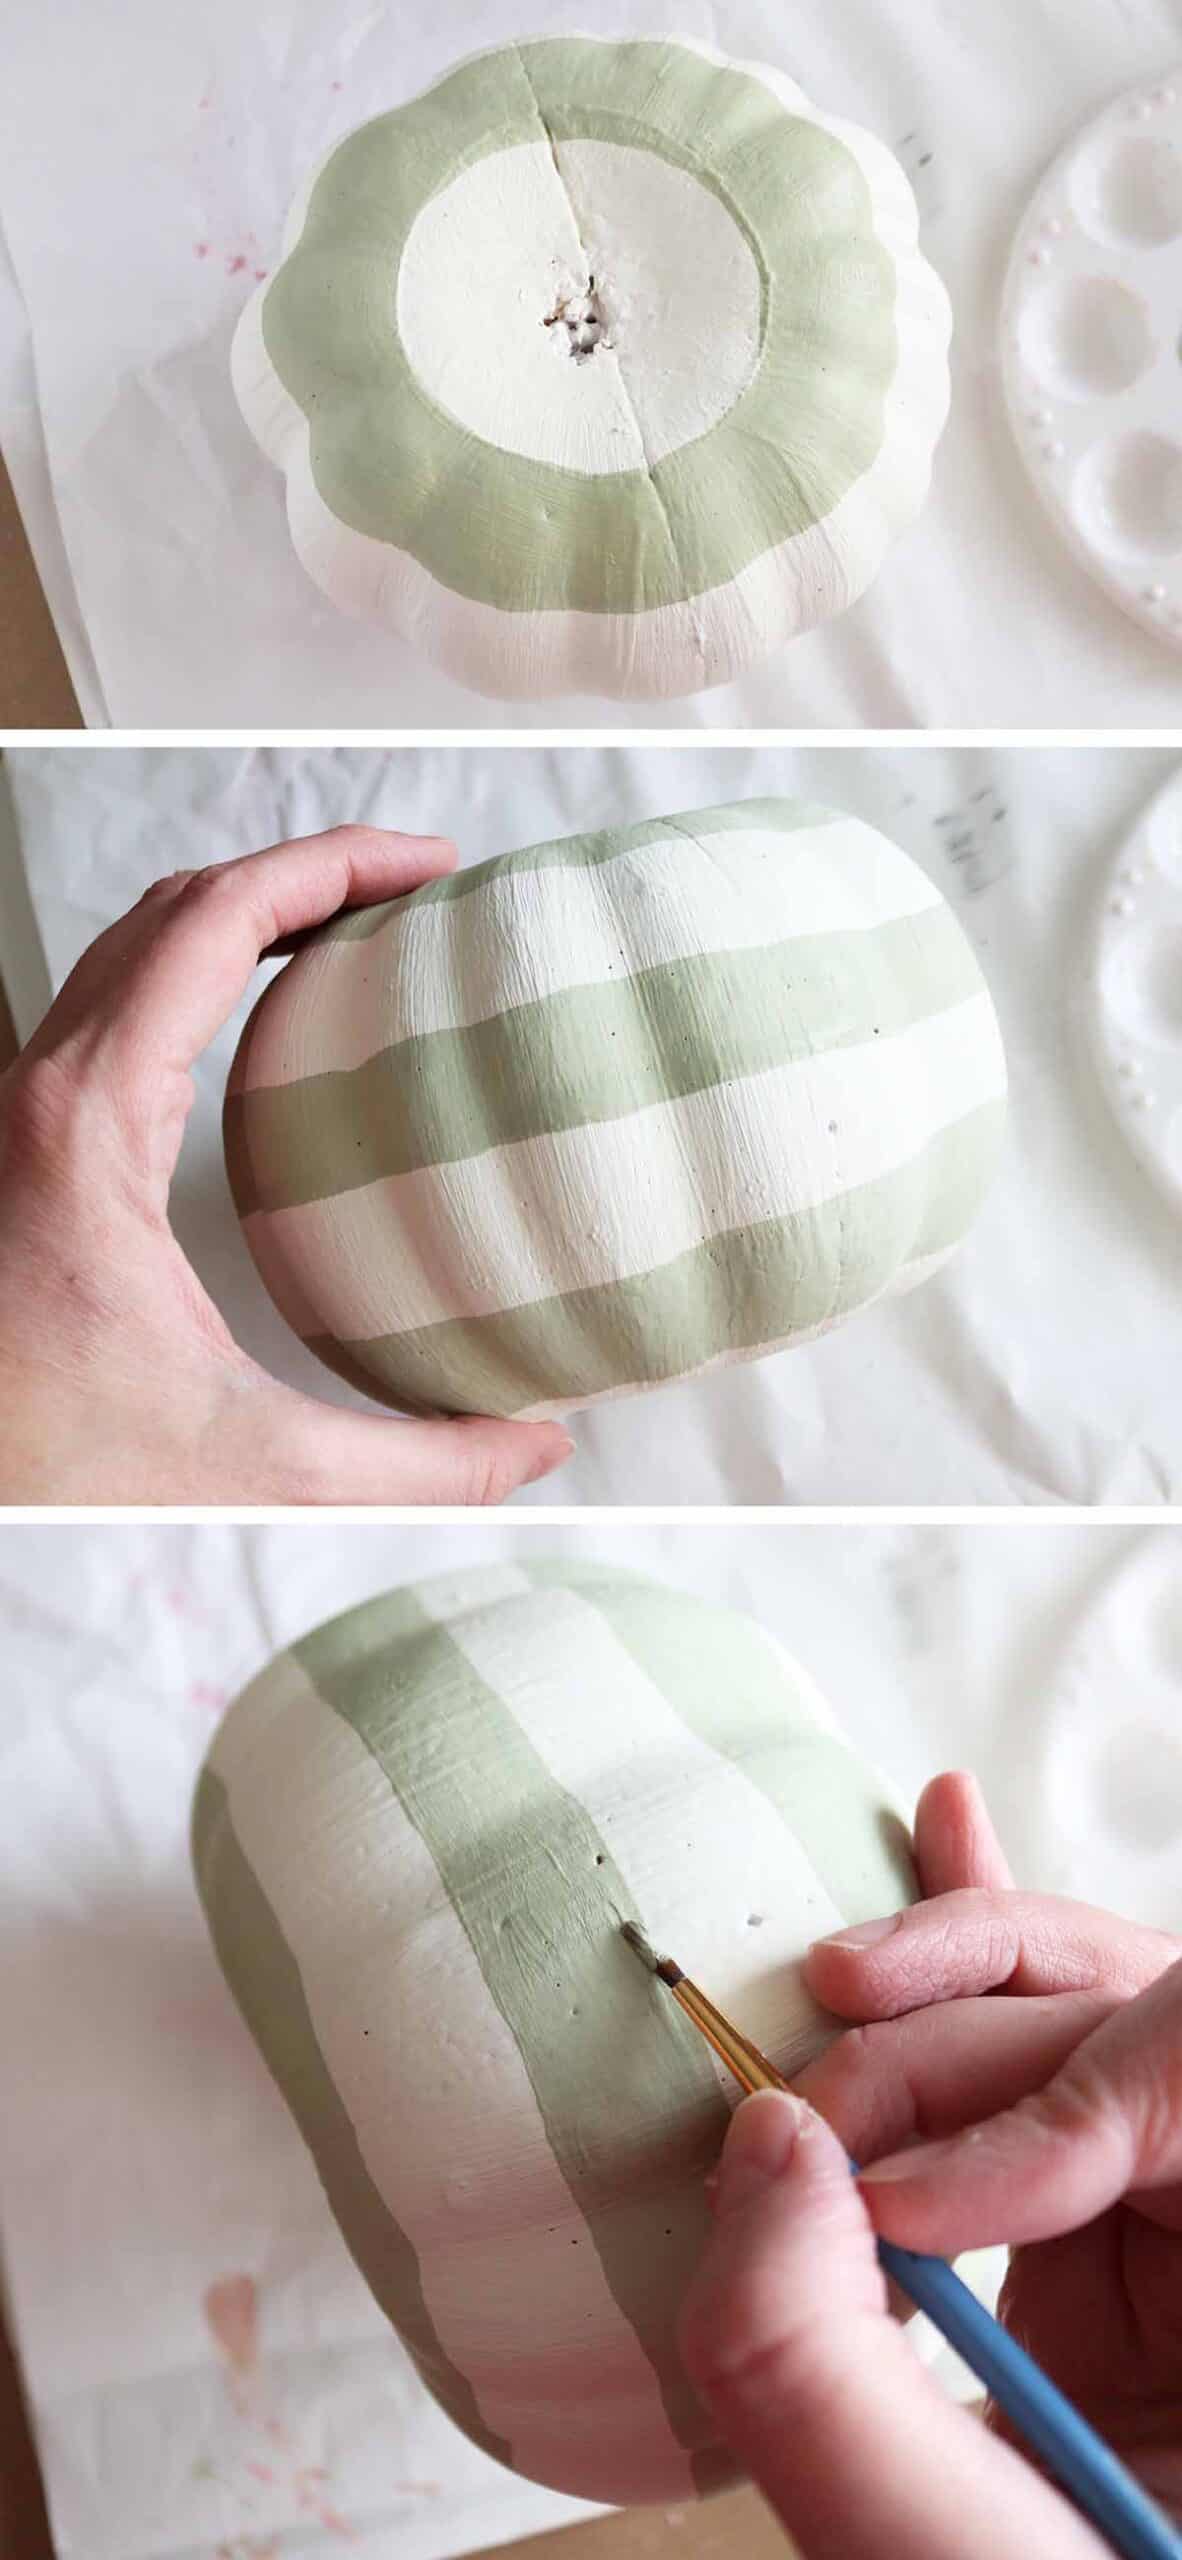
3. Paint vertical stripes on the pumpkin
With the same paint color, paint vertical stripes on the pumpkin on every other “groove” of the pumpkin.
When you get to the top, paint a triangle to the center.
When you get to the bottom, you can either finish it how I did (continuing the stripes just enough so that the pattern looks continuous when the pumpkin is sitting on a flat surface) or you can keep going with the buffalo check pattern until you get to the center of the bottom (so, taper your stripes so they eventually make a triangle shape at the center, like how you did on the top of the pumpkin).
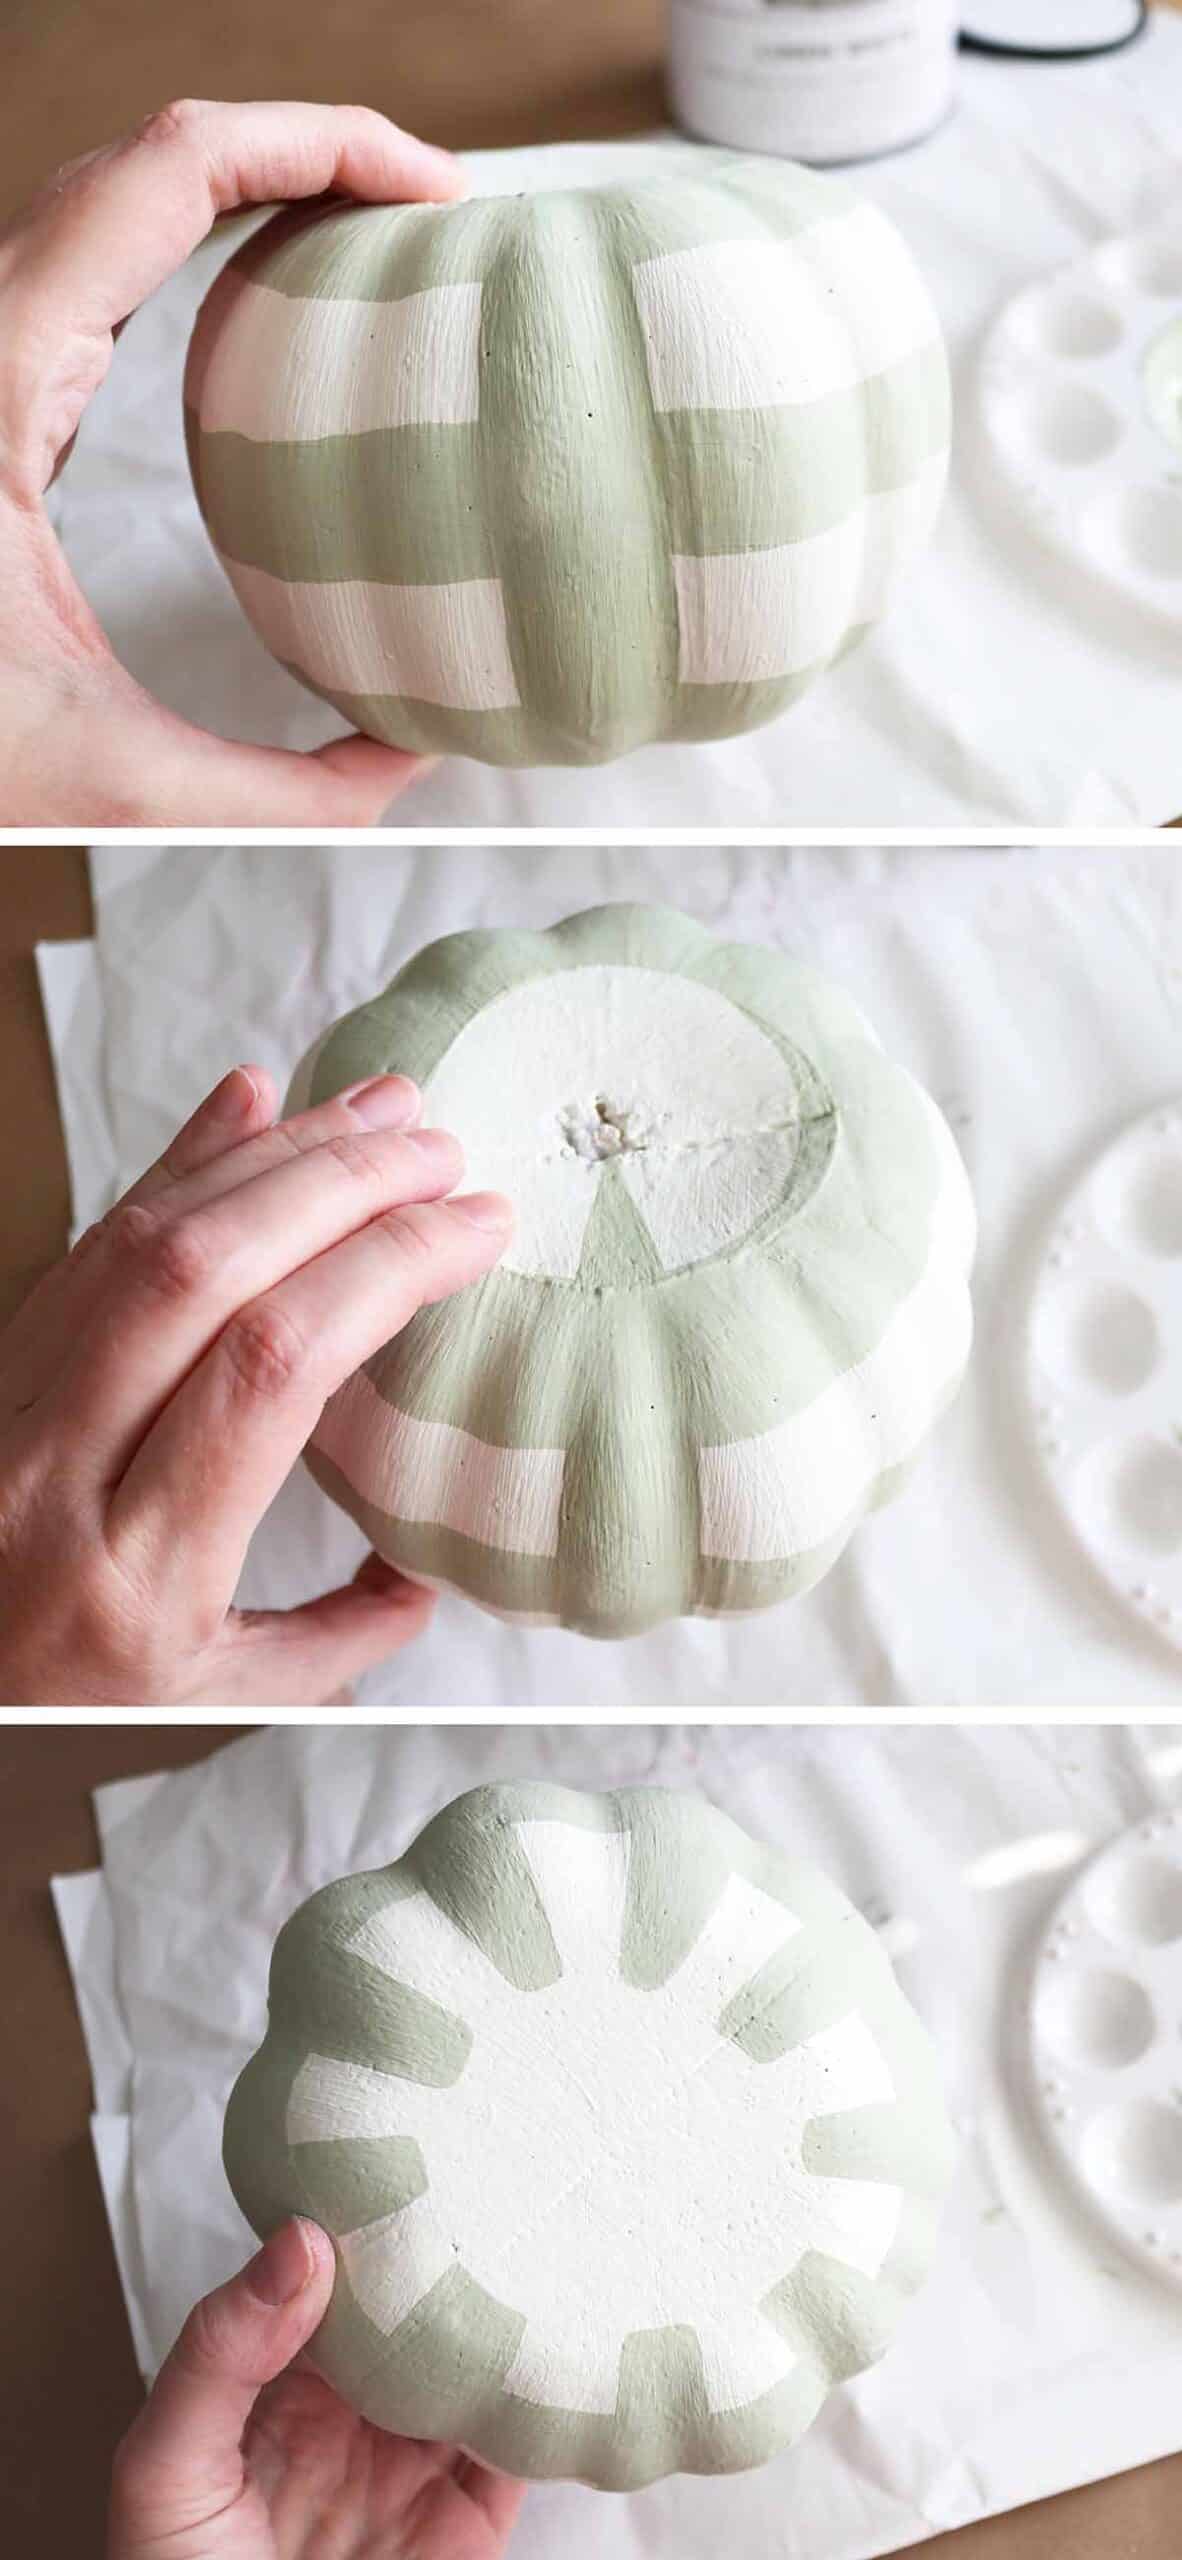
I think part of the reason I skipped painting the entire bottom (aside from laziness 😂) was that it gave me a dry spot to rest the pumpkin—balancing the pumpkin on a paint bottle worked great! Once you’ve finished the stripes, let the paint dry again.

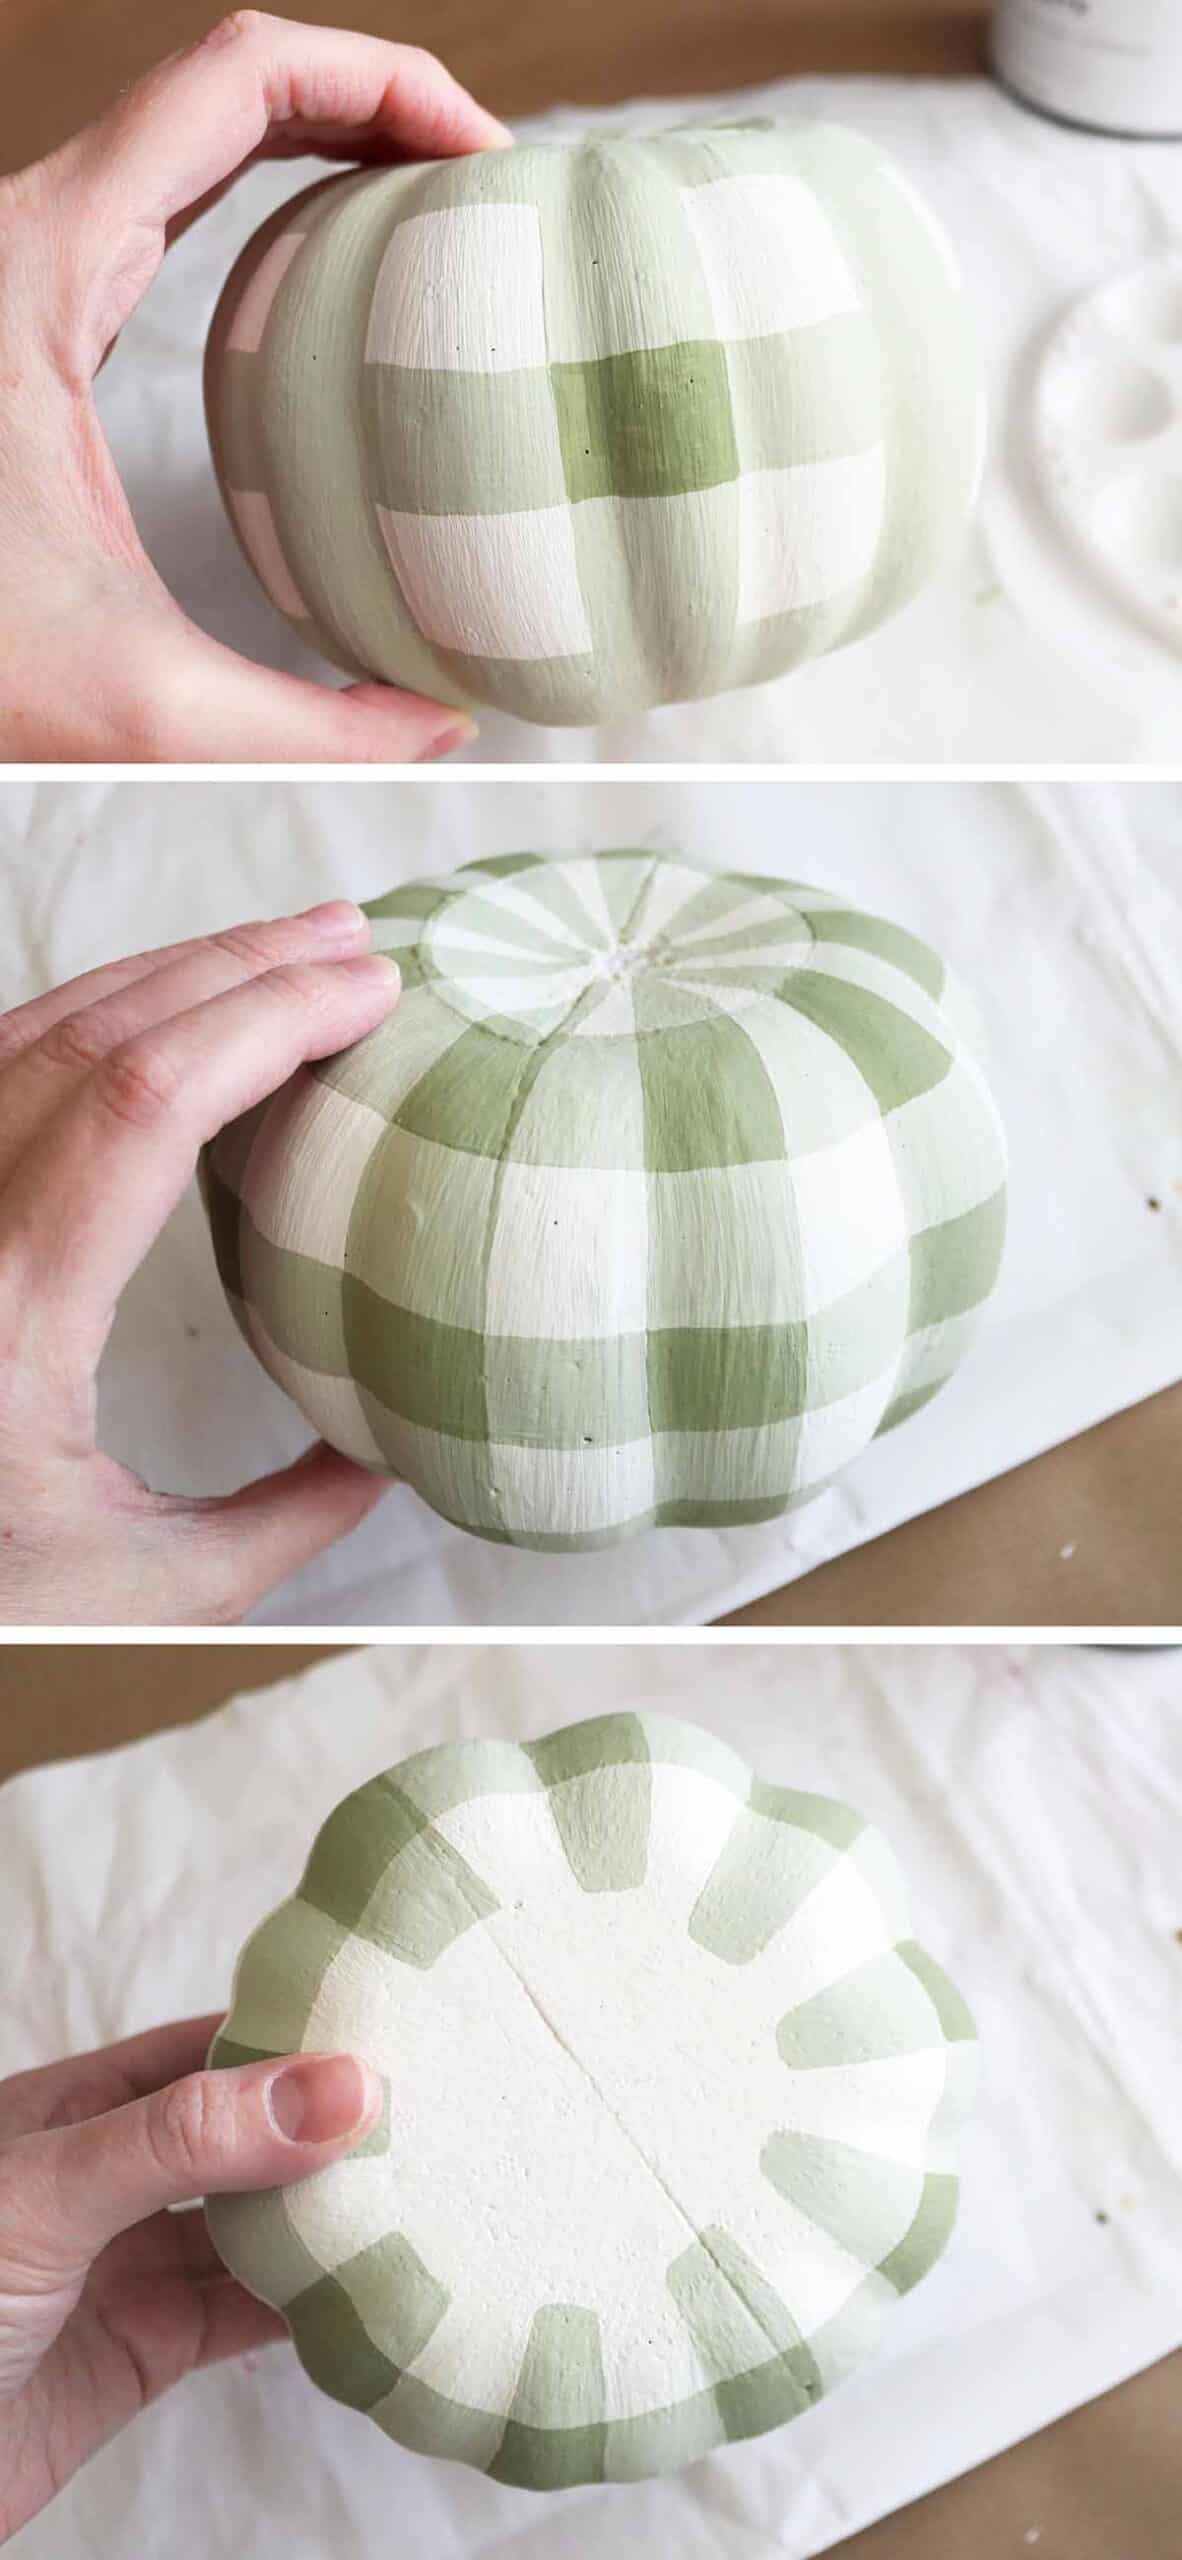
4. Paint darker squares where the horizontal and vertical lines intersect
Tint some more chalk paint with the same color of acrylic paint (green for me) but add more acrylic paint this time to make it darker. Or, if you have leftover tinted paint from the previous steps, simply add some more acrylic paint to darken it.
Paint squares where the horizontal and vertical lines intersect.
Again, I left the bottom mostly unfinished but feel free to continue the buffalo plaid pattern underneath.
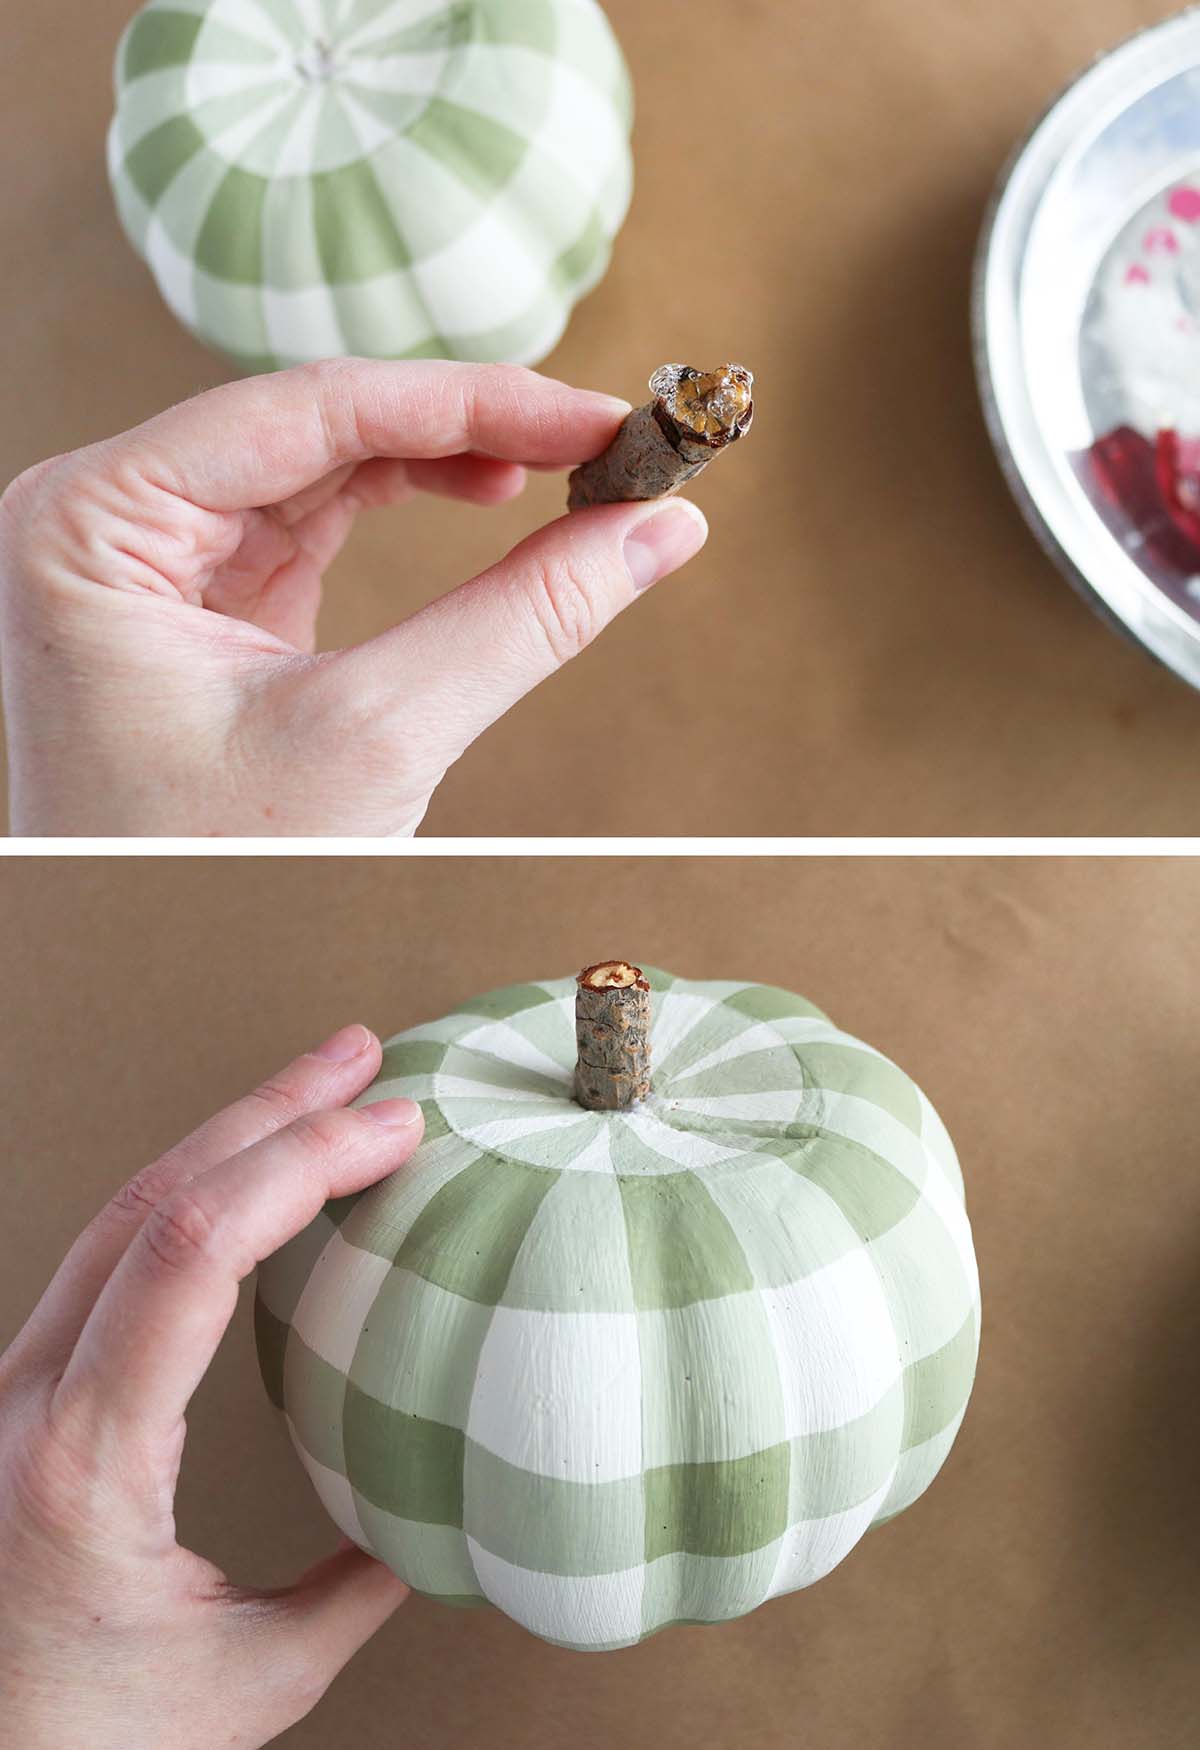
How to make a stem and finish your foam pumpkin
Find a stick (could be one you found in your yard like me, a cinnamon stick, or a wooden dowel) and cut it to size, about three inches long. Add a big glob of hot glue to one end (the uglier end if we’re being picky) and stab it into the top of the pumpkin (don’t worry, foam pumpkins can’t feel pain).
If you want, tie a bow around the stem using ribbon or mesh tubing and glue it in place if needed. Feel free to add faux leaves or other decorations.
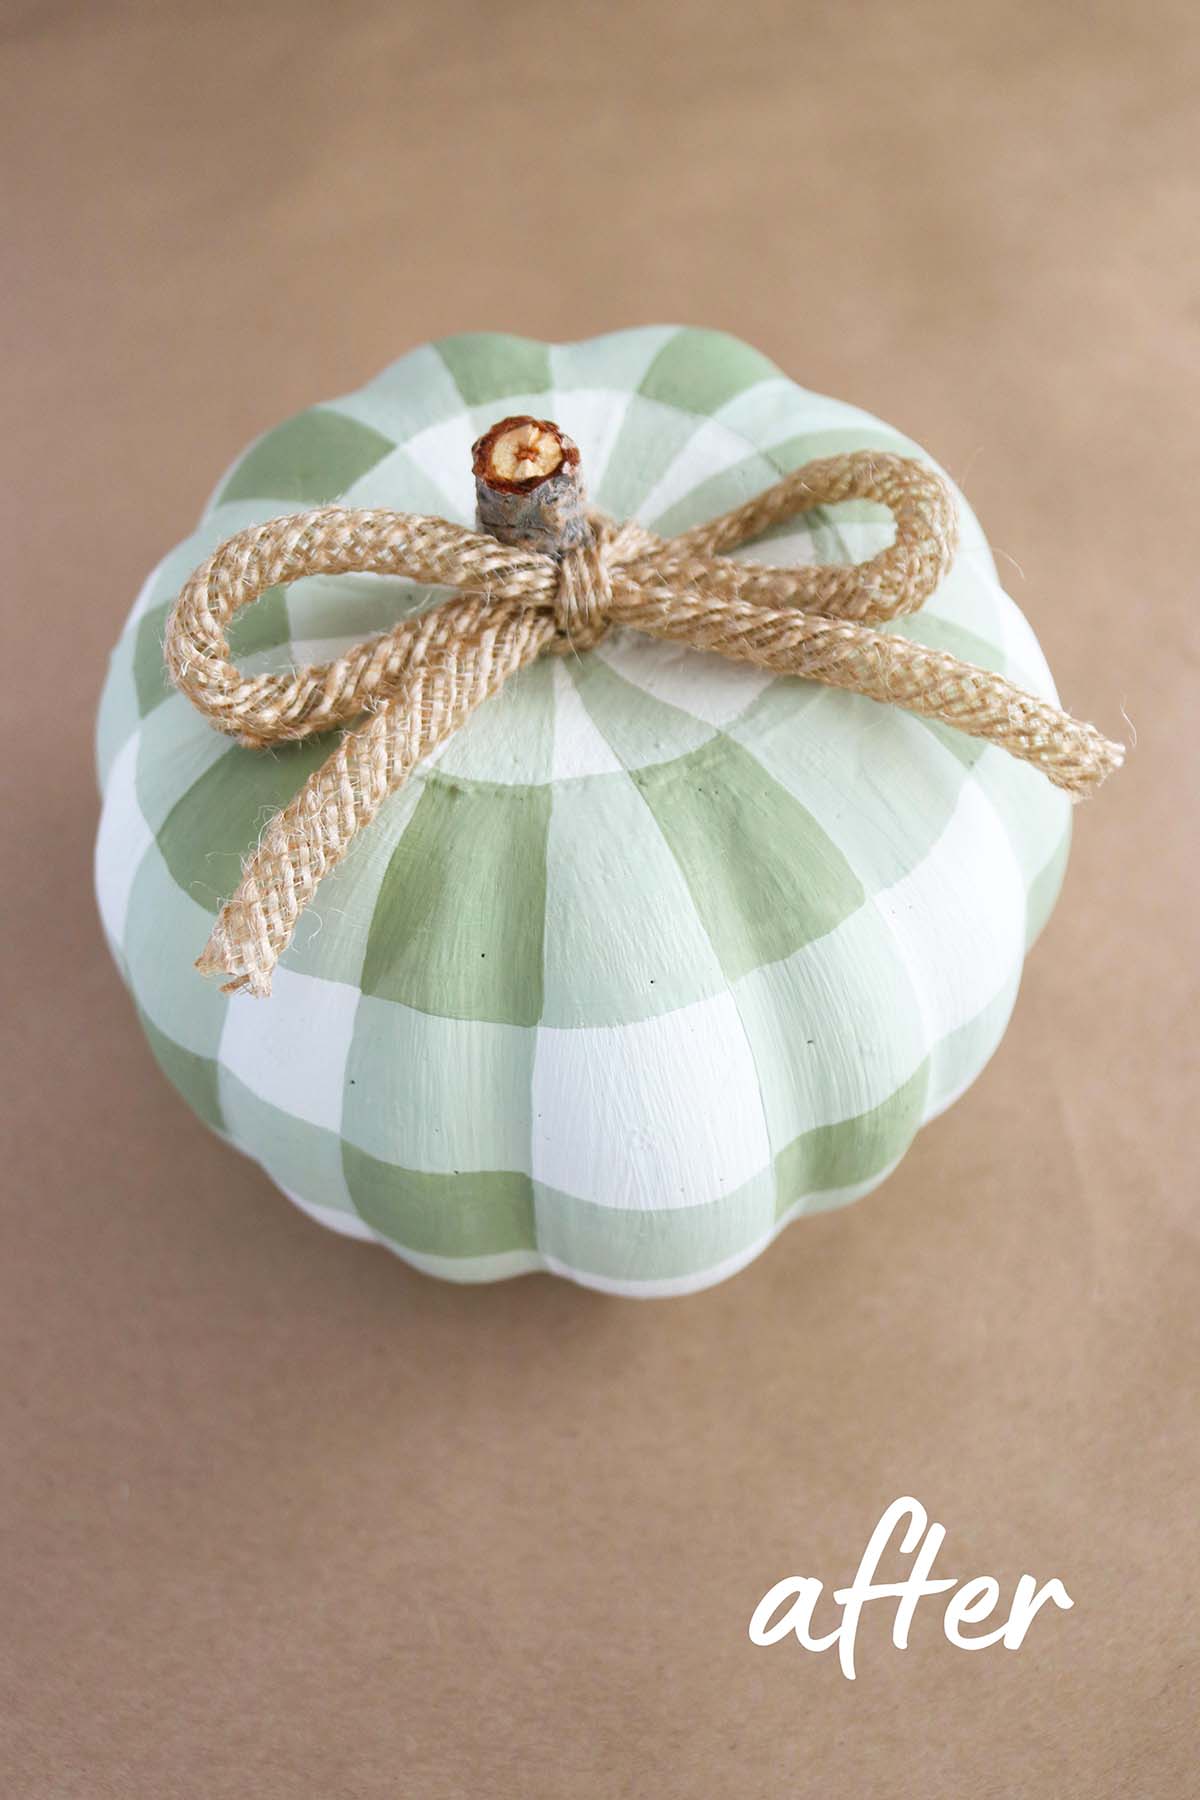
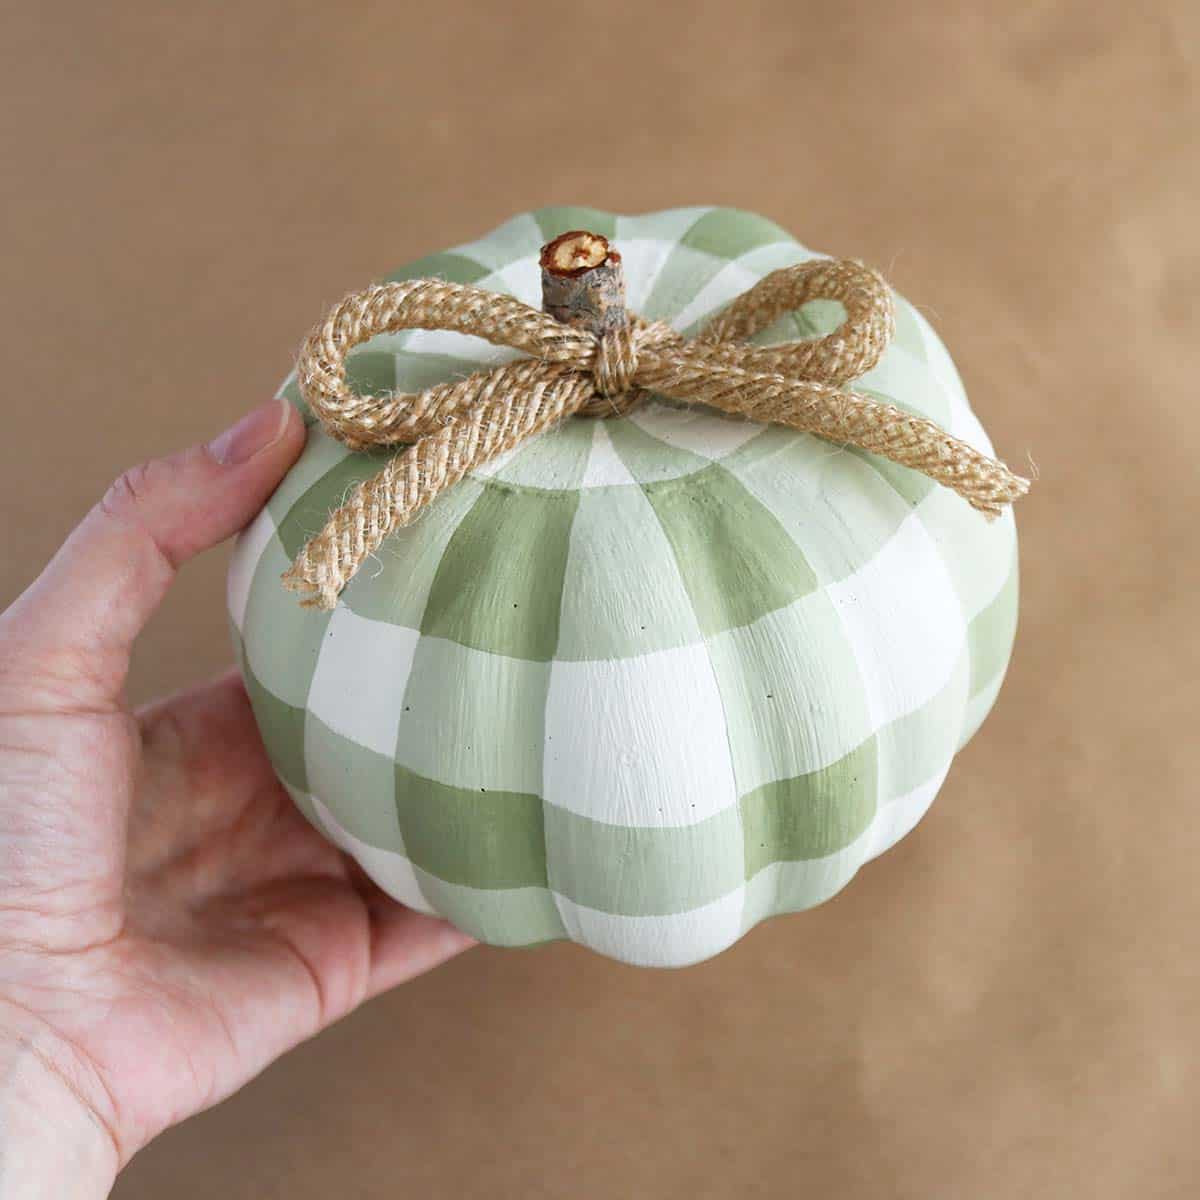
DIY Buffalo Check Dollar Tree Foam Pumpkins
And you’re done! I love how classy this pumpkin turned out, especially when you know where we started! Yes, you can absolutely makeover Dollar Tree foam pumpkins and make them look good—this buffalo check pumpkin proves it! I can’t wait to display this with the rest of my fall decor.

Don’t forget to pin and save for later!
I absolutely LOVE this pumpkin!! Thanks for the different color option. Using green is genius!!❤️❤️
I’m so glad you like this! I love using olive greens for fall!