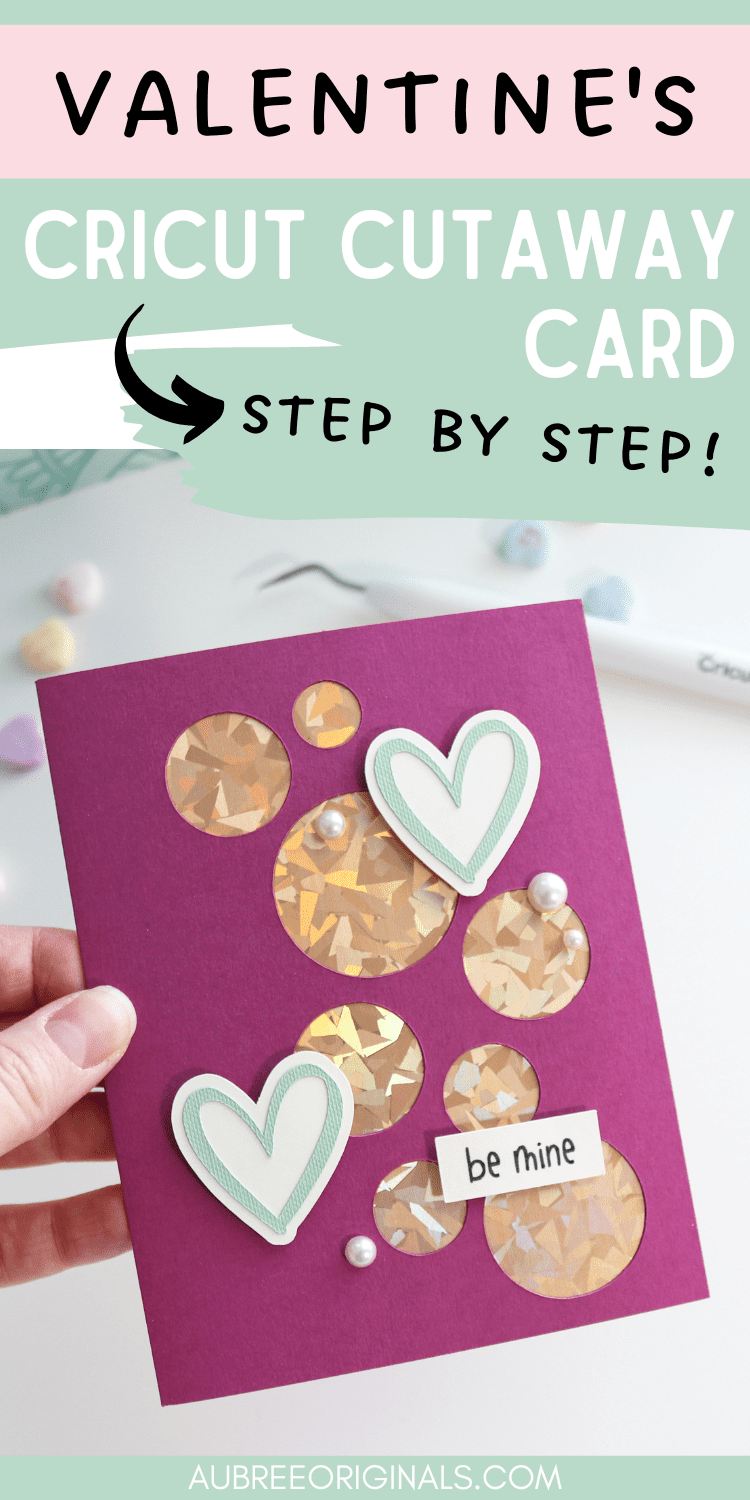
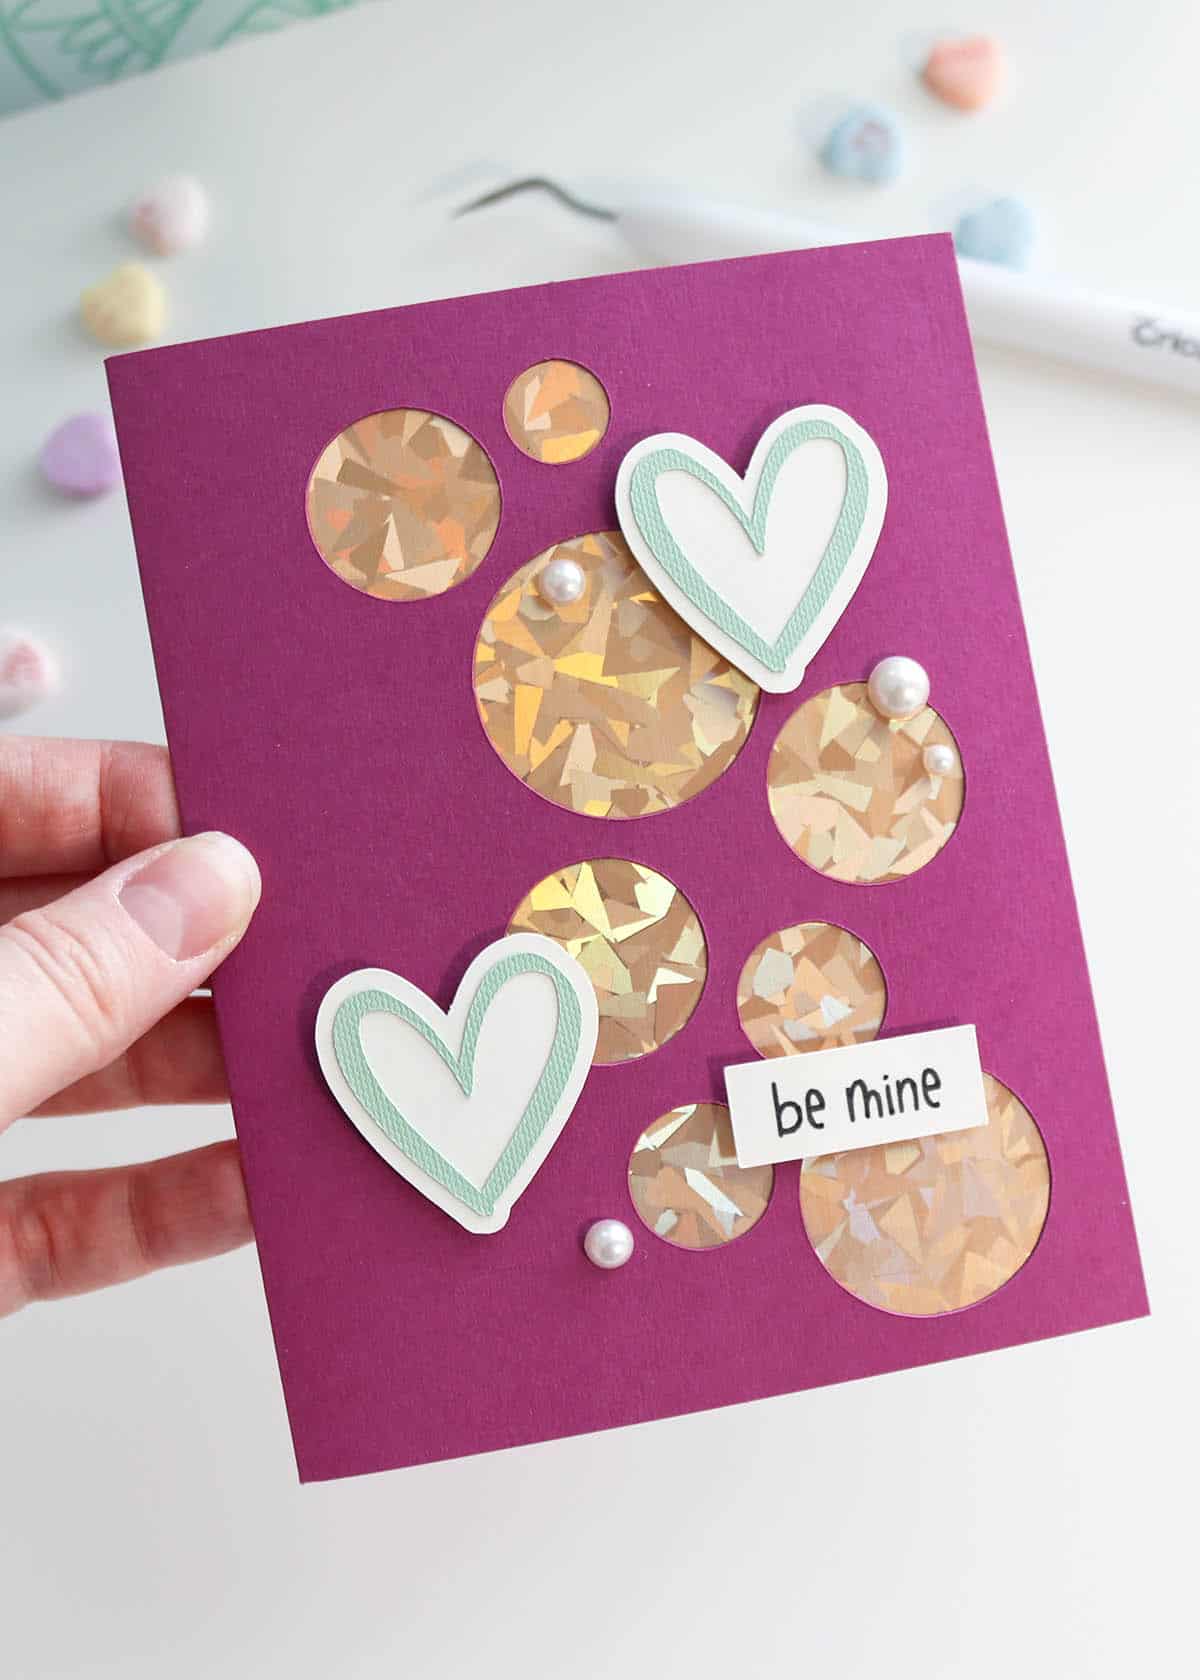
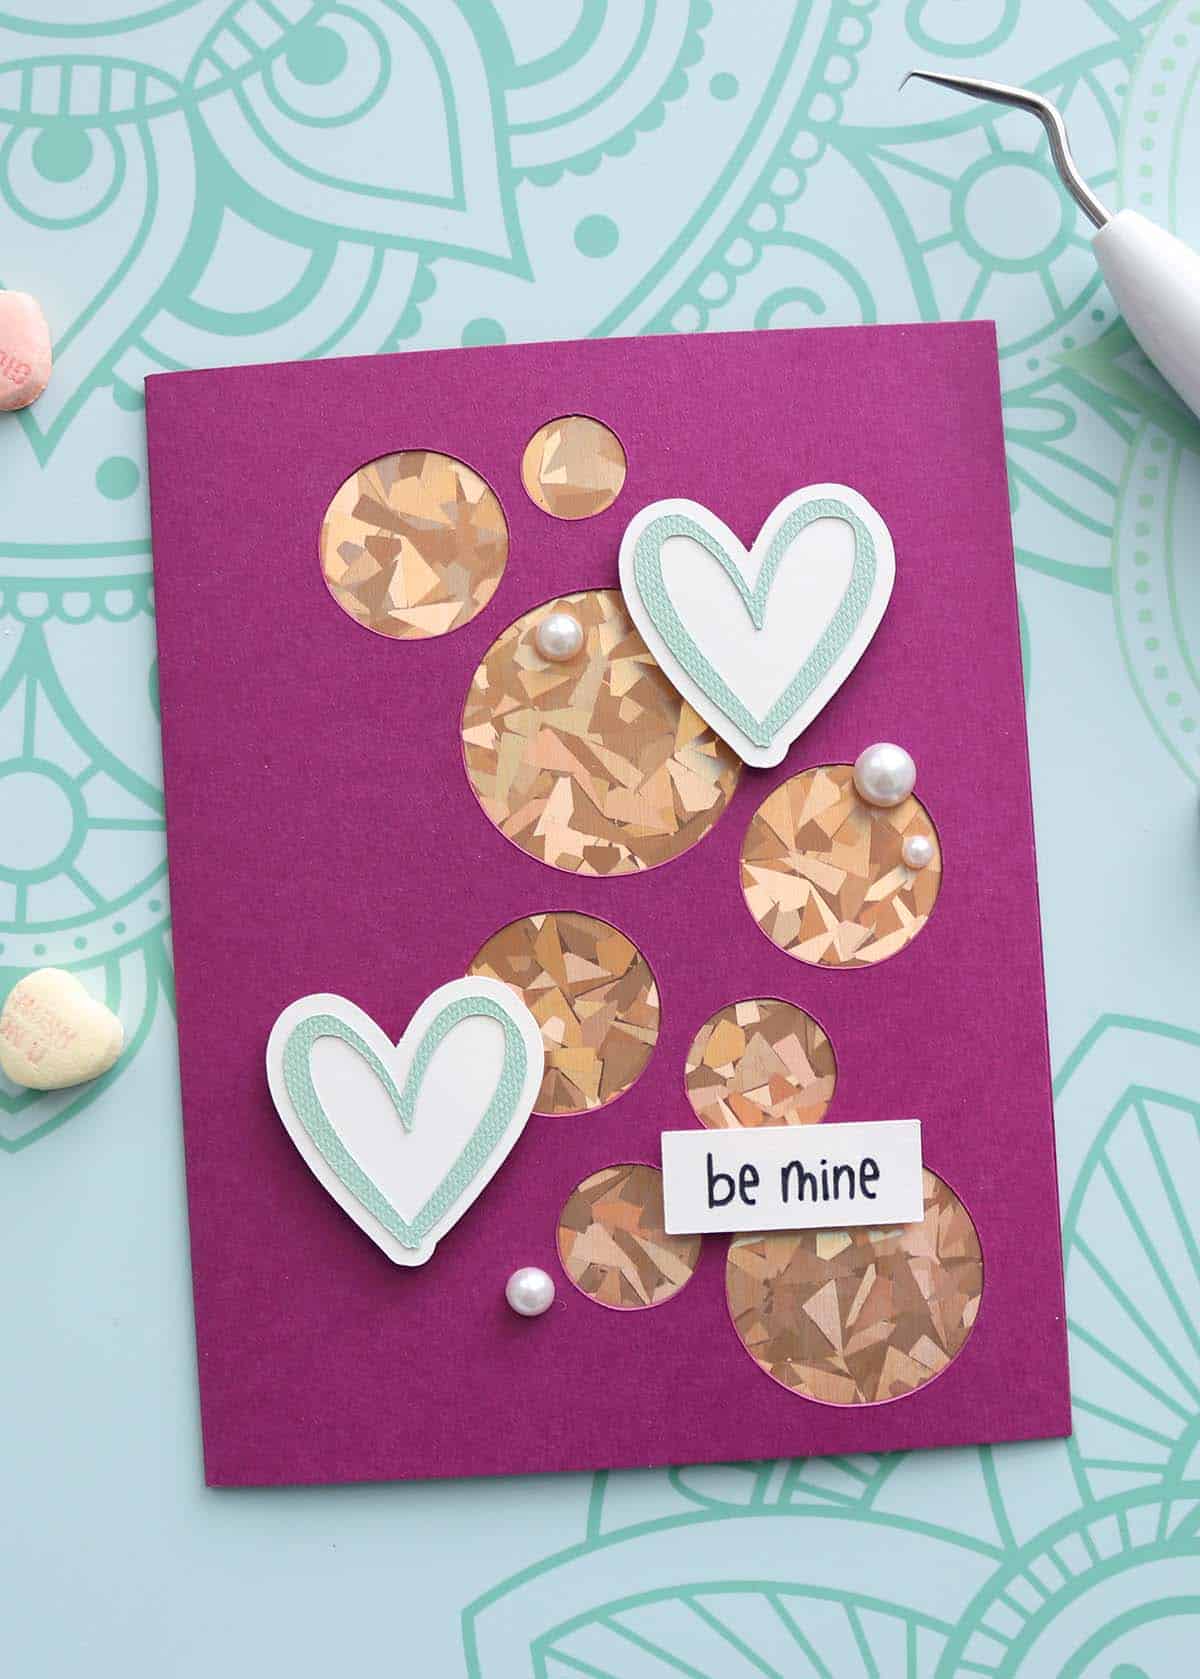
“Be Mine” Cricut Cutaway Valentine’s Card
Learn how to make a Cricut cutaway card for Valentine’s! This cute “Be Mine” card with cutout circles and heart accents is a fun diy Valentine’s craft!
This post contains affiliate links. For more information, see my disclosures here.
One of my new favorite ways to make cards is with Cricut cutaway cards and the card mat 2×2! Once you try it, you’ll be addicted to how easy and fun it is!
This cutaway card design is perfect for Valentine’s. I originally made a non-cutaway card version, but I adjusted the sizing so the design works with cutaway cards too. But feel free to use regular cardstock and create your own backer from patterned paper (you’ll just need glue to adhere it, unlike the cutaway cards that already come with an adhesive card).
Keep reading for all the steps to make this easy card!
What you need to make a Valentine’s cutaway card
- Cricut machine
- Cricut Access subscription: This project uses Access images and fonts. If you’re not sure if Access is right for you, check out this post all about Cricut Access.
- cutaway card and backer, or cardstock and patterned paper if making your own (this is the cutaway card pack I used)
- cardstock in two colors for the hearts and text box
- Cricut pen: I used a 0.4 tip in black
- Cricut card mat 2×2 (not required if you’re making your own cutaway card and backer)
- LightGrip mat: I prefer this mat for cutting medium cardstock
- foam tape/dots: I used this foam tape from Dollar Tree
- craft glue: I love this glue, especially for the super fine point tip
- gems or pearl embellishments
What are Cricut cutaway cards and how do you make them?
You can find the basic steps for this particular Valentine’s cutaway card below, but if you want a more in-depth tutorial, check out my post on how to make Cricut cutaway cards. In that post, I go over everything you need to know to start designing and making your own cutaway cards with lots more step-by-step pictures. You’re going to love adding this to your card-making skills!
How to make this Valentine’s cutaway card with your Cricut
I’m assuming most people will choose to make this card design with the actual Cricut cutaway cards, so I’m going to cater these steps to that. But if you want to make your own regular cardstock card and backer, open this Design Space project instead. Then just cut each layer on a normal mat (and follow the prompts like normal to score and draw when it’s time). The only difference in assembly will be that you need to manually glue the backer to the inside cover of the card.
Customize in Cricut Design Space
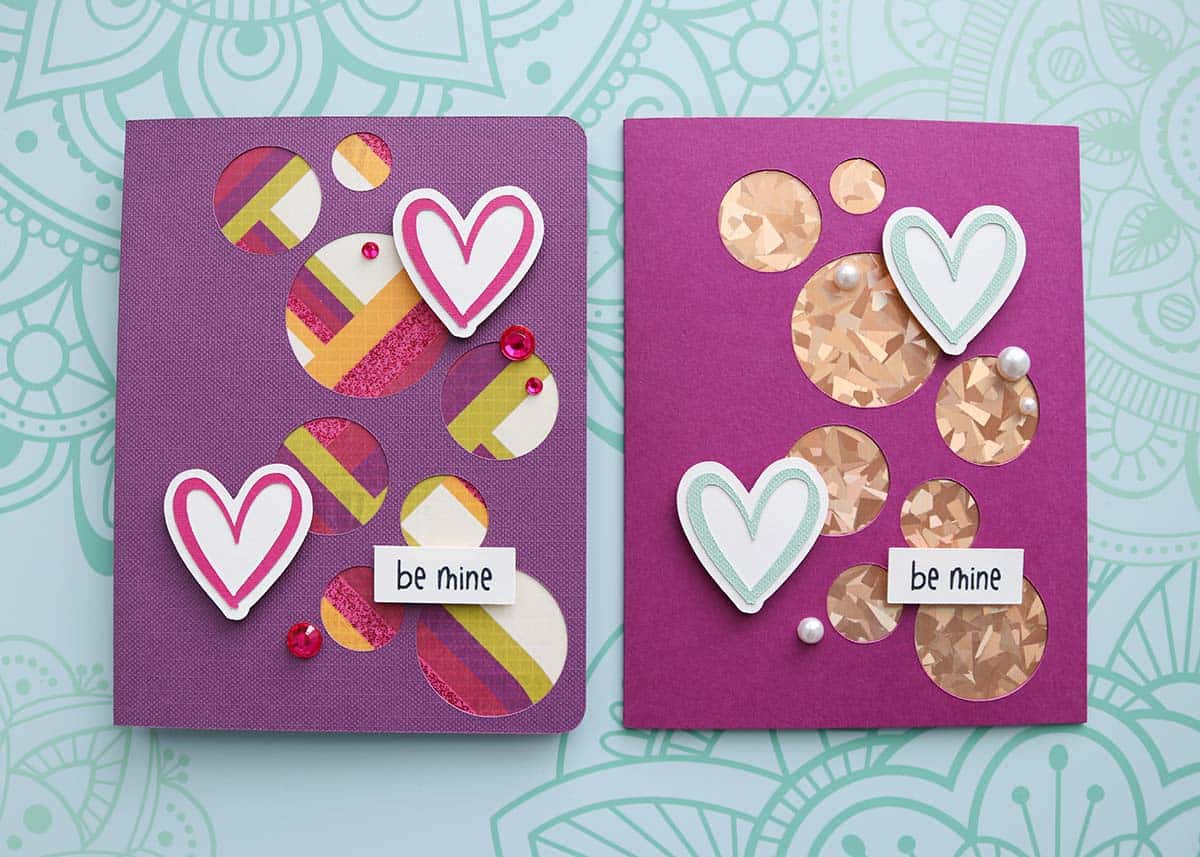
Open my Be Mine Valentine’s Cutaway Card project in Cricut Design Space. If you want to make any changes, choose Customize (if you’re using different colors of cardstock, you may find it helpful to change those on the Canvas before cutting—even though the circles are getting cut out, I made them the color of my cutaway card so I’d know what color to load on the card mat).
This card uses an R20 size cutaway card for a 4.25 x 5.5″ completed card (A2 card size).
Cut with your Cricut machine
Click Make It. When choosing your mat preferences, select “Multiple Ways–manually select for each load”. On the Prepare screen, set the “material load type” for each mat/color (On Mat for the hearts and text, On Card Mat for the circles and make sure your material size says R20).
For the circles, Design Space automatically centers them on the card mat, so you will need to move them over—position them roughly where I have them, centered top to bottom and about that same distance from the right hand side of the card (you may see a red bounding box appear, I believe that’s the guide for the adhesive backer so just make sure you’re inside of that). Manually positioning never turns out totally perfect (at least for me), but this card design is pretty forgiving so don’t stress it.
Set your base material to Medium Cardstock for the cardstock mats. Load your mat with your material and load it into your machine. Load a pen into clamp A and make sure the fine-point blade is in Clamp B. Press start and continue following the Design Space prompts.
When you get to the card mat, first prep your cutaway card: remove the inside liner covering the adhesive and press a backer to it, pretty side down. Open the card and insert it into the first position on the card mat, pushing up and to the right as far as it will go (again, check out my Cricut cutaway card tutorial for visuals of these steps). Set your base material to Cutaway Card + Backer, load the mat into the machine, and press start.
When you’re removing the card from the card mat, pull up slowly to avoid bending or curling it.
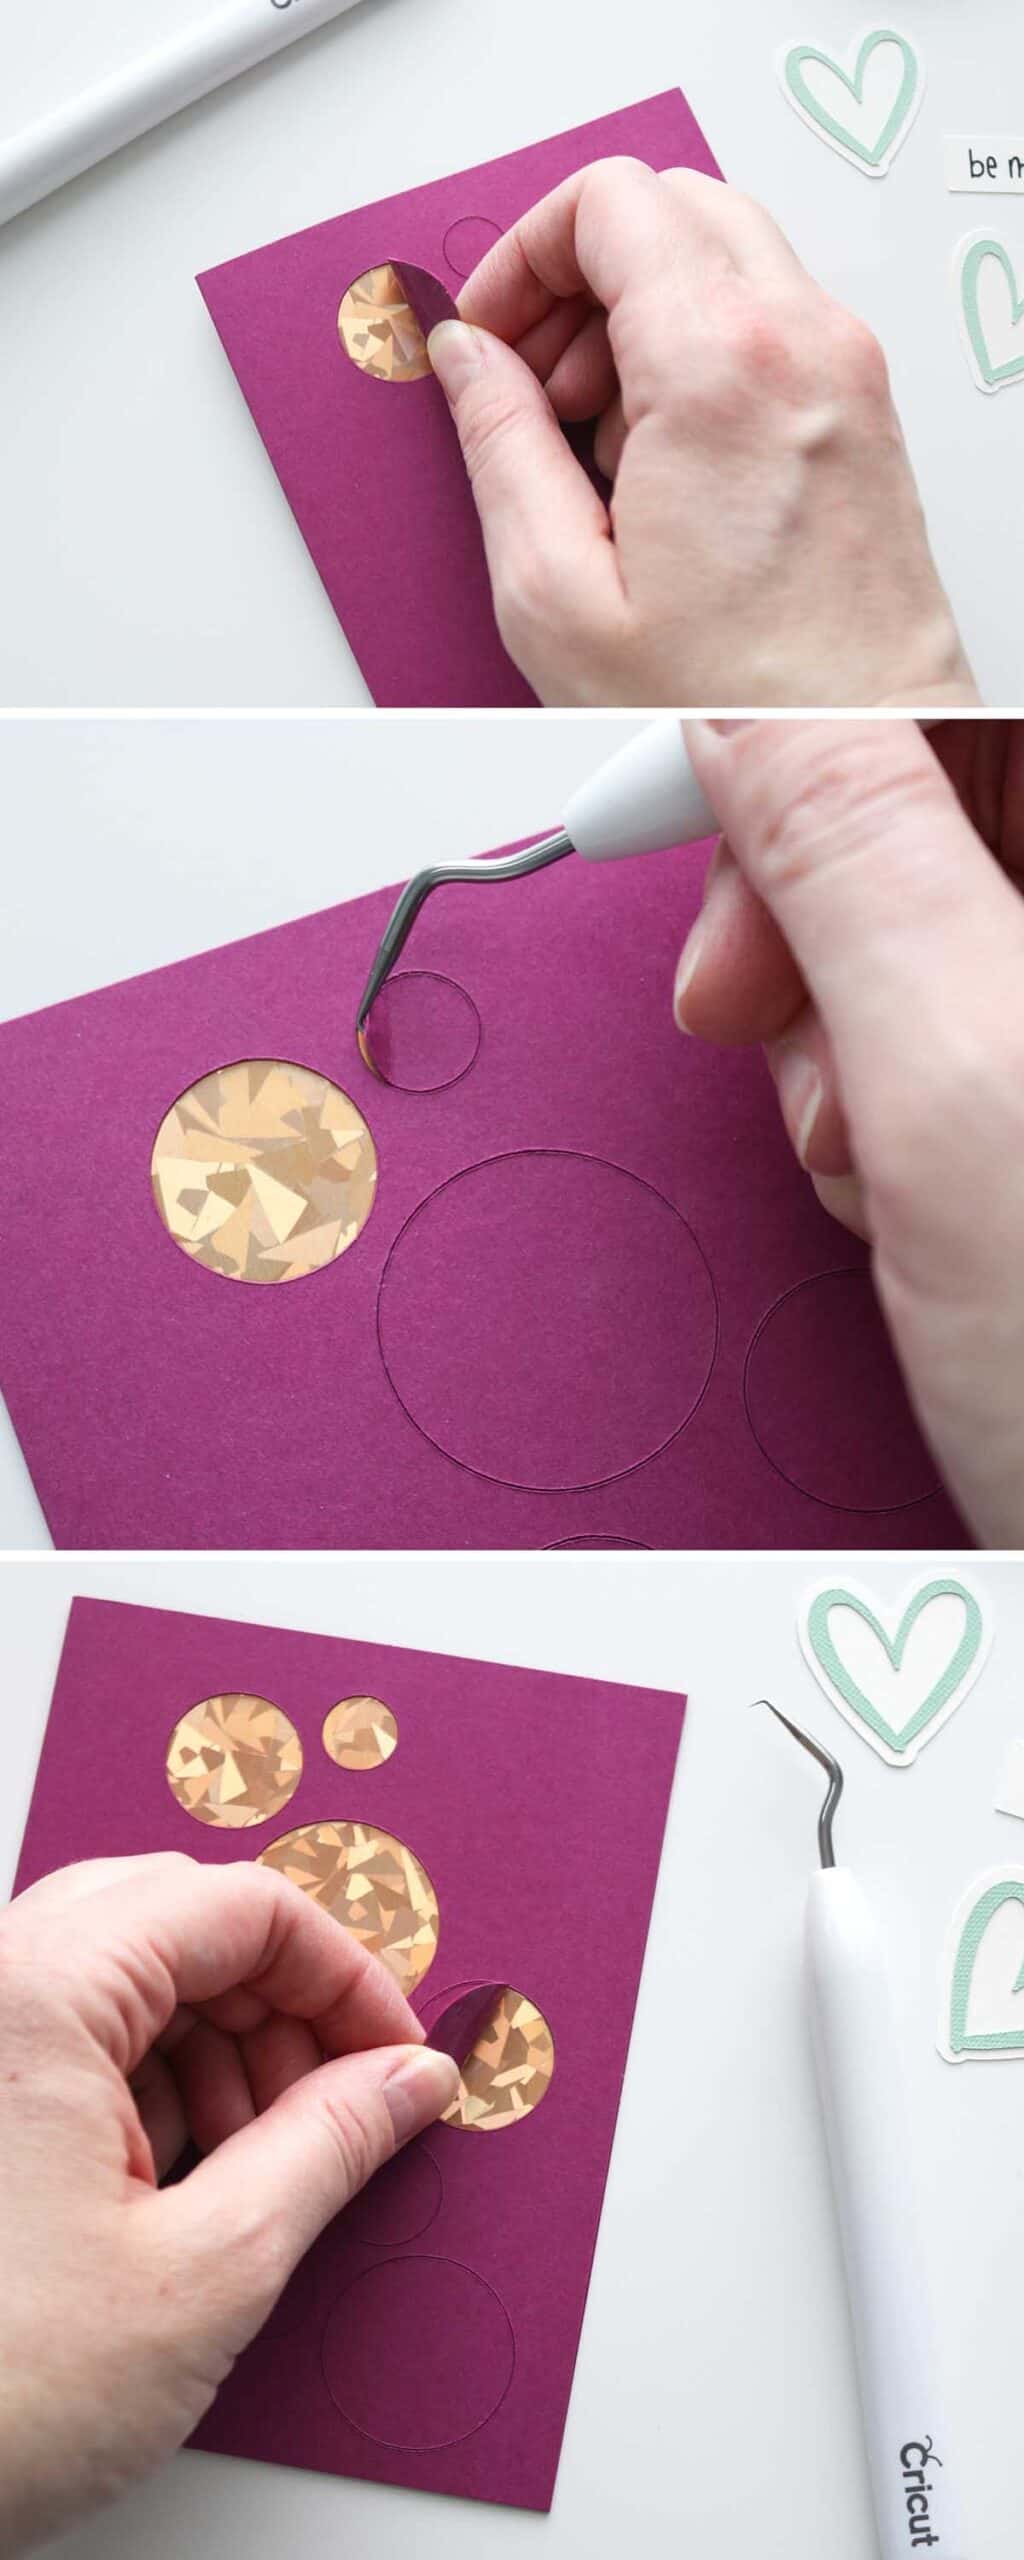
Weed and assemble card
Now for the fun part of making cutaway cards (at least I think so): weeding! Carefully “weed” all the circles out to reveal the pretty backer underneath. You can use a combination of a weeding tool and your fingers, just be careful not to scratch the backer underneath (lots more tips on that in my cutaway card tutorial post!).
Next, glue each outline heart on top of its backer. Apply foam tape to the hearts and the “be mine” text piece and adhere to the card.
Stick several gems to the card for a finishing touch (if you struggle like I do knowing where to put them, just copy my cards exactly!).
DIY Valentine Cricut Cutaway Card
Let me know if this Valentine cutaway card tutorial was helpful! I hope you enjoy making it!

Don’t forget to pin and save for later!