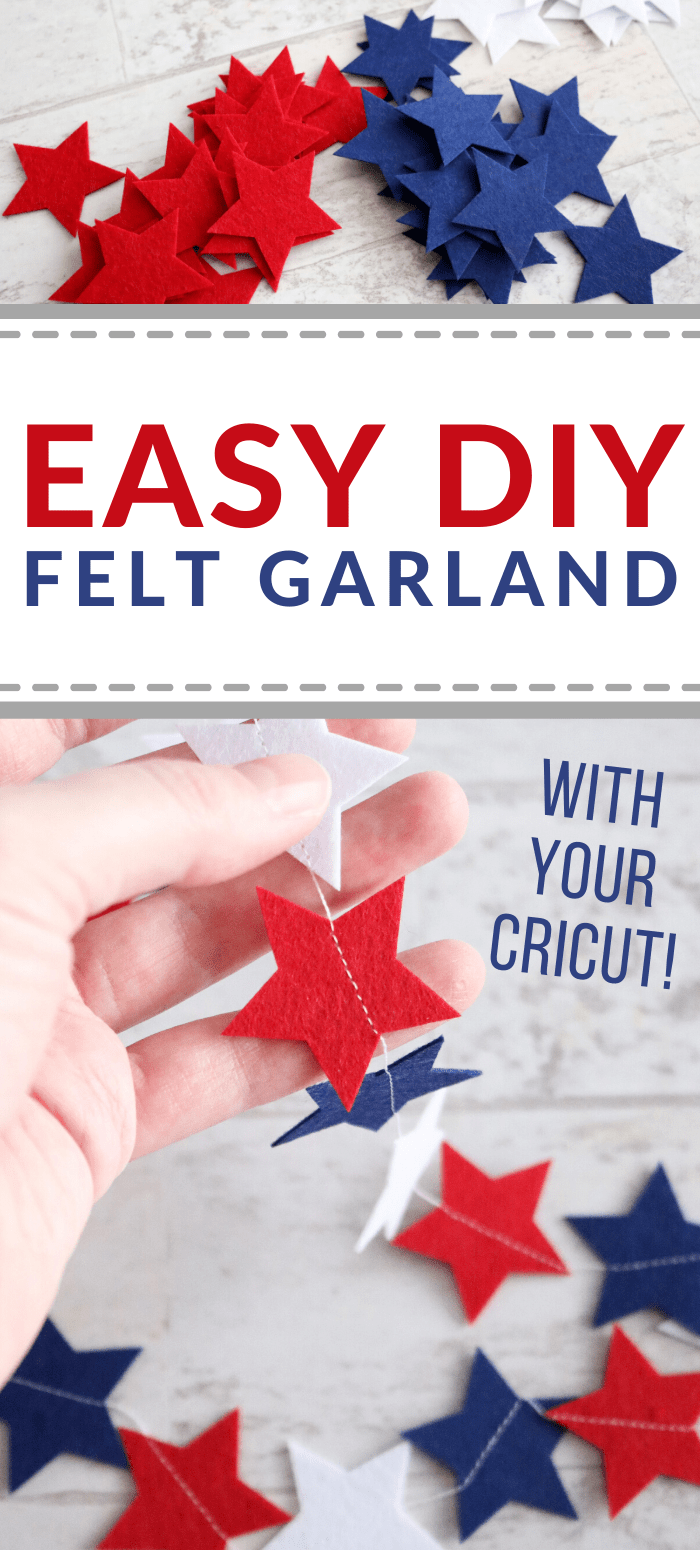
Easy Felt Star Garland for the 4th of July
You can make this felt star garland in under an hour with the help of your Cricut Maker! This is a great beginner project if you’re just learning how to cut felt with your Cricut machine, plus it makes for super cute patriotic decor!
This post contains affiliate links. For more information, see my disclosures here.
I’m not kidding when I say you can make this 4th of July garland in under an hour. I did it during nap time today…and then texted my husband telling him AGAIN how much I’m in love with my Cricut Maker. If only I’d had it last year…
Last year, I made some simple felt circle garlands but I traced and hand-cut every single circle. While definitely doable if you don’t have a Cricut, it was so much nicer to simply load my Cricut mat with felt and let it do its thing! Especially since I was doing stars instead of circles this time.
Seriously, I love this machine. 😍
How to Cut Stars from Felt with Your Cricut
Prepare Your Design in Cricut Design Space
You can create your own design in Cricut Design Space, or you can skip this step by going to my simple design, all ready for you to cut, here:
4th of July Felt Star Garland
The stars in my design measure about 1.5″ in size. If you want to change the size (or recolor them or add more) before cutting, click the “customize” button. Once you’re ready to cut, click the “make it” button.
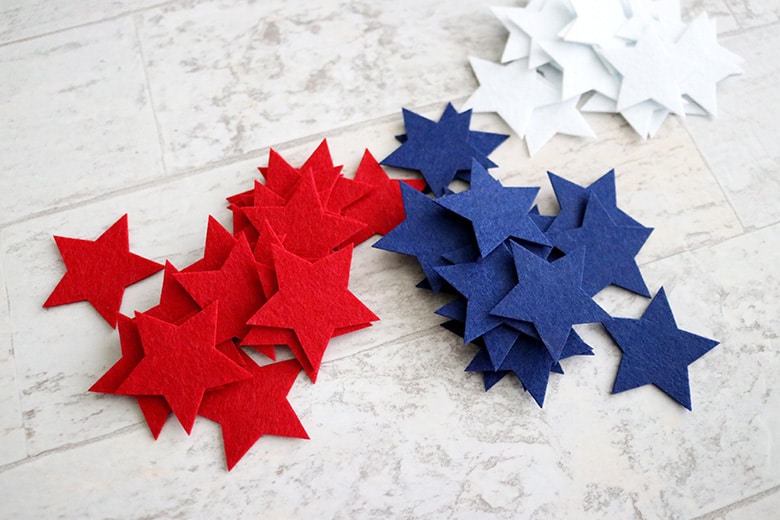
For reference, my finished garland is 6 feet in length (two loops across a fireplace mantel) and I used 54 stars, 18 of each color.
From the prepare screen, you can cut your stars as is like this:

Or you can manually move the stars around (and even rotate them) to save space and use up less felt:
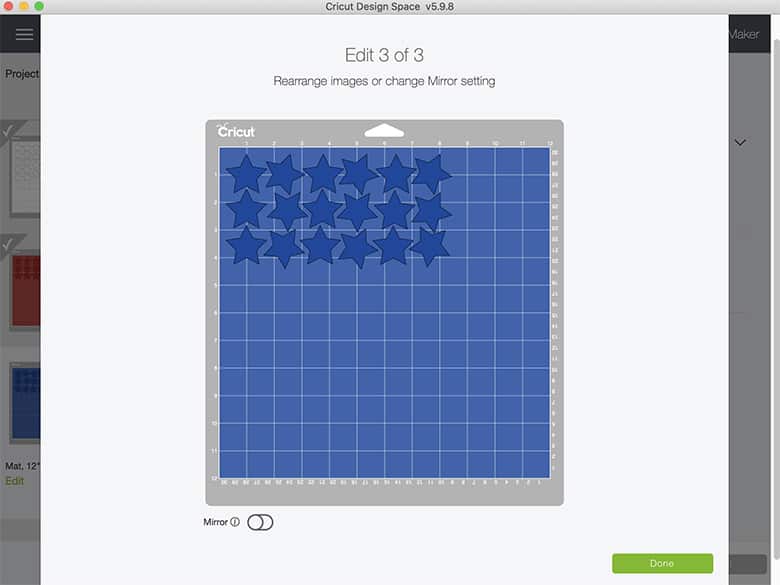
(The image above is actually from the next screen, but there’s an “edit” button that still allows you to make changes to your design before cutting.)
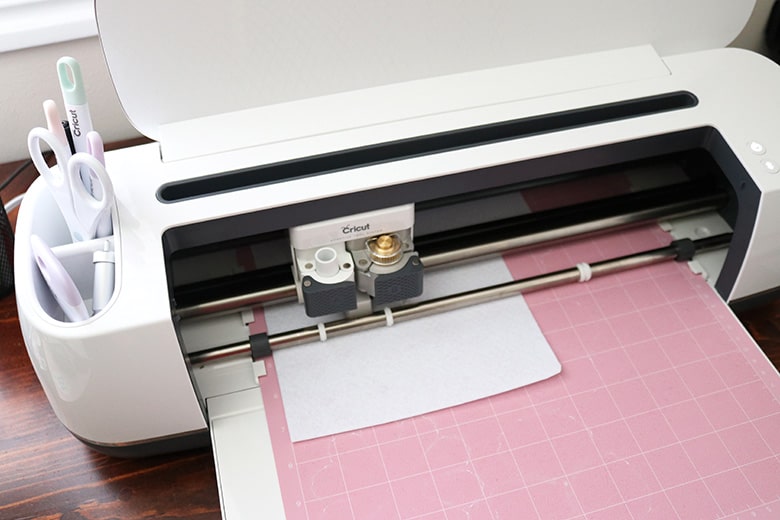
On the make screen, set your material to felt (if you click on “browse all materials” you can search “felt” to find more specific options if you want).
I personally like using the rotary blade when cutting felt, so I would edit the tools to that and load your rotary blade into your machine.
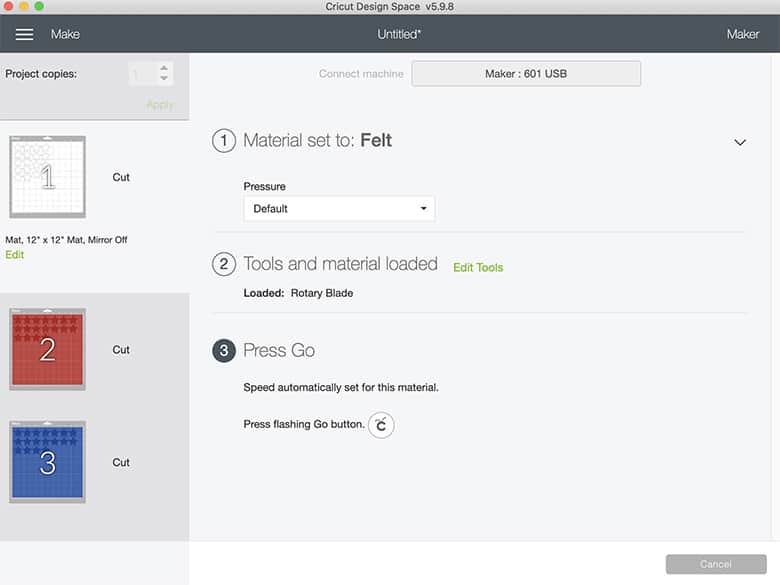
Then load your mat and press go!
Can the Cricut Maker Cut Stiffened Felt?
Yes! And it does so beautifully, possibly better and cleaner than regular felt. (I found my 12×18″ sheets of stiffened felt at Hobby Lobby, by the way.)
However, I found that the stiffened felt didn’t stick very well to my FabricGrip mat–but then I was lazy and didn’t use a brayer or anything to press it down, which might have helped. Also, my mat isn’t terribly sticky–it’s my “designated felt” mat, so it’s already been kind of ruined with felt fuzzies.
How to Get Felt to Stick to Your Cricut Mat–and How to Protect Your Mat
What I should have done before ever cutting any kind of felt on my brand new FabricGrip mat is the transfer tape trick: you lay transfer tape down on the mat, sticky side up, and then stick your felt to that. When the tape loses its stickiness, you just replace it and your mat retains its stickiness–much more cost-effective!
And even though my mat is already damaged, I think the transfer tape still would have worked better to cut the stiffened felt on. I would recommend trying that first to prevent the felt from sliding around.
And if you’re still having trouble? You could always tape the edges of your felt to the mat using painters tape or washi tape (just stay clear of the cutting area so your blade doesn’t have to cut through the tape–I haven’t done it, but I’d imagine it could gum up your blade a bit).
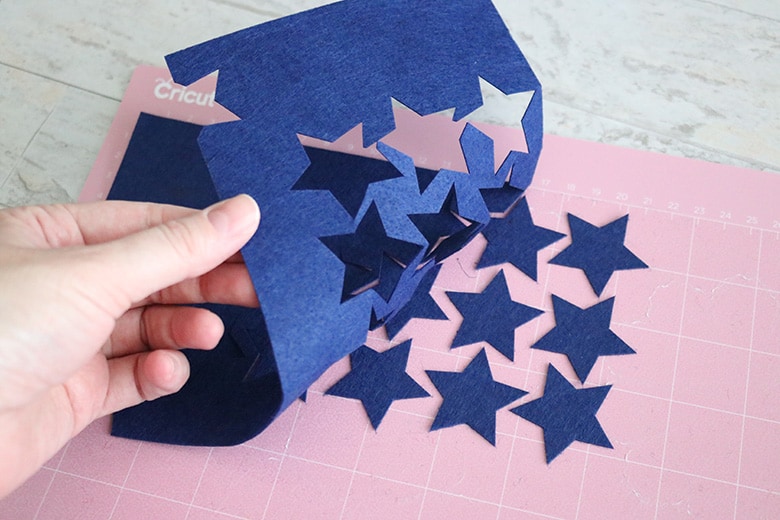
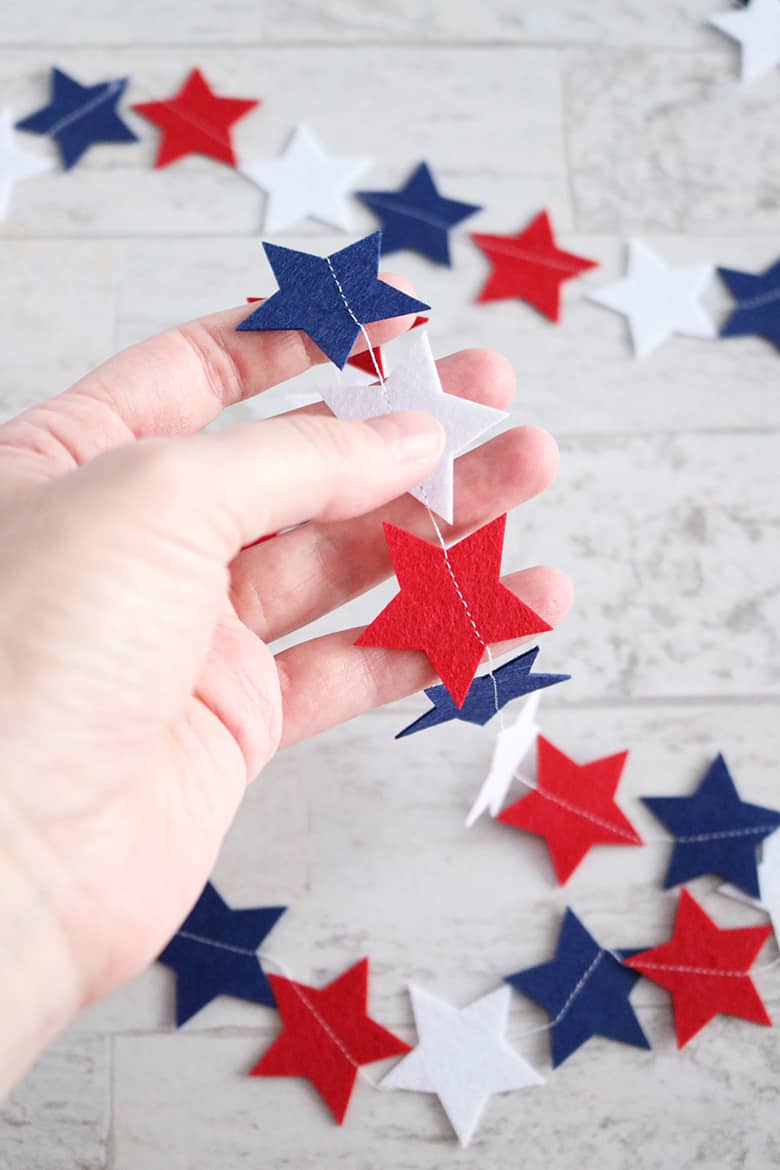
Ahh! It’s so satisfying to pull back that felt and have all those perfectly cut stars!
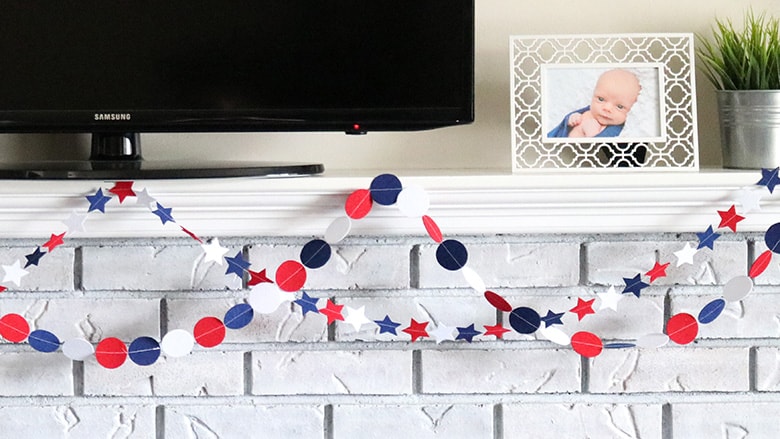
How to Make a DIY Felt Star Garland
To turn your cut stars into a garland, follow the same instructions in my Easy Felt Circle Garland tutorial. You’ll want to read through that post for all the sewing details (and helpful pictures), but basically you’re just feeding the stars through your sewing machine in a red, white, and blue pattern, with one long seam down the middle.
I didn’t feel it was necessary to line up the stars the same direction so I just fed them into my machine however I happened to pick them up. However, if your machine tends to eat small pieces of fabric at the start (you’ll know what I mean if your machine does this), then it’ll be easier if you don’t start sewing directly on a point of the star–start between two points instead.
Don’t forget to keep some thread at the beginning and end if you think you’ll need it for hanging your garland!
My 6-foot garland only gave me two loops across my fireplace mantel, but that actually ended up complementing my 8-foot circle garland perfectly.
If you need more length, simply copy and paste more stars in Cricut Design Space before cutting or cut multiple sheets in each color (I recommend doing this before sewing, that way your garland can be one continuous piece).
Ok, did I forget anything? I feel like I can never trust my “mom brain” these days. 😆 Just leave me a comment below if you have any questions!
I hope you enjoy your felt star garland!
Want more 4th of July decor inspiration? Check out this red, white, and blue clothespin wreath DIY!

Don’t forget to pin and save for later!