Mummy, Pharaoh, and Sphinx DIY Halloween Costumes
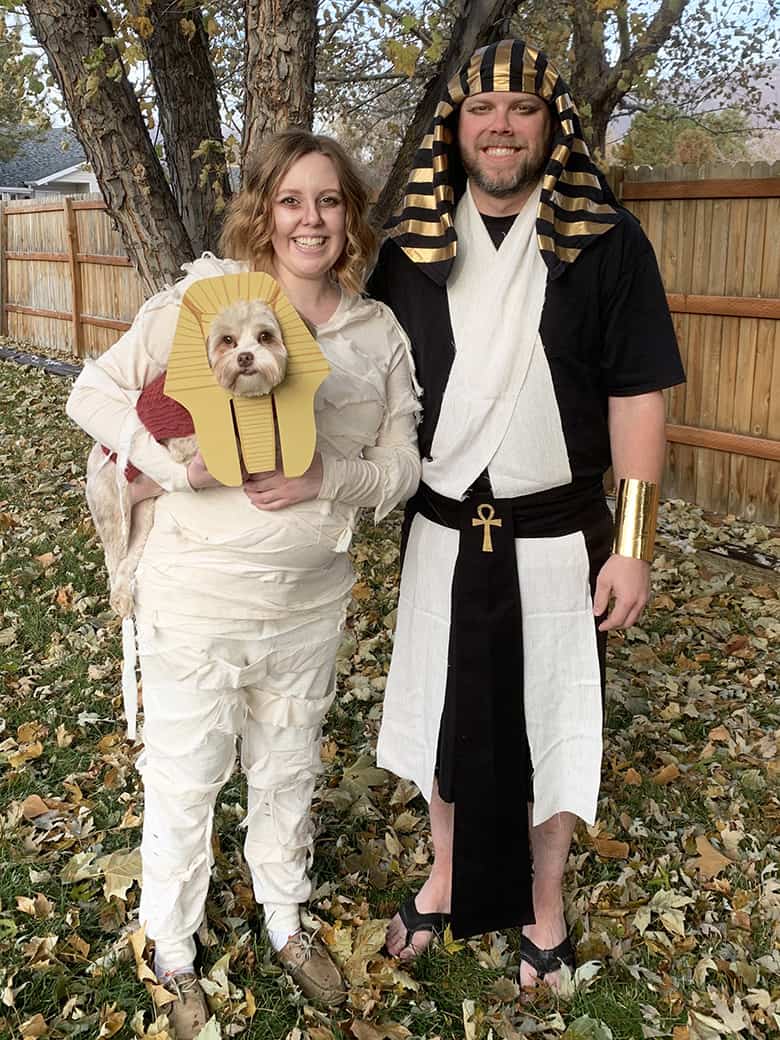
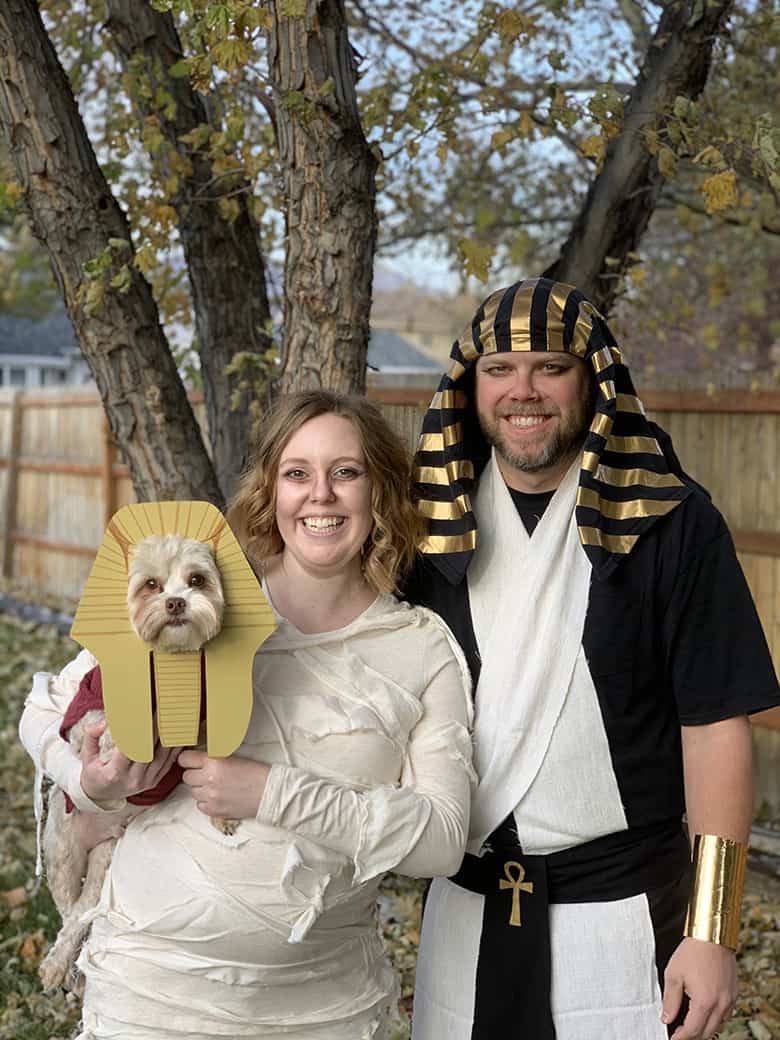
What better way to show off my “Mummy to be” costume than with an Egyptian Pharaoh and little Sphinx by my side? These DIY Halloween family costumes were cheap and so fun to make!
These Egyptian family Halloween costumes were so fun to make! And yes, I’m counting the baby in my belly and the dog as members of our family (as opposed to this being just a couple’s costume).
Of course, being pregnant added a few challenges to making this costume: primarily, my physical exhaustion and lack of any motivation. And I wasn’t quite sure how things would come together or if I’d have time to complete all three costumes. In classic Aubree fashion, I did everything the week of–and finished the final parts the night before Halloween.
But, also in classic Aubree fashion, I do my best work under pressure and I was so pleased with the final result!
Now, let’s get to the how-to for making your own Egyptian costumes!
This post contains affiliate links. For more information, see my disclosures here.
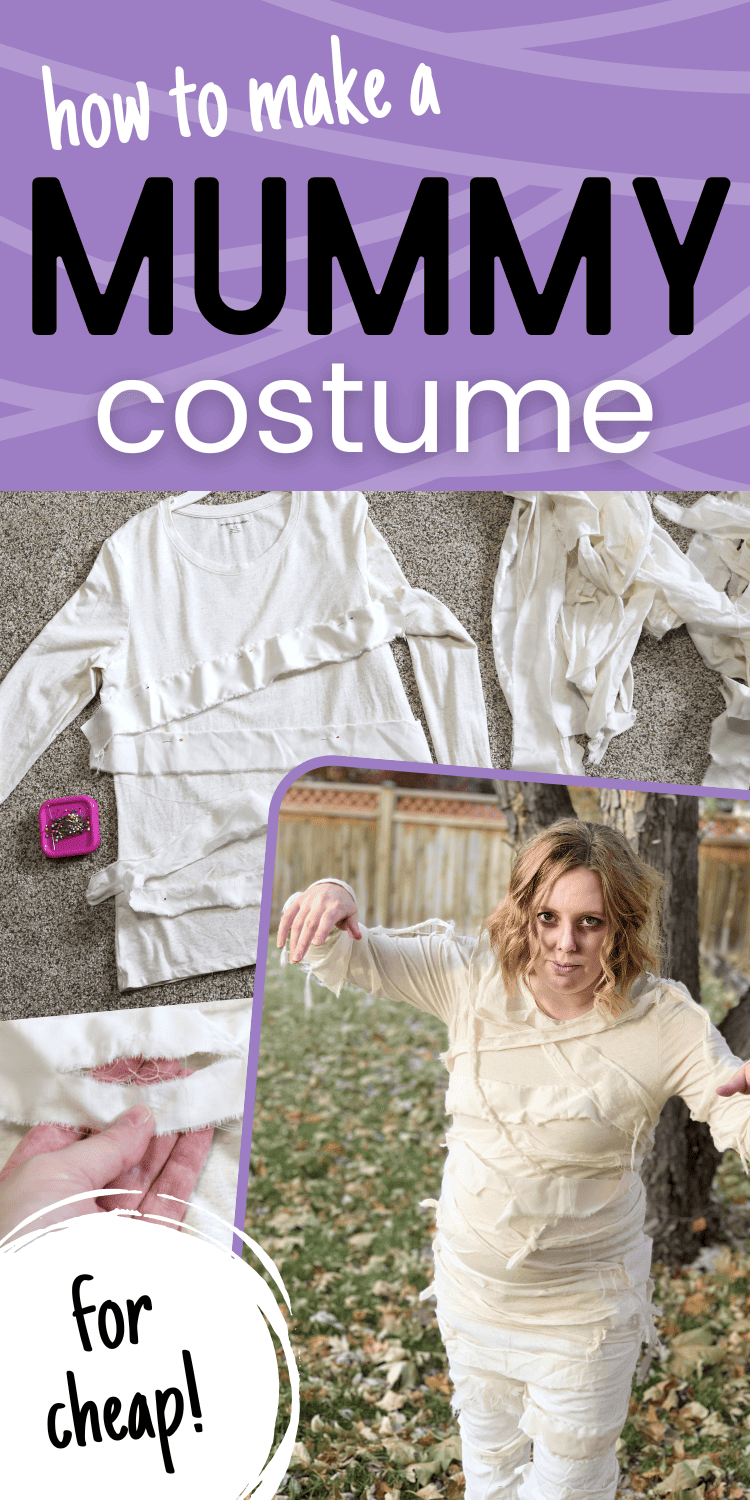
How to Make a DIY Mummy Costume
To make the mummy-to-be costume, you will need:
Shirt and Pants
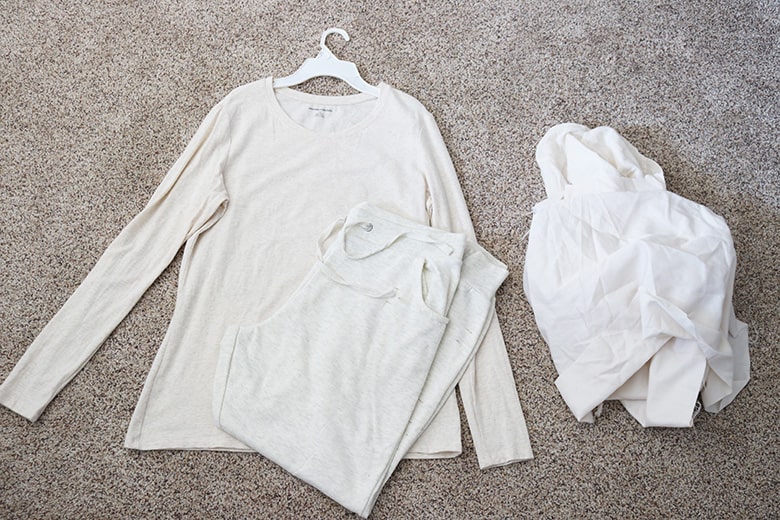
You’ll want a long-sleeved shirt and pants in either white or off-white fabric. I went for the off-white/almost taupe color for a more “realistic” mummy. And, obviously sweatpants and a stretchy top for comfort (and to fit my belly).
This shirt is the exact one I purchased from Amazon (in a size large for reference).
I bought the sweatpants on clearance from Walmart so I don’t believe they’re still available. However, Amazon has what looks like perfectly-matching joggers to the shirt linked above!
Strips of Fabric
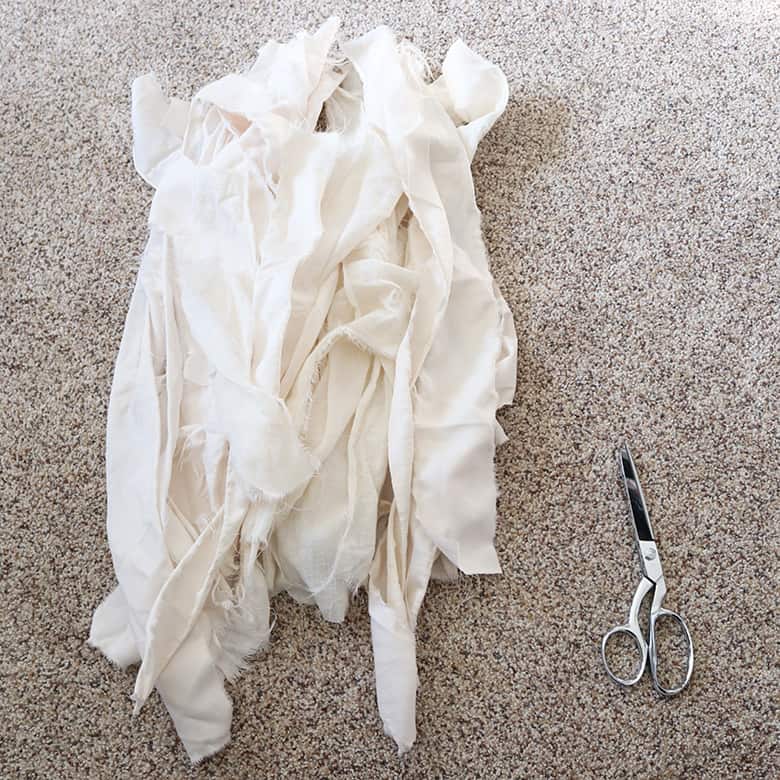
You will also need strips of fabric in a coordinating color for the mummy wrappings…bandages…whatever you’d like to call them. I happened to have part of an old threadbare sheet on hand that was the perfect color (and texture), as well as an old linen shirt. But you can just as easily buy some fabric (I’d guesstimate at least a half yard) and even distress it yourself if you’d like.
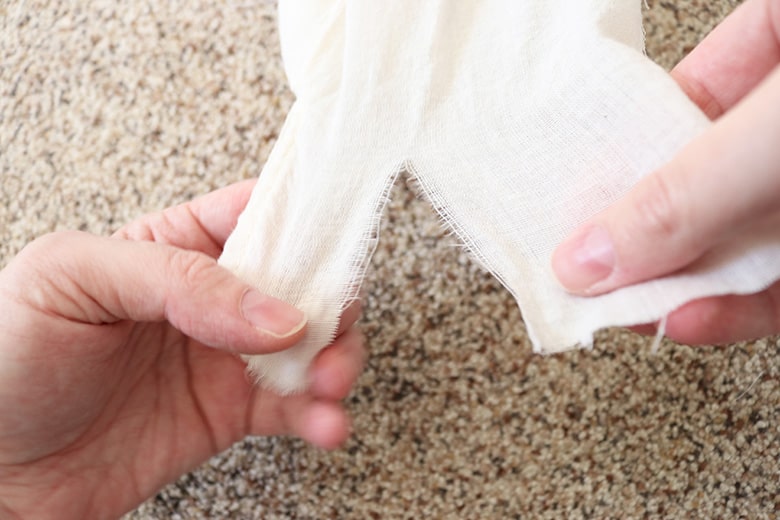
How to make the mummy bandages
First, tear strips of fabric between 1 and 3 inches wide (vary your widths for variety). Tearing (versus cutting) will give you that imperfect texture you’re going for. To make it easier to tear, you can first make a small cut (about 1/2″ or 1″ long) in the fabric along the grain and then tear along the grain (in the direction of the fabric threads).
To further distress your strips of fabric, you can cut holes, make additional tears within the strips, or make any other distress marks you’d like. The more “shredded” you can make your fabric look, the better!
If you wanted to, you could even go above and beyond to make the bandages look old by mixing some brown paint with water and “watercoloring” the edges. Brown makeup would work too, but it might rub off or get on other clothing.
How to sew the mummy bandages
Okay, I’ll be honest…this part gets a little tricky. Especially if you’re pregnant and trying to make this for yourself. It helps to have an extra pair of hands (or a dress form would have been amazing if you have one!).
I think the hardest part of this (and the important thing to remember if you’re pregnant like me and using similar materials) is that the shirt is stretchy and needs to remain stretchy in order to fit over your belly, but the fabric strips most likely aren’t made of stretchy material. So, give yourself extra length when wrapping the shirt and make everything looser than you think you need.
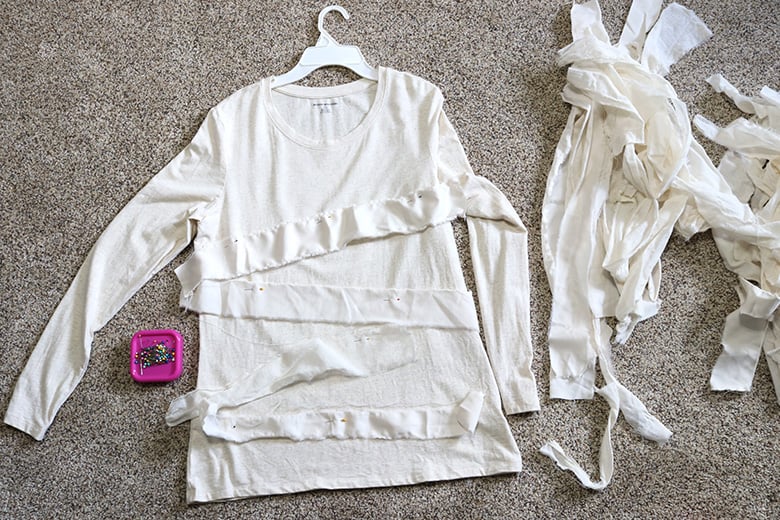
First, try on your shirt to see how it lays against you. (Note: I always, always prewash any clothing and materials so they won’t shrink if I end up washing them later on).
Begin pinning strips to the shirt in alternating directions–using safety pins if you’re smart, or regular pins if you’re dumb and lazy like me 😜. (If you do use regular pins, which is probably what you have more of on hand, just be super careful taking the shirt on and off. And know that you’ll most likely knock some out and have to repin certain sections, so safety pins really are the better option all around.)
This is where it helps to have extra hands, especially for pinning the strips wrapping around your back (I started some of the strips with my shirt laying flat on the floor, but to know how things are going to sit you really have to be wearing the shirt). I would hold a strip of fabric where I wanted it and have my husband pin it to the shirt for me…and then tell him it was too high or low and to try again. 😂 This was the most time-consuming part of these costumes for sure.
If your strips aren’t long enough, you can easily sew or tie them together to make them longer (no need to finish edges or hide seams!).
Once you know where you want a few strips, you can sew them into place with a few “tacking” stitches. You probably don’t want to sew along the whole strip, again to preserve stretchiness, but also because loose and hanging strips will look more mummy-like. So just sew a straight line here and there (not more than 1″ long), sewing your strip to the shirt. As you’re pinning, it helps to put a pin exactly where you’d like a tacking stitch and only remove it when it’s under your sewing machine ready to sew.
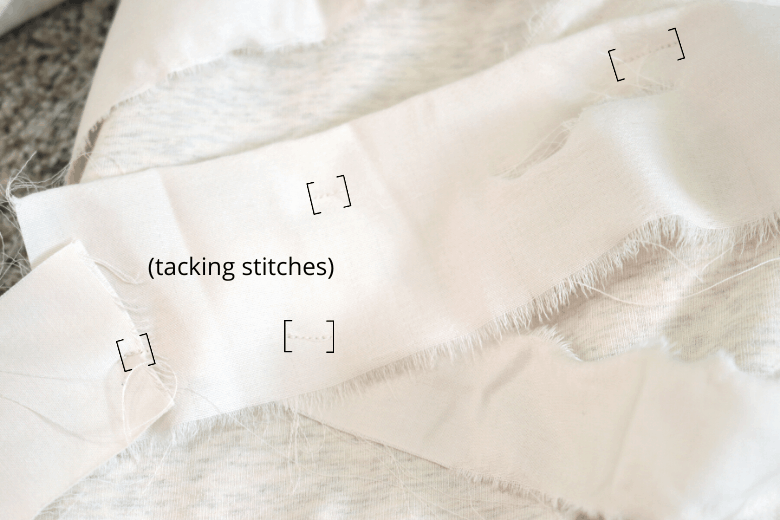
In the photo above, you can see where I’ve put a few tacking stitches, sometimes overlapping strips (to keep the amount of sewing to a minimum), and sometimes using the stitches to join two strips together (the one on the far left). Also, you can see the lengths of stitches aren’t all the same which is perfectly fine.
As you’re sewing, be sure to use the arm on your sewing machine to put your shirt around so you don’t sew through both sides of the shirt!
Once you’ve sewn a few tacking stitches and removed all your pins, try on your shirt again to see if it still fits well or if you need more tacking stitches anywhere. I added more where the strips were drooping and unpicked a few where the strips got too tight.
Continue this back-and-forth process (as tedious as it is) until all your strips are sewn in place how you’d like.
You can also add strips to your sleeves, hips, and pant legs.
In some places, to add more interest and texture, I tied some strips from the already-sewn-on strips and let them hang down. I personally thought small, skinny strips worked best for this.
How to Do Mummy Makeup
I promise, I am no makeup artist. So if I can do costume makeup, so can you! I suggest watching a few tutorials on YouTube to get an idea of what you’d like to do. And then use what you have on hand to make up your own thing (I actually prefer using regular makeup and skipping the Halloween face paints).
The great thing about mummy makeup (and most Halloween makeup in general) is it can be totally imperfect and still look amazing!
If you want to copy my look, here are some general steps to follow:
- Start with a super pale face–the lighter the foundation, the better. You could even add a white powder (like white eye shadow) over the top.
- Next, use a primer over your eyelids and under your eyes. Use a white (or really light) eye shadow over your lids.
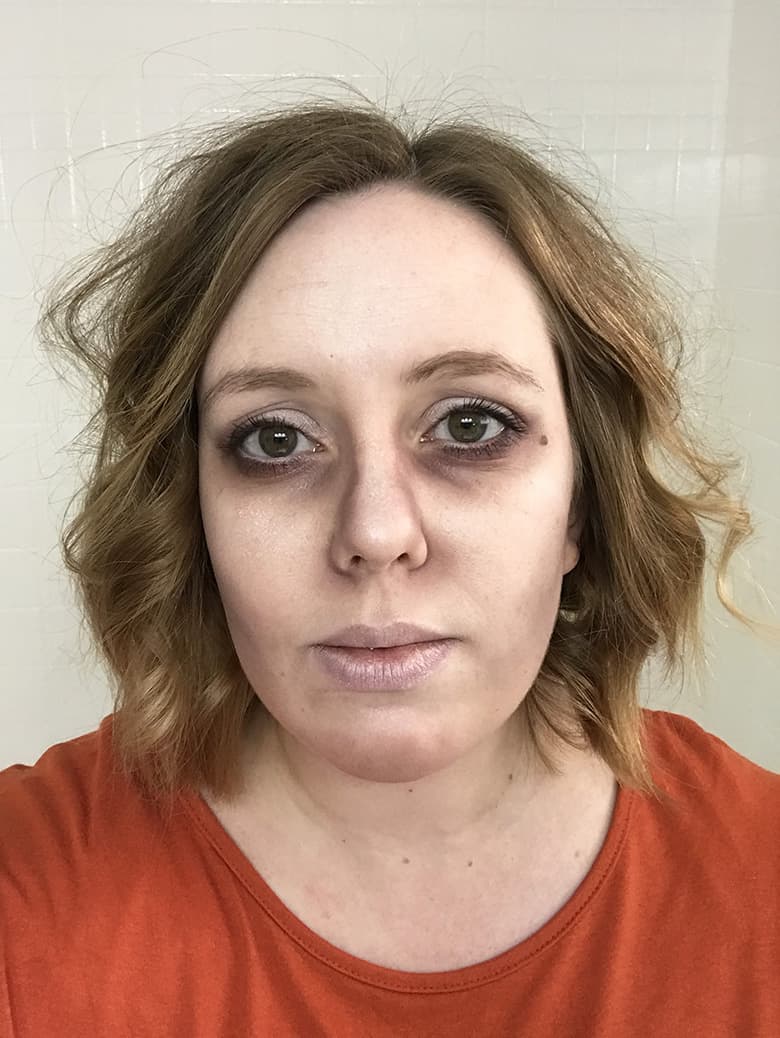
- Now is the fun part: Apply dark eyeshadow colors (almost like an upside-down smoky eye) under your eyes and at the corners. Blend browns, purples, and pinks to get that “we’re not quite sure if she’s living” look. I used a combination of my Urban Decay Naked3 palette and my Mac Burgundy Times Nine palette. Use a dark brown or purple to highlight your “tired eye” lines, as well as the sides of your nose and around the base of your nose. Apply more dark shadow under your cheekbones and on your chin.
- To help take some color out of your lips, dab a light-colored eyeshadow primer or foundation on your lips.
- Add eyeliner and mascara if you want. Because glamour mummies are all the rage. Or something.
And if those instructions were totally unhelpful, here is the video I loosely followed:
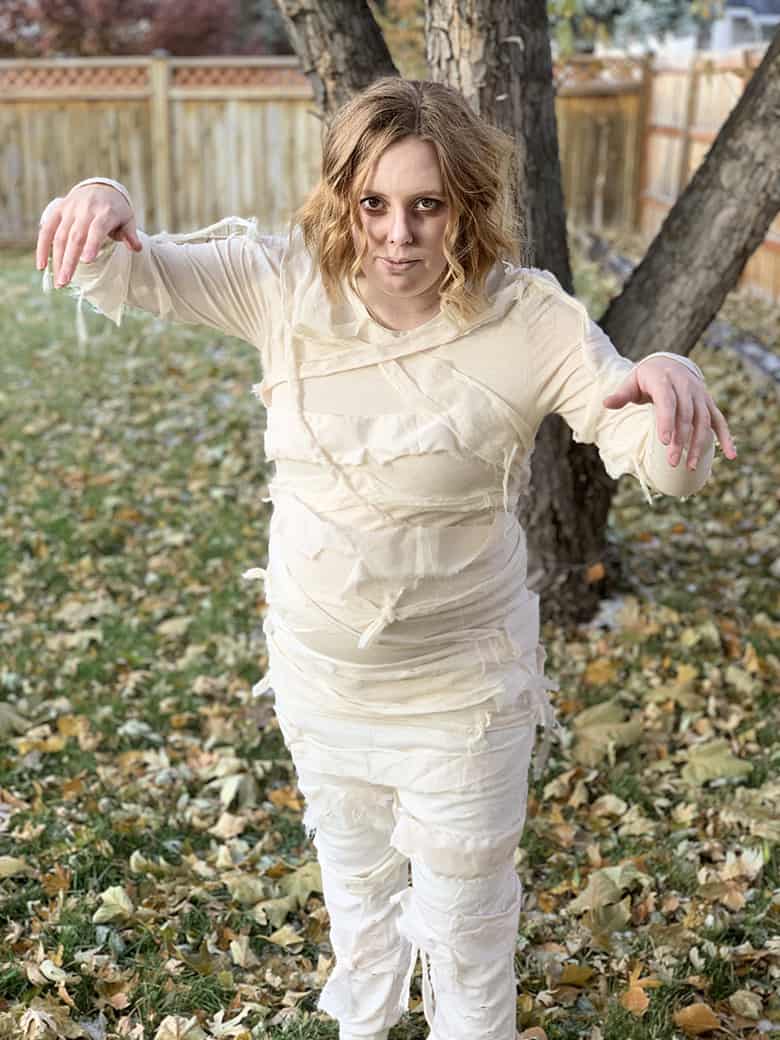
I was rather pleased with how my mummy makeup turned out! It looked much better in the closeup photos, so here’s a pre-costume shot (where I look totally dead–mission accomplished):
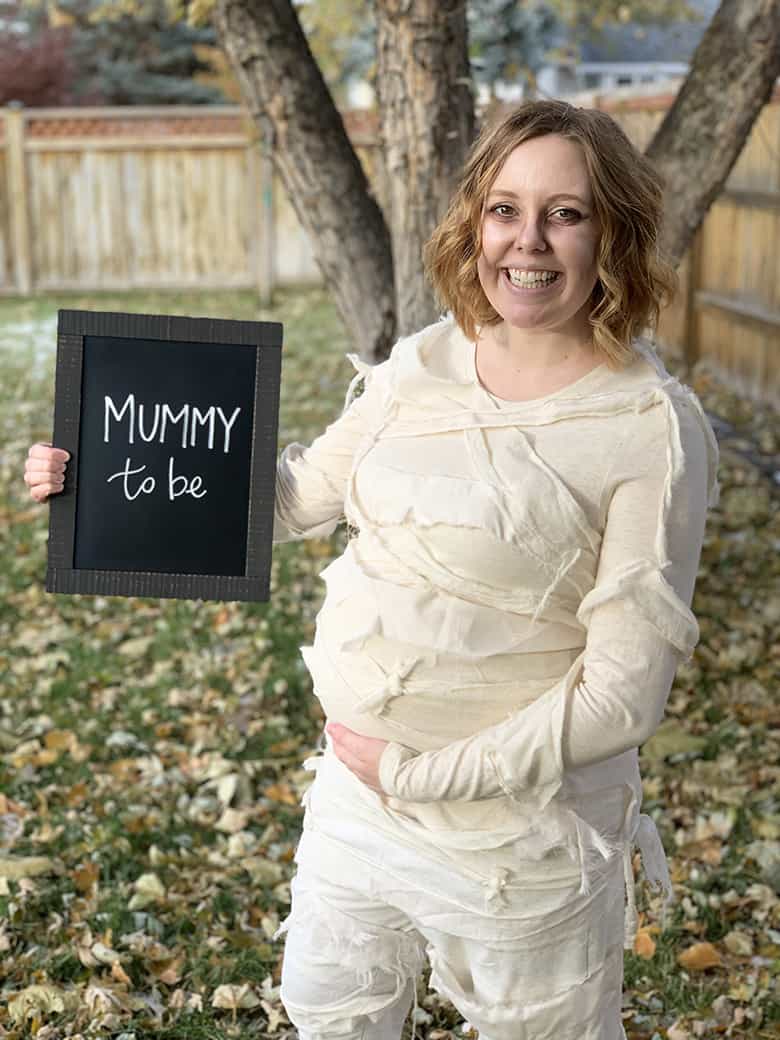
Make a Mummy-to-Be Sign
The final (optional) step to your mummy costume is to make a sign for pictures! I found a chalkboard on clearance at Michael’s and wrote “mummy to be” with a chalk marker. Super simple!
How to Make a DIY Pharaoh Costume
I didn’t take pictures of my process of the Pharaoh costume: 1, because I wasn’t sure it was going to work. 2, because I procrastinated until the day or two before Halloween to make it and didn’t have time (nor did Jared want to wait while I photographed everything).
But the components are actually super simple to make (with or without sewing skills), so you should be able to duplicate this based on my measurements! Of course, the measurements are for an adult male Pharaoh costume, so simply use this as a guide if you’re making a child’s costume.
For the Pharaoh costume, you will need the following pieces:
Shirt
Just a plain black t-shirt. Easy peasy.
Skirt
You are welcome to actually sew a skirt with an elastic waistband, but that seemed like way too much work for a one-time costume. I simply found an old black curtain panel, folded it to size, and safety-pinned it around my husband’s waist (he wore basketball shorts underneath). It worked perfectly!
If you don’t have a black curtain (which you probably don’t unless you’re a hoarder like me), then a black towel or bed sheet would work just as well!
You could also purchase about a half yard of plain black fabric to wrap around a smaller person. Or, if you want the skirt to be able to wrap all the way around an adult, get a full yard, then cut it in two (so you have two rectangles instead of a square) and sew the two pieces together to make one long piece. (Of course, be sure to measure your pharaoh before buying or cutting fabric! These are just ideas.)
Long “Scarf” Thing
Mm…I don’t know what you would call this. But it’s the cream-colored part of the costume that hangs down around the neck and crosses over in front. You’ll need scrap fabric in a contrasting color. I used a piece of soft linen-like fabric that I found at the thrift store years ago.
The “scarf” measures 110″ long and 6″ wide. Because it’s so long, I cut two pieces measuring about 55.5″ and sewed them together (you won’t see the seam at the back of the neck). I didn’t finish the edges on this but you easily could if you have the time (or use hem tape for a no-sew option).
Belt
For the belt, I finished some of the edges but left the ties with raw edges (I was running out of energy and it wasn’t worth the extra time to me at that point). I’m only giving you the finished measurements of each part, so feel free to add extra length and width if you plan on serging or folding over the edges.
Finished edges look cleaner, of course, and might be important if your costume will get tons of use, but know that it’s an optional step!
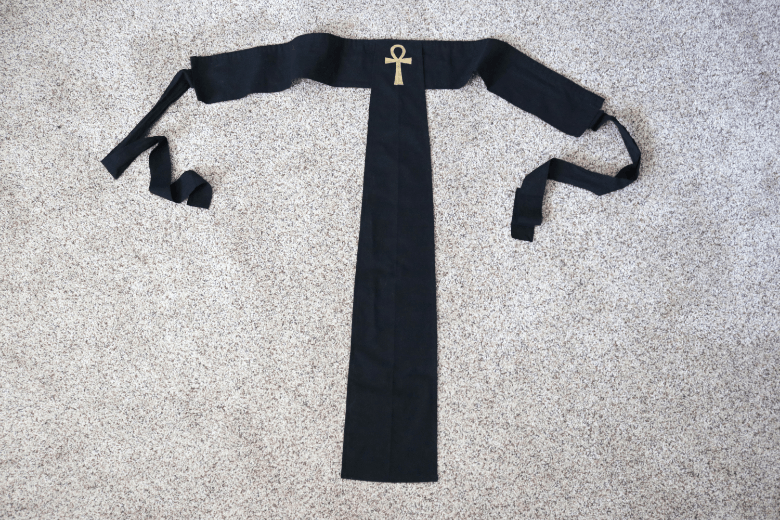
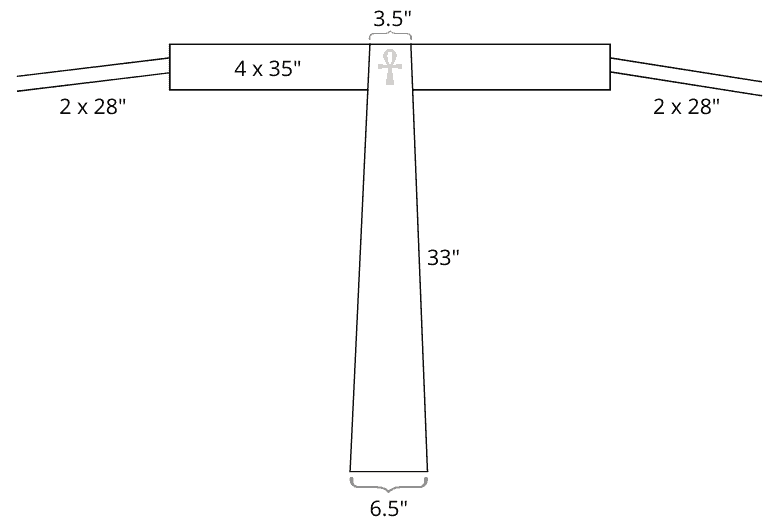
The main, wide belt part measures about 35″ long by 4″ wide.
The tapered “hangy-down” thing in the middle measures 33″ long, 3.5″ wide at the top, and 6.5″ wide at the bottom. To cut a perfectly symmetrical diagonal line: First, fold your fabric in half lengthwise, mark 1.75″ at the top and 3.25″ at the bottom (more if you plan on finishing the edges). Connect the markings and cut both layers of fabric with the help of my favorite quilting supplies.
Each tie measures 28″ long by 2″ wide.
The middle part is sewn just across the top so that it would be free to hang naturally when worn. Each tie is sewn to the back of the wide middle belt.
To add the ankh symbol to the belt, make a stencil from freezer paper and paint it with gold fabric paint. Refer to my freezer paper stencil tutorial for more instructions on how to do this. Or, cut the symbol from heat transfer vinyl and iron it on–even easier and no drying time!
Headdress
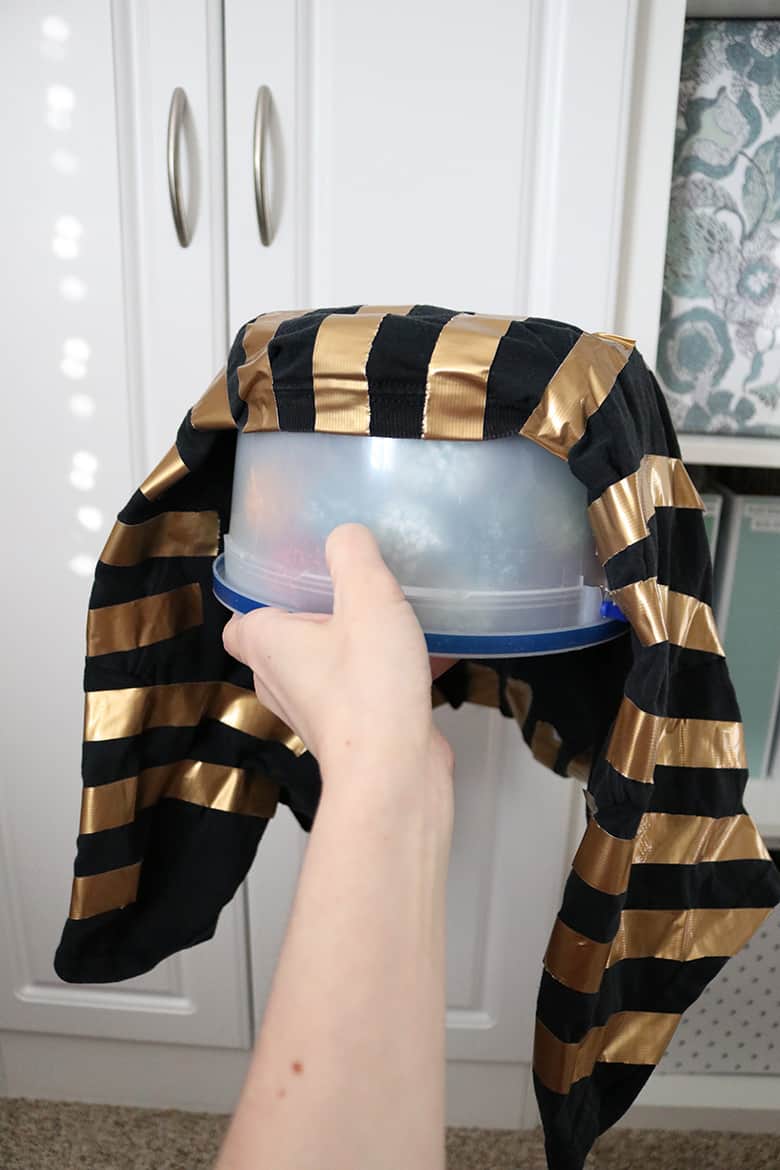
To make the headdress, you will need an additional black t-shirt and gold duct tape.
This is the trickiest part of the whole costume and definitely easiest when made on someone else (if you’re making this for yourself, find someone who has a similar head shape to be your model).
Put your model’s head through the neck hole of the shirt until it sits comfortably over their forehead and behind their ears. The sleeves of the shirt will become the front “hangy things” on either side of the face (I know, super technical terminology).
Pin the sleeves flat so the shirt starts to resemble a headdress.

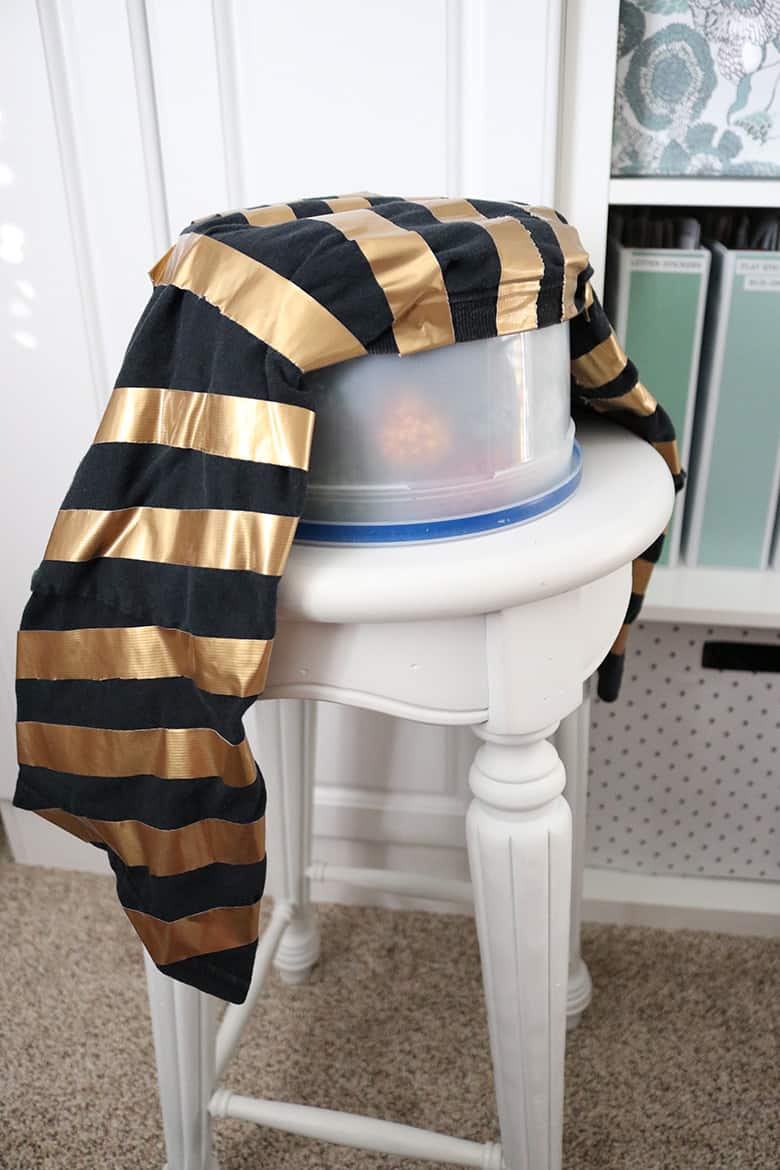
Next, tear long strips of duct tape in half lengthwise for the stripes. Starting at the bottom of the sleeves, duct tape strips horizontally across with equal spaces in between. (These stripes won’t follow the angle of the sleeves–they should instead be parallel to the floor–so pay attention to that! I had to redo this part when I realized my mistake.)
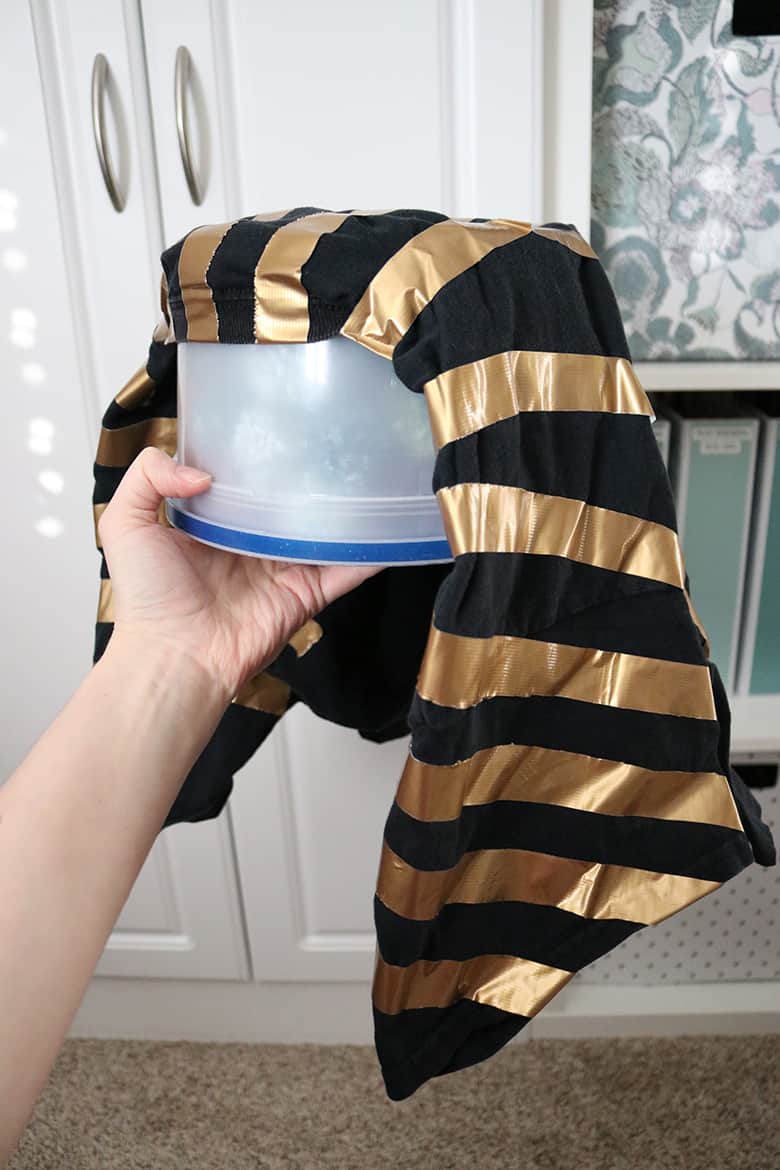
Wrap the duct tape around the sleeves so that they lie flat and keep the same shape as the opposite side (don’t worry about the t-shirt having wrinkles or folds on the underside).
Once you’ve finished the sleeves (the bottom four stripes for me), start taping the top of the headdress. Start with one very long stripe of tape in the middle of the head by folding the tape a couple inches underneath (through the neck hole of the shirt) and going down the back of the headdress.
Add more long stripes on either side of the center stripe, but angle them slightly so you can gradually spread the stripes out as you get closer to the sleeve stripes. (The stripes should fan out at this point instead of going parallel like the ones you did on the sleeves.)
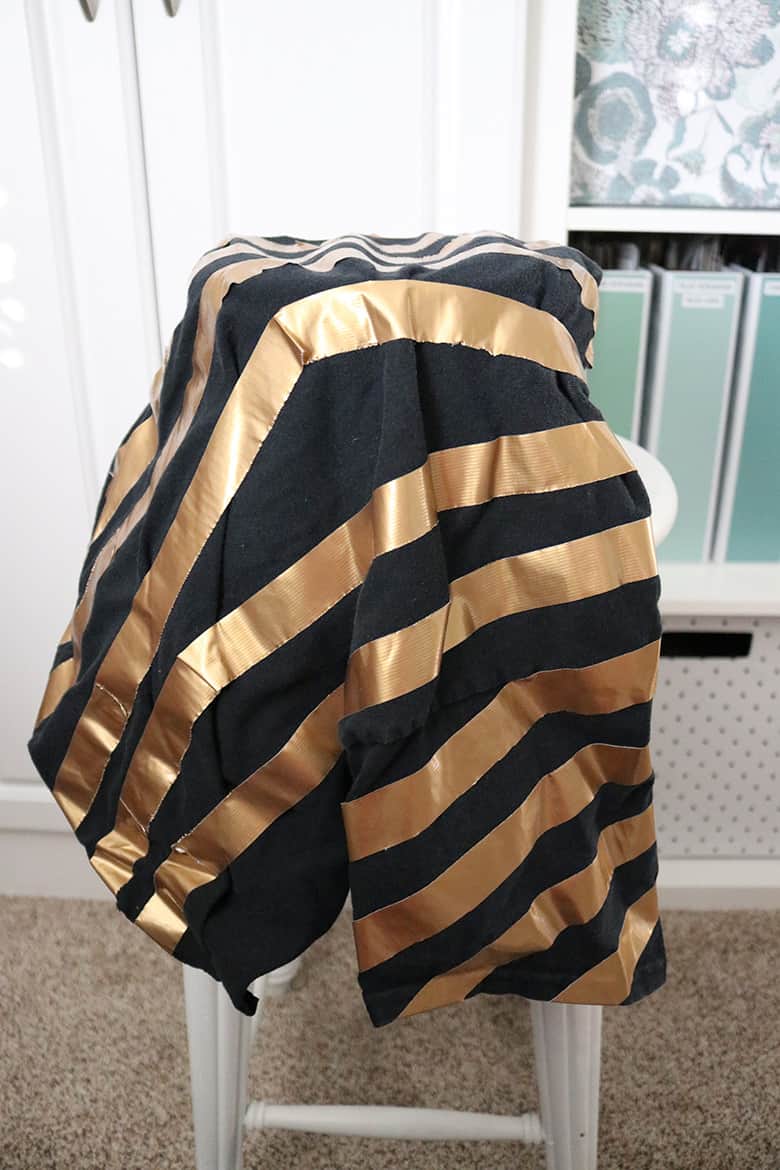
Utilize the duct tape to fold the shirt down at the corners of the head so the headdress sits comfortably–again, don’t worry about bunching up the fabric underneath the tape.
Oh, and be careful not to catch your model’s hair in the tape! I may or may not speak from the experience of an unhappy husband with this…
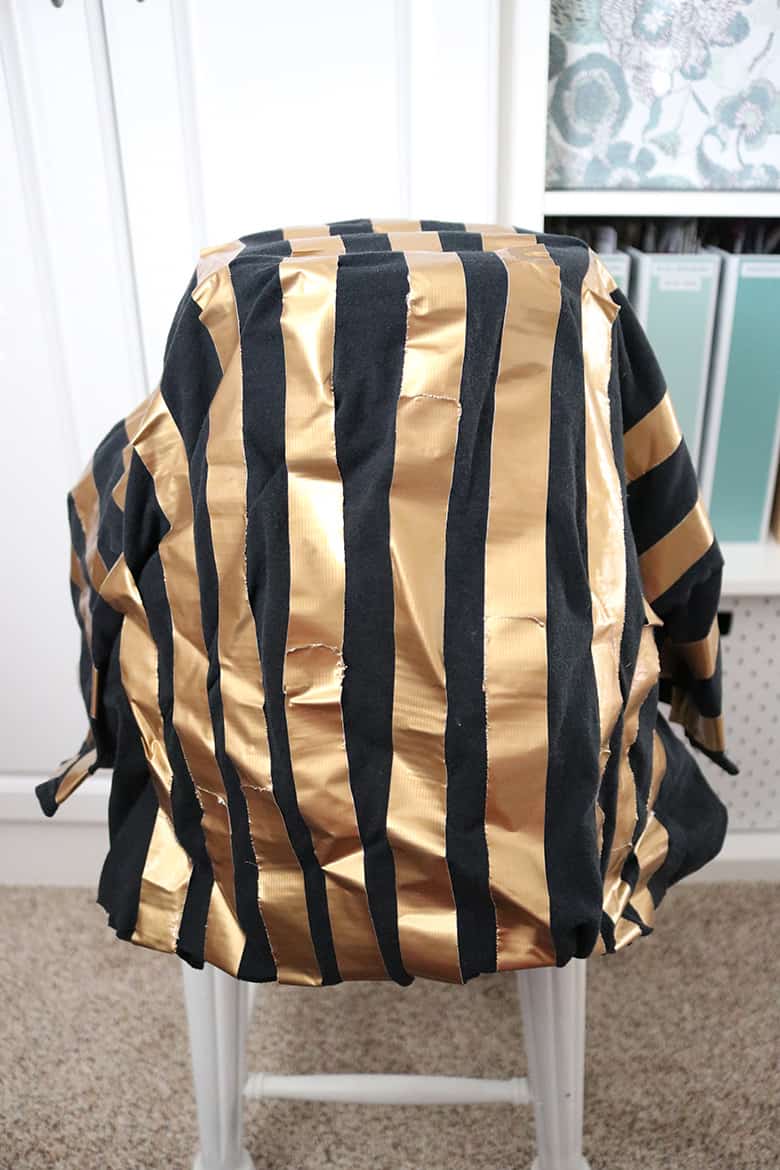
Once you’ve applied all your duct tape stripes, you can cut the back of the t-shirt straight across to get rid of some of the excess fabric. (Or, do this part before applying the stripes so you know how much tape you actually need and then fold the tape under the shirt for a “finished” look.)
If you made your tape strips too short on accident (like I did at first, not realizing how much I’d need to go all the way over the head and down the back), you can simply overlap another strip of tape and continue it down. Normally my OCD wouldn’t be able to handle the imperfectness of this, but it wasn’t visible from the front of the headdress so I survived. 😉
Arm bands
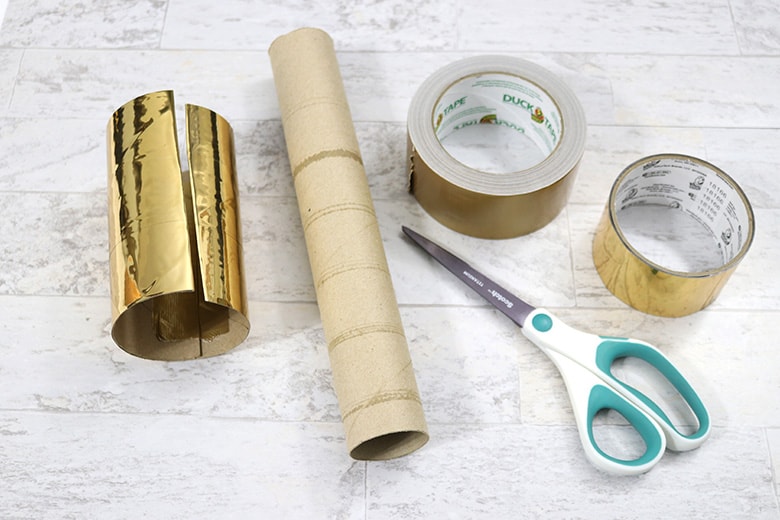
For the gold arm bands, you will need a paper towel roll (or two toilet paper rolls) and gold duct tape. I actually used gold mirror duct tape for this part of the costume, but it wasn’t nearly sticky enough to use for the headdress. There’s really not a need for two different types of duct tape, so you can just use the regular gold duct tape here if you want.
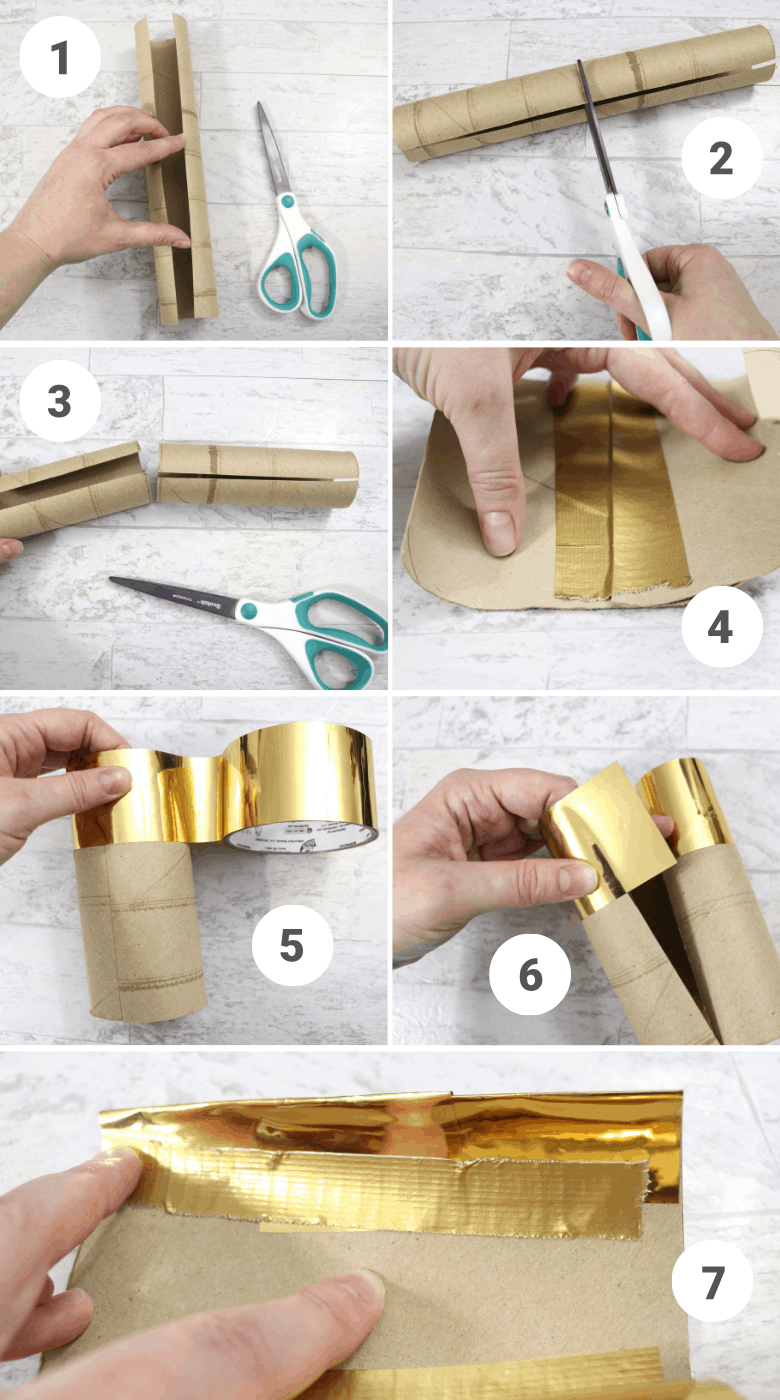
If using a paper towel roll, first cut a slit lengthwise down the tube. Next, cut the tube in half. (If using toilet paper rolls, just cut slits lengthwise down each.)
Apply duct tape to the rolls, folding over on the edge. Because the mirror duct tape isn’t particularly sticky, I applied a strip of regular duct tape to the inside of the bands to hold it in place. Trim your cuffs to the same size and cut off any excess tape or cardboard as necessary.
The arm bands slipped over my husband’s wrists and stayed in place just fine as is, but you could punch holes and add some string to tie them in place if needed.
Sandals and ribbon
To complete the look, you’ll want black sandals or flip-flops and black ribbon to make them “lace-up sandals.” The ribbon is optional, and we ultimately decided to go without.
And, of course, if you’re wearing this costume on a cold, possibly snowy, October night, you may not be wearing sandals at all with your costume and that’s okay too!
Whew! And you’re done! Oh, except for the eyeliner…if you can convince your Pharaoh to wear it! (Yes, I now have photographic evidence that my husband wore guy-liner once upon a time. 😏 He really deserves a husband-of-the-year award for cooperating with all my Halloween shenanigans.)
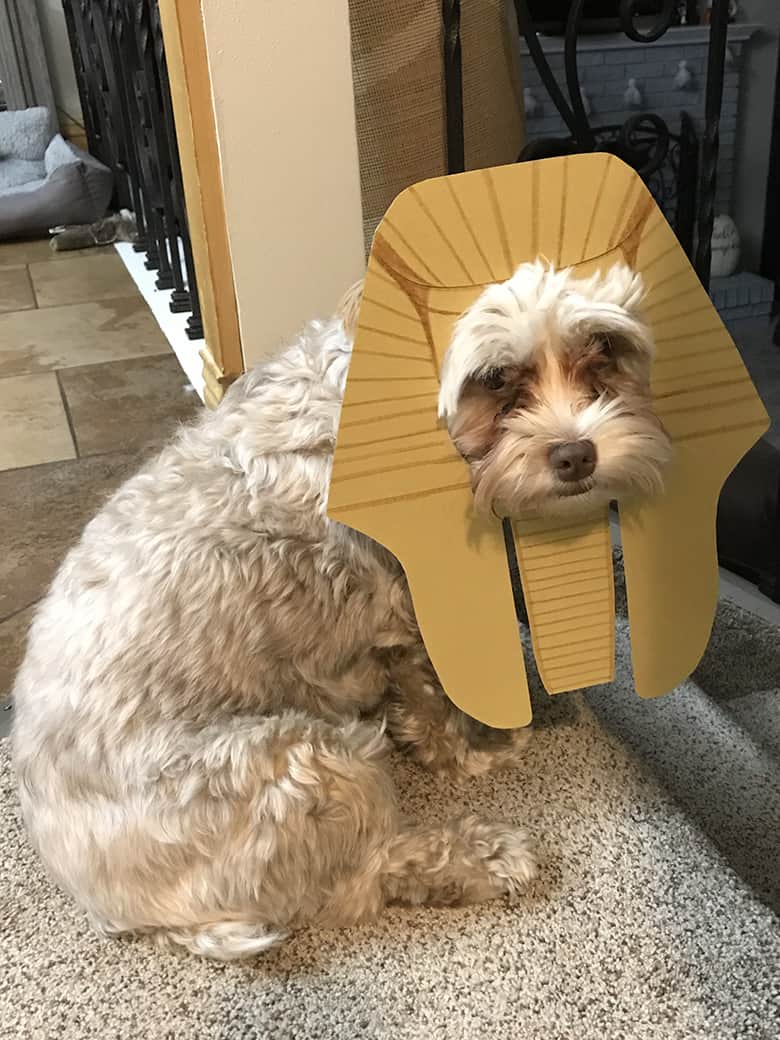
How to Make a Sphinx Costume for Your Dog
Chip’s sphinx headdress was the easiest part of this whole family costume. I figured a cardboard cutout would be the simplest, especially since I knew he wouldn’t wear any costume for more than a few pictures anyway.
Unfortunately, I don’t have a pattern for you to copy because I just free-handed this.
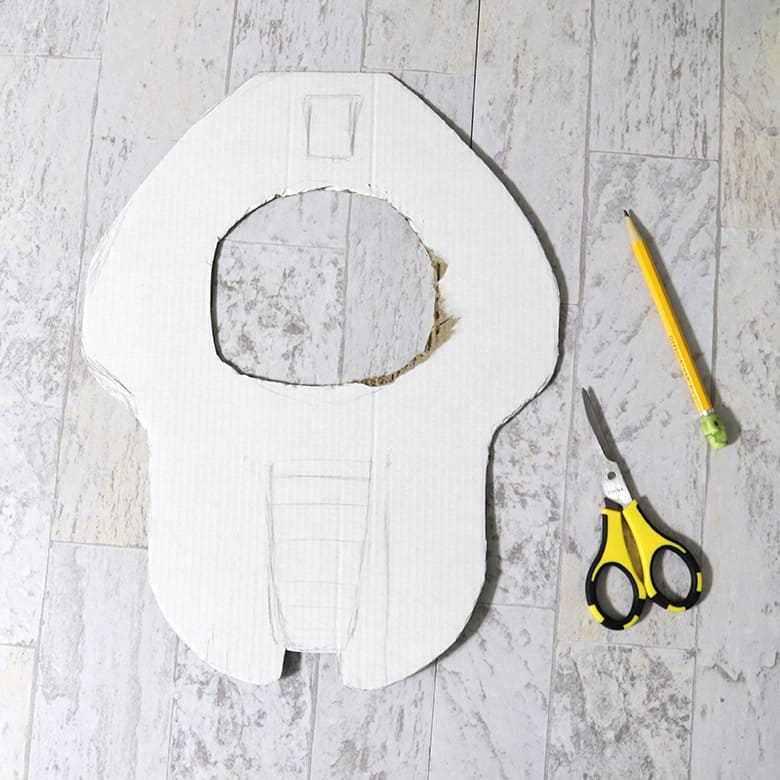
After sketching out a basic headdress shape and cutting a hole for Chip’s head, I covered the cardboard with colored cardstock. I refined the shape of the headdress a bit and then I drew in lines with a marker.
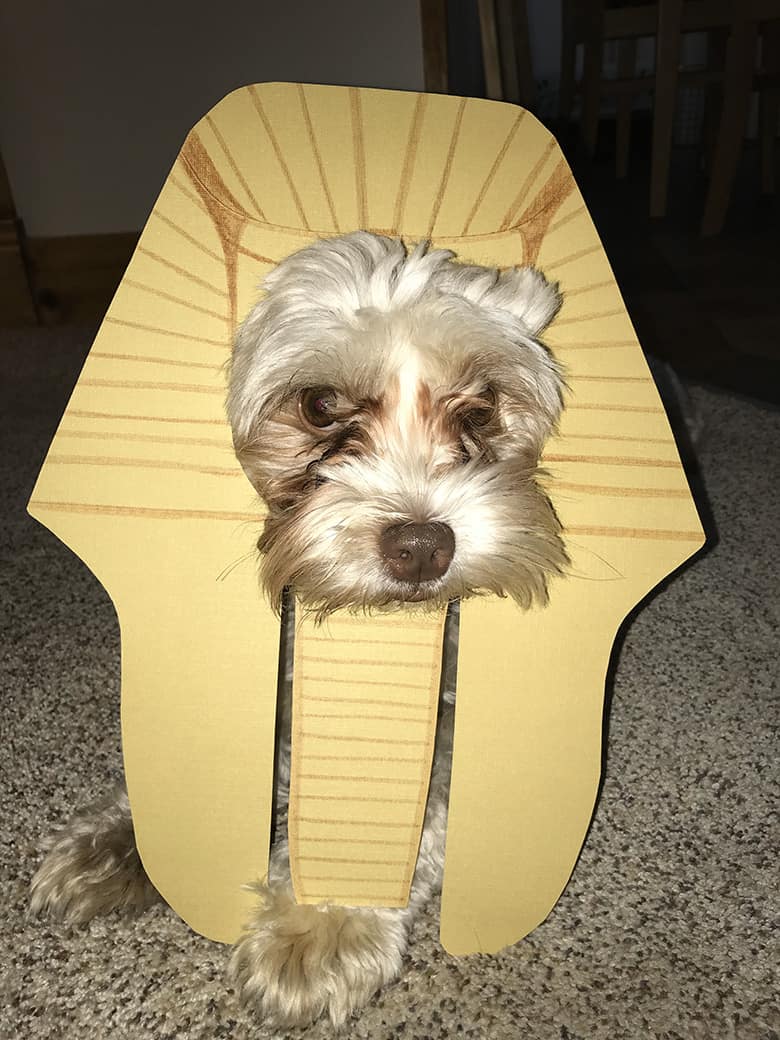
I decided it looked better to have gaps in between the chin thingy and the other hangy things (super technical) so I cut out those parts too.
DIY Egyptian Family Halloween Costumes
I hope these tutorials help you with your own Egyptian family costumes. If they do, leave a comment or shoot me an email, I’d love to see how yours turned out, too!

Don’t forget to pin and save for later!
hello! love the mummy idea. did you tack down one long piece of fabric wrapped from front to back? or did you use one piece tacked on front and a second piece tacked on the back?
Hi Elizabeth! I used multiple strips, tacking some across the front and some in the back. Some wrapped around the sides of the shirt but not all of them. Each strip was 1 to 2 feet long and probably some smaller too. If you have a continuous strip of fabric (like if you tore it from a bedsheet or are using gauze), then you could do one long piece, tacking it as you go. I hope that answers your question!