Wizard of Oz Couples Halloween Costume: Wicked Witch of the East DIY Tutorial
Halloween couples costumes are the best, and last year’s Wizard of Oz theme was my favorite yet! Learn how I made this Wicked Witch of the East costume from a cardboard box!
I loved our Halloween costumes last year! I started much earlier (about a week or two in advance) and was still adding the finishing touches the day before Halloween. Go figure.
But I promise I’m getting better…I started this year’s costumes in August. 😆
1. Because I really do love Halloween that much, 2. Because being pregnant opens up a whole new world of costumes and I need to take advantage!
But that’s for a future post…back to these awesome costumes from last year.
Wizard of Oz family costumes seem to be fairly popular for Halloween, but I wanted to do something slightly different than the usual Wicked Witch of the West, Dorothy, or Glinda. And I think I would have had a hard time making Jared be the tin man, lion, or scarecrow (plus, they seemed like a lot more work to make).
So, here we are, the Wicked Witch of the East, who gets crushed by Dorothy’s house, and the tornado, the cause of said crushing:
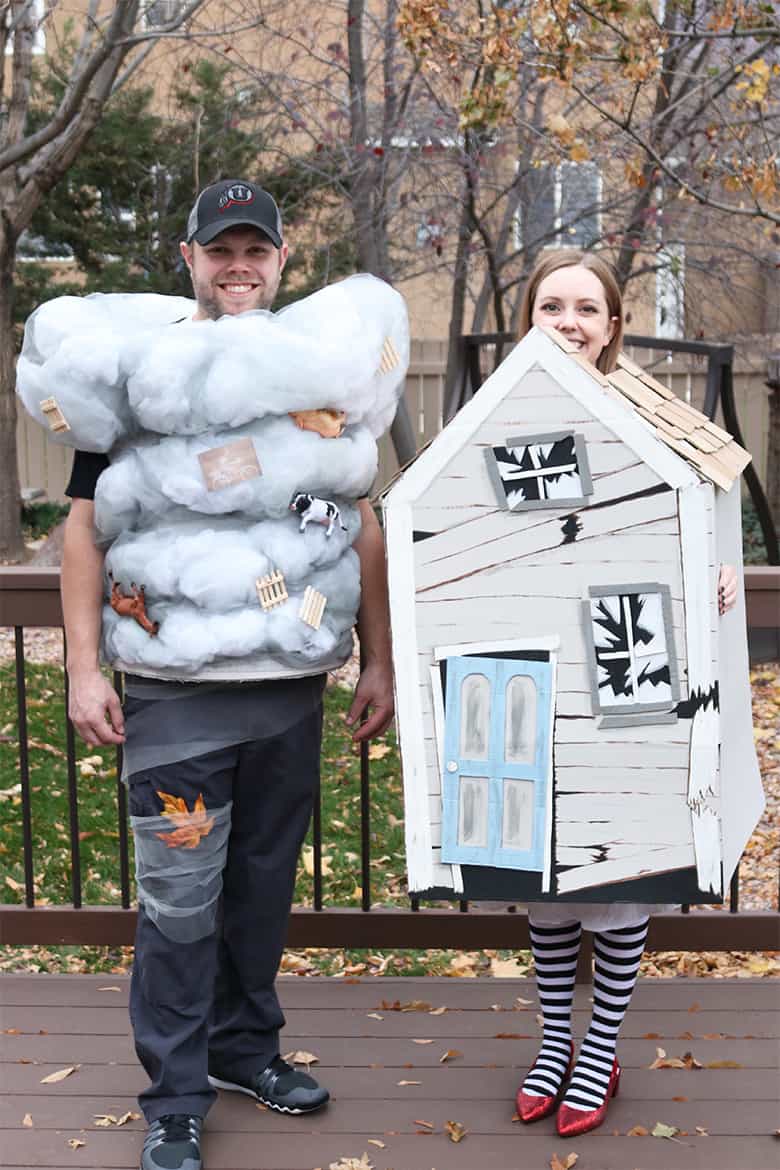
Click here to skip to the Wizard of Oz tornado costume tutorial.
“Make a Halloween costume” is one of the 31 items on my October bucket list. Grab your free printable October bucket list here!
This post contains affiliate links. For more information, see my disclosures here.
How to make a Wicked Witch of the East DIY Halloween costume
How to make the Wicked Witch of the East house
You’re going to need:
- an XL cardboard box from Home Depot, measuring 22″ x 22″ x 22″
- measuring tape, scissors and/or Xacto knife, ruler or straight edge, and a pencil
- paint for “exterior” house color: you could use spray paint, but I just found some leftover latex house paint samples and used that! So much faster!
- large paint brush
- acrylic paint, various colors for house details
- craft paint brushes
- cardboard scraps for shingles, door, and window frames
- hot glue
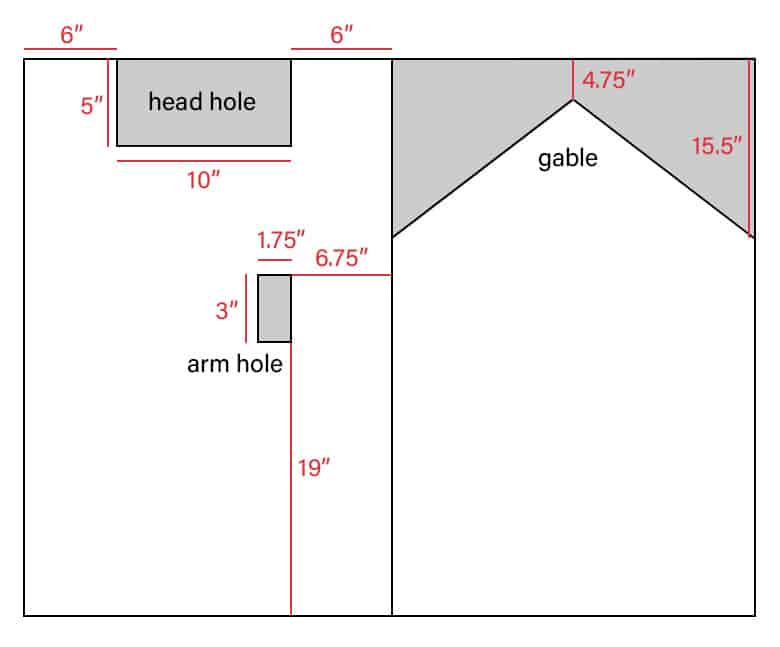
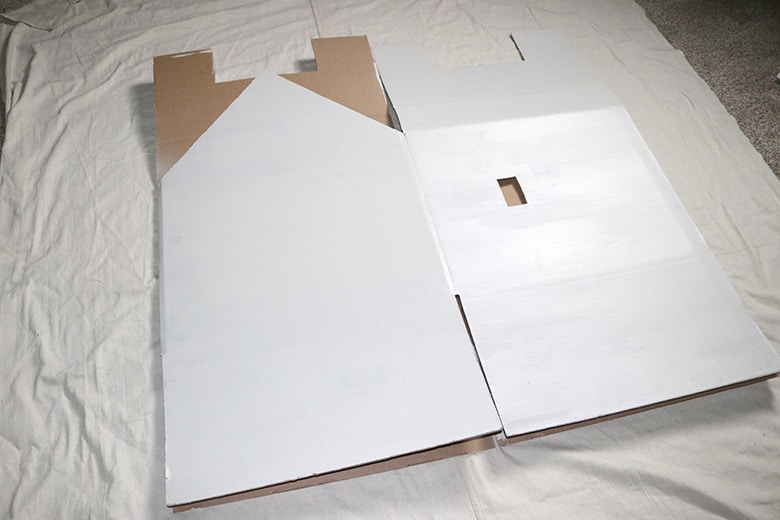
Lay the cardboard box flat on the ground, collapsed so only two sides are visible. Reference the following diagram (NOT to scale) as you make cuts for the gabled sides, head holes, and arm holes.
For the gabled sides of the house:
On one of the four sides of the box (see the right half of the diagram), make a mark in the top center and draw a line down 4.75″ inches. Make a mark on each of the sides, 15.5″ from the top of the box flap. Connect your marks, using a ruler and pencil. Cut out the triangular pieces with scissors. This forms one of the gabled sides of the house.
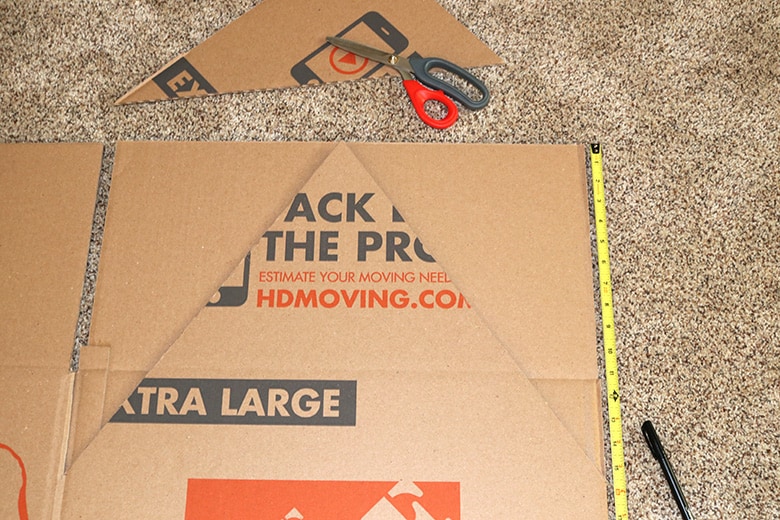
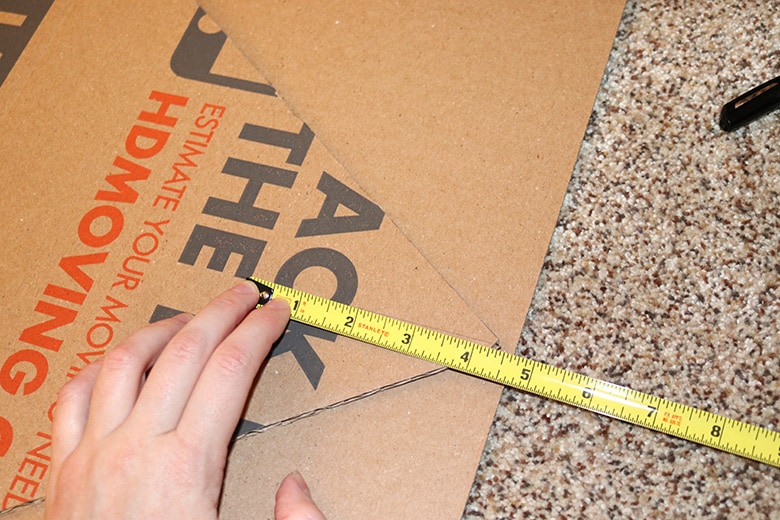
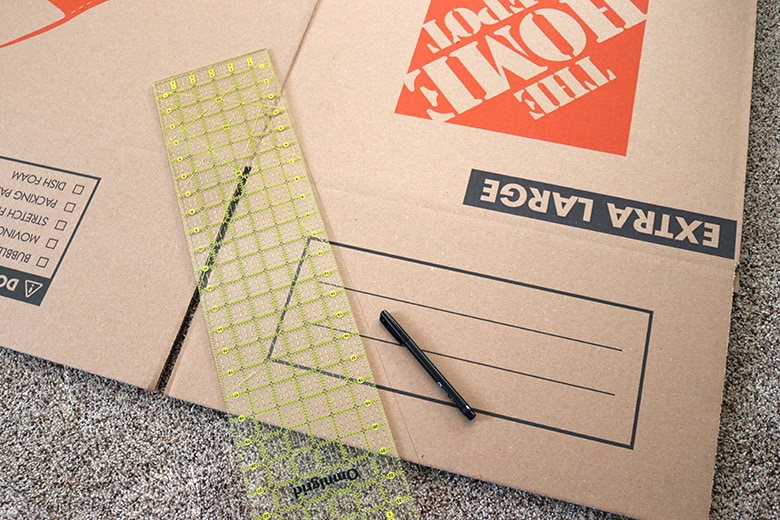
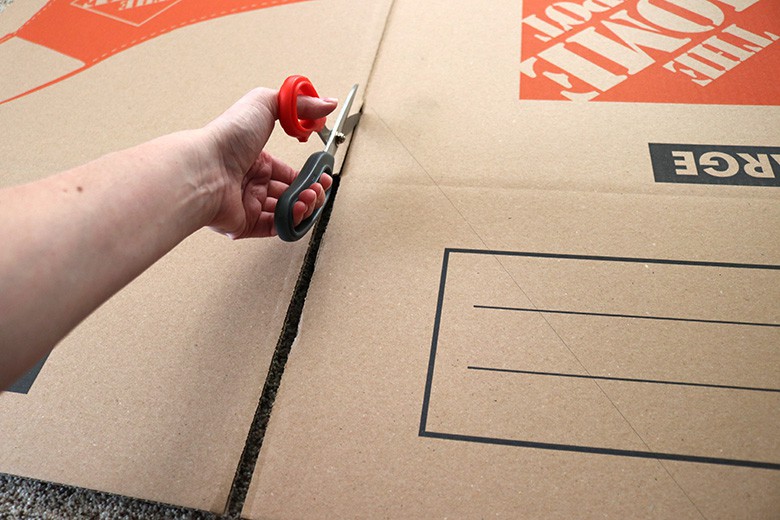
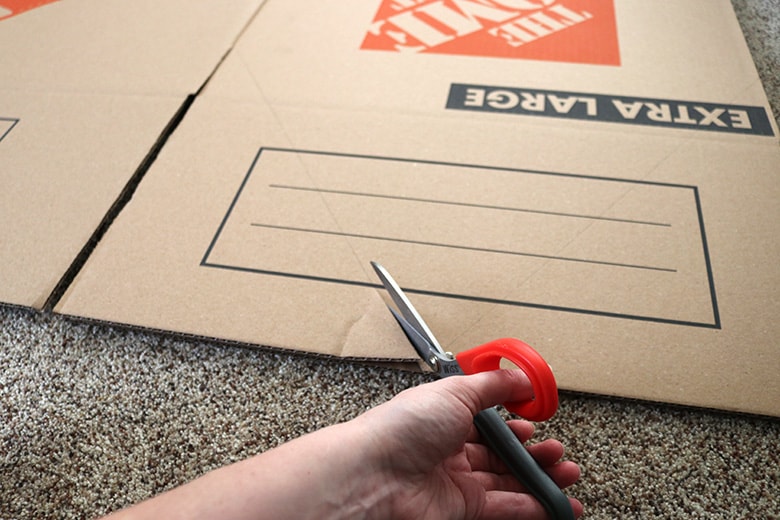
Repeat this process on the opposite side of the box (when the box is collapsed, like in the diagram, the opposite side is NOT underneath this one, so don’t simply trace the gable because that is actually one of the head hole sides).
For the head holes:
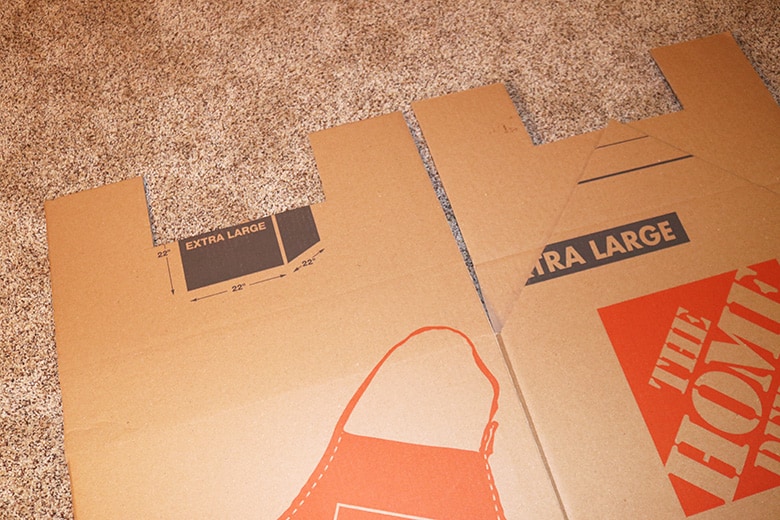
On one of the sides adjacent to a gabled side, cut out a rectangle on the top flap that measures 6″ from either side and 5″ from the top (this results in a rectangle measuring 5″ x 10″). Repeat on the opposite side of the box.
For the arm holes:
You can actually make arm holes wherever is most comfortable for you, and if you want your arms to be able to go all the way through then don’t follow my instructions. I decided on “hand holes” rather than arm holes because it was easier to hold the box up that way.
If you want to do what I did:
Reference the diagram for placement of the arm holes. Make a mark on one of the head hole sides 6.75″ from the front gabled side of the house and 19″ from the bottom of the box. This will be the bottom right corner of an arm hole. Make your arm hole at least 1.75″ wide and 3″ high. Carefully cut this out with an Xacto knife with the box open so you don’t cut through the other side.
For the opposite arm hole, repeat process, but make sure to cut out the hole closest to the front gabled side of the house again (so your arm holes are the same distance from the front of the house).
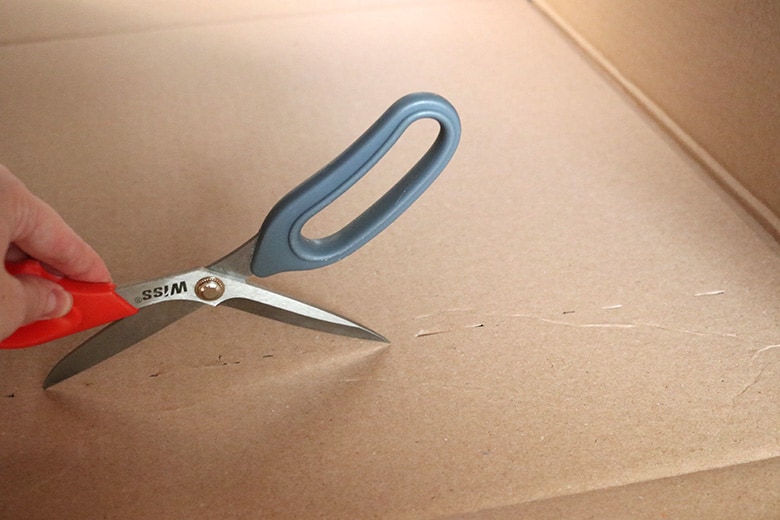
Because the “head hole” sides of the box are going to be folded down at the corner of the gables–and since this is a few inches below the natural fold of the box’s flaps–carefully “score” the box in a straight line where it will be folded. To do this, I simply took the points of my scissors and stabbed the box a few times. Try to only go halfway through the cardboard and not all the way through if you can.
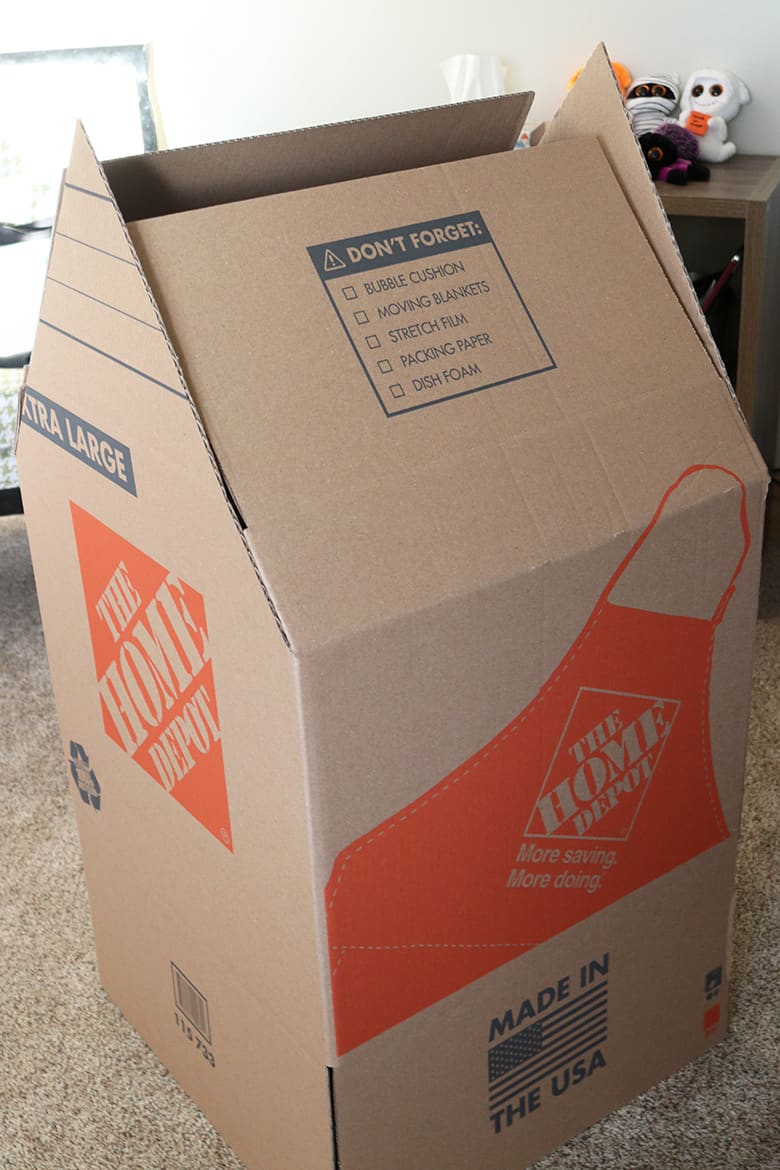
Next, set up the box and paint the exterior with a solid color. A large paint brush and latex house paint make this process go super quickly.
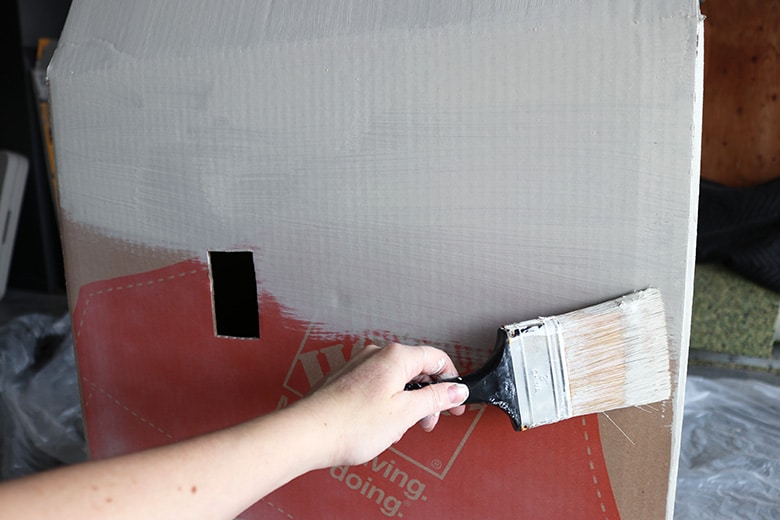
Once dry, you can paint the box to look like siding or wood. Be sure to lay out a drop cloth so you don’t get paint on your floor!
I don’t have any pictures of my process here because it was super late at night (the night before Halloween) and I was in a hurry. I also had no idea if my painting skills would come through for me or not…
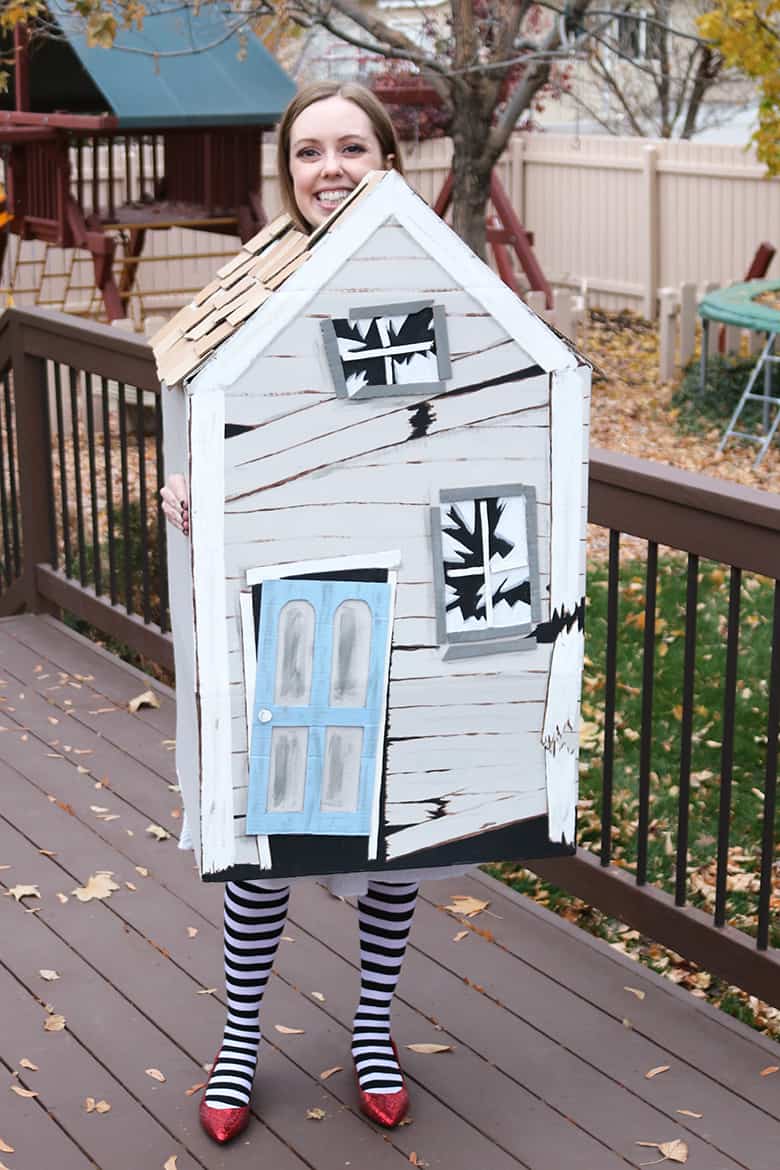
…but, they did. I sometimes surprise myself when I paint, because it’s not something I do very regularly.
Feel free to 100% copy what you see here and I’ll do my best to explain how I painted the front of the house (it’s the only side I bothered painting).
How to paint the house
First, know that the blue door is made with a scrap of cardboard, as are the grey and white window frames. We’ll get to these in a minute.
Start by sketching out what you want: two windows, a door, and where you want the wood slats to be. Make several of the wood slats broken (this house has been through a tornado, after all).
I left the wood slats the same color as the exterior of the house and only painted the lines in between and a few squiggly lines to make them look like wood. These lines don’t have to be perfectly defined.
Next, you can paint the outer frame of the house as well as a door frame.
Before going any further with the painting, make the door and window frames from scraps of cardboard.
Sketch the door’s windows with a pencil and use an Xacto knife to cut them out. Paint the door and let dry. Cut a small circle for the doorknob, glue to the door, paint carefully and let dry. Glue the door to the house at an angle.
Now that you know where the door is going to be, you can paint the “inside” of the house behind the door black, plus anywhere you want a wood slat to be missing or broken. (Leave the door windows the exterior color of the house and just add some shading.)
Cut small strips of cardboard for window frames. Glue to the house. Carefully paint the outer ones grey and the inner ones white.
For the windows, sketch where you want broken glass and paint the glass shards white. Paint around the glass black.
I attempted to add shading everywhere a natural shadow might fall (I’m not the best at this). If it helps, try to imagine a light source coming from one side or corner of the house. Use a grey paint slightly darker than the rest of the house for shadows.
And I believe that’s everything on painting the front of the house! Don’t worry if yours doesn’t end up like mine–tornadoes affect different houses differently. 😉 And if you want to go even simpler, just paint a door and some windows at angles and call it good!
The last part of the house is the shingles. Cut scraps of cardboard roughly 3.5″ x 4.5″ in size. Hot glue in rows on the roof sides (head hole sides), starting from the bottom. Remember, this house has been through a tornado so some of these shingles are crooked or missing. Fill in the roof as much or as little as you want.
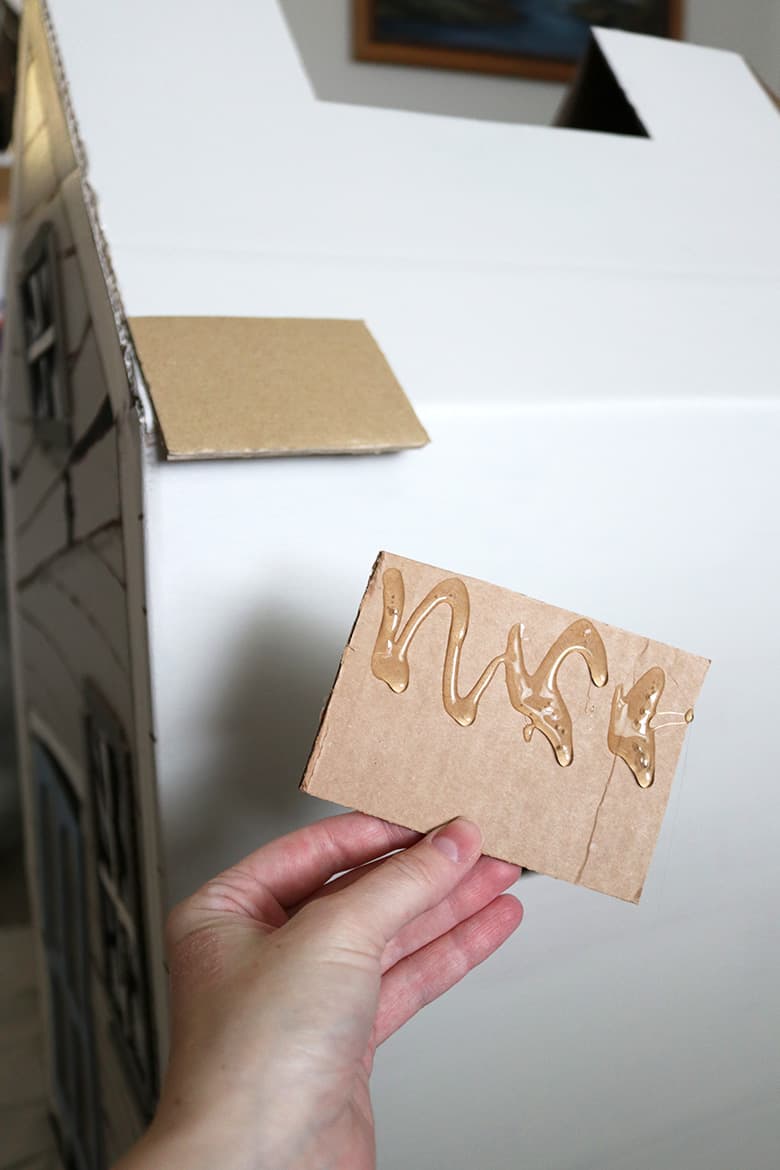
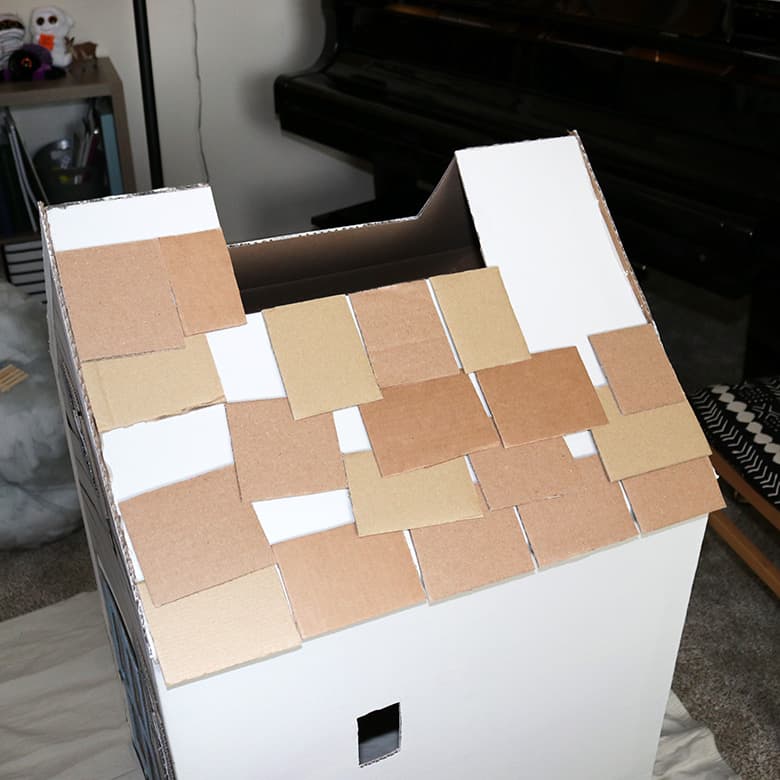
Finally, assemble the finished box! I held the roof pieces together while running a heavy bead of hot glue down the seams. Keep holding it together until the glue dries. You could also use a strong tape from the inside of the box.
If you’re transporting your costume to a Halloween party, consider the size of the assembled box first–you may want to wait to assemble it because transporting it can be tricky (ask me how I know).
How to make DIY red glitter shoes for a Wizard of Oz costume
If you plan on wearing your red glitter shoes a lot, I recommend finding actual “Dorothy shoes” that might hold up better to wear and weather. But, if you just want something to wear once with a Halloween costume, this DIY will be perfect.
You’re going to need:
- red shoes
- red glitter
- Mod Podge
- a paint brush
- a disposable bowl for mixing
Mix the Mod Podge and glitter until it forms a paste (I believe I used a 1:1 ratio, but you can add more or less of either until it’s a “paintable” consistency). The mixture will look white until it dries, but don’t worry, your shoes will be red in the end. Paint the shoes, avoiding the inside where your feet will be and the bottoms.
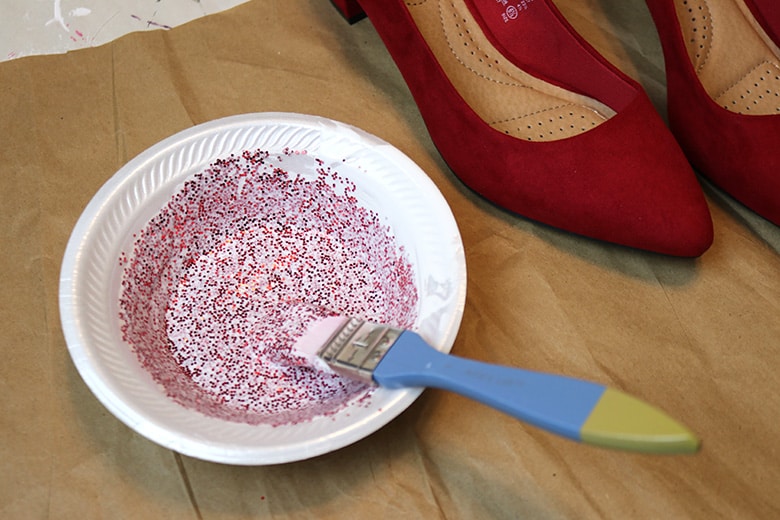
The paste will be thick so you may have to “pat” it down with your paint brush to get it to stick. Apply several coats, letting the shoes dry in between each coat. If afterwards you feel the glitter isn’t staying, add a finishing coat of plain Mod Podge to seal it.
Other things you’ll want to finish off your Wicked Witch of the East costume
black and white striped tights
a black dress: it probably won’t show once you’re wearing the box, but it keeps you in costume when you’re not wearing it
a witch hat, optional: I went without because it was going to be way too hard to put it on myself after I was already wearing the house
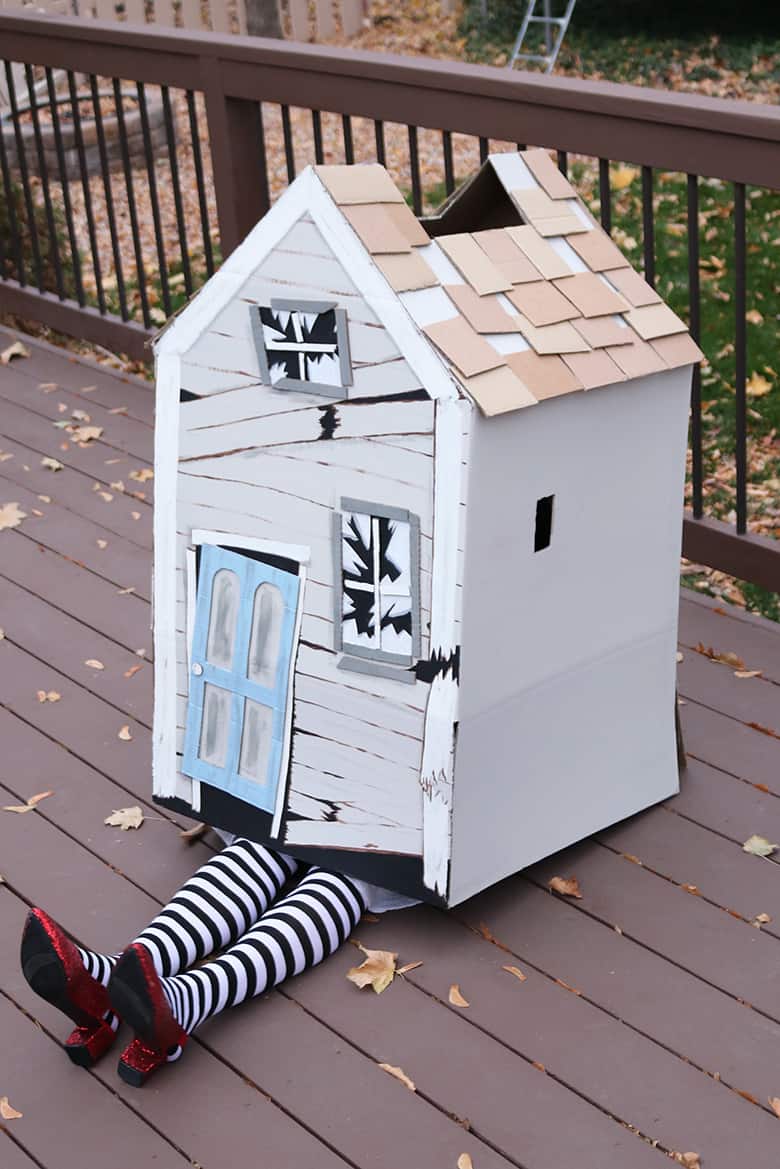
And…you’re finally done! Such a fun DIY costume! I hope this detailed tutorial was helpful.
Now, go check out the Wizard of Oz tornado costume tutorial!

Don’t forget to pin and save for later!
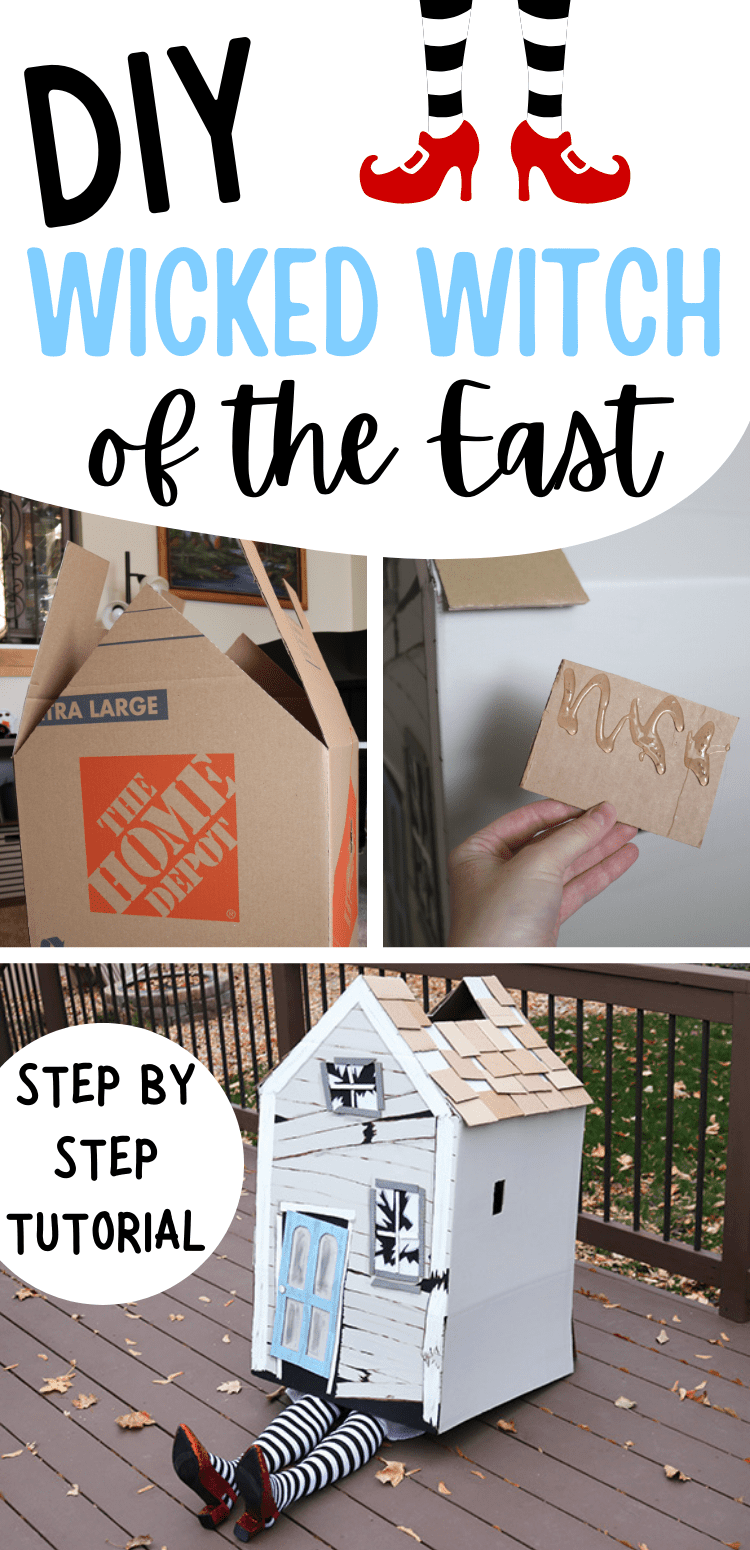

I couldn’t find 22X22X22 at Home Depot 🙁
Only 24X20X21
😳😬
Aw, dang! That’s too bad. I wonder if you could still make that size box work, depending on the orientation and who the costume’s for. It might be worth trying, you’ll have to let me know!
I made the Wicked Witch house for a work theme Halloween day of Wizard of Oz! Thank you for sharing your idea and creation!
Hi Caryn! You’re welcome, I’m so glad you found this helpful!
I just made these costumes and am so excited for Halloween! I also have two daughters, they’re going as Dorothy and Glinda! Thank you for the great tutorial!
Yay, that makes me so happy Janae! Sounds like such a fun family costume. If you post a picture anywhere, tag @aubreeoriginals, I’d love to see!
This is a great costume, so great that I decided this is what I want my husband and I to be for Halloween. I have successfully followed your wonderful instructions and I’ve made my house but wonder if you have directions for the “Tornado“. Specifically, what material you used for it. Thank you
Hi Diane! Yay, I’m so glad you’re making these your Halloween costumes. Here is a link to the tornado tutorial: https://www.aubreeoriginals.com/tornado-diy-halloween-costume/
I used a fabric laundry hamper, batting, and tulle. Let me know if you have any other questions!
How did you seal the four flaps of the roof together? With hot glue or wood glue
I used hot glue–a ton of it. Just keep holding the flaps together until the hot glue has held and dried (I’d do this over something in case the hot glue drips). You could probably also use a wood glue if you have a way to hold it together while it dries. Or duct tape from the inside of the box would work too. I hope that helps!
Thank you! Also the box warped slightly after painting…I’m worried I have to do everything over as this will get in the way of gluing everything. Did you come across this issue?
The only part that warped for me was the bottom flaps of the box, so I didn’t have too much of an issue. If you’re worried about the glue not holding, tape might work better? I’d hate for you to have to start over! I wonder if you could use a hairdryer to straighten the box out? I actually have no idea if that would work, haha, but something like that might be worth a shot. Or gently uncurling/folding the warped parts. Another option to attach the flaps would be to punch holes close to the edges and sew them together with twine–time consuming, so I’d only do that as a last resort, but I’d imagine that would be really sturdy.