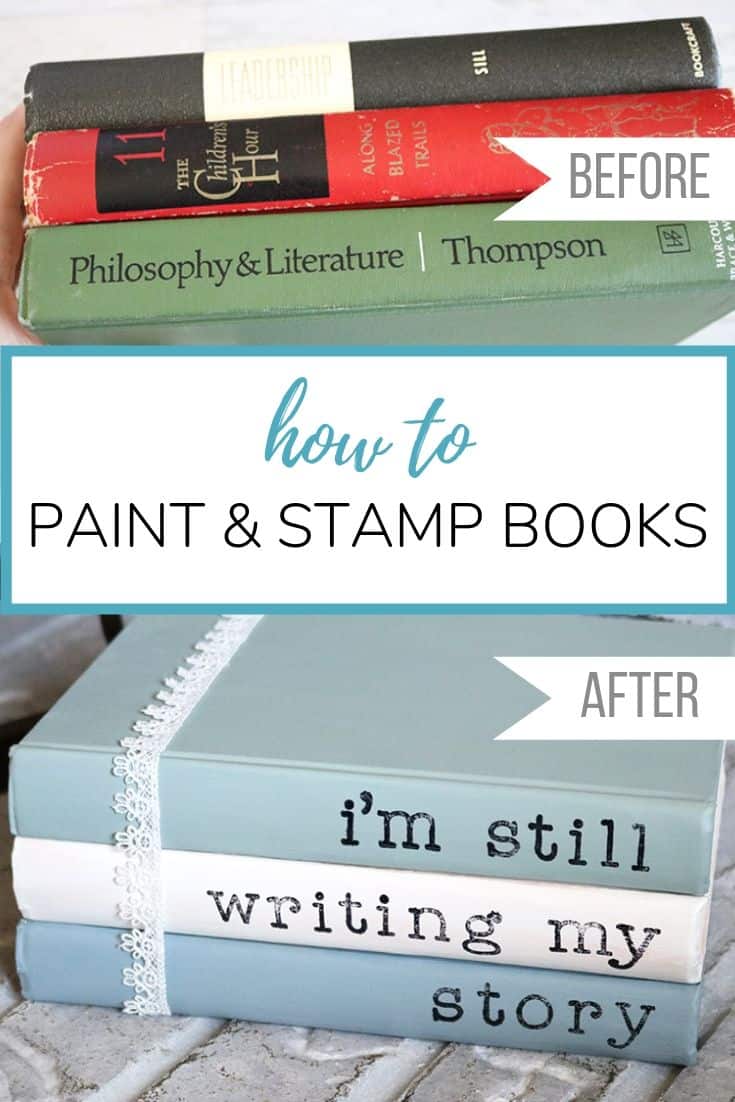
Easy Home Decor: Chalk-Painted and Stamped Books
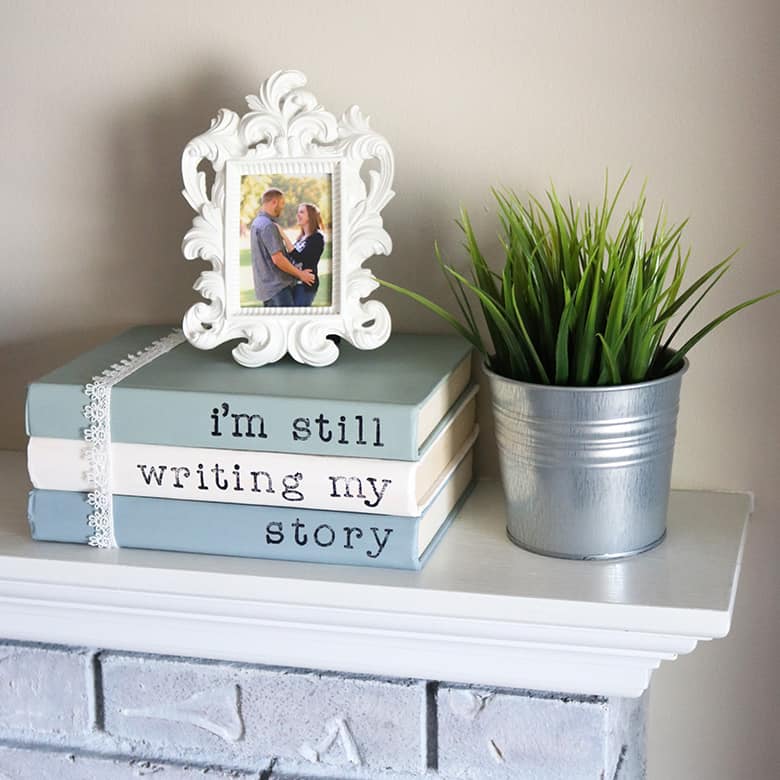
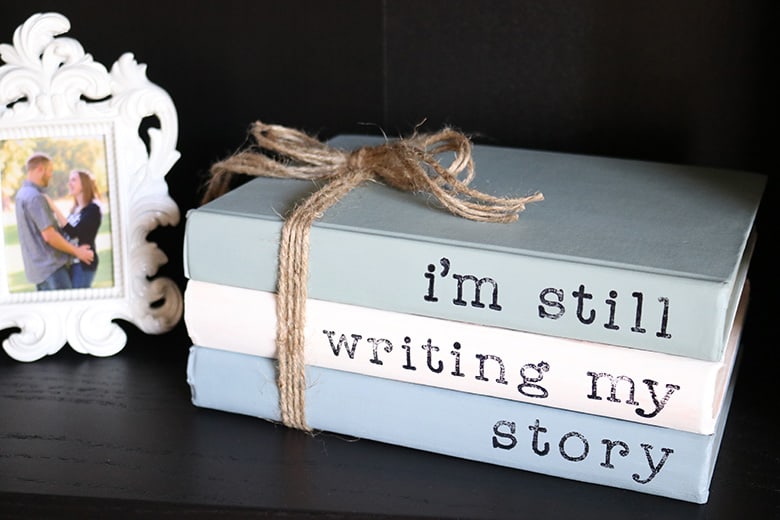
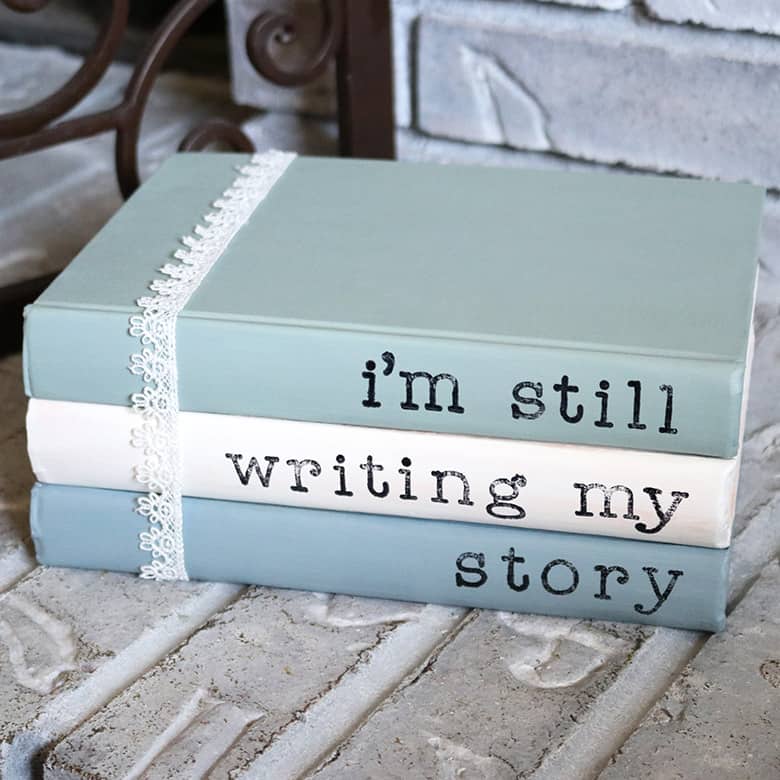
Looking for unique and cheap decor for a table or bookshelf? These chalk-painted and stamped books with custom sayings are so easy to DIY! Great for farmhouse or shabby chic decor!
I’m on a strict crafting budget these days. (Something about being a stay-at-home blogger, having a baby in a few months, and eating out a lot–I blame the baby. 😉) So I am all for easy, cheap home decorating projects. This is one of them, and I think you’ll love the finished product!
This post contains affiliate links. For more information, see my disclosures here.
What you need to paint and stamp books

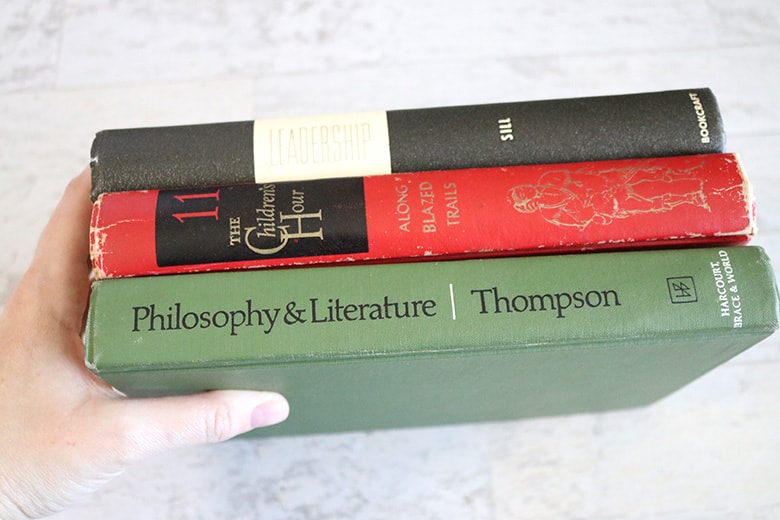
- old hardcover books: I purchased mine at a second-hand store for $1-2 each, but you could also use old textbooks, etc.
- chalk paint (I used this set of chalk paint, just be aware they’re only 2 oz. each), or matte acrylic paint and a chalk finish medium (I found mine at Hobby Lobby and used a coupon)**
- clear wax: I would only use wax on actual chalk paint, not the acrylic paint + chalk medium
- foam paint brushes
- painter’s tape
- letter stamps* and StazOn ink, or letter rub-ons
- optional: twine, ribbon, or lace
*I recommend using clear stamps and an acrylic block for this kind of project, simply because it’s so nice to be able to see where you are stamping. I purchased my stamp set at Joann in their dollar section I believe, but here are some other fun options:
**Update: some readers have had issues with the wax removing their chalk paint. Though I didn’t have any issues with the products I linked to above, you may want to purchase a chalk paint and wax finish from the same brand so you know they’re compatible. I also recommend testing both products first and letting your chalk paint dry completely, even overnight, before adding the wax.
Looking for more upcycled craft ideas? Check out these posts:
How to Upcycle a Magnet Board with Chalk Paint
DIY Fall Wreath From a Thrifted Picture Frame
DIY Gratitude Jar From an Old Container
How to Sew a Pillow Cover From a Sweater
What should you look out for when buying old books?
Condition
Depending how you plan to display your book stack, you’ll probably see at least part of the book pages. Look for books in good condition without water damage or stains on the page edges.
Texture
Because paint won’t hide texture, look for books with smooth spines. If the book title is embossed or indented, skip it because you’ll probably still be able to read the original title through the paint.
Book color
A few coats of chalk paint will probably cover any color of book. But if you plan to paint your books a really light color (or white), I’d look for a light-colored book to begin with.
If you’d like to distress your book after painting it, consider what original color will show through and choose books accordingly.
Book size
Book size is up to you, but make sure you’re buying books thick enough to fit your letter stamps. You can have all your books be the same size or you could make a “tower” where the bottom book is largest and the top book is the smallest.
How to make painted and stamped books
1. Clean the books
First, clean your book covers with a damp towel and dry completely. If you have any mystery residue that’s stuck to the book cover (speaking from my thrift store shopping experience), take some sandpaper to it.
2. Prepare the books
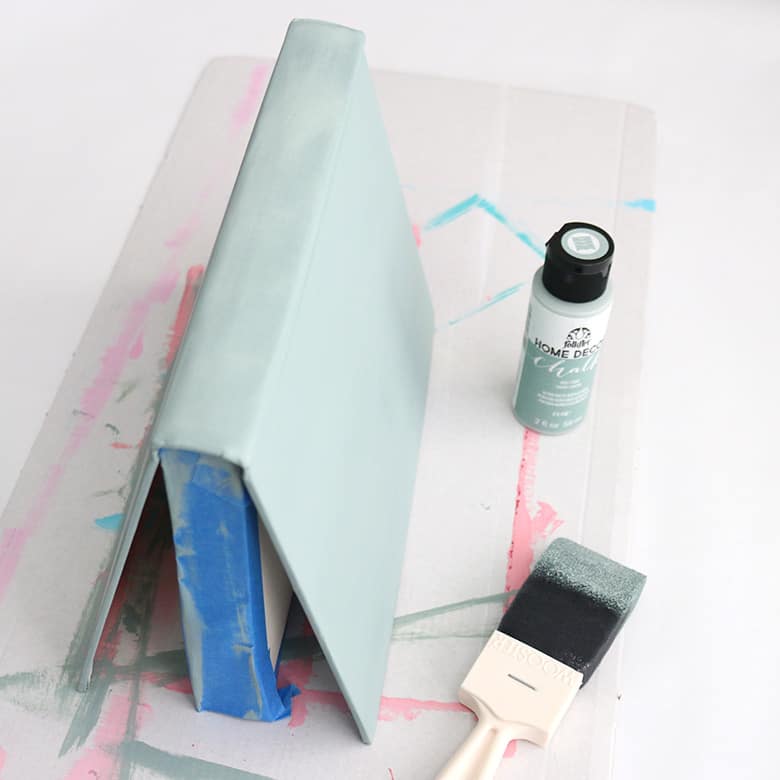
Cover the book pages with painter’s tape to protect them from being painted. You may have to tear or cut small pieces to fit tight areas next to the spine.

3. Prepare the paint
If using a chalk finish medium, prepare your paint according to the instructions. For mine, I mixed 1 part medium to 4 parts paint.
*Note: next time I do this, I will opt for actual chalk paint, I find it has the best finish. This brand of chalk paint gave me the best result, especially after applying the wax.
4. Paint the books
Paint your book, keeping in mind that some brush strokes will still be visible with chalk paint. Start with edges first and then brush the cover with long strokes, starting on one end and dragging the paint brush to the other end without lifting it.
Chalk paint dries fairly quickly so work fast and don’t apply too much paint in one coat (or you might get an uneven finish). Wait until the first coat is completely dry before applying a second.
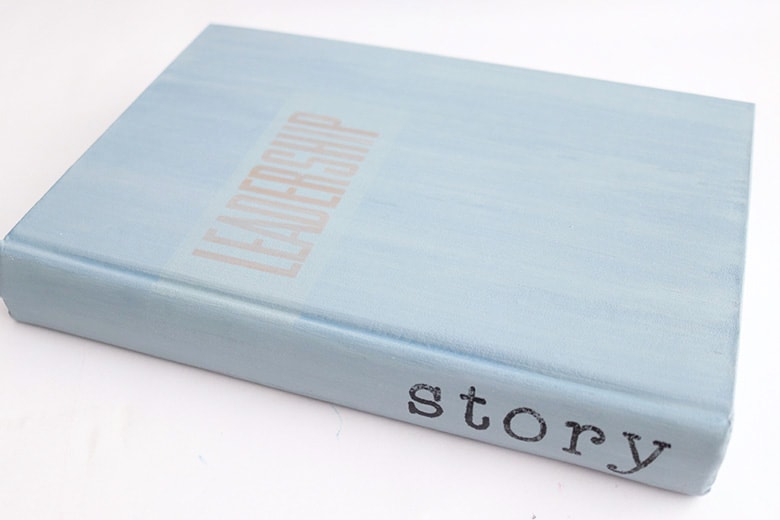
I applied at least two coats to my books, adding more paint until you could no longer see the original book cover. Remember, the spines will be seen more than other parts of the books so be sure to paint those well.
5. Stamp words or a saying
First, practice stamping on scratch paper. Use the scratch paper words to determine the placement on the books (and to make sure they’ll fit!).
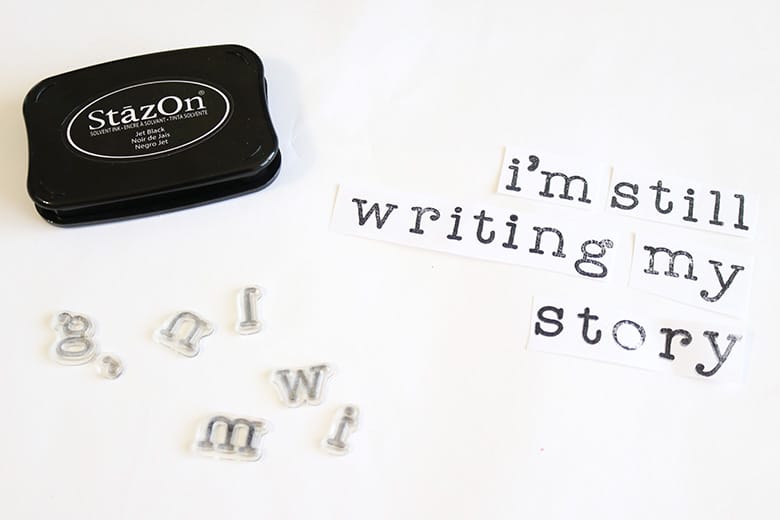
Stamp your words with ink (or possibly paint, if you choose), or apply rub-ons.

Because book spines tend to be curved, you’ll have to stamp in a “rocking motion” from top to bottom (this is why I love using clear stamps and an acrylic block, so I can see where I’m stamping). Take your time and press hard enough to transfer the ink. If the ink doesn’t transfer all the way, you can carefully repeat stamp the letters, or you can also finish drawing the letters in with a fine point Sharpie.
(Scroll down for a list of sample sayings for inspiration!)
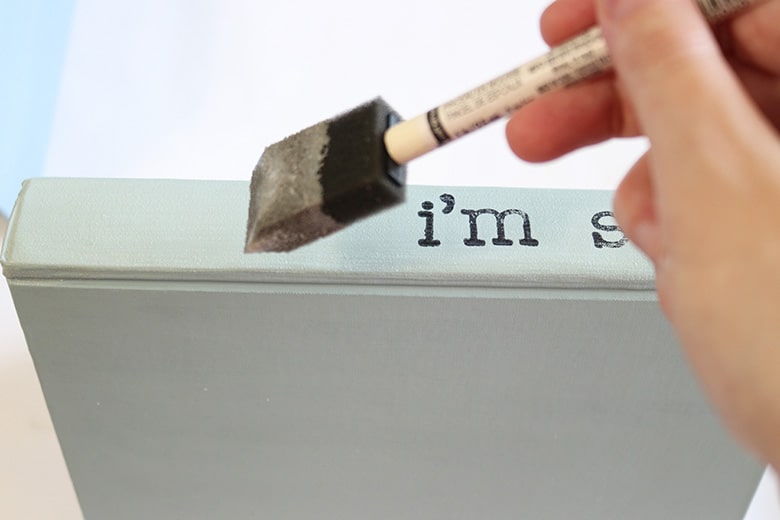
6. Apply a coat of clear wax
This is an optional step, but I love the finished look wax lends to chalk paint. Plus, it seals and protects the chalk paint.
HOWEVER…the clear wax did not like the acrylic paint + chalk medium combination–look what happened when it dried:
So, only use wax over legitimate chalk paint!
Wax is super easy to apply. Follow the instructions on your bottle of wax, but essentially brush it onto the books in a thin coat using a clean cloth or brush. I used a foam brush for this and it worked great. You’ll be able to see brush strokes, so make sure your strokes are all in the same direction.
If your wax has a lot of air bubbles in it (I made the mistake of shaking my bottle first), lightly drag your paintbrush across the waxed surface to smooth it out. Or just blow on the bubbles, I totally did that too.
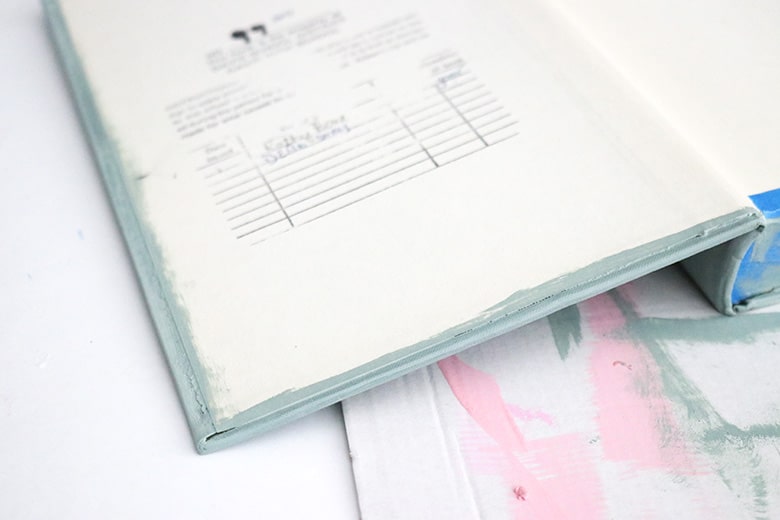
Let the wax dry overnight. Carefully remove the painter’s tape (go slowly to avoid tearing the book pages).
7. Optional: add twine, ribbon, or lace
Tie your stack of books together with twine or ribbon, or add a strip of lace around one or more individual books for a shabby chic look.
What words or sayings should you stamp on your book spines?
Here are a few ideas to get you started. Feel free to personalize as much as you want!
- single words, in any combination: live, laugh, love, travel, dream, imagine, create, gather, hello, XOXO, grateful, thankful, blessed
- home sayings: home sweet home, farm sweet farm, this is our happy place, love lives here, love grows here
- gratitude sayings: grateful thankful blessed, start each day with a grateful heart, live simply, collect moments
- love sayings: I love you to the moon and back, you are my sunshine, you will forever be my always, faith family friends
- travel sayings: not all who wander are lost; oh, the places you’ll go; enjoy the journey
- motivational sayings: the best is yet to be, good things take time, follow your heart, choose happy, stay true, stay strong, be brave, be kind, have courage and be kind, pay it forward, live out loud, dream big, follow your dreams, believe in yourself, learn to dance in the rain, weather the storm
- seasonal sayings: hello spring, hello summer, hello fall, hello winter, or any happy “holiday” sayings
- names of children or grandchildren (one name per book)
- an important location and the latitude/longitude coordinates
- an important date: first met, engagement, wedding, etc.
I hope you love your new stack of books as much as I love mine! I can’t wait to make a set for the nursery.
Don’t forget to share this post and pin to Pinterest!

Do you ever glue your books together before putting string or ribbon around them? Love the look, detailed explanation, and saying suggestions!
Hi Melinda! I haven’t, but that’s actually a great idea! If it’s just meant as a decor piece I don’t see why gluing them would be a problem, and it would solve the annoying problem of trying to line them up just right when I move them (or my toddler plays with them).
I used the chalk paint you recommended and the wax finish took the paint off. Any suggestions?
Hi Jean, I’m so sorry this happened to you! I wonder if the chalk paint and wax finish weren’t compatible together (I didn’t have any issues with the ones I linked to above, but it might be worth trying paint and wax from the same brand so you know they’re compatible–even opting for a higher-quality product from the hardware store). If your chalk paint wasn’t completely dry, that could also be a problem–try letting it dry overnight before adding the wax. If none of that helps, you may have to prime your books before applying the chalk paint (see my response to the previous comments–not exactly the same problem but similar).
I’m sorry I’m not more help! If I could, I’d just come over and craft with you and troubleshoot it!
Hi, I am using chalk paint and a clear wax on my books. I am having a problem with the wax turning brown in streaks on some of my books. Have you ever had this problem and how did you solve it? I like the finish the was gives the books. I’m using the Folk Art brand of chalk paint and was from Joanne’s.
Thank you!
Hi Amy! I actually did have this same problem on the white book in this stack (which is why I ended up sandwiching it between the other books to hide the streaks, to be honest). I believe it’s caused by the high water content of either your chalk paint or wax or the combination of both, which is causing the color of the original book to bleed through. So, unfortunately, more coats of chalk paint will probably only worsen your problem, not solve it.
I need to experiment more, but my best suggestion is to use some sort of primer (maybe even a stain-blocking primer) prior to applying any chalk paint. (I’m sorry, I know that adds additional cost to this project!)
And I agree, I love the finish of the wax, so it stinks that the wax seemed to be the culprit, at least in my case. I guess, then, you just need to decide what’s more important to you–having the wax finish or cutting costs/time and not having to prime.
I hope this helps you!
Thank you for getting back to me. It does only seem to do it only on the white paint. So far it has been ok. Kinda makes them look distressed. Just didn’t know if I should use mod lodge instead. Live this project!!