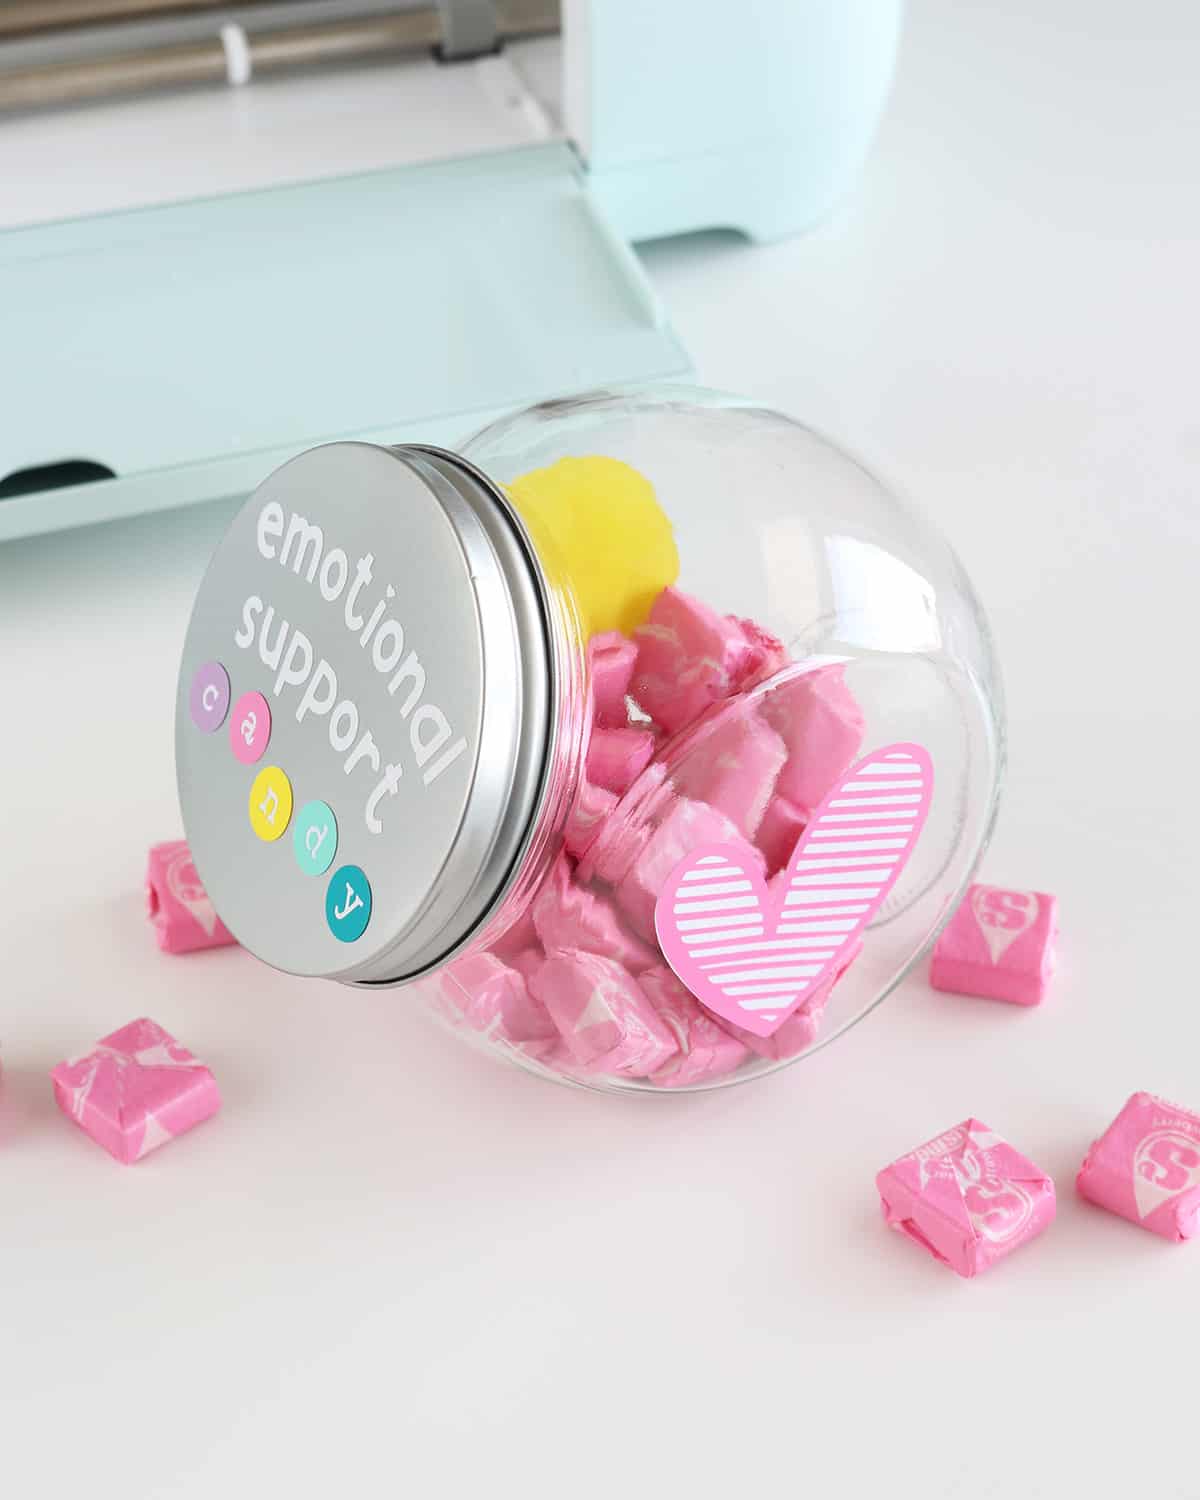
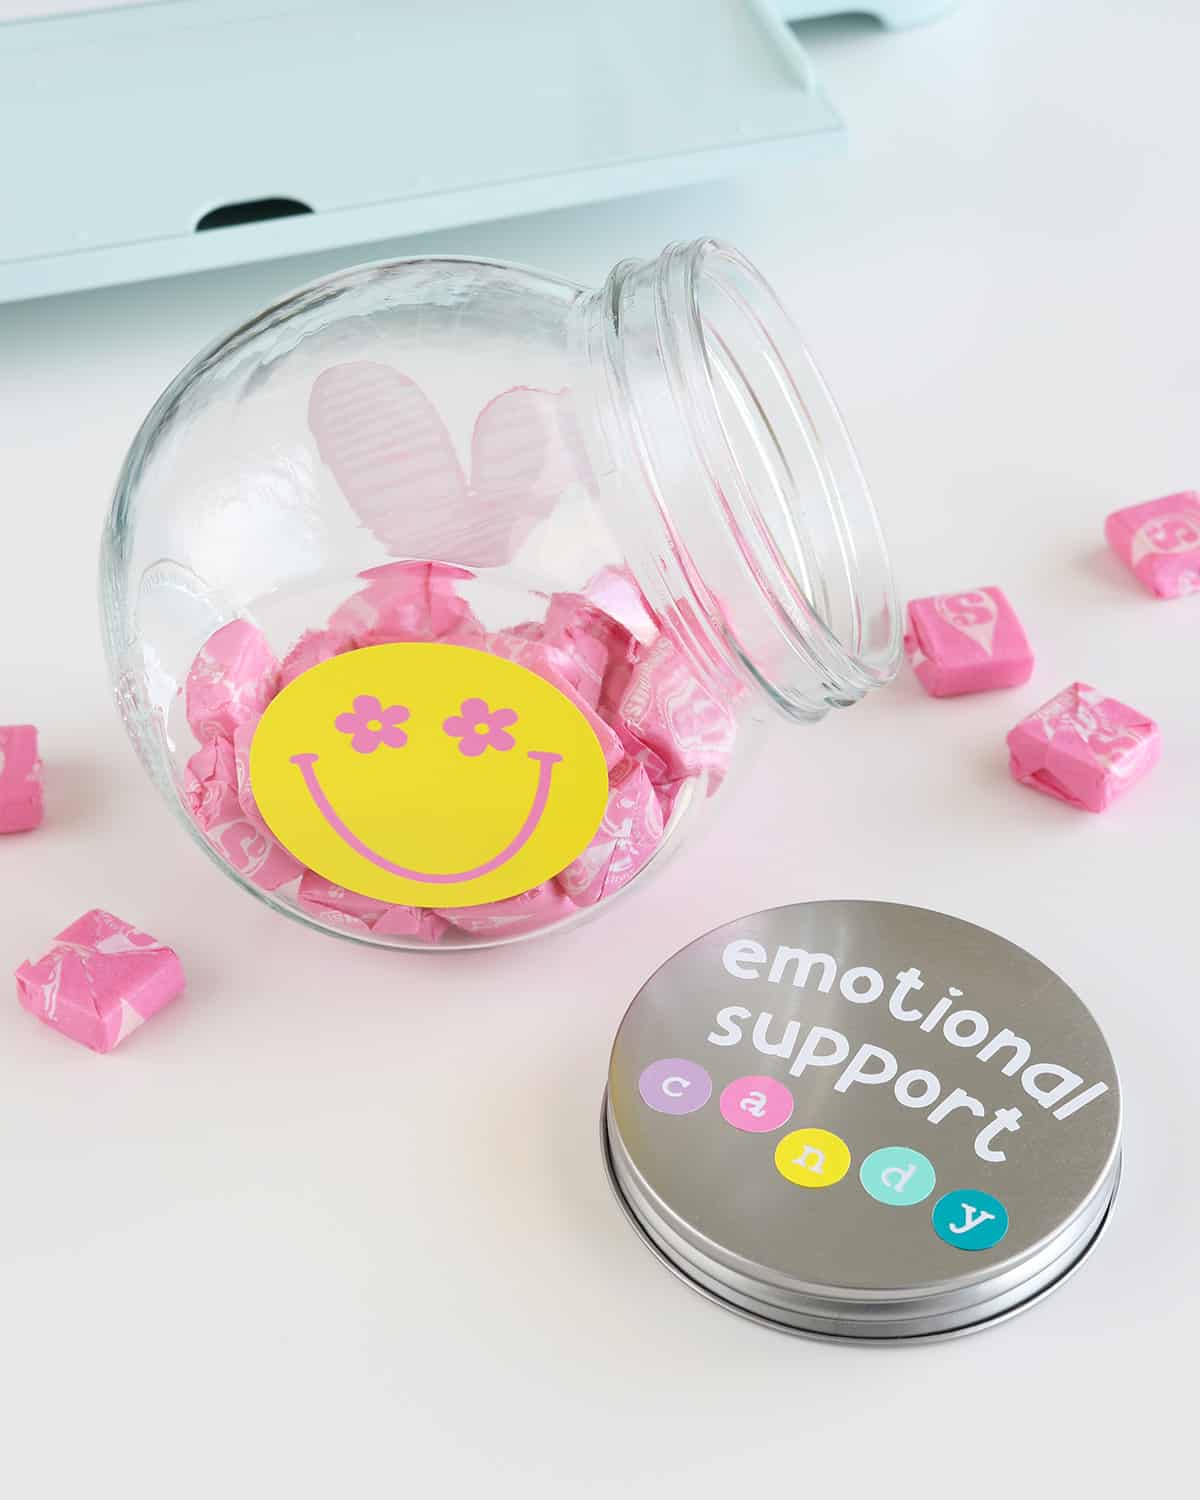
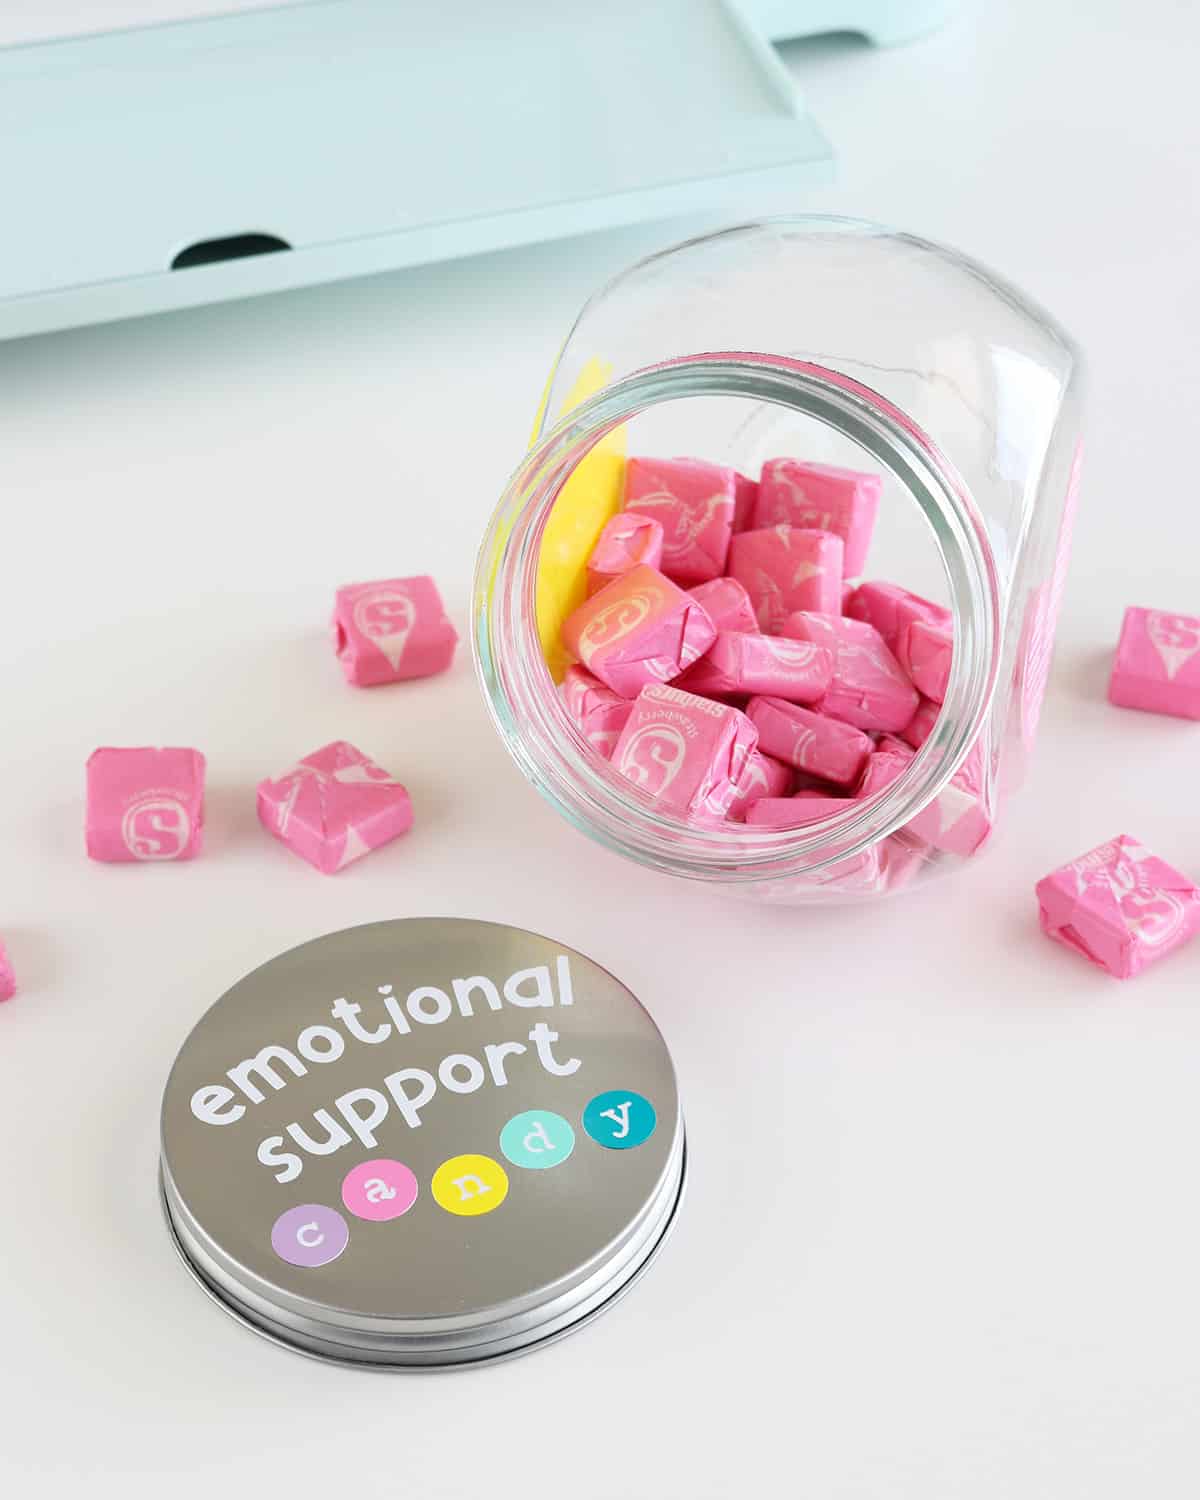
DIY Dollar Tree Candy Jar: Emotional Support Candy
Make a fun “emotional support” candy jar with a Dollar Tree glass jar and some vinyl! Perfect to stash on your desk or gift to a friend!
We all need emotional support from time to time. And what better way than with candy? While we’re at it, we might as well make something crafty, too, since that’s the best form of therapy.
This Dollar Tree craft is super easy but so adorable! This little “emotional support” candy jar is going to sit on my craft desk for a little pick-me-up whenever I need it (so, yes, I’ll be restocking it on the daily…haha).
You could also give this to someone in need of some sugary joy–a friend, neighbor, ministering sister, or your child’s teacher would all love this cute candy gift!
This post contains affiliate links. For more information, see my disclosures here.
More posts you’ll like:
What you need to make a Dollar Tree candy jar

- glass jar: I love scouring the dollar store for cute glass containers and this one with a lid was perfect. Clean it beforehand with dish soap and water (or run it through your dishwasher) so it’s ready to fill with candy.
- permanent adhesive vinyl: I usually use a combination of Cricut vinyl and Oracal 651, just whatever I have on hand
- Cricut machine with fine-point blade and StandardGrip or LightGrip mat
- Cricut Access subscription: If you want to use the images and fonts I used, they require an Access subscription (if you don’t have one, you’ll be asked to checkout in Design Space before making the project). Read this to see if Access is right for you. You can also find free images or upload your own.
- weeding tool and scraper
- transfer tape
- small piece of parchment paper
- alcohol wipes
- candy to fill the jar: let’s see how long it takes my husband to notice that I stole his pink Starburst for pictures 😆
Save $10 on any Cricut machine or heat press with the coupon code AUBREE-10
How to make an “emotional support” candy jar
Customize in Design Space
Open my Emotional Support Candy Jar project in the Cricut Design Space app.
Make any edits you want. You can resize to fit your jar if needed and change the colors to match your vinyl colors (definitely do this on the Canvas beforehand so you know what color to load in your Cricut machine when prompted).
There’s an extra “melting” smiley face you could use in place of one of the other sides. If you don’t want to use it, delete it or hide it by toggling the eye symbol in the layers panel.
Cut your vinyl
Click Make and then On Mat, For any material.
On the next screen, you can rearrange the images as needed to fit the vinyl on your mat. For example, my pink vinyl scrap wasn’t straight on the top so I moved the images lower in Design Space so they’d fit perfectly (use the ruler markings as a guide or you can use the SnapMat feature if using a tablet or phone).

Set your base material to Premium Vinyl–Permanent Glossy (or whatever material you’re using). Check the Remember material settings so you don’t have to keep choosing the base material for the other mats.
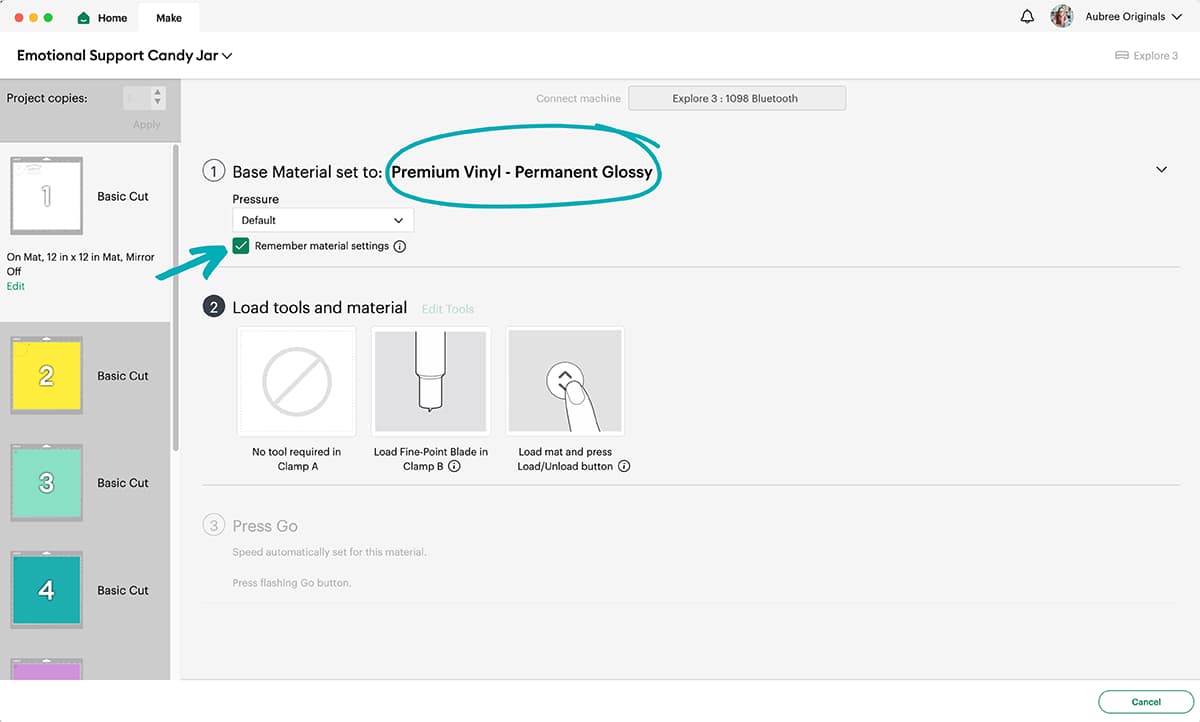
Load your mat with your material (I usually roll over it with my brayer to make sure it’s adhered well), then load your mat into your machine. Click Go.

Remove the mat when finished. Flip the mat over on your table and peel the mat away from the vinyl so your vinyl doesn’t roll or crease.
Repeat until all your pieces are cut.
Weed the vinyl
Before weeding the vinyl, I like to cut around my images, leaving just a small border. This way I can save as much material as possible for a future project.

Use your weeding tool to remove all the unwanted vinyl pieces (start from the very edge and remove the unwanted border, then work towards the middle).

Continue weeding until all vinyl pieces are ready. (I forgot to weed the eye holes in the flowers, but don’t worry, I got them before applying the vinyl!)
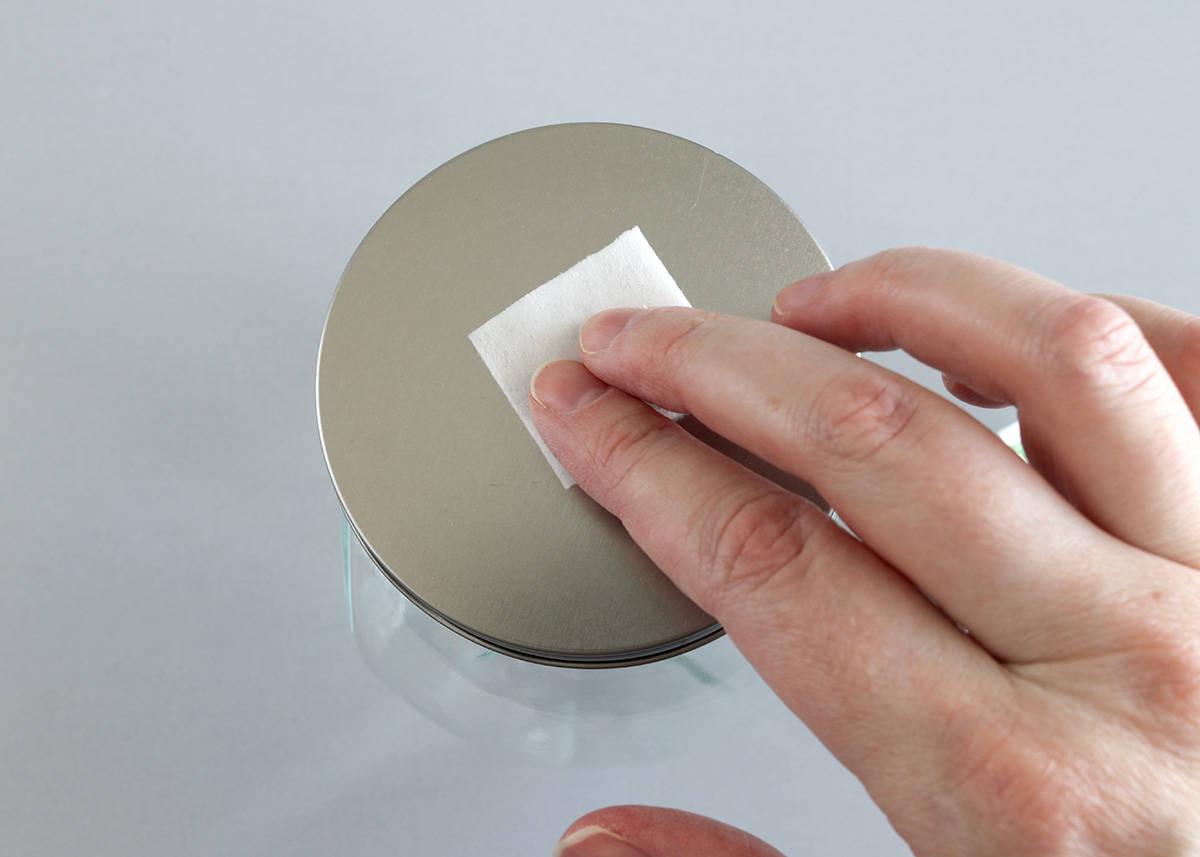
Prep the jar
Clean the jar and jar lid with an alcohol wipe (wherever you plan to put vinyl) to remove fingerprints and anything that could interfere with a good transfer.
Apply transfer tape and vinyl
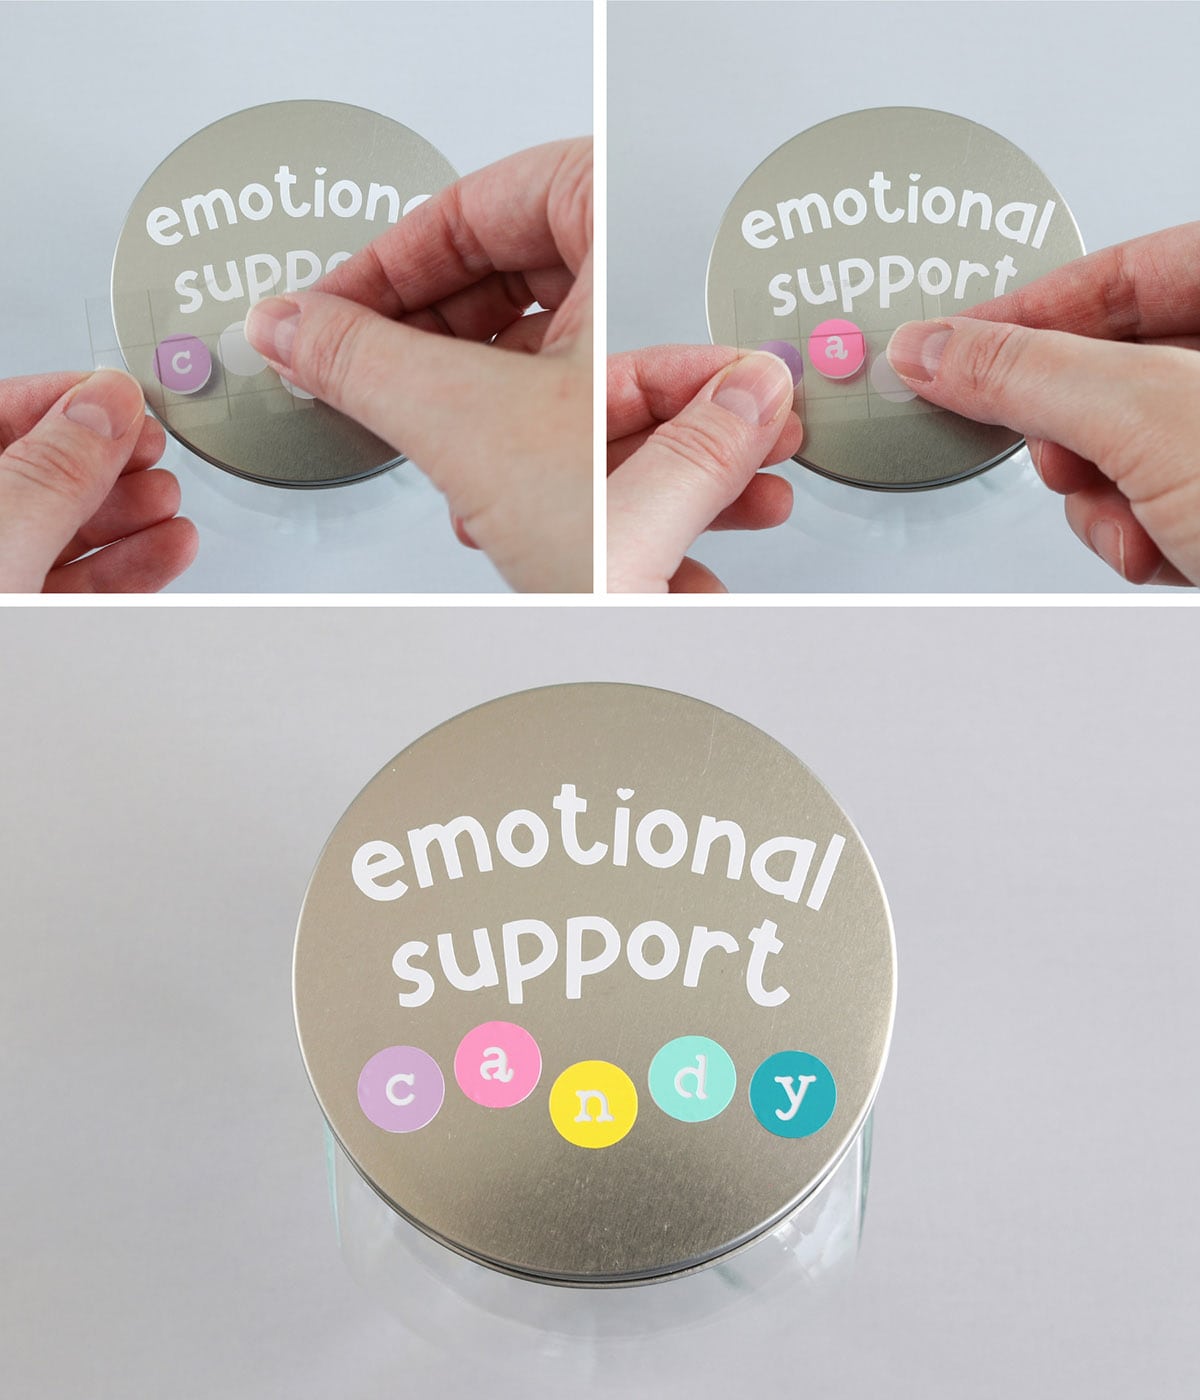
Starting with the white “emotional support” layer,
- Cut a piece of transfer tape a little larger than the vinyl. Remove the transfer tape from its backing.
- Place the transfer tape over your vinyl. Do your best to line up the vinyl on the transfer tape’s guidelines (optional, but nice if you want to be able to use them later to see how straight you’re applying the vinyl). If you’re struggling to perfectly place the transfer tape over the vinyl, you can slip a piece of parchment paper in between them (see below how I use parchment paper when layering the vinyl heart).
- Burnish (press really hard) with your scraper tool from the front.
- Burnish again from the back.
- Remove the vinyl backing.
- Apply to the jar lid.
- Burnish well.
- Remove the transfer tape.

Apply transfer tape to each of the “candy” letters and apply over the top of the white circles. Burnish with your scraper.
Next, assemble the layers of the heart decal by using parchment paper.
- Lay a small piece of parchment paper over your bottom layer of vinyl (the white heart). Leave just a small part of the vinyl exposed.
- Apply transfer tape to your top vinyl layer (the pink lined heart) and position this over the parchment paper. It won’t stick to the parchment paper, which will allow you to slide the vinyl around until it’s centered over the bottom layer.
- Once the vinyl is centered, press it down on the exposed part and burnish with your scraper.
- Roll the parchment paper and transfer tape back (to the right in this case), keeping that small corner adhered.
- Pull the parchment paper out from under the transfer tape with your left hand while you burnish with your right hand (moving from right to left in this case). The parchment paper will eventually slip out completely and you can finish burnishing the vinyl.
- Remove the backing from the bottom layer of vinyl. Apply the layered vinyl decal to one side of the jar.
- Burnish well.
- Remove the transfer tape.

For the yellow smiley face, I layered the pieces on the jar instead (you can still use parchment paper if needed):
- Apply transfer tape to the yellow circle and apply to the jar. Burnish and remove the transfer tape.
- Apply transfer tape to the flower smiley face and apply to the yellow circle. Burnish and remove the transfer tape.
Note: I did have a few bubbles after transferring the vinyl but 95% of them were gone within a week. You could use the wet method (where you spray soapy water on the jar before applying the vinyl) but that never works for me. Maybe I’m doing it wrong, but, in my experiences so far, I’ve hated waiting for the water to dry, I still get bubbles, and the water seems to weaken the vinyl’s adhesive. So…I’m not a fan. I’ll stick with my wait-for-the-bubbles-to-fade-on-their-own approach. 🙂
Fill the jar
Fill your jar with candy and enjoy!
P.S. If you’re curious, this is my favorite dye-free Starburst alternative. They kind of taste like Now & Later candy. (We do our best to do dye-free for our son, but mom and dad are obviously still cheating. 🙈)
DIY emotional support candy jar gift
I hope you have fun making your own candy jar! You (or your recipient) will love this cute jar to stash your favorite emotional support candy.

Oh, and if you’re wondering how long it took my husband to notice his pink Starburst missing…he noticed as soon as he got home from work, haha. Maybe he’s the one who needs the emotional support candy. 😉

Don’t forget to pin and save for later!
