Lucky Pot of Gold Gift DIY
Make an easy “lucky” pot of gold gift for St. Patrick’s Day with a pot, a little paint, and some gold-wrapped candy.
I have vague memories of St. Patrick’s Day as a kid where I actually believed I might get lucky enough to find a pot of gold at the end of a rainbow. I kind of knew it was just pretend, but it was one of those things like, maybe if I pretended hard enough, I could just strong-will it to be true.
(I also thought if I held still long enough I could get birds to land on me like Snow White…so there’s that.)
Well, as much as I’d love to find my lucky pot of gold out in the wild, it hasn’t happened yet. Lame. So I’m going to stick to these DIY pots of gold instead.
These little painted pots make the best St. Patrick’s Day gifts for friends, neighbors, ministering sisters, teachers, and anyone else who might need a wee bit o’ luck. Or, make them for yourself to use in your St. Patty’s decor–they’d be adorable on a tiered tray!

This post contains affiliate links. For more information, see my disclosures here.
More posts you’ll like:

What you need to make a DIY pot of gold
You’ll note that a lot of these materials are optional and that’s because there are so many different ways you could decorate these St. Patrick’s pots! You can stick to just painting by hand, paint with stencils, use a Cricut machine to make stencils or cut vinyl decals, or use stickers or other decor elements you might have on hand.
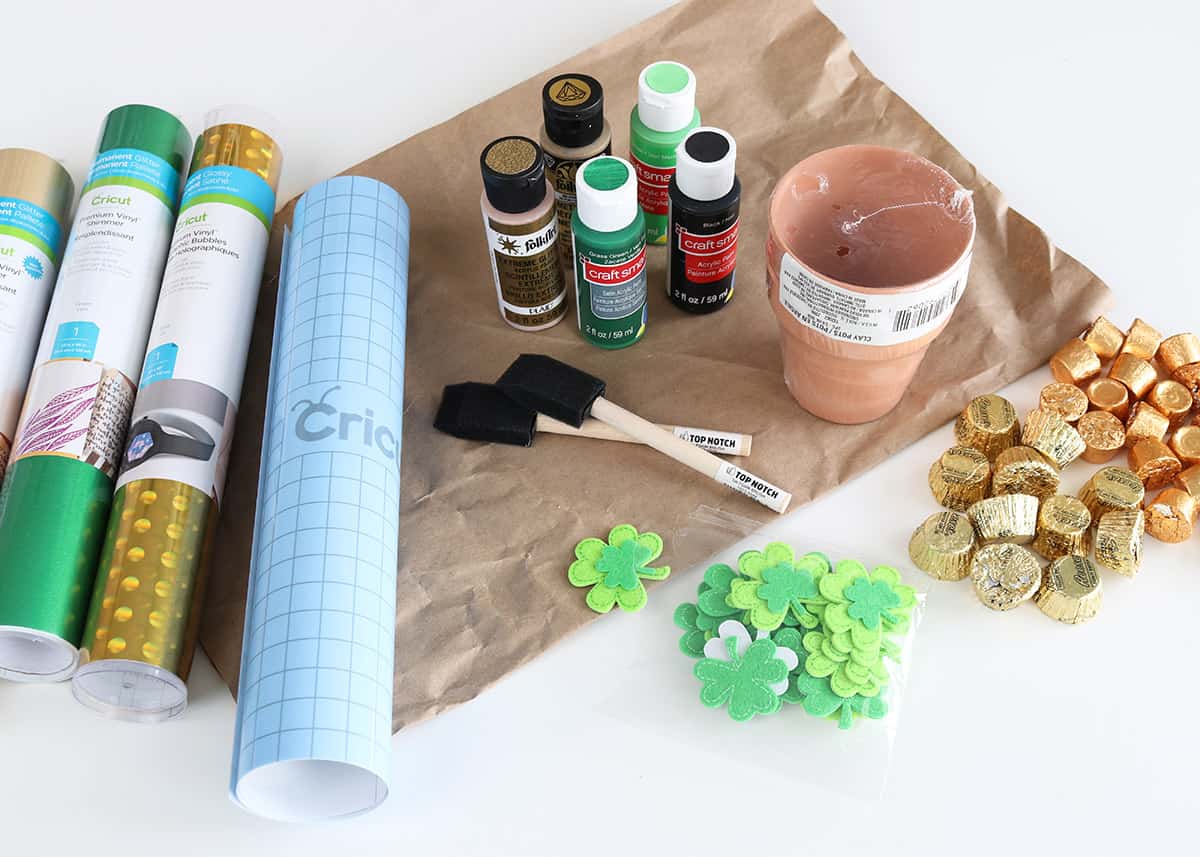
- small terracotta pots: Mine are 3.5 inches tall and 3.5 inches in diameter at the top. If you want smaller gifts (in other words, needing less chocolate to fill), you can find even smaller pots–these would be perfect for St. Patrick’s Day classroom gifts, primary gifts, etc.
- acrylic craft paint: I used black and Grass Green in the Michaels/Craft Smart brand (in case you want to duplicate mine exactly)
- metallic gold paint and gold glitter paint, optional
- acrylic paint sealer, such as this one or this one for clay pots, optional
- stencil vinyl and/or permanent vinyl and a Cricut machine, optional
- foam paint brushes, small detail brushes, and/or stencil brushes
- shamrock stickers: I found some stacked felt stickers in my craft room that I’d never used–check what your local Dollar Tree or craft store has around St. Patrick’s Day
- green ribbon, trim, sequins, gems, or anything else you want to decorate with
- paper shred or gold filler: I definitely recommend this for the 3.5 inch pots or anything bigger, otherwise you’ll be using an entire bag of candy to fill the pot (which is okay too, no one will be offended by more chocolate)
- gold-wrapped candy: lots of ideas below!
Where can you buy terracotta pots?
I bought my 3.5 inch pots from Dollar Tree a year ago but they didn’t have them when I checked this year. You could also look at Walmart, your local hardware store, or a garden center for small terracotta pots. If you can’t find them or it’s off-season, Amazon has lots of good options (these ones even come in different colors so you could skip the painting part of this project if you wanted).
How to make a pot of gold
Prep your pot (optional)
If you plan on using your terracotta pot as a planter or want your gift recipient to be able to use it as a planter later, then you’ll want to seal your pot before and after painting for best results (seal the outside, inside, and bottom).
If you don’t seal the pot, the moisture from watering a plant or from outdoor elements could cause the paint to peel and lift from the pot.
I don’t plan on using these pots for anything but gifts or decor, so I skipped the before coat. But after painting, I was worried about scuffing the pots so I did apply a coat of spray sealer at that point.
Keep in mind that painted and/or sealed terracotta pots will no longer be porous, so adjust your watering schedule accordingly when using as a planter.
Paint your pot
Apply 1-2 coats of paint to your pot with a foam brush. Because I didn’t seal my pots prior, they drank the paint right up and I was able to apply the second coat almost immediately. The foam brush should eliminate most brush strokes but I still kept a uniform up-and-down motion.
Paint the bottom of the pot, as well as the first few inches inside the pot (or just paint the whole thing, but I was apparently too lazy for that last inch 😆).

If you’re making the rim a different color from the base, paint the flat part of the rim first with a foam brush. Then take a small detail brush to fill in the rest, touching up with the opposite color once dry. You can use painter’s tape if you don’t have a steady hand.

Paint details with stencils or by hand
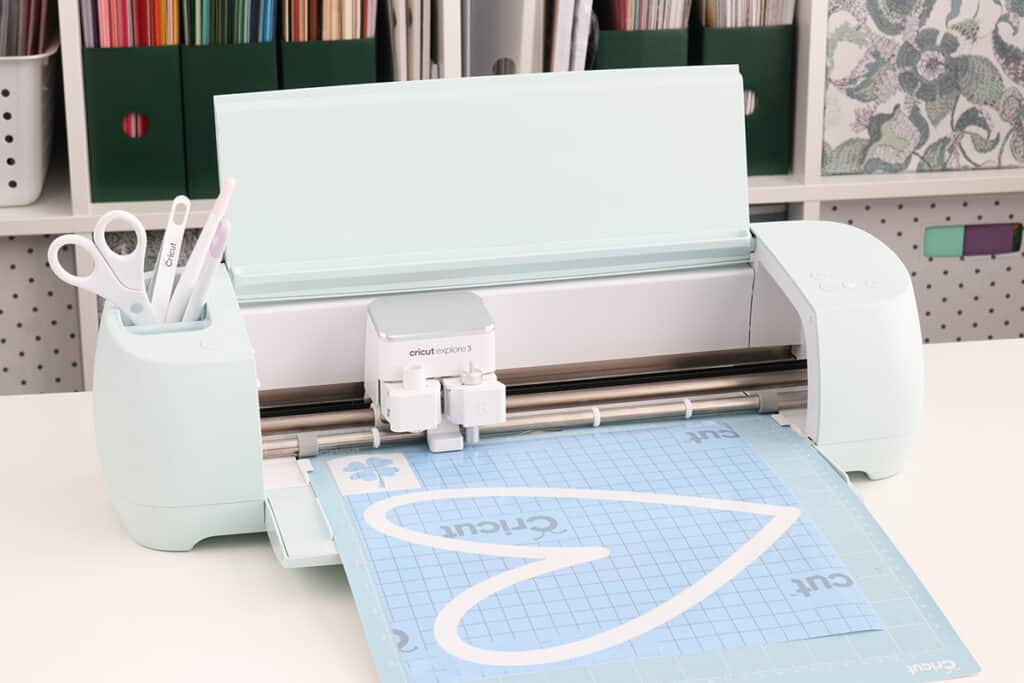
Even though I had permanent vinyl as a backup, I decided it would be easier to make stencils to paint my designs on, especially given the curved shape of the pot. And my Cricut stencil vinyl worked beautifully for this!
You can use or edit my Cricut Design Space project here to cut your own stencils. I included both stencil images and regular images in the project, so you can hide or delete any unwanted layers.
Load the stencil vinyl on a StandardGrip cutting mat (blue material side up) and set the material setting to Stencil Vinyl (or one of the other stencil options if using a different type of stencil material). Follow the Design Space prompts to load the mat, cut, and unload it.
(Ignore the heart already cut out of the stencil vinyl in the image below, I was using a scrap piece.)
Remove the stencil from the liner and stick it on your pot (I chose to skip the transfer tape on this small of a project, but you can use it if your prefer). Be sure to include any “island” pieces, like the middle of the “L”, “k”, and “y” on Lucky (use tweezers if needed). Press firmly and make sure all edges around the design look sealed to prevent the paint from bleeding.
Apply light coats, pulling the paint from the edge of the vinyl to the center, or use a stencil brush.
My shamrock border was a little tricky to apply on the curved surface. The single strip was nice for spacing the shamrocks evenly, but you might be better cutting in between each shamrock so you can position them easier (which is what I did for some).
I needed at least three coats of the green for it to show up well on the black. Let dry in between each coat. Remove the stencil after your last coat or when completely dry. Touch up as needed with a detail paint brush.
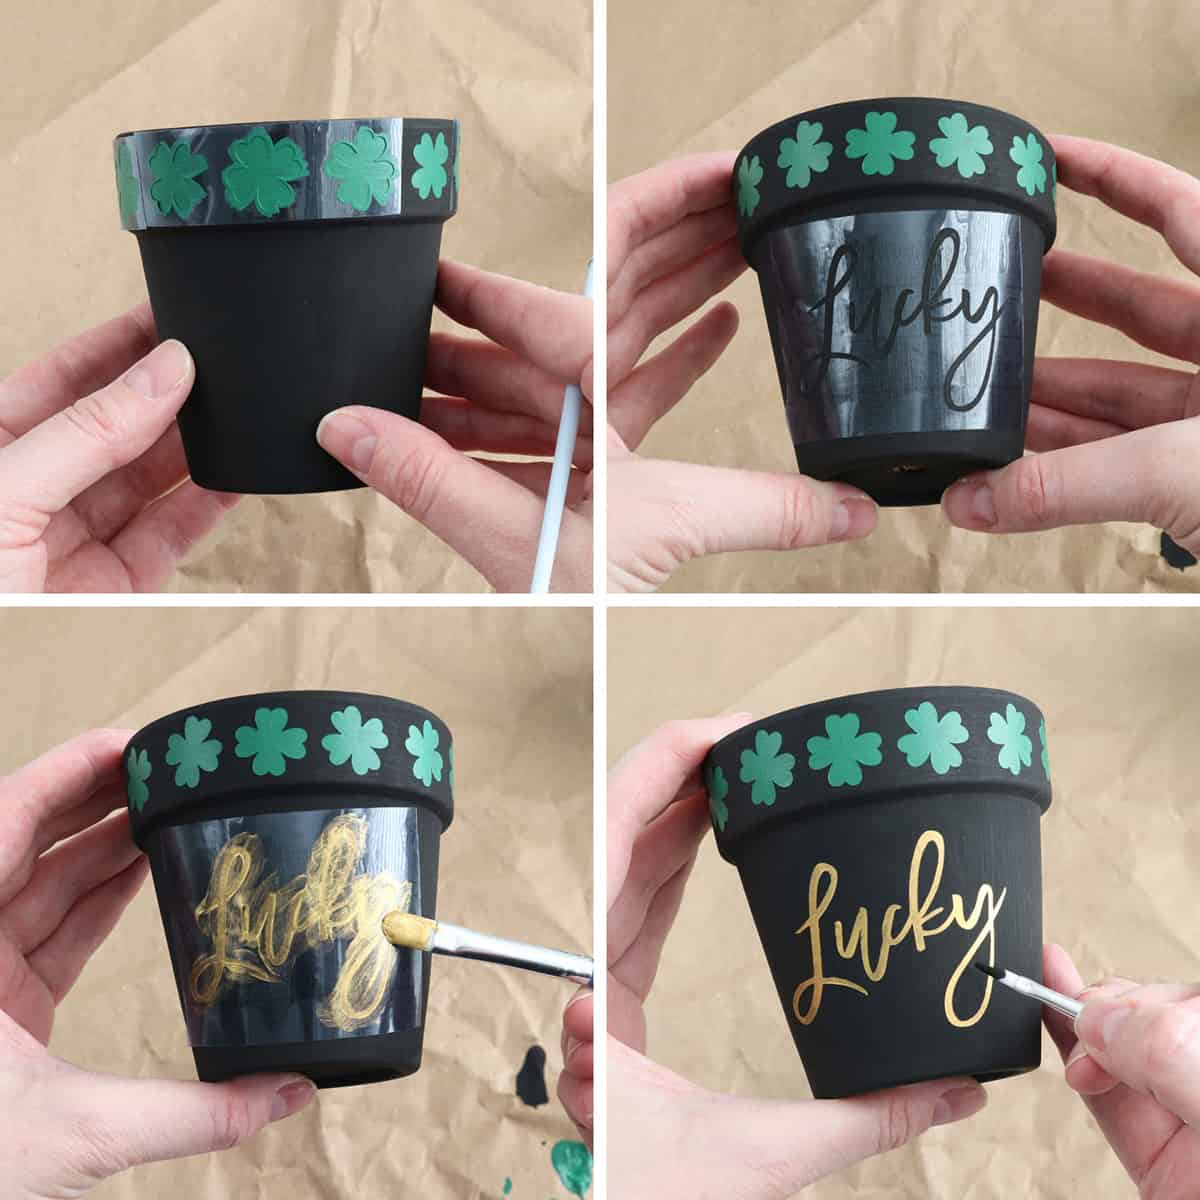
For the gold Lucky word, I used 2-3 coats of gold metallic paint. Don’t remove the island pieces until completely dry (I was impatient and scuffed the gold paint, but it was easily fixed with a little more black paint). Use tweezers (I like the ones in this set) to remove the stencil pieces.
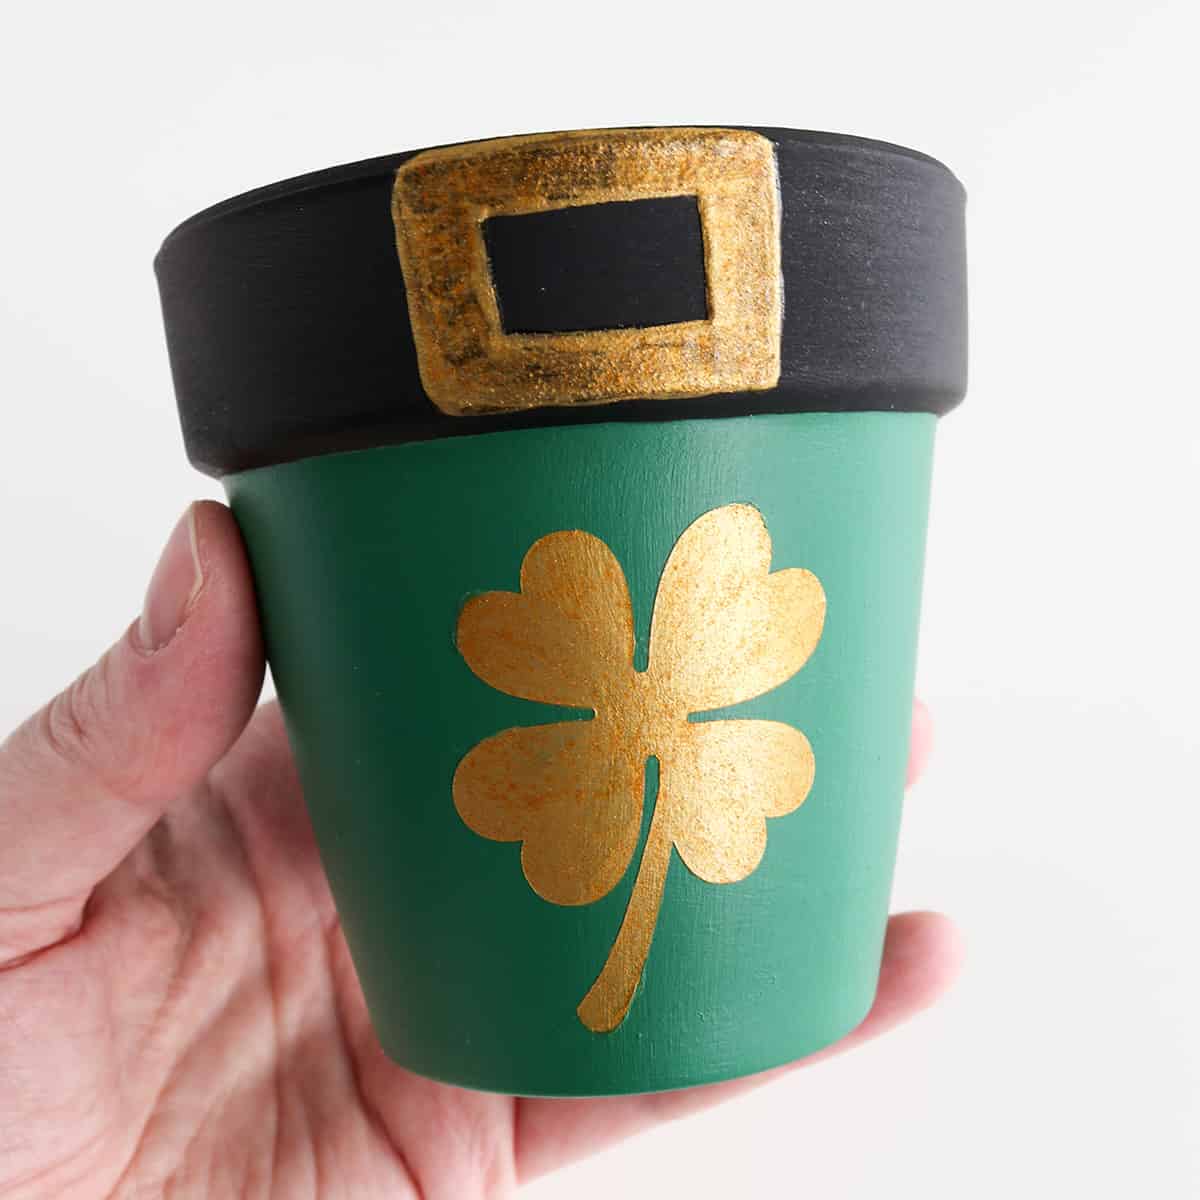
I didn’t use a stencil for the gold buckle on my leprechaun hat pot, opting to paint it by hand instead. I used a combination of gold metallic paint and glitter paint (after realizing the glitter would require a bajillion coats to show up, I applied a coat of the metallic, then a final coat of glitter). You can kind of dab the glitter paint on to get it to apply thicker, too.

I used the same process when applying paint over my shamrock stencil, using the metallic paint first, then the gold glitter (the glitter went kind of orange-y this time, so I probably should’ve just done the metallic paint by itself).
Seal your pot
Again, if you want to use your pot for a plant or outdoor use (or if you just want to protect your pot), seal it with an acrylic paint sealer. (I went with a matte sealer, so you really couldn’t tell a huge difference once they were dry, but I just like knowing the paint’s a little more protected from chipping.)

Add finishing touches
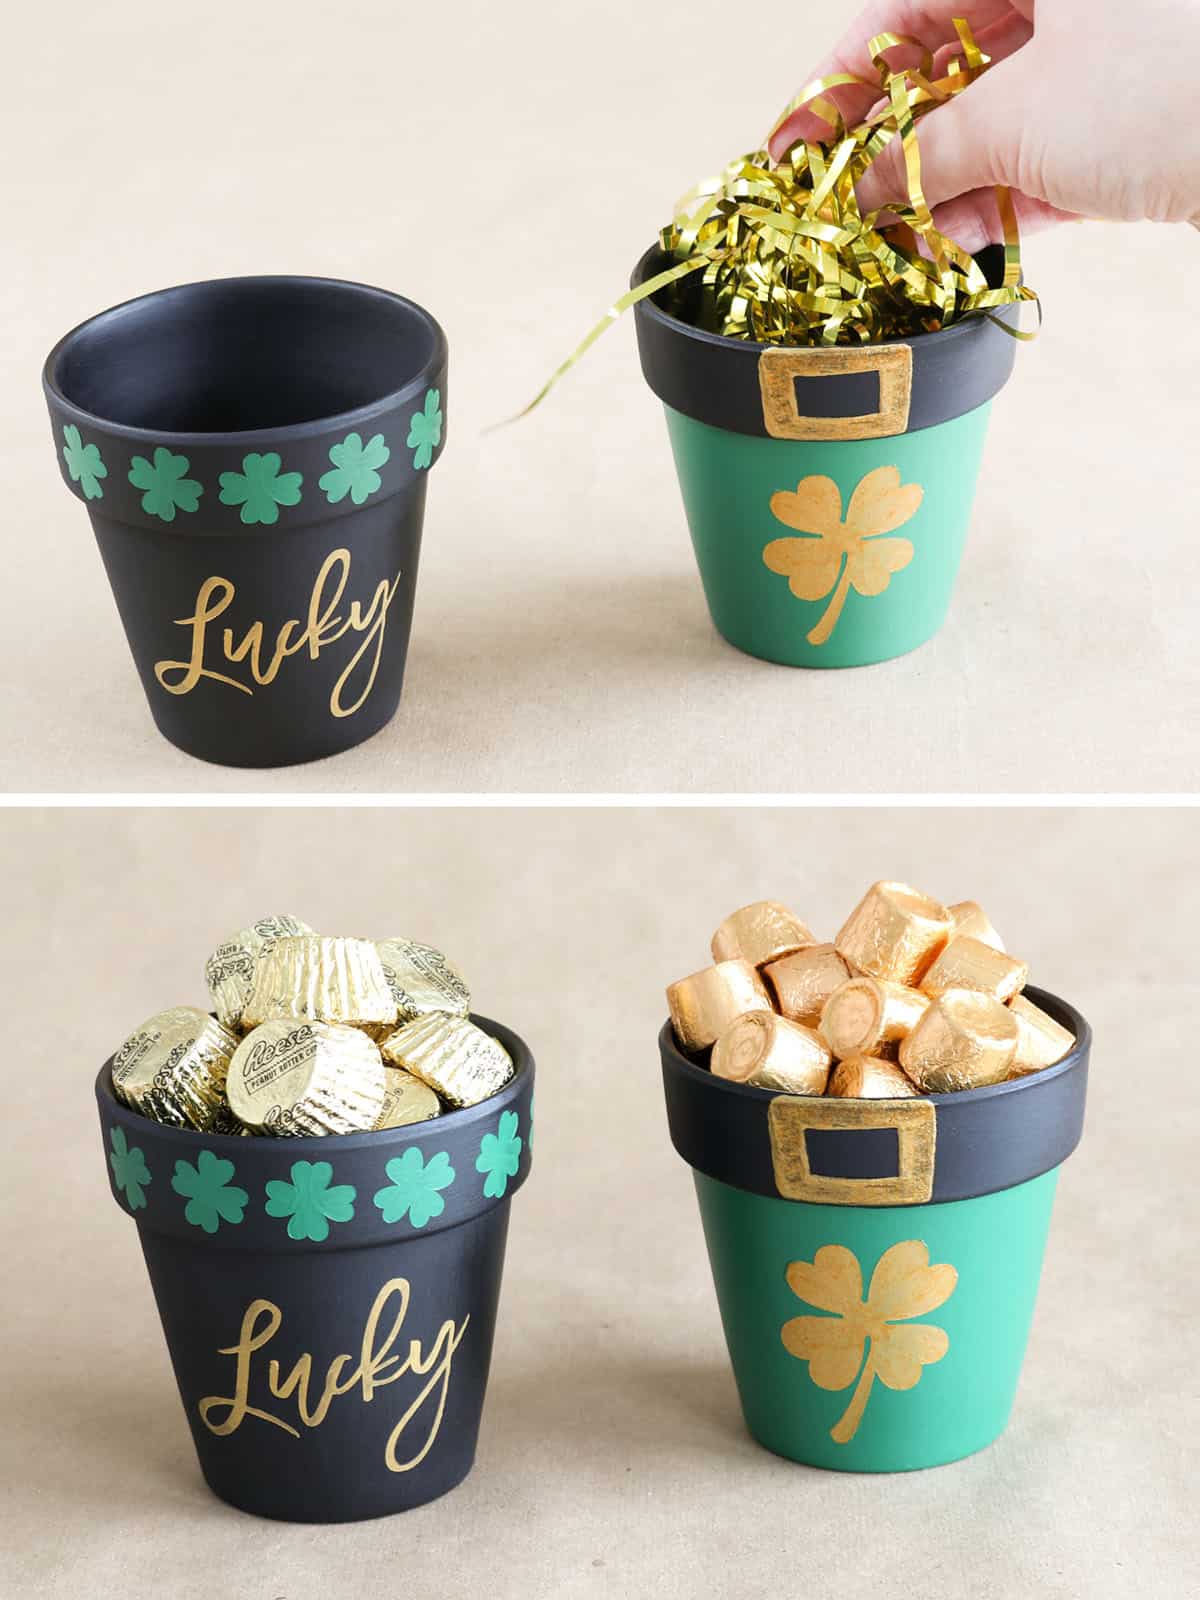
I hot glued a felt shamrock sticker to one side of my black pot, opposite the gold Lucky. I think a ribbon bow underneath the rim would be a cute finishing touch, too.


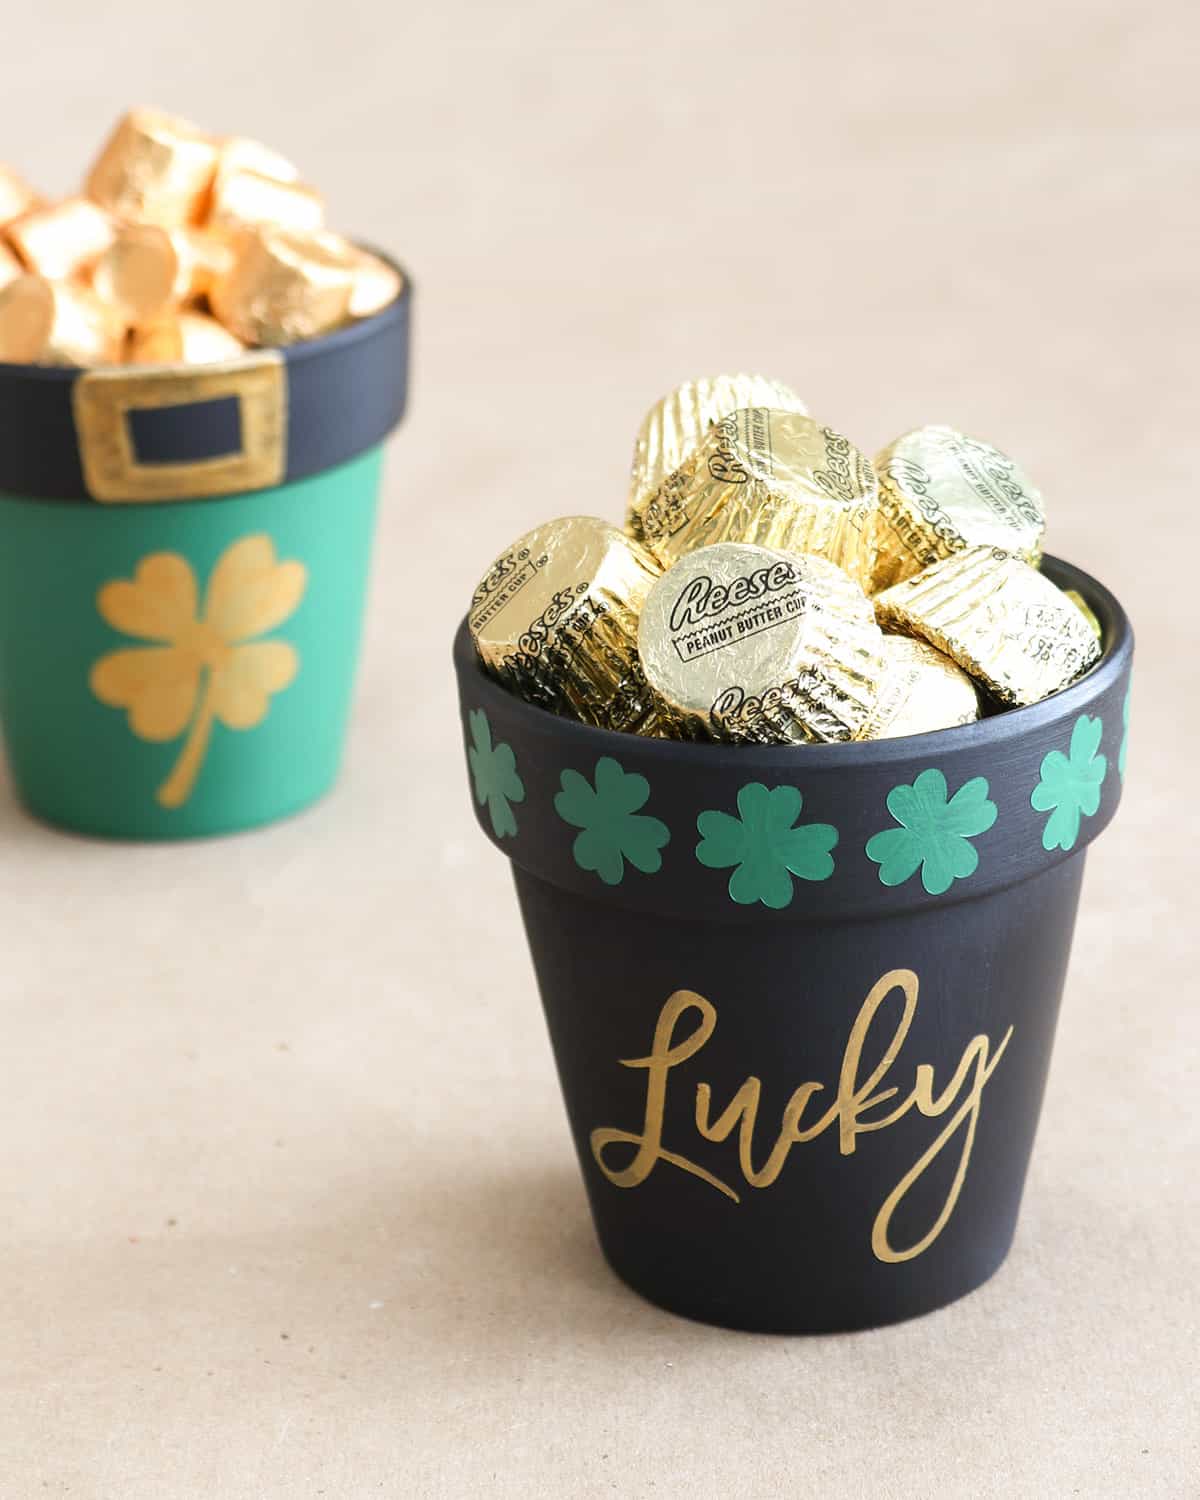
Once you’re done decorating the pot, you’re ready to fill with gold filler and candy!
Gold wrapped candy ideas
To make your pot of gold look like, well…a pot of gold, fill it with gold-wrapped candy. Here are as many gold-wrapped candies and chocolates as I could think of:
- Rolos
- miniature Reese’s
- chocolate coins
- Ferrero Rocher
- Werther’s Original (lots of options)
- Hershey’s Nuggets
- Hershey’s Kisses milk chocolate with almonds
- Lindor caramel milk chocolate truffles
- Dove Gifts caramel & milk chocolate
- Ghirardelli squares milk chocolate caramel
- Twix
Did I miss anything?
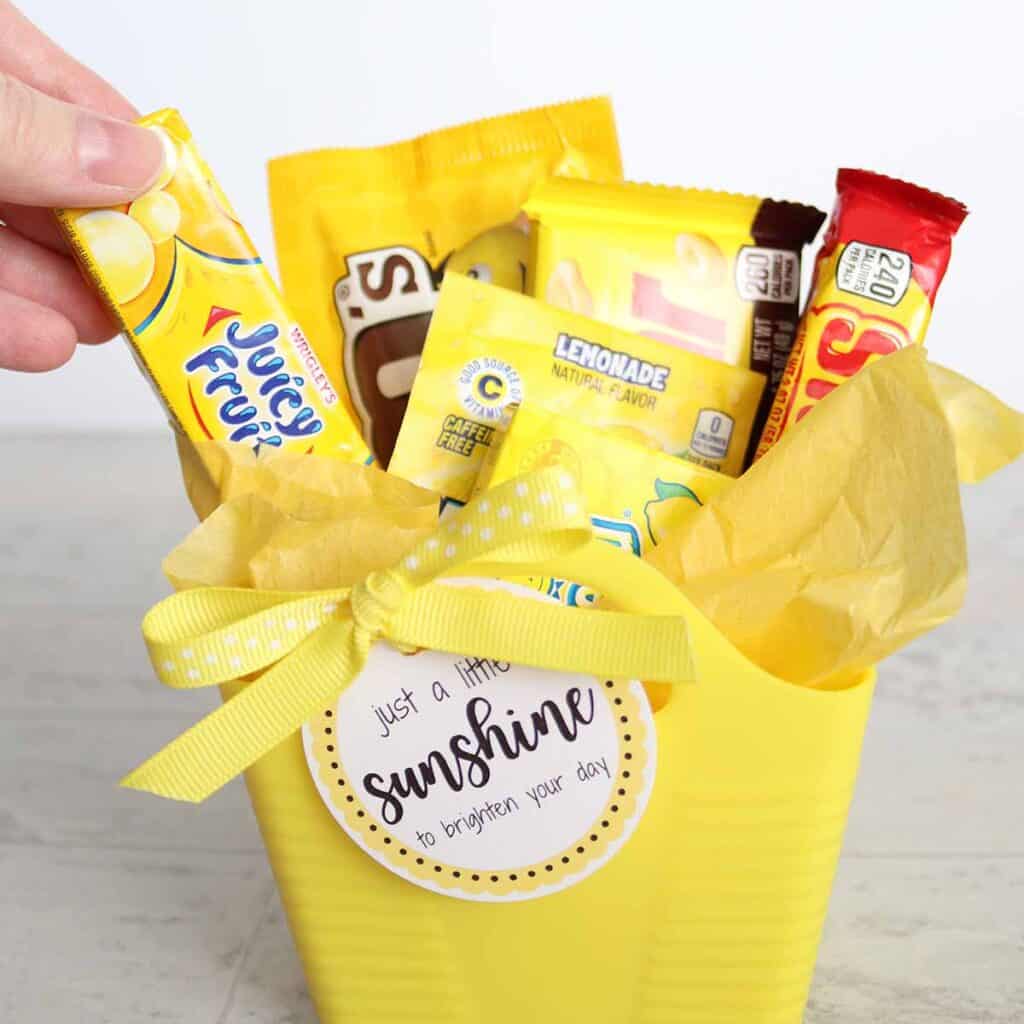
Yellow candies, like miniature Butterfinger, would work too. See my ultimate list of yellow candy ideas here. Or, you could go the healthy route and do something like popcorn or clementines (if you want to be that person…haha 😉).
Easy pot of gold gift
Good luck making your own pots of gold. These make the perfect gift for St. Patrick’s Day!
And now I’m off to refill these pots because a few (or a lot) of those Reese’s ultimately became casualties of crafting. What do you do? 😉

Don’t forget to pin and save for later!
