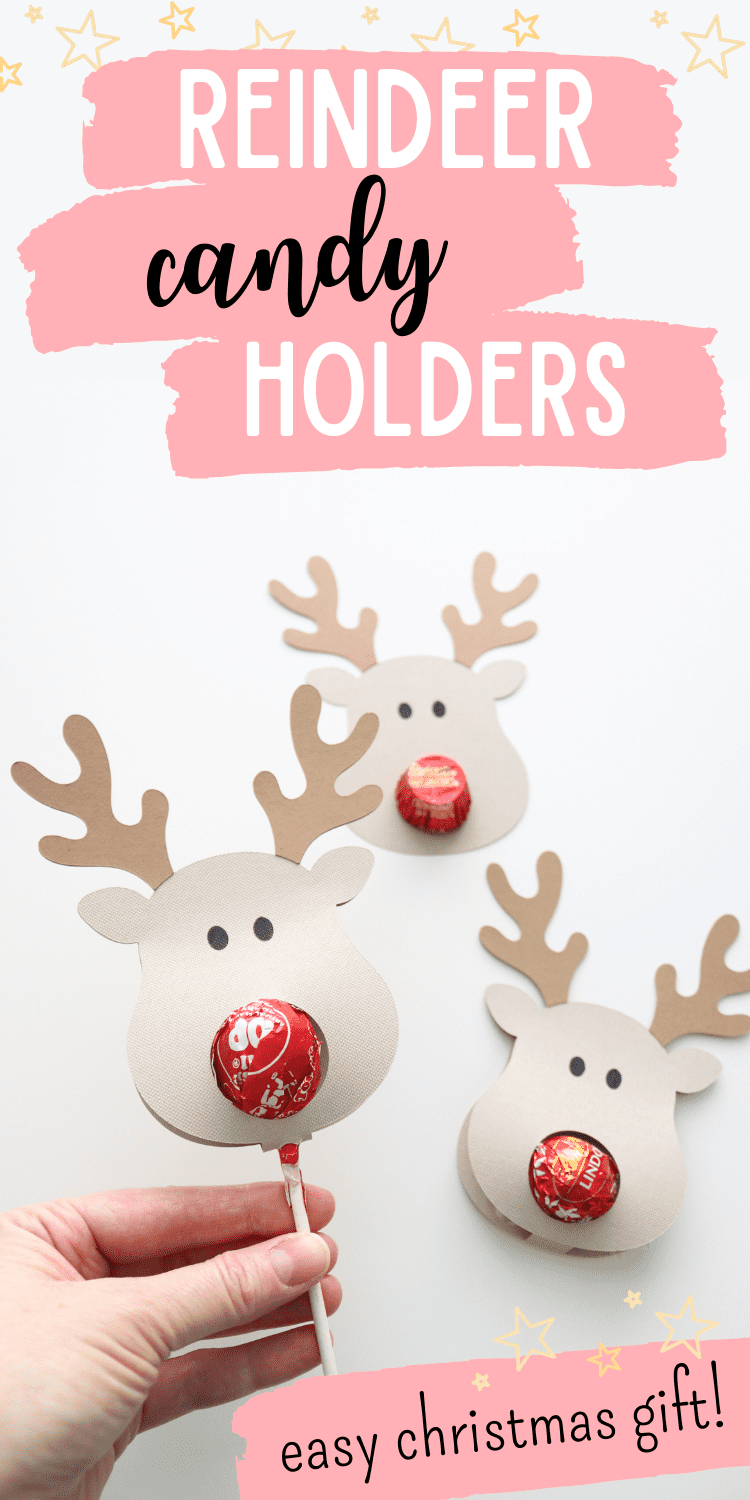
DIY Reindeer Lollipop or Chocolate Holders
These Rudolph reindeer candy holders made from cardstock are simple and adorable! Easy papercrafted holiday gifts for friends, classmates, and anyone else on your list!
If you’re in need of a quick little Christmas gift, or even if you just want to make a cute Christmas craft, these reindeer lollipop (or Lindor truffle or Reese’s) holders are so adorable!
I’m definitely not the first person to come up with this idea, but I wanted mine to look a specific way so I adapted some images in Cricut Design Space and came up with these!
I love them so much! And so does my toddler…but mostly the candy part. He saw a Reese’s on my desk (the one I was going to use as a prop for the photos) and goes “aw, thanks mommy!” and walks out of my craft room opening it. 😂 Good thing I was prepared with extra candy for my little snacker.
This post contains affiliate links. For more information, see my disclosures here.
More posts you’ll like:


What you need to make these reindeer candy holders
- cardstock: You need two different shades of brown. I believe my light brown cardstock came in this pack, and my dark brown was just some scraps I had on hand (non-Cricut brand). This pack of brown cardstock also has a good variety of brown shades, just not quite the same as what I used (but I actually recommend you get the 12×24″ size if you can—it’ll make cutting easier and you’ll actually save on material!
- a Cricut machine, equipped with a regular fine-point blade
- a 12×24″ cutting mat
- a Cricut Access subscription: the reindeer image requires Cricut Access (or I think you can purchase it separately for about $1, but a subscription is SO nice to have if you craft regularly)
- black 1.0 Cricut marker
- glue: this is my favorite craft glue for papercrafting right now! (I promise it’s worth the price! With this glue, you don’t need a ton, but you have to work quickly because it dries quickly—actually one of the reasons I like it so much!)
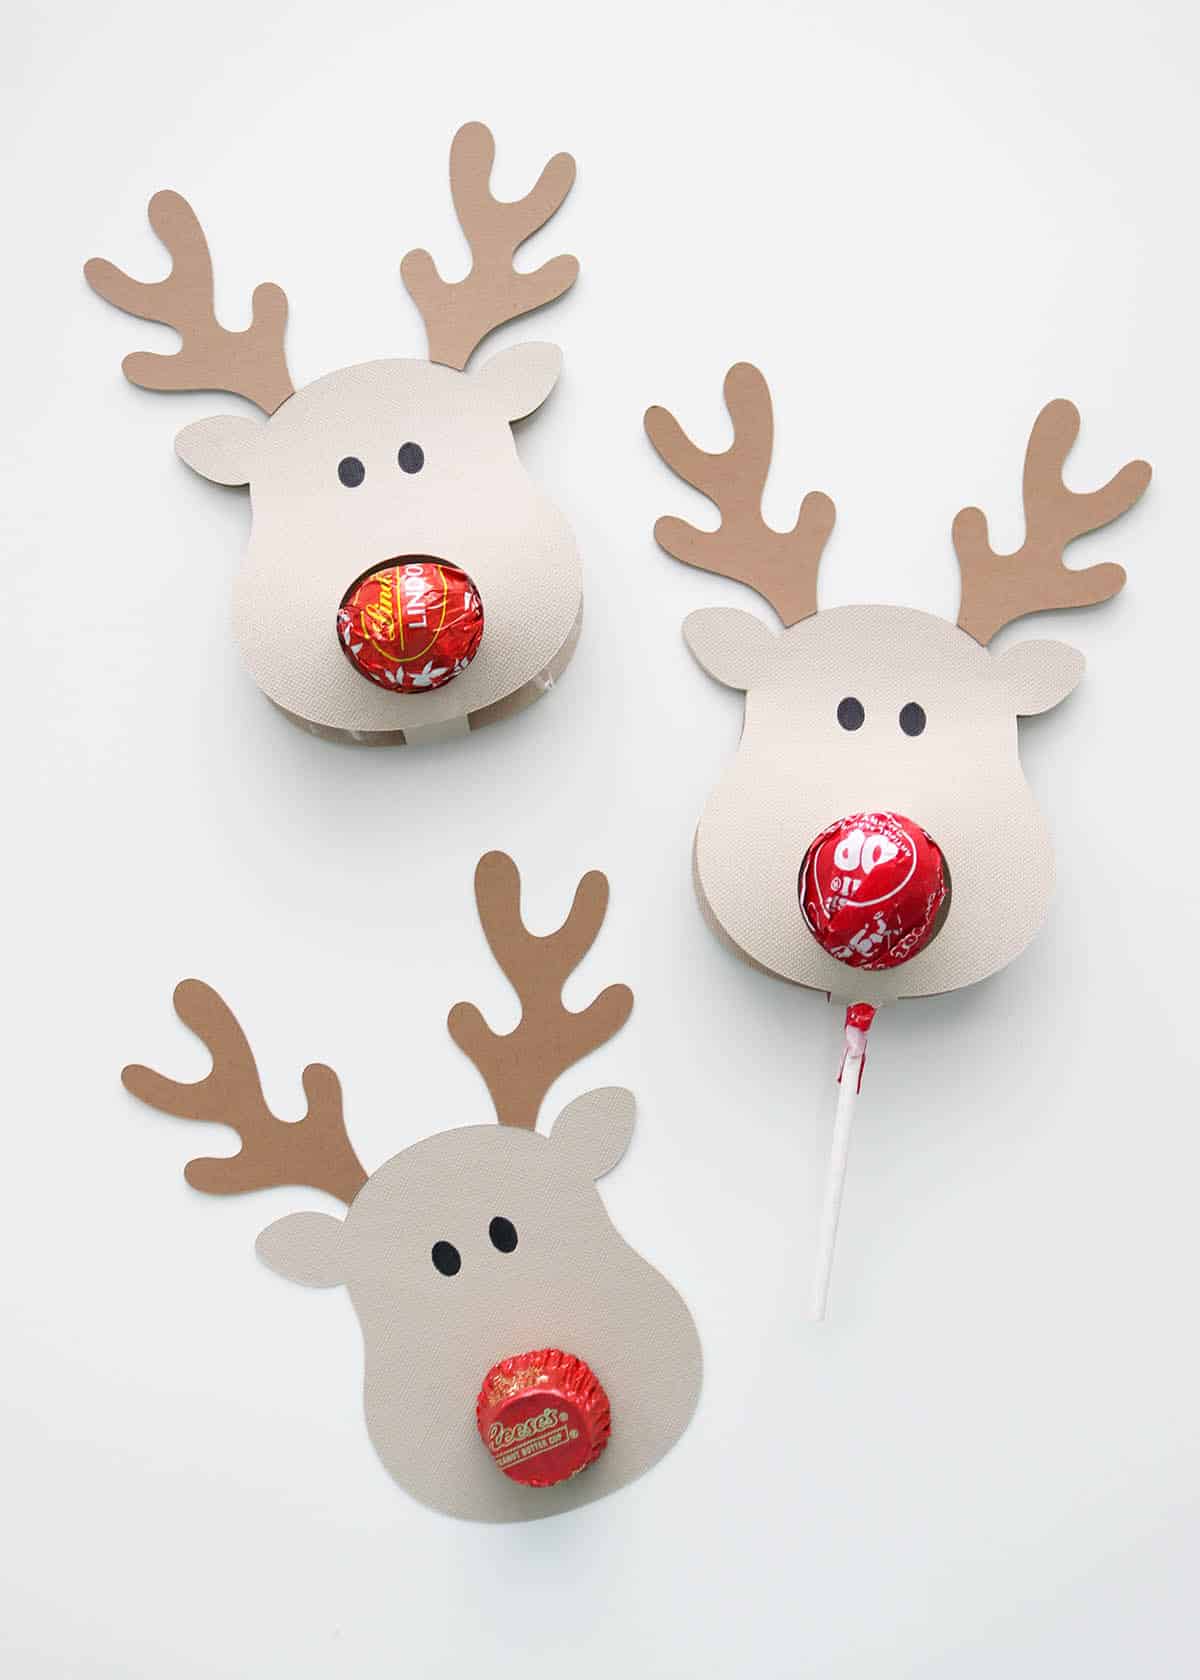
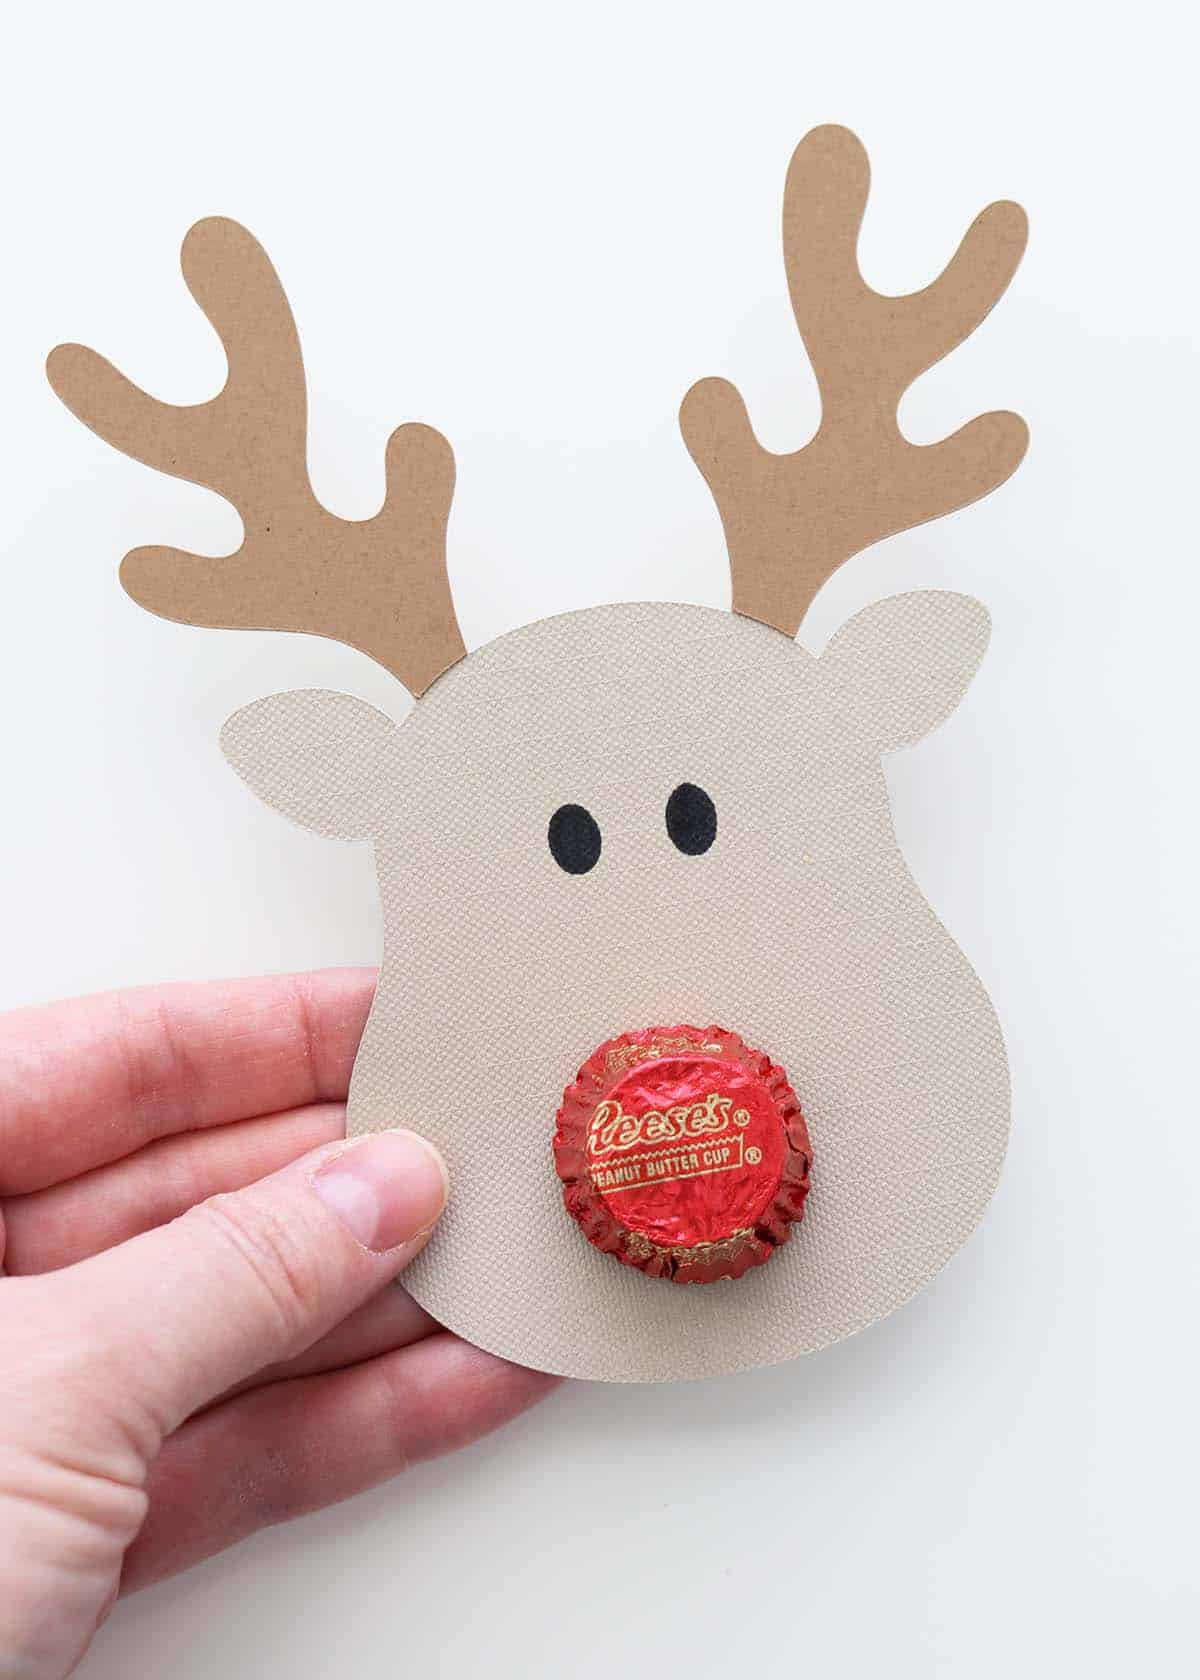
- red-wrapped candy for Rudolph’s nose: Lindor truffles, Tootsie pop suckers, or Reese’s (or other similarly-sized candy)
- tape if making the Reese’s reindeer: Scotch tape or masking tape both work fine
- stapler—optional, and only if you’re short on time and would rather staple the double-sided reindeers together instead of gluing them (for the Lindor chocolates and lollipop options)
About these papercraft reindeer candy holders (and some handy tips)
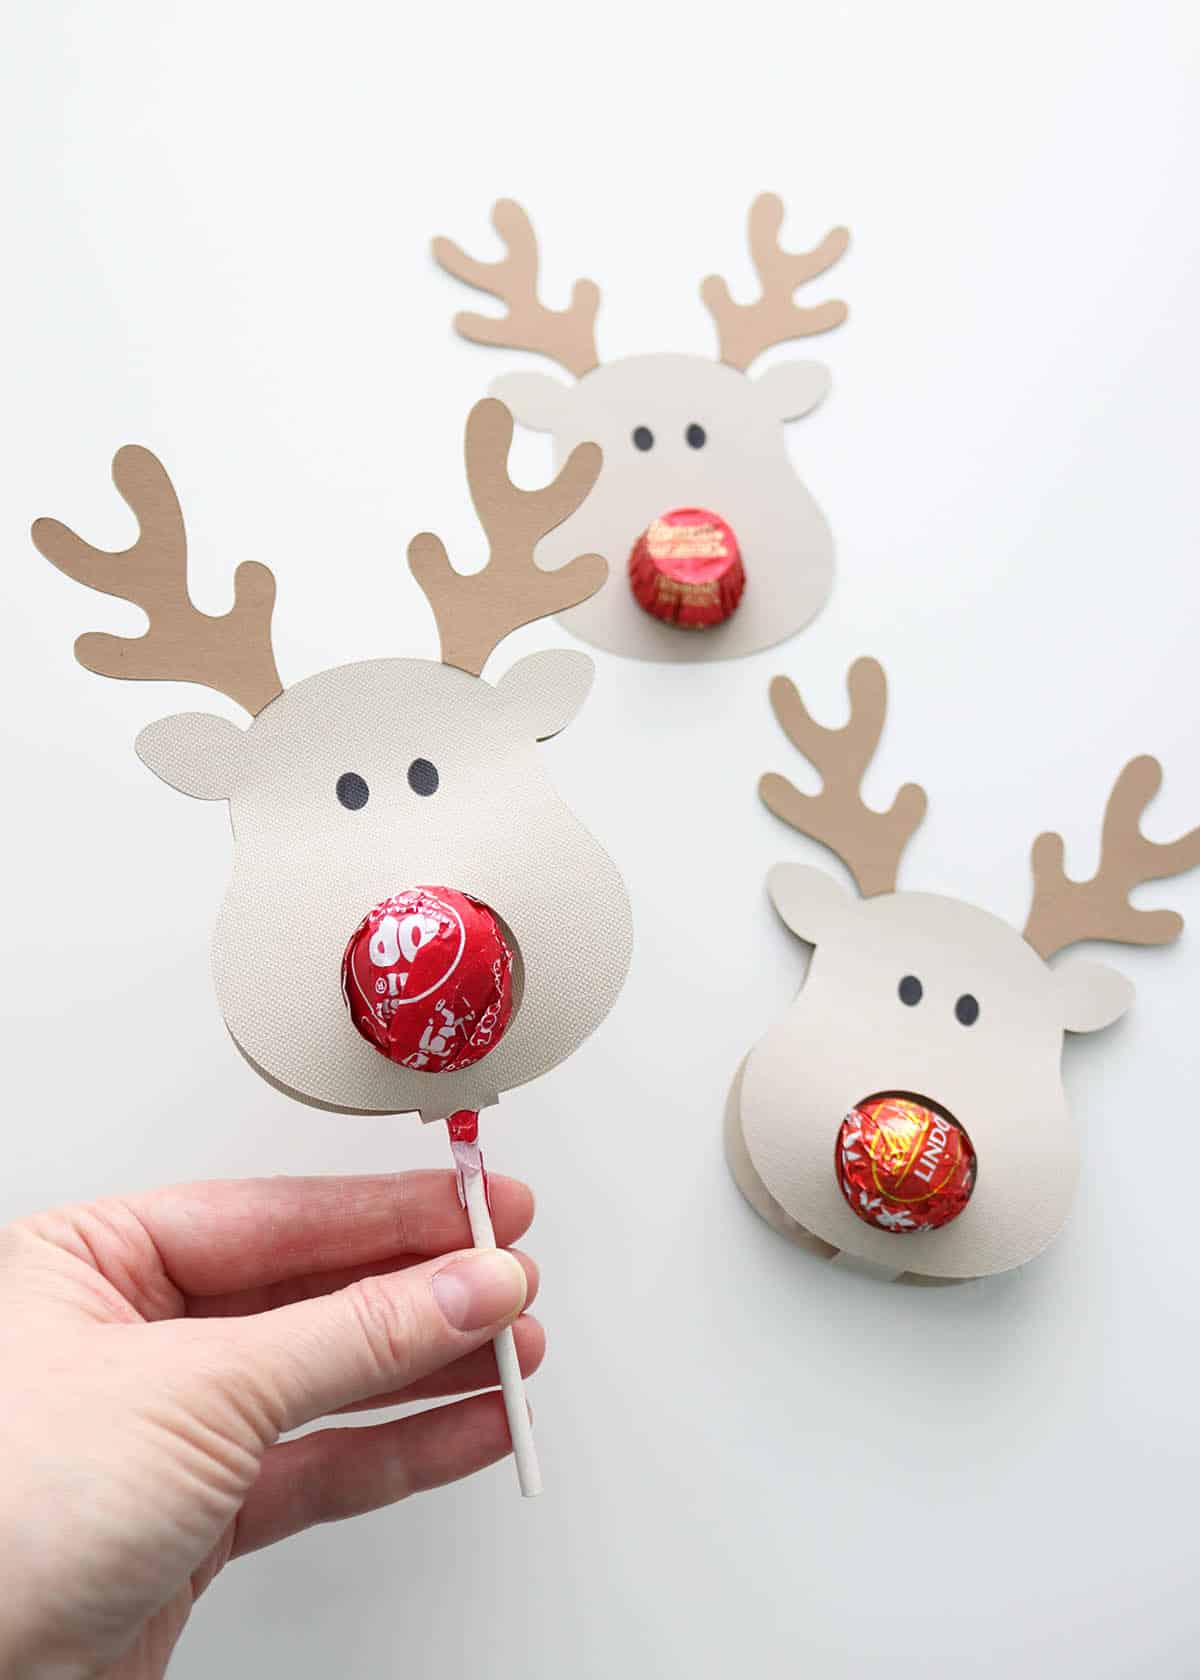
I made three different designs for the reindeer, but they’re all essentially the same image.
- First, a single reindeer that you can tape a Reese’s or similar candy to (this definitely saves on paper if you’re needing to mass-produce these).
- The second image is a foldable (double-sided) reindeer without a hole in the bottom that works for Lindor truffles and similar chocolate candies.
- Finally, there’s an option for a double-sided reindeer with a hole in the bottom so you can slip a lollipop or sucker inside.
The last two are set up with score lines where you’ll fold the reindeer, making them super easy to assemble! For these two, feel free to add text to the bottom reindeer side (just make it upside down on the canvas so it’s right-side-up on the reindeer once it’s assembled. Center it by selecting both the reindeer layer and the text and Align–center horizontally (top toolbar). Then have your Cricut draw your message for you with a pen (a “to/from” would be perfect here)!
For all reindeers, I’ve made it so your Cricut will draw the eyes and you can quickly color them in after cutting. I thought this would be easiest rather than guessing where to position little ovals of cardstock and it only takes a second to color them in. But if you prefer, select the eyes on the canvas in Design Space and change the operation type (top toolbar) to Cut–basic. Then just glue the eyes onto the face once the reindeer’s cut out.
If you’re only making one type of the reindeer (say you’re only doing the Lindor chocolates), you can toggle the eye icons in the layers panel to hide the other reindeer designs. Or, you can just delete them if that’s easier—don’t worry, you can always come back to my project and create a new copy at any time! Don’t forget to like and bookmark the project to save it in your favorites!
Before mass-producing these, I recommend doing a sample cut first to make sure your candy fits in the design as is. You can easily size up or down as needed by highlighting the entire design and dragging the corner of the bounding box (just keep in mind that this gets tricky with the double-sided reindeer since it ends up being pretty tall, surprisingly—this is why you need a 12×24″ cutting mat and probably 12×24″ cardstock.) You can also use a circle shape to either slice or weld over the reindeer’s nose to change the size of the opening. If you have any questions on this, leave a comment at the end of the post and I’m happy to help!
How to make reindeer Reese’s tags
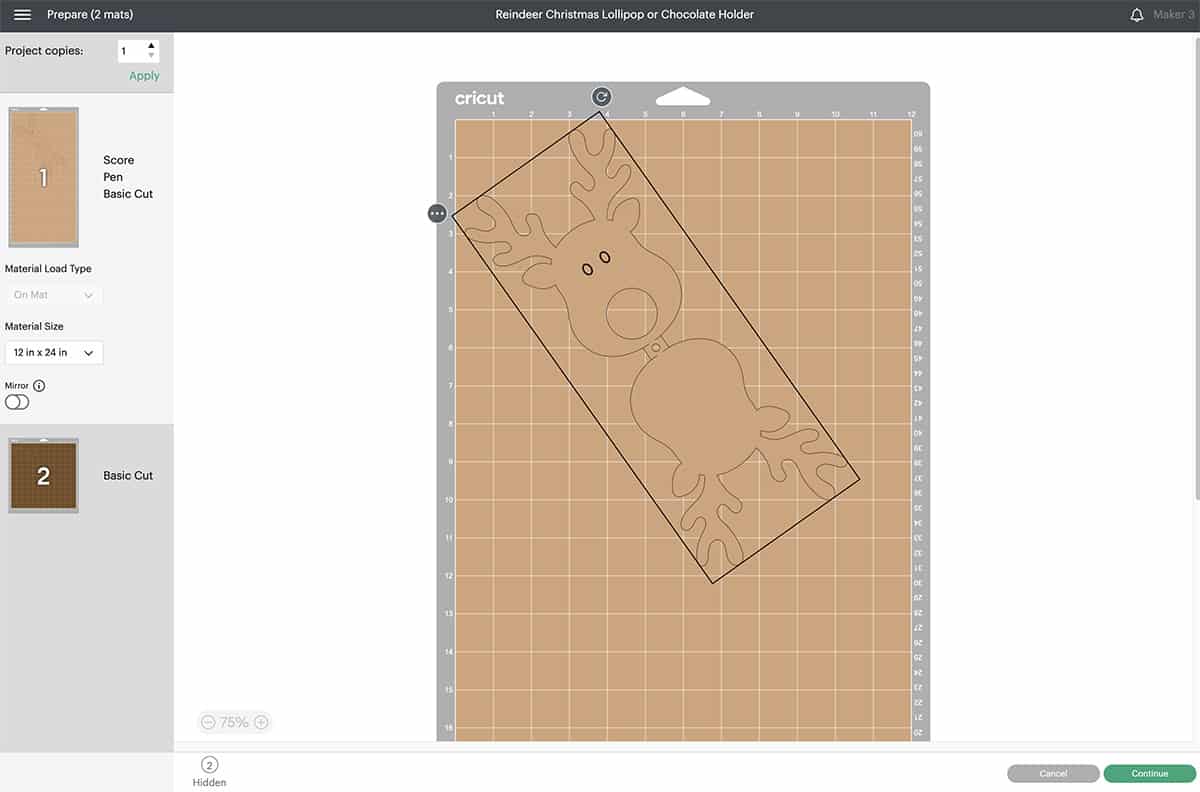
Cut the reindeer
1. Open my reindeer project in Design Space and click Customize. Make any adjustments you need to.
2. Click Make It. Select “On Mat–for any material” as your load preference and Confirm.
3. Adjust your reindeer on the mat if needed, then click Continue.
4. Choose your material settings (the Medium Cardstock setting works great for Cricut cardstock). You can also check the “remember material settings” box if this is the same setting for all your mats—saves time in between cuts.
5. Load tools and material: your pen in Clamp A, fine-point blade in Clamp B. Then load your mat with cardstock into your machine and press Go.
6. Unload the mat from your machine when it’s done cutting and gently remove your pieces from the mat (with cardstock especially, you always want to turn the mat upside down on your table and peel the mat away from the material so the mat is the one curling, not the material).
Assemble the reindeer
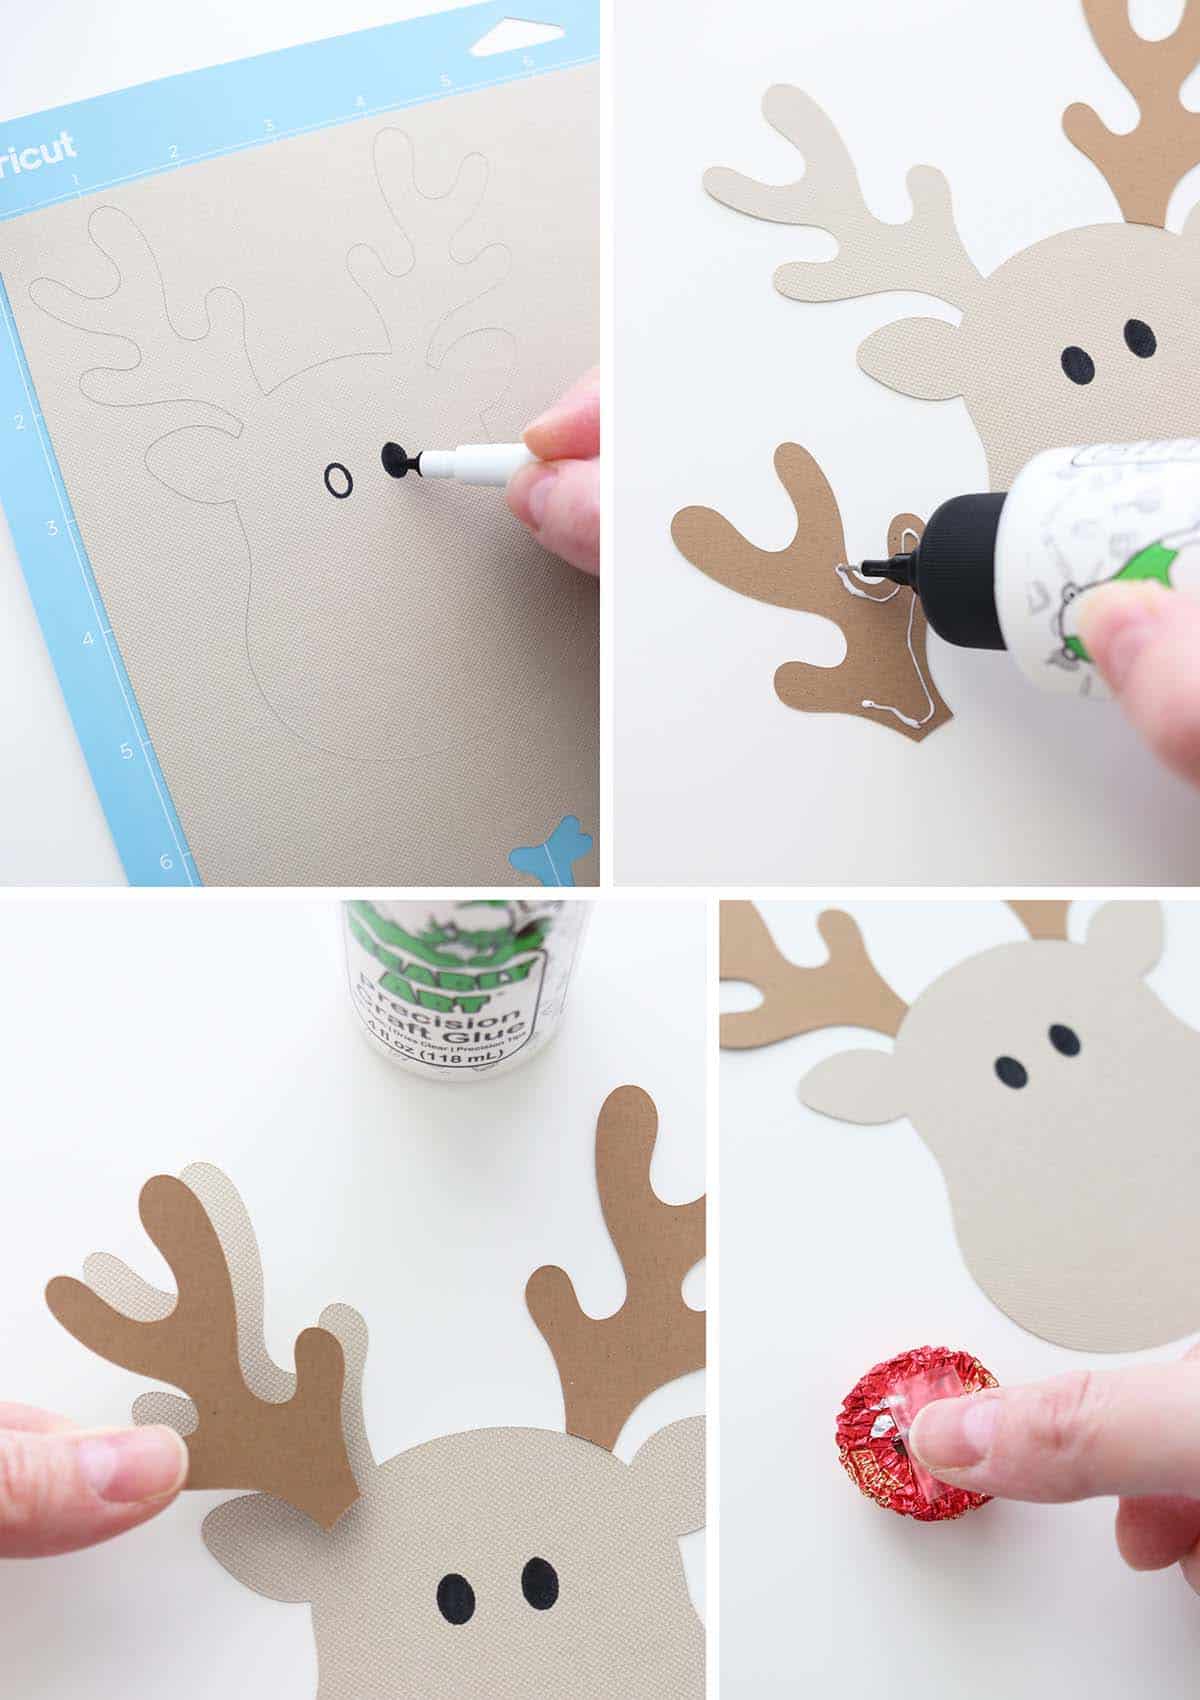
1. Color in the eyes with your Cricut pen (or glue them on if you chose to make them out of cardstock).
2. Glue the antlers on.
3. Add a piece of tape to the bottom of a Reese’s and stick it on the reindeer for its nose.
How to make reindeer Lindor chocolate holders
Cut the reindeer
1. Open my reindeer project in Design Space and click Customize. Make any adjustments you need to.
2. Click Make It. Select “On Mat–for any material” as your load preference and Confirm.
3. Adjust your reindeer on the mat if needed…then click Continue.
Okay, here’s where it can get a little tricky, depending on the size of cardstock you have available.
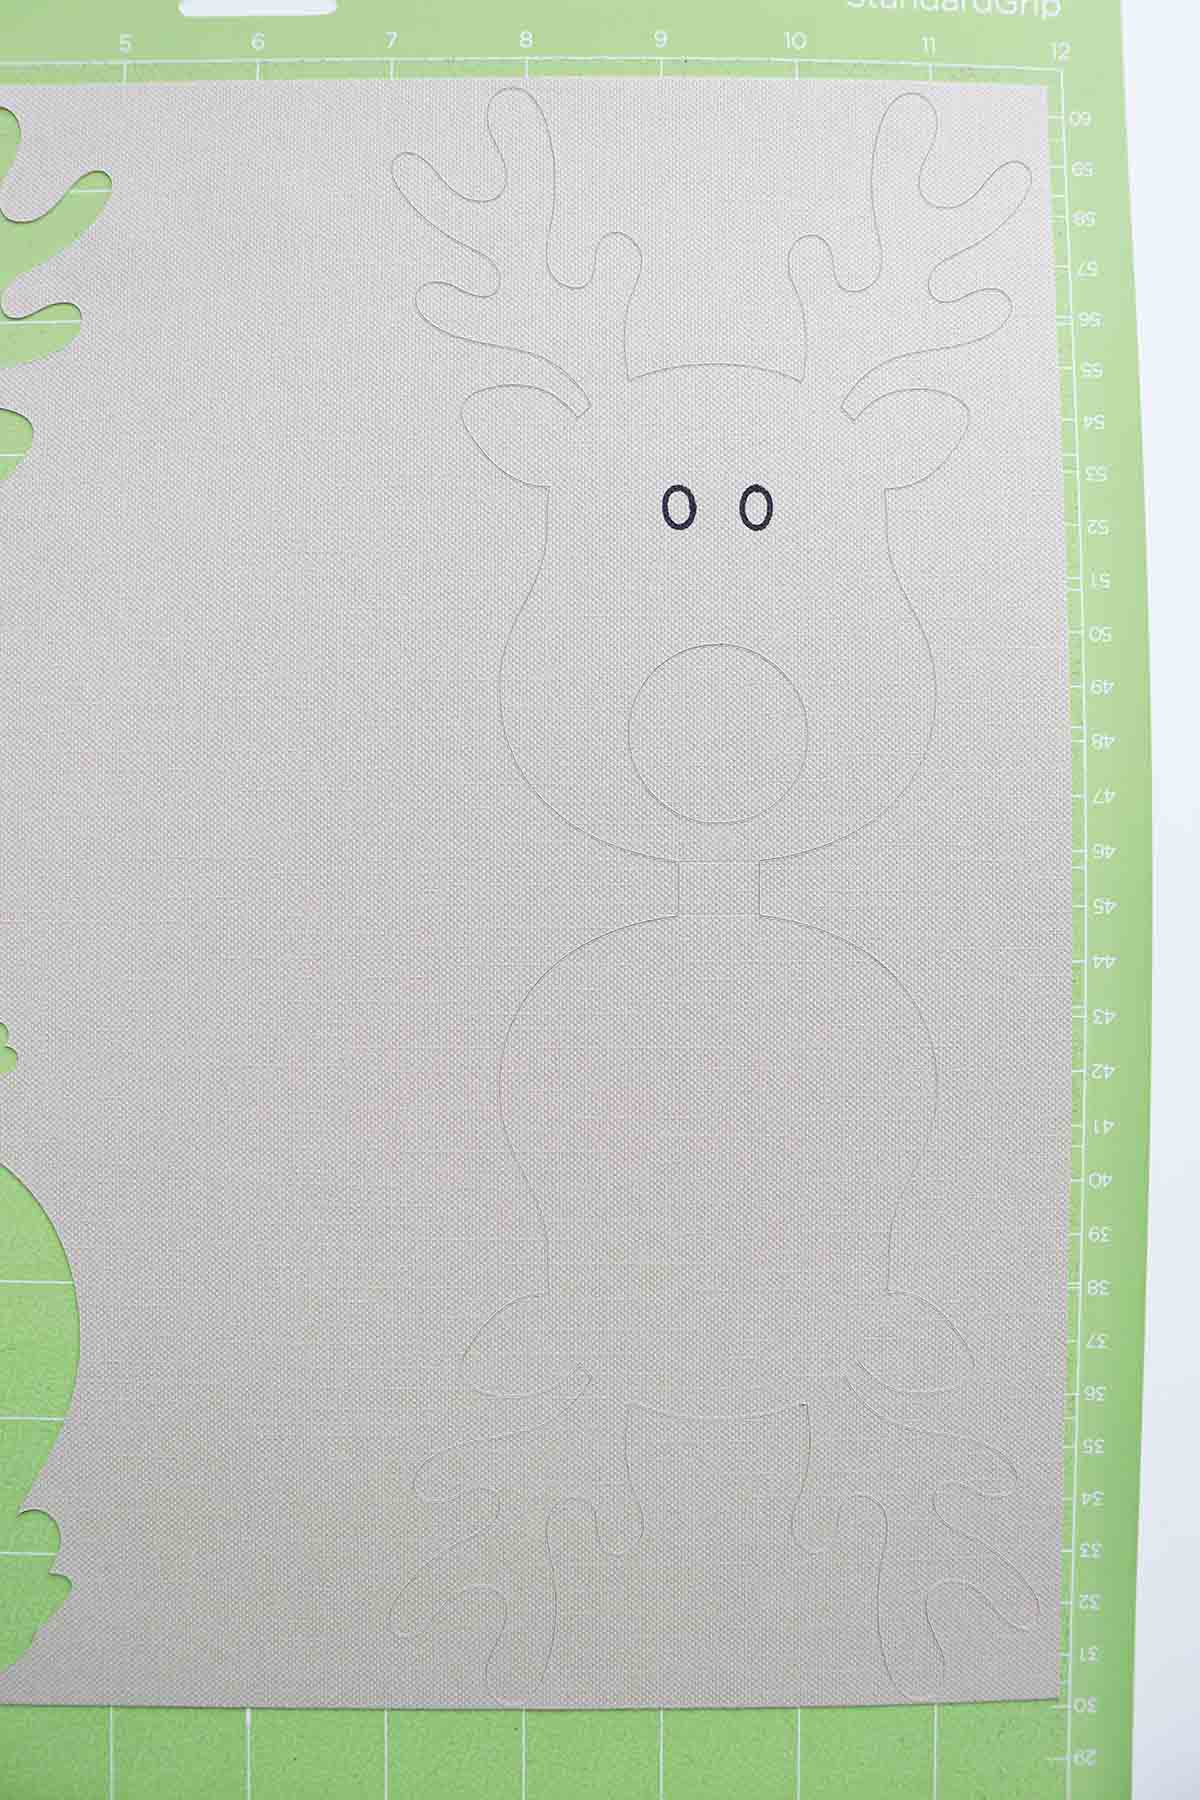
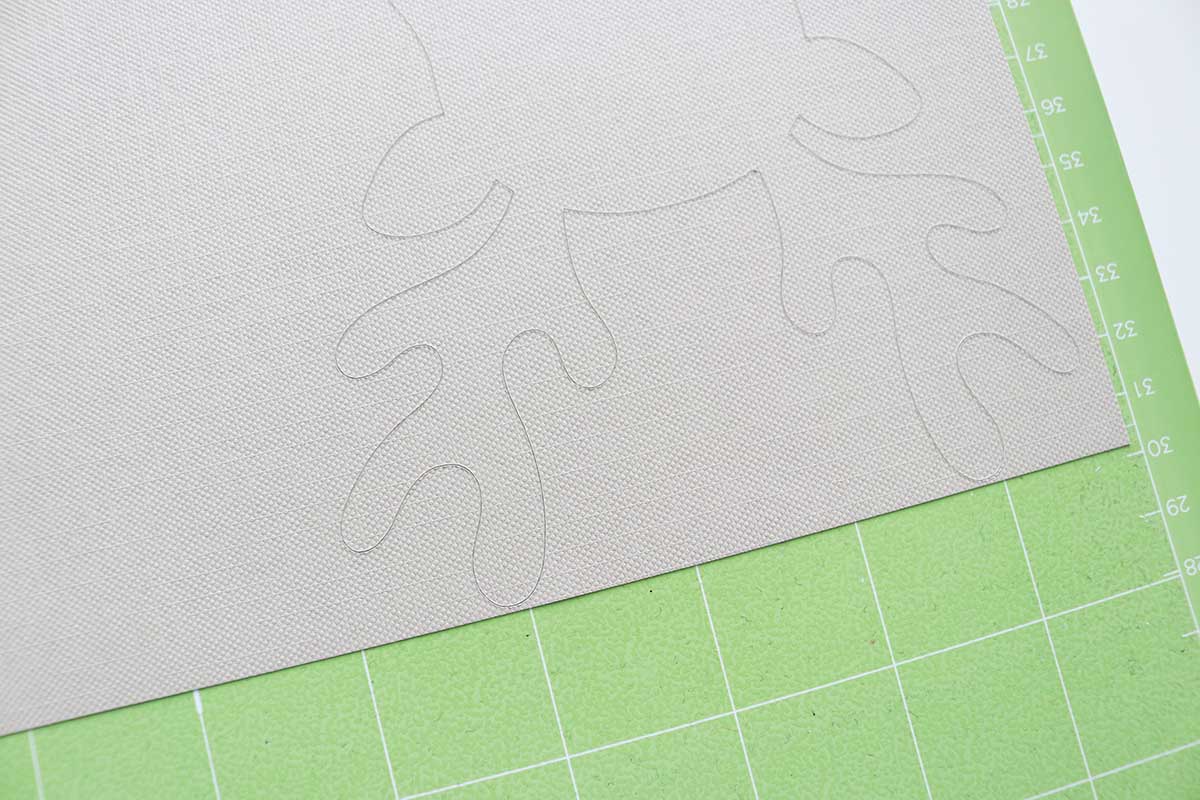
These double-sided reindeers are almost 12″ tall, which is larger than the maximum 11.5″ cut area for a standard 12×12″ cutting mat. So, you’ll need your 12×24″ cutting mat.
Now, technically you can fit the reindeer on a 12×12″ piece of cardstock…but you have to position it just so on your cutting mat (and then cross your fingers that it comes out correctly). Because your Cricut naturally leaves a 1/4″ margin before cutting, you can place the cardstock not quite 1/4″ of the way down the mat, making sure it extends past the 12″ mark a little (look at the positioning in Design Space and make sure your cardstock will cover the design)*. When you go to load your mat into your machine, try to load it as straight as possible (I occasionally have issues with my Maker 3 loading crooked, that’s why I say this…just hold the mat very straight and push it against your machine while loading so it feeds in correctly).
*I don’t recommend using the SnapMat feature for this (if that’s something you like to do) because it usually isn’t accurate enough for the precise positioning we need.
Or, a less stressful option is you can rotate the reindeer so it fits on the mat easily. The problem with that is it takes up most of your sheet of cardstock and doesn’t allow you to cut more than one from a sheet (not great if you’re mass producing these).
See? Not ideal.
So, the easiest option is to use a 12×24″ sheet of cardstock—you don’t have to worry about positioning, and you can keep the reindeer straight and cut multiple next to each other.
But…I only had 12×12″ cardstock available in the color I wanted and I needed to save space…so I did the tricky positioning on the mat. 😆
Whew, just barely! Skills.
4. Choose your material settings.
5. Load tools and material: your pen in Clamp A, scoring wheel in Clamp B. Then load your mat with cardstock into your machine and press Go.
6. Follow the Design Space prompts to change the scoring wheel for the fine-point blade when it’s time (DO NOT UNLOAD THE MAT YET). Unload the mat from your machine when it’s all done cutting and gently remove your pieces from the mat.
Assemble the reindeer
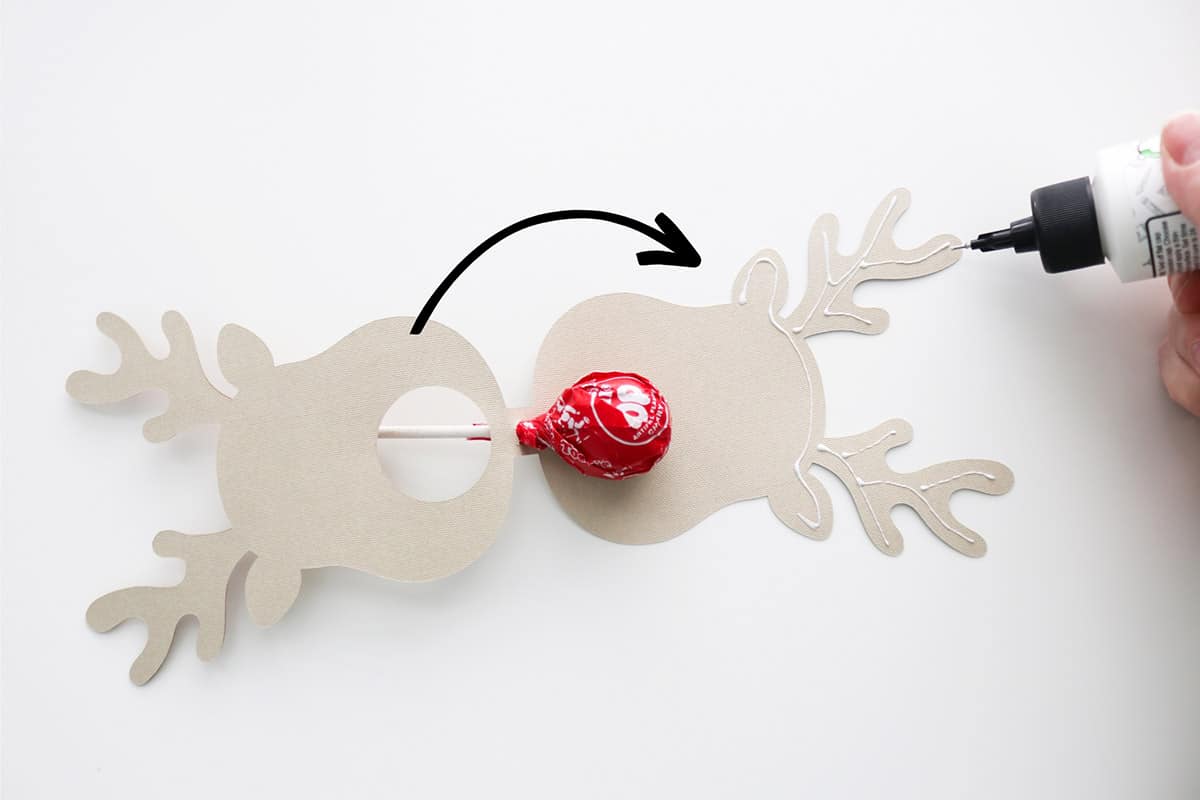
1. Color in the eyes and glue on the antlers the same as for the Reese’s tag.
2. Fold the reindeer at the score lines.
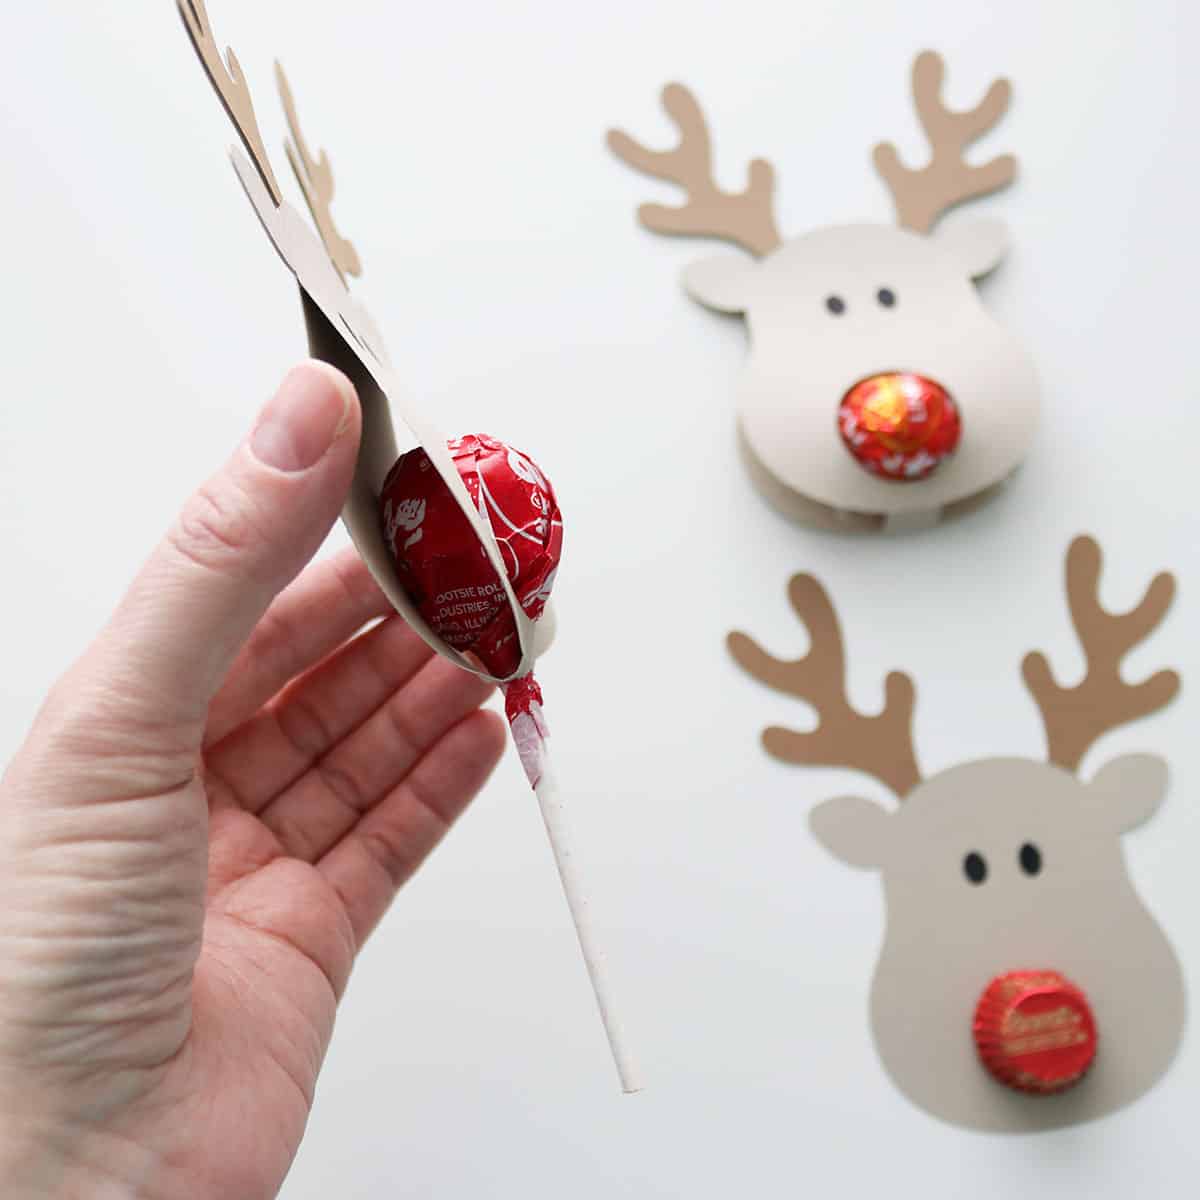
3. Flip the reindeer so it’s open, set a Lindor chocolate on the back, and add glue to the back reindeer piece (I glued from the ears up to the antlers). Fold the front side over the chocolate so it sits in the opening, and glue the ears and antlers together.
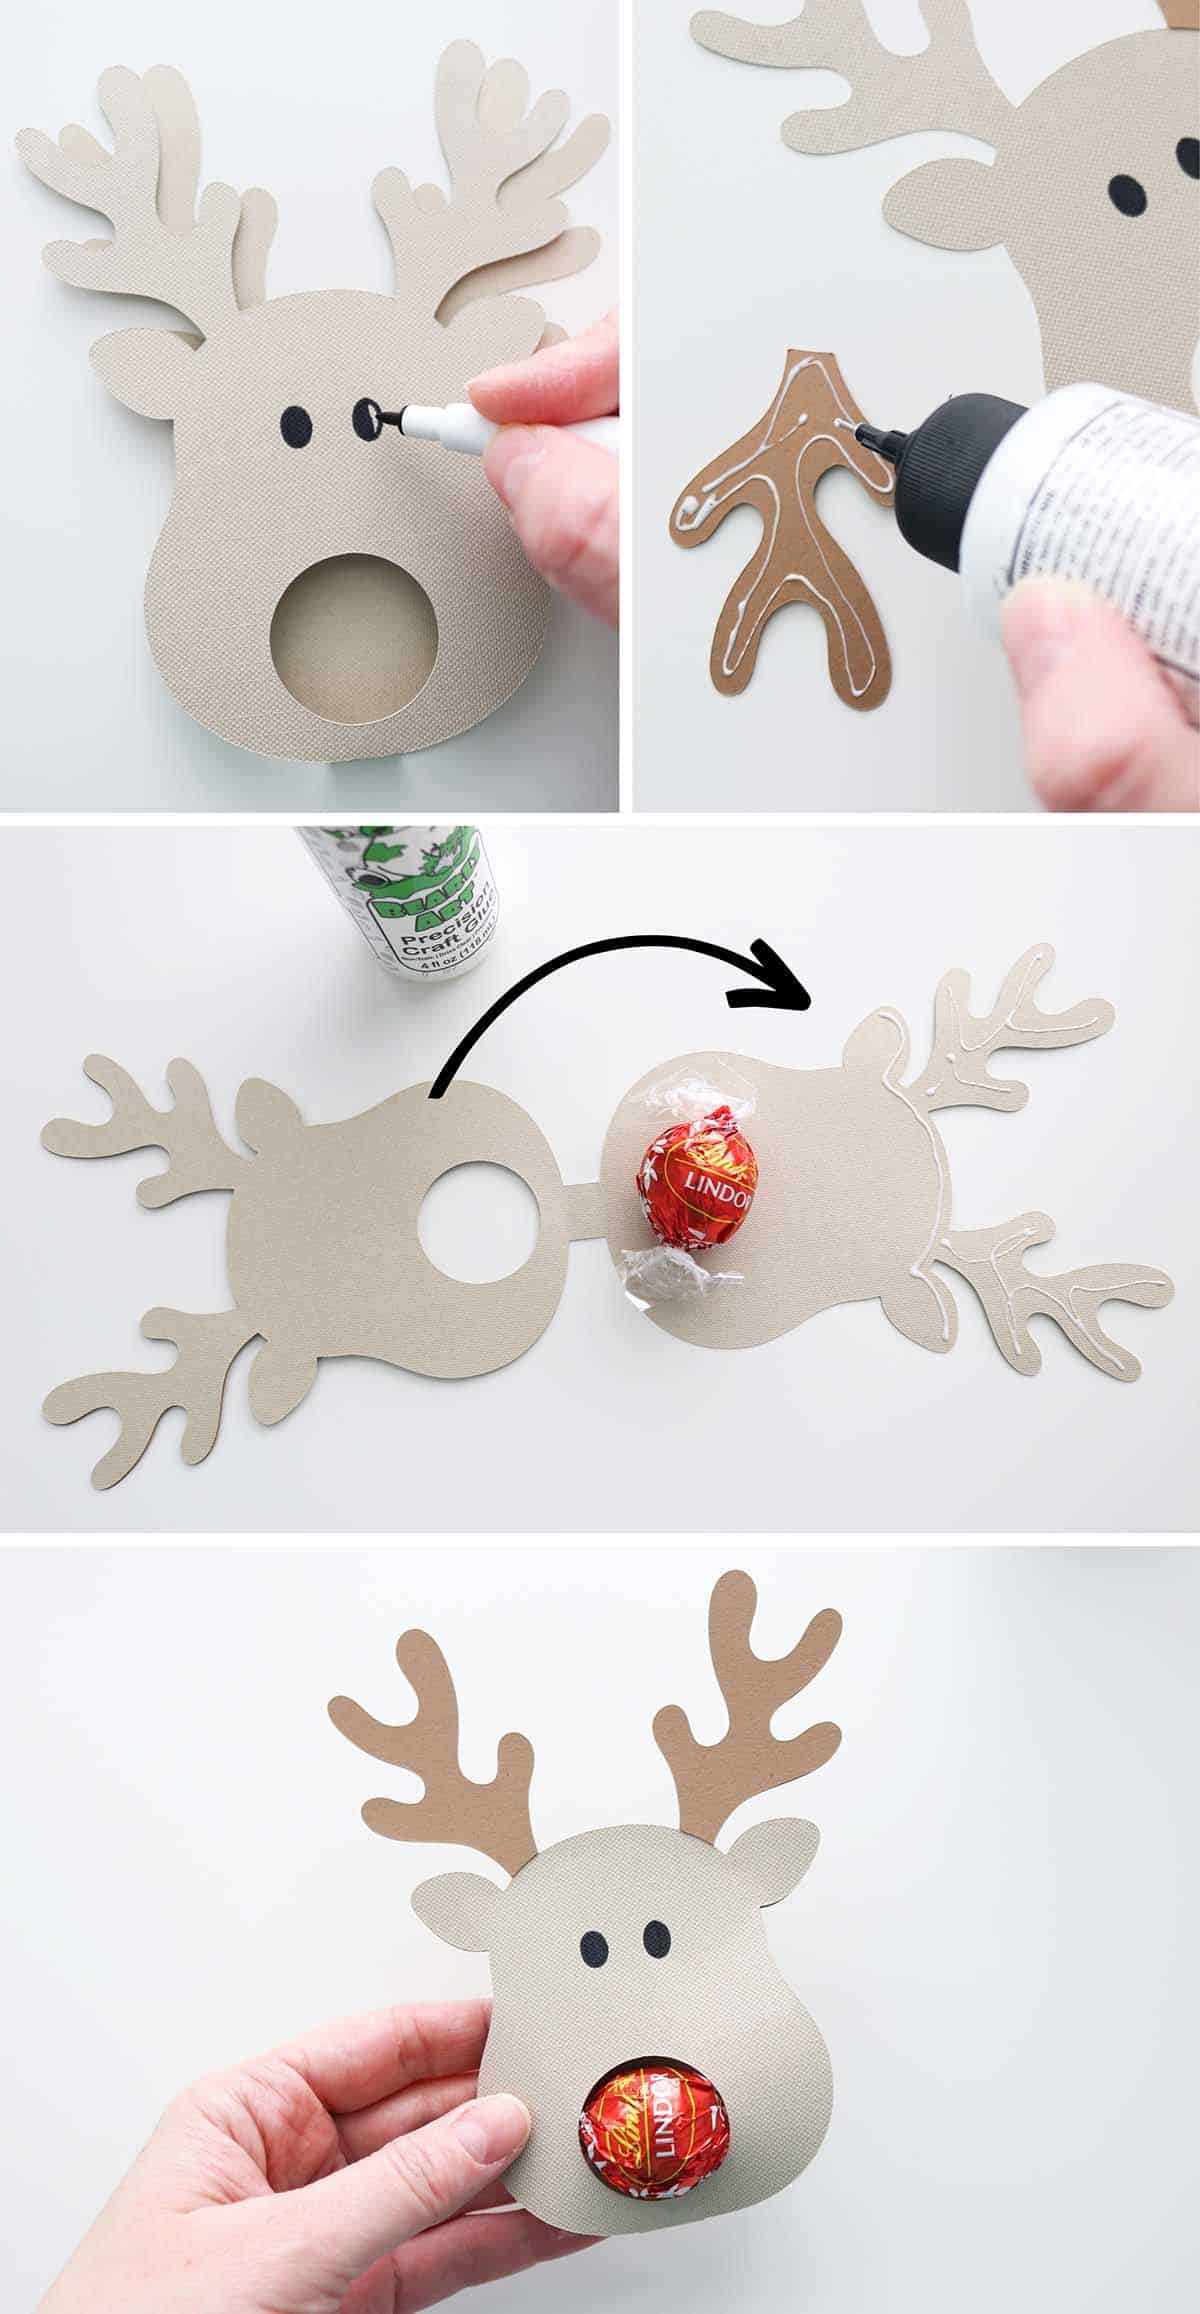
Alternatively, if you’re short on time, you could simply staple the pieces together with a staple on the reindeer’s forehead (I prefer the look of the glue, though, and it dries so quickly anyway).
How to make reindeer Tootsie Pop lollipop holders
The process for cutting and assembling the Tootsie Pop lollipop holders is almost identical to the Lindor chocolates holder. When assembling, after folding on the score lines, you’ll just stick the sucker through the hole in the base*. And then glue or staple the tops together like before.
*If your lollipop’s wrapper is too big for the hole, first try twisting it tightly around the stick as much as possible and then re-insert it. If that still doesn’t solve the problem, you can make the hole at the base of the holder bigger—with a manual hole punch or scissors, or in Design Space before cutting more copies: You’ll add a circle to the canvas, resize it, center it over the existing hole, select only the base reindeer piece and the circle and slice them together, then delete the excess pieces. You’ll also have to re-attach the eyes and score lines to the reindeer piece afterwards. If that’s totally confusing, you can always leave me a comment below and I can try and help you troubleshoot the specific lollipop you’re using.
Easy DIY Reindeer Candy Holder Gifts
Yay, so cute! I hope you love these! Super easy and fun to make. (I promise they’re easy, despite my lengthy instructions 😂…I just like to make my tutorials very detailed to try and predict any questions or possible issues ahead of time! Hopefully you find it helpful.)
Let me know how your Christmas reindeer candy holders turn out by leaving a comment below!
Happy Christmas crafting!

Don’t forget to pin and save for later!
Where can i purchase the pattern if I don’t have a subscription to Cricut design?
As long as you’re still using Cricut Design Space and a Cricut machine, you can purchase the project in Cricut Design Space (it should just be $1 for the reindeer image, all other parts used were free). From my project, click Make It, then you will be prompted to checkout before cutting it. Let me know if you have any issues!
I love the design that holds the Lindor chocolate, but when I cut it on my Cricut Maker, there is a cut (I think it is a square) that splits the reindeer into two halves. I don’t see this cut line on the screen, and don’t know how to get rid of it. Any suggestions?
Hi Lois, I just opened the project again and everything appears to be set up correctly. 🙂 The square connects the two halves (front and back) of the reindeer and the line is a score line: it shouldn’t cut, but you will need to load a scoring wheel into your machine in place of the blade when it gets to that part (Design Space will prompt you when to do this). If you’re not familiar with scoring, it just leaves an impression in the cardstock which makes it easier to fold later–not necessary, but can be helpful. If you want to skip the score lines, you can delete them from the layers panel: just make sure only the lines are selected and then hit delete on your keyboard or “edit–delete” from the top toolbar. Let me know if you need any additional help!