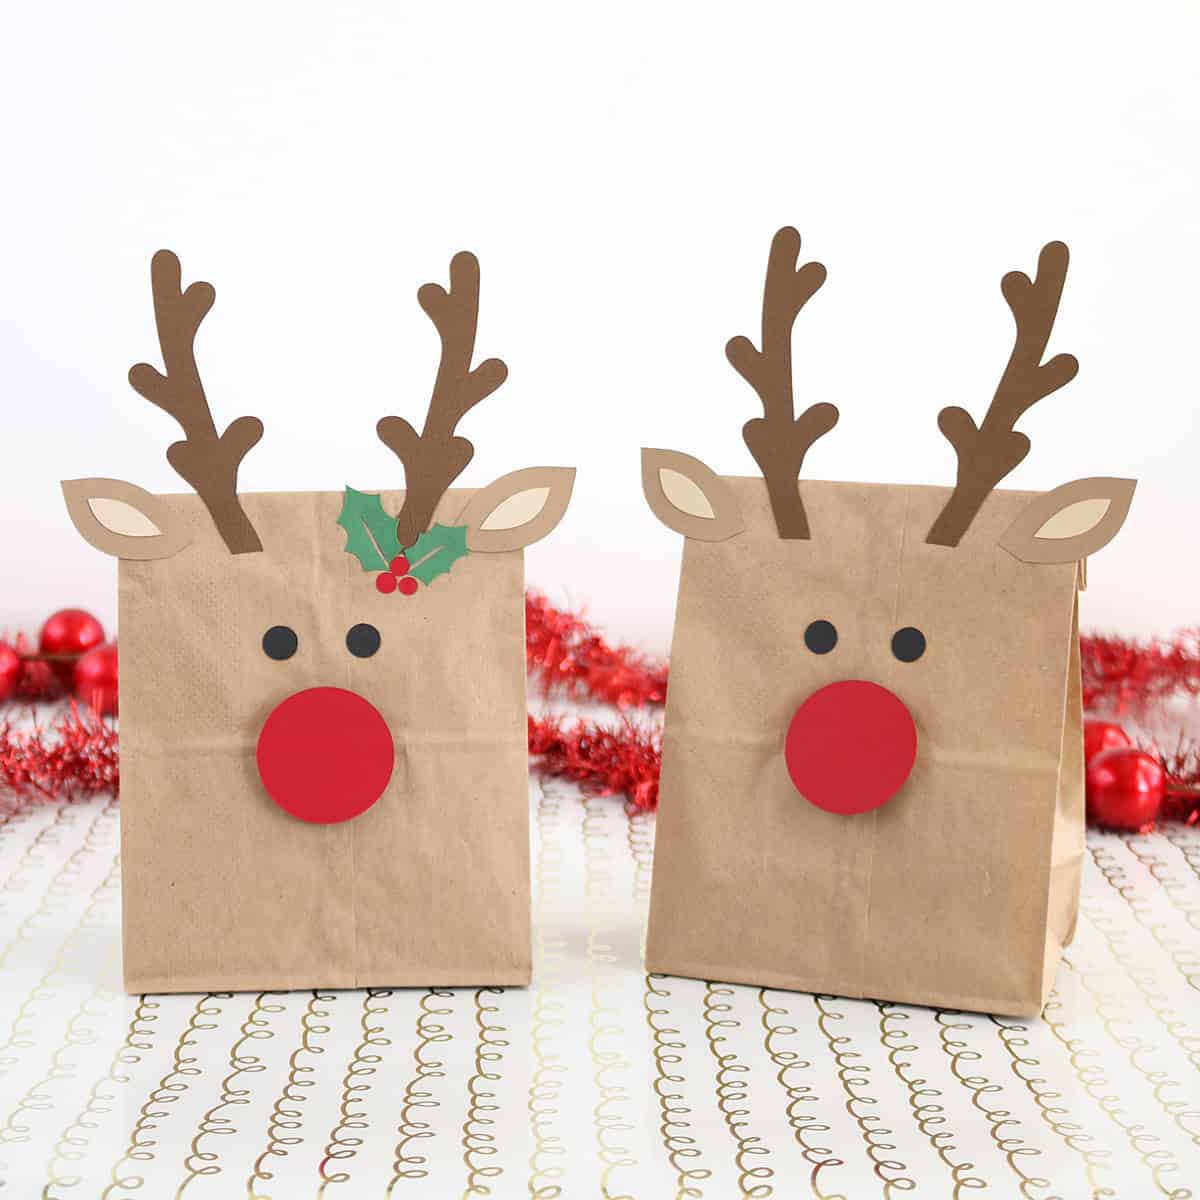
Easy Reindeer Gift Bags – Fun Christmas Favor Idea!
Dress up a simple brown paper bag with some cardstock for these adorable reindeer gift bags! Cute Christmas favor and gift wrapping idea!
If you’re in need of the cutest (and cheapest!) DIY Christmas favor or treat bag this holiday season, these easy reindeer gift bags are perfect! For starting with a simple brown paper lunch sack, they turn out so professional-looking!
This tutorial couldn’t be easier, making this a great Christmas party favor that’s easy to mass-produce for a large classroom or family. Fill with treats, small toys, or any other gifts you want!
Keep reading to get my Cricut project and step-by-step instructions!
This post contains affiliate links. For more information, see my disclosures here.
More posts you’ll like:


What you need to make reindeer gift bags
- brown paper lunch sacks
- my Reindeer Gift Bags project in Cricut Design Space
- a Cricut machine and StandardGrip cutting mat (I love the Cricut Joy Xtra for this! Read this post to see if it’s the right machine for you!)
- cardstock in dark brown, kraft brown (try for same color as lunch sacks), light brown, black, red, and green
- glue: this is my absolute favorite for paper crafts
- craft tweezers: optional, but I’ve come to love using them when doing paper crafts–makes gluing so much easier!
- foam tape for added dimension: you can use dots like these or cut pieces off strips like these (less convenient but a great way to save money!)
- regular tape to close bags (could also use a Christmas sticker or glue)
- googly eyes and glue dots, optional
How to make reindeer gift bags
Cut cardstock pieces with your Cricut
Open my Reindeer Gift Bags project in Cricut Design Space. On the Canvas, you’ll see a large rectangle: this is the exact size of my brown paper bags. I recommend measuring yours and resizing this and the reindeer face as needed so it’s proportional to your bags.
Click Make. I moved all my pieces to one mat so I didn’t have to load and unload a million mats, but only do this if you can keep good track of which pieces are which color and also where you need to put the cardstock on your cutting mat – if you’re using the mobile app, you can use SnapMat, which makes this so easy! (If you’re clear on which pieces are which color, you can even save yourself time by making all the pieces the same color on the Canvas prior to clicking Make.)
Load your cardstock on your cutting mat now so you can look at the guides and make sure everything is placed correctly.
Continue in Design Space until you get to the material screen. Set your base material to Medium Cardstock. Load your mat into your cutting machine and continue to cut your material.
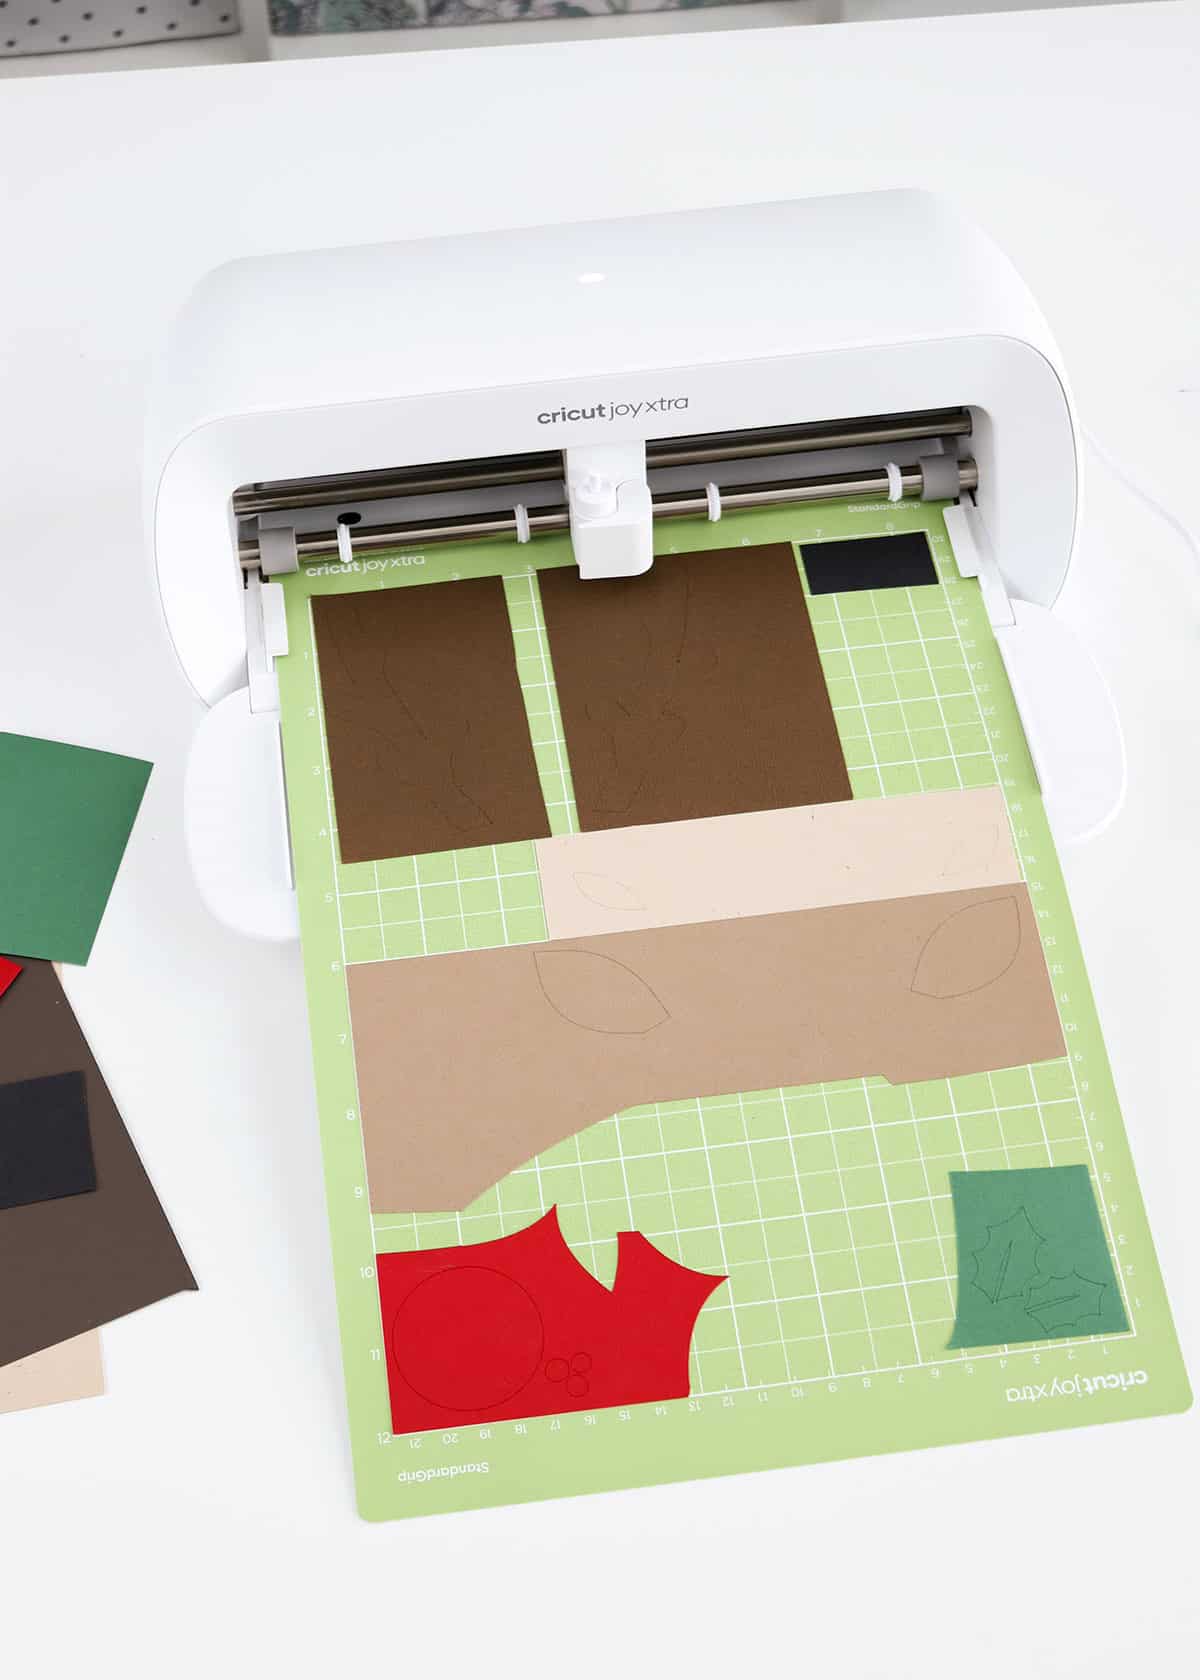
Remove the mat from your machine and remove the cardstock pieces (try to keep the ear pieces right-side-up so you don’t get confused which direction they should go, but it’s not the end of the world if they get glued backwards).
Glue cardstock pieces on
I folded the top of the bag down three times so the gift bag would be a little smaller. You can do this or leave your bag as is, depending what you’re filling it with.
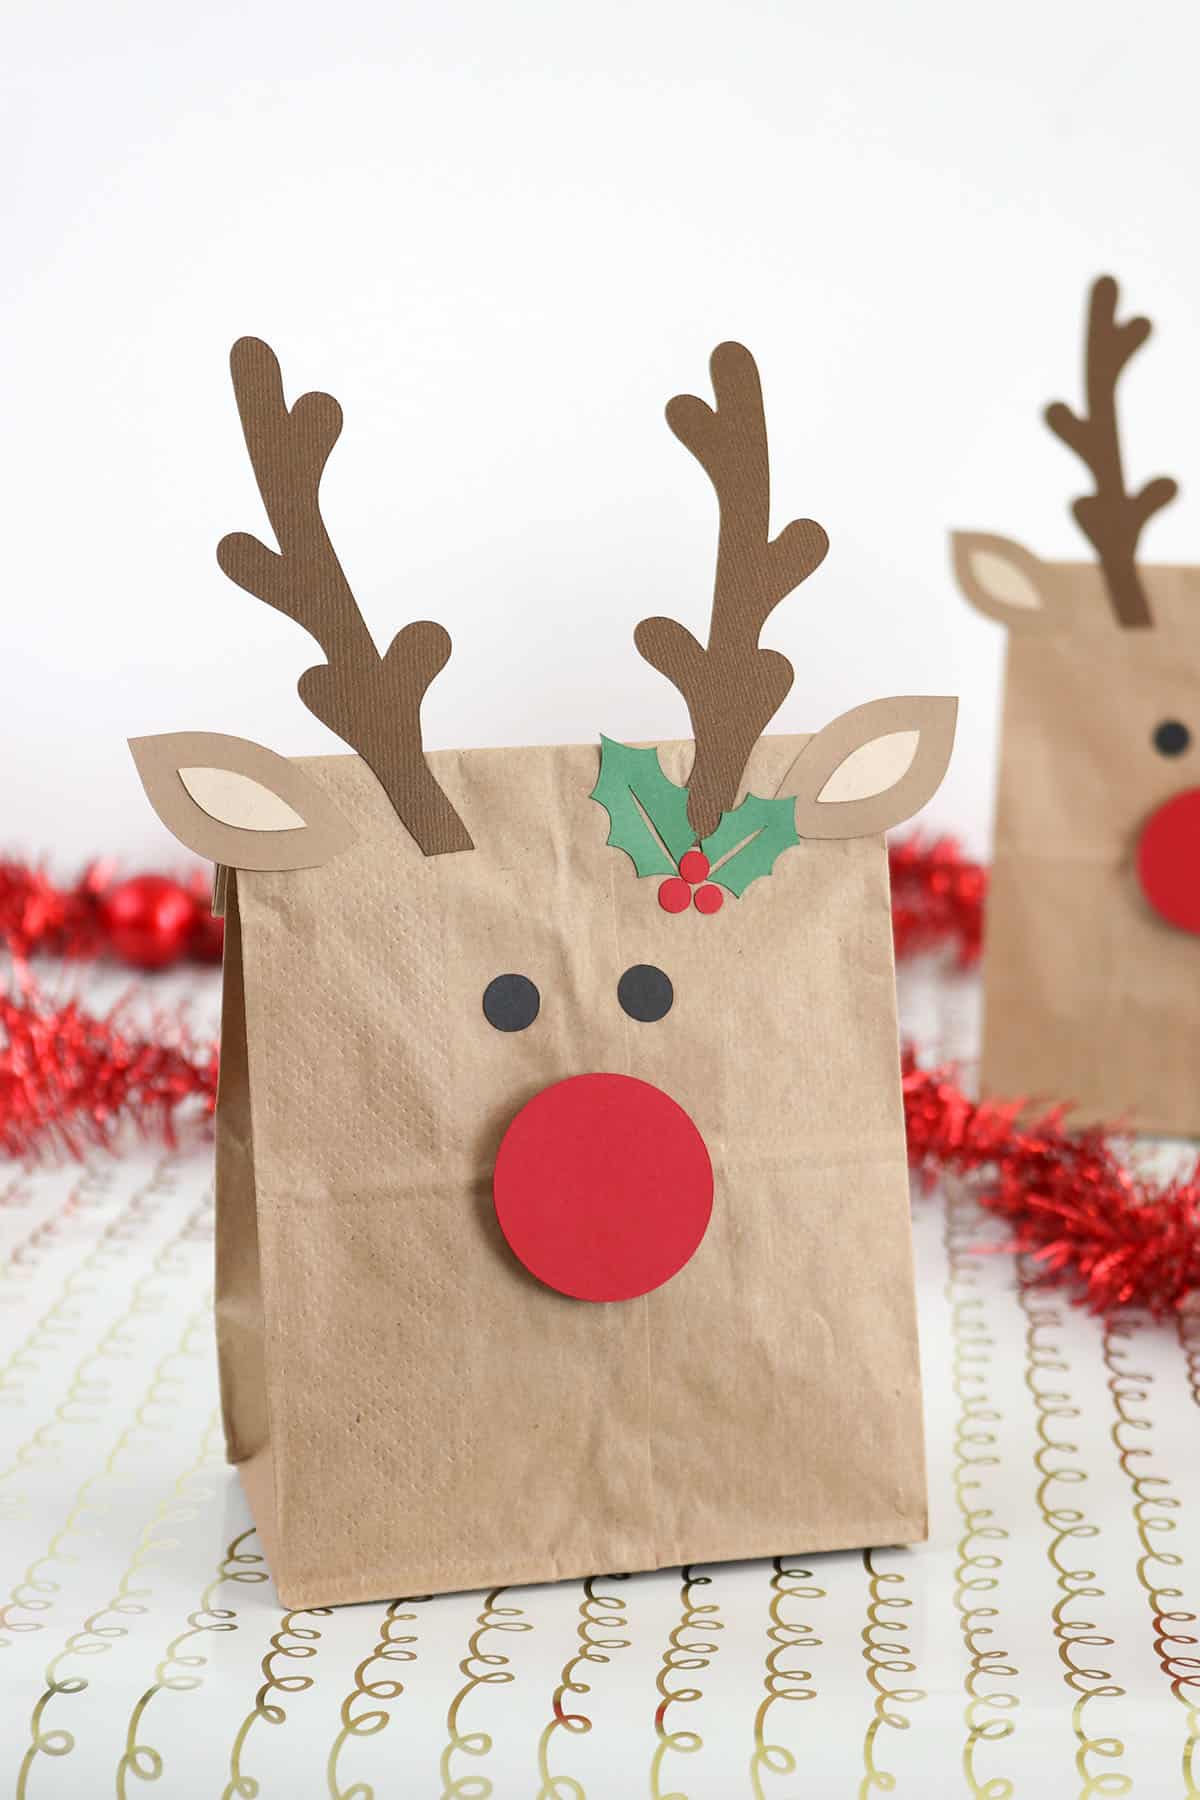
Start gluing cardstock pieces on, starting with the antlers, then ears, and then eyes. If desired, you can use googly eyes instead of the black cardstock circles–apply these with glue dots.
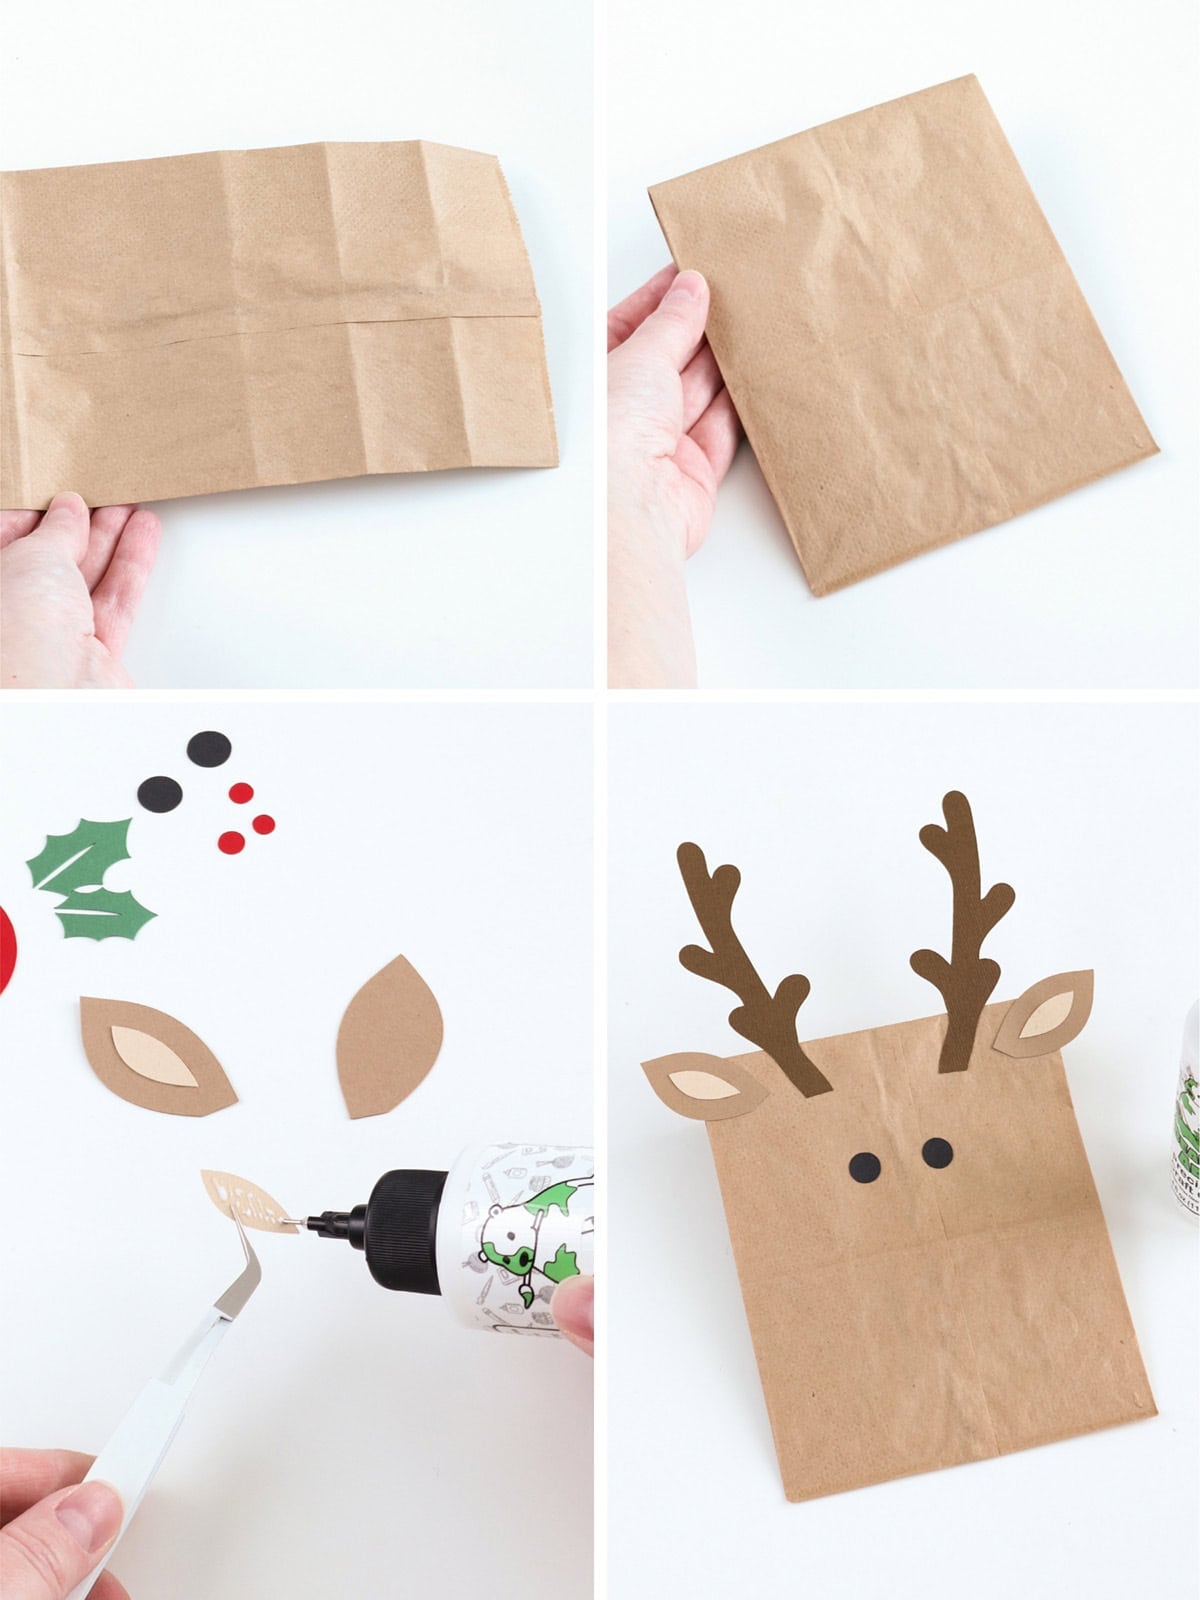
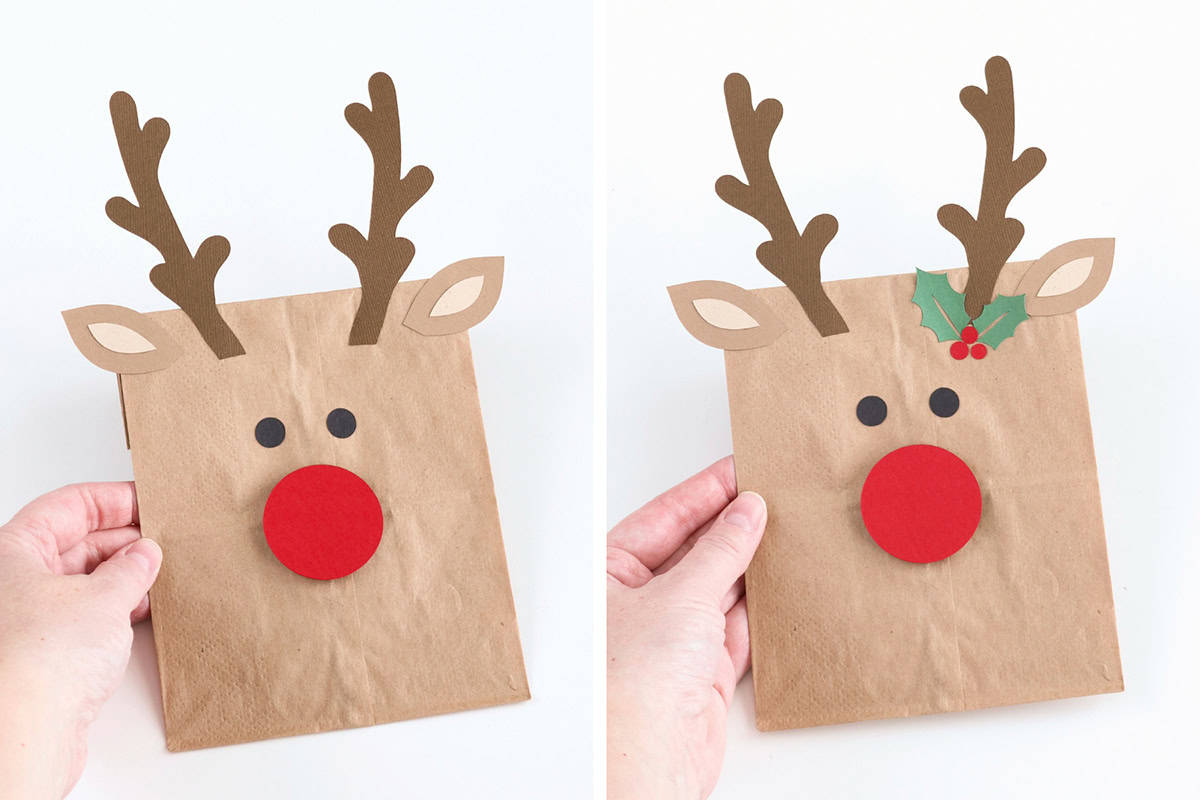
The cardstock holly leaves and berries are optional, but you can glue those on now if you’re using them.
For a little extra interest, I adhered the red nose with two layers of foam tape so it would stand out from the bag more.

I just use the foam tape rolls from Dollar Tree and cut pieces however big I need. This tape gums up your scissor blades, but it’s super easy to clean them after by sticking some masking tape to the blades a few times to pull up the gunk – that’s why masking tape is one of the 13 unexpected craft supplies I keep on hand in my craft room!
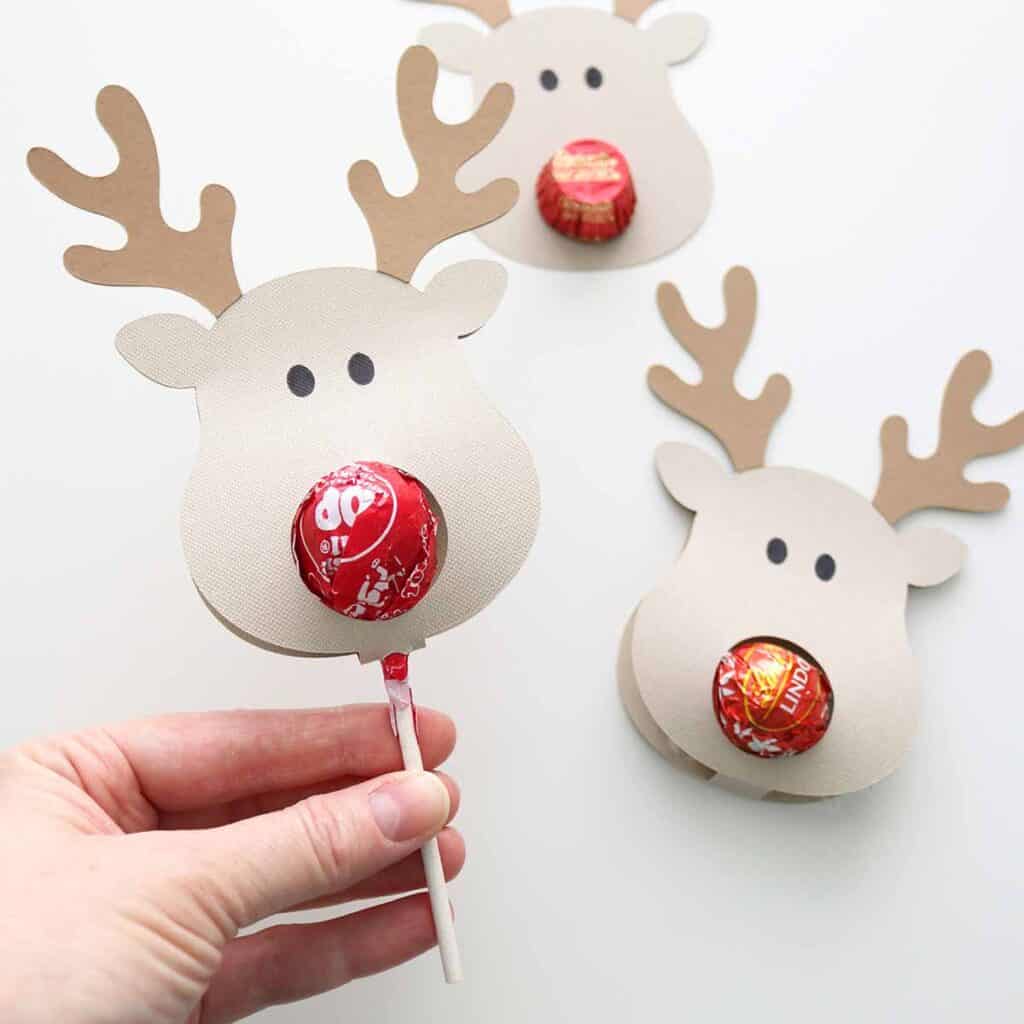
For an alternative nose, glue a large red pom pom on with a hot glue gun! You can buy pom poms like these or make your own with yarn. I’ve also seen people use candy canes for the antlers, too!
Fill your gift bags & enjoy!
Now you’re ready to fill your cute reindeer gift bags with goodies, treats, and small gifts! If needed, you can use a little tissue paper or paper shred to take up space in the bag for smaller gifts.
These easy reindeer bags are great for class parties, family Christmas party favors, ministering gifts, teacher gifts, and more! If you want to tape a gift tag to the back of the brown paper bag, I’ve got lots of free ones you can download:
Traditional Christmas Gift Tags
Black and White Christmas Gift Tags
From Santa Christmas Gift Tags
12 Days of Christmas Gift Tags
DIY Reindeer Gift Bags
I think this reindeer paper bag craft turned out so cute!

I also just realized you could easily turn them into paper bag puppets by turning the bags upside down before gluing on the reindeer faces–I’m totally doing that with my son next!
Happy Holidays!

Don’t forget to pin and save for later!
