3-D Paper Shamrock Banner
Make an easy shamrock banner for St. Patrick’s Day with your Cricut, some cardstock, and glue! Get the Design Space project below!
I’ve slowly been trying to add to my St. Patrick’s Day decorations. Unfortunately, most store-bought decor for this holiday is kind of garish and tacky. But thanks to a Cricut, I can make my own decor!
This cardstock banner features 3D shamrocks. It’s a quick project, but it will add so much to your St. Patty’s entry table, mantel, or banister!

This post contains affiliate links. For more information, see my disclosures here.
More posts you’ll like:

Supplies needed
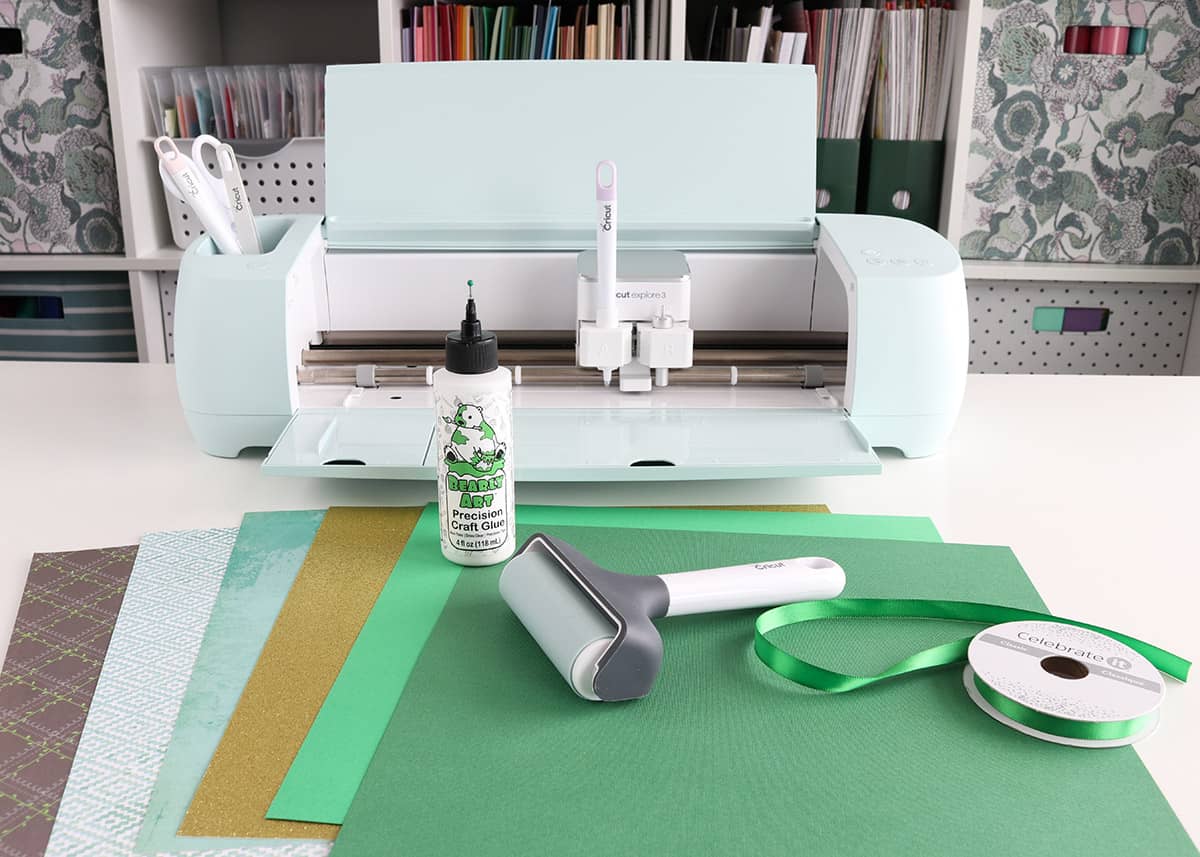
- solid, patterned, and/or glitter cardstock: choose any for the backgrounds, I used two shades of green for the shamrocks
- craft glue: this one is my favorite
- glue dots if using any glitter cardstock
- Cricut machine: If you want to be able to score the shamrocks (which makes them easier to fold), choose an Explore or Maker machine–I’m using my Cricut Explore 3 which is awesome for paper crafts! You can use a Joy or Joy Xtra, you’ll just need to hide the score lines before making the project, then score by hand after cutting or just fold where the score lines would be.
- StandardGrip or LightGrip mat and a fine-point blade
- scoring stylus
- Cricut Access subscription: this project uses Access images in Design Space. See why I love my Access subscription here!
- 3/8 inch ribbon and scotch tape to help with threading the banner
Save $10 on any Cricut machine or heat press with the coupon code AUBREE-10
How to make a 3D shamrock banner
Customize in Design Space
Open my 3-D Shamrock Banner project in the Cricut Design Space app. Customize as needed: you can adjust the size or change the colors.
If you’re using different types of cardstock for the pennants, you may want to duplicate the layers on the Canvas so it’s easier to organize into mats and cut (that way when you duplicate the quantity on the Prepare screen, Design Space won’t try to put them all on the same mat).
The pennants have holes specifically sized for 3/8 inch ribbon. If you resize the project smaller or if you want to use wider ribbon, you’ll need to make the slits bigger by creating a rectangle shape and slicing or subtracting it over the pennant layer. You can also make circle-shaped holes if you want to use string instead (you’d want to contour the pennant layer to hide the current slits first).
Cut the project
Once you’ve finished editing the project, click Make. Choose On Mat, For any material.
Adjust the project copies on the Prepare screen so you have as many pennants and shamrocks as you need (I made 8, which resulted in a 4-foot banner from ribbon bow to ribbon bow).
Click continue and choose your material settings. I used Medium Cardstock for my patterned cardstock and Glitter Cardstock. If your material is the same for all the mats, you can click the box next to Remember material settings.
Load the scoring stylus into Clamp A and make sure your fine-point blade is in Clamp B.
Load your material onto your cutting mat (I always like to press it down well by rolling my brayer tool over it).
Follow the Design Space prompts to score and cut the project. Unload and reload mats into your machine until all pieces are cut.

Remove pieces from the mats by flipping the mat upside down and rolling the mat away from the material (so your material doesn’t curl).
Assemble the banner
Each shamrock has two pieces: a background piece and the scored top piece.
Glue a background piece to each pennant. Glitter cardstock can be resistant to glue, so I also used some glue dots on those shamrocks to hold them in place (it’s not pictured, but I used both glue dots and regular glue on those).
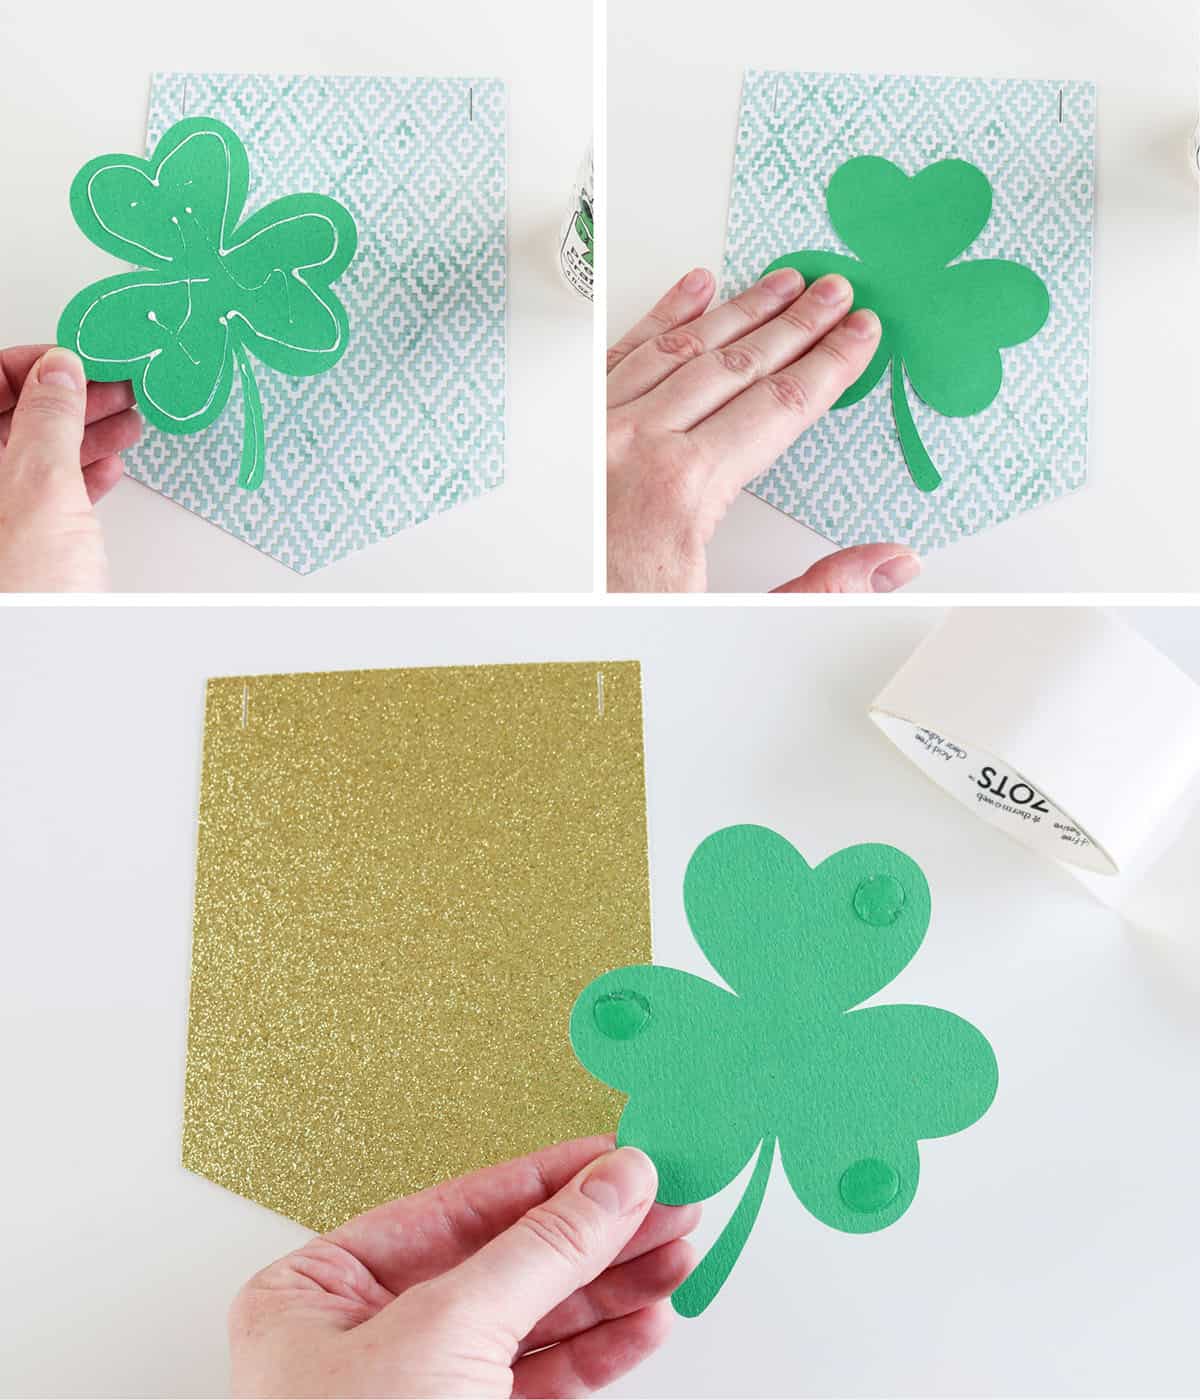
Fold the scored shamrocks along the score lines. Put some glue in the center and glue on top of the other shamrocks.
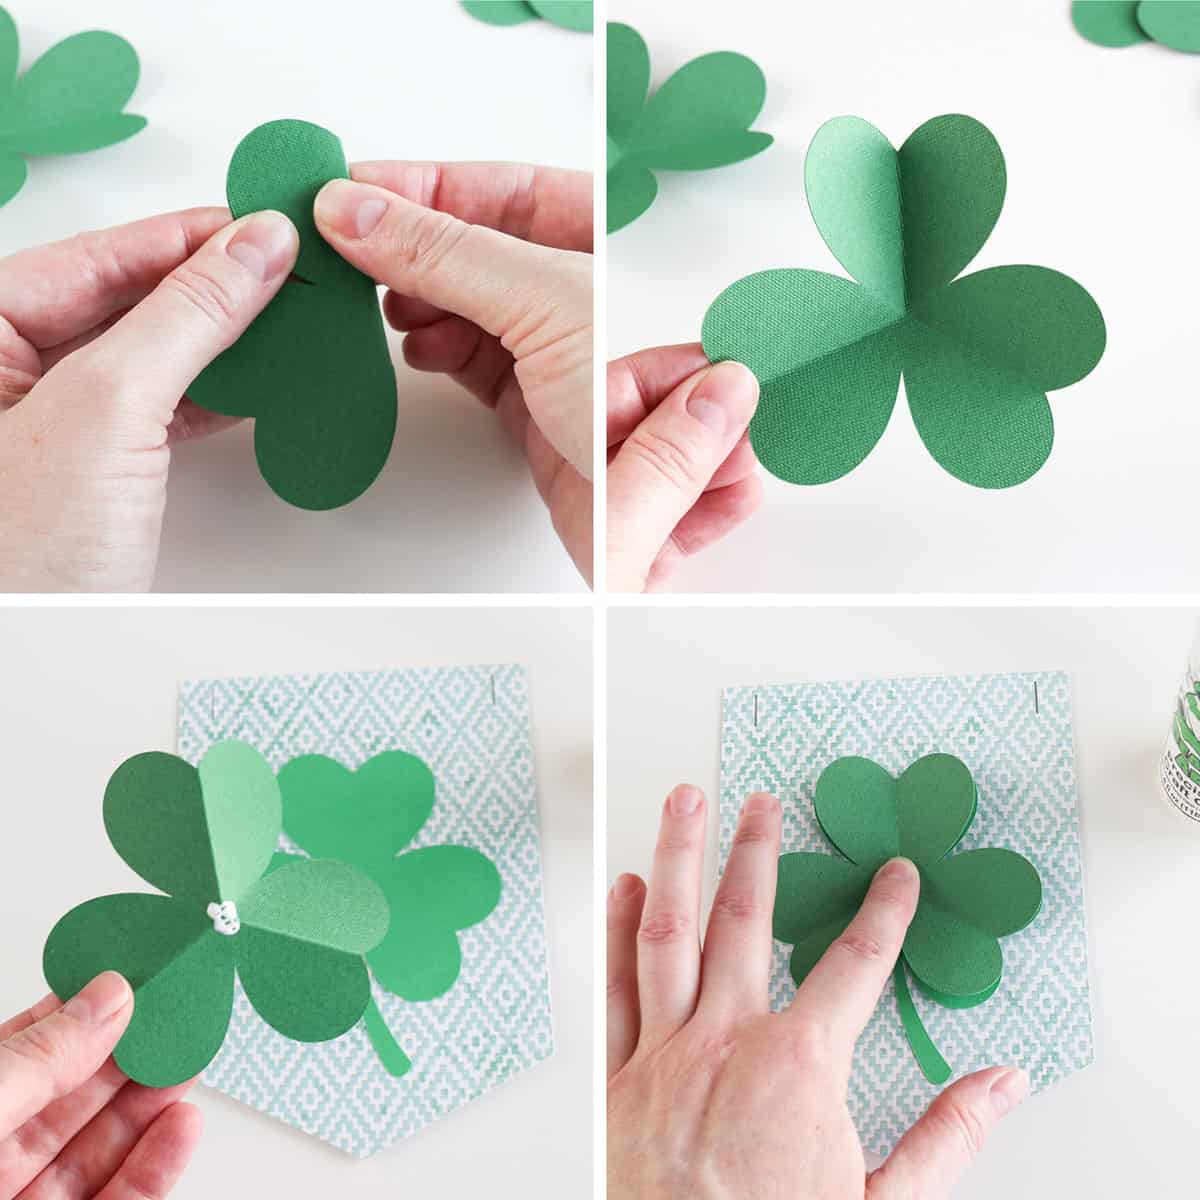
I held the shamrock in place with a finger in the center and then fluffed the leaves/petals to make sure the glue didn’t flatten the 3D effect too much. You can fluff the shamrocks more after the glue has dried.
Lay out your pennants in the order you want. Thread your ribbon through each pennant (I chose to do it so the ribbon only showed between the pennants). If you’re having a hard time getting your ribbon through the slits, I found it helpful to use a small piece of scotch tape on the end to keep it from fraying (wrap the tape around the end of the ribbon, then trim it close so the ribbon still fits through the slit).
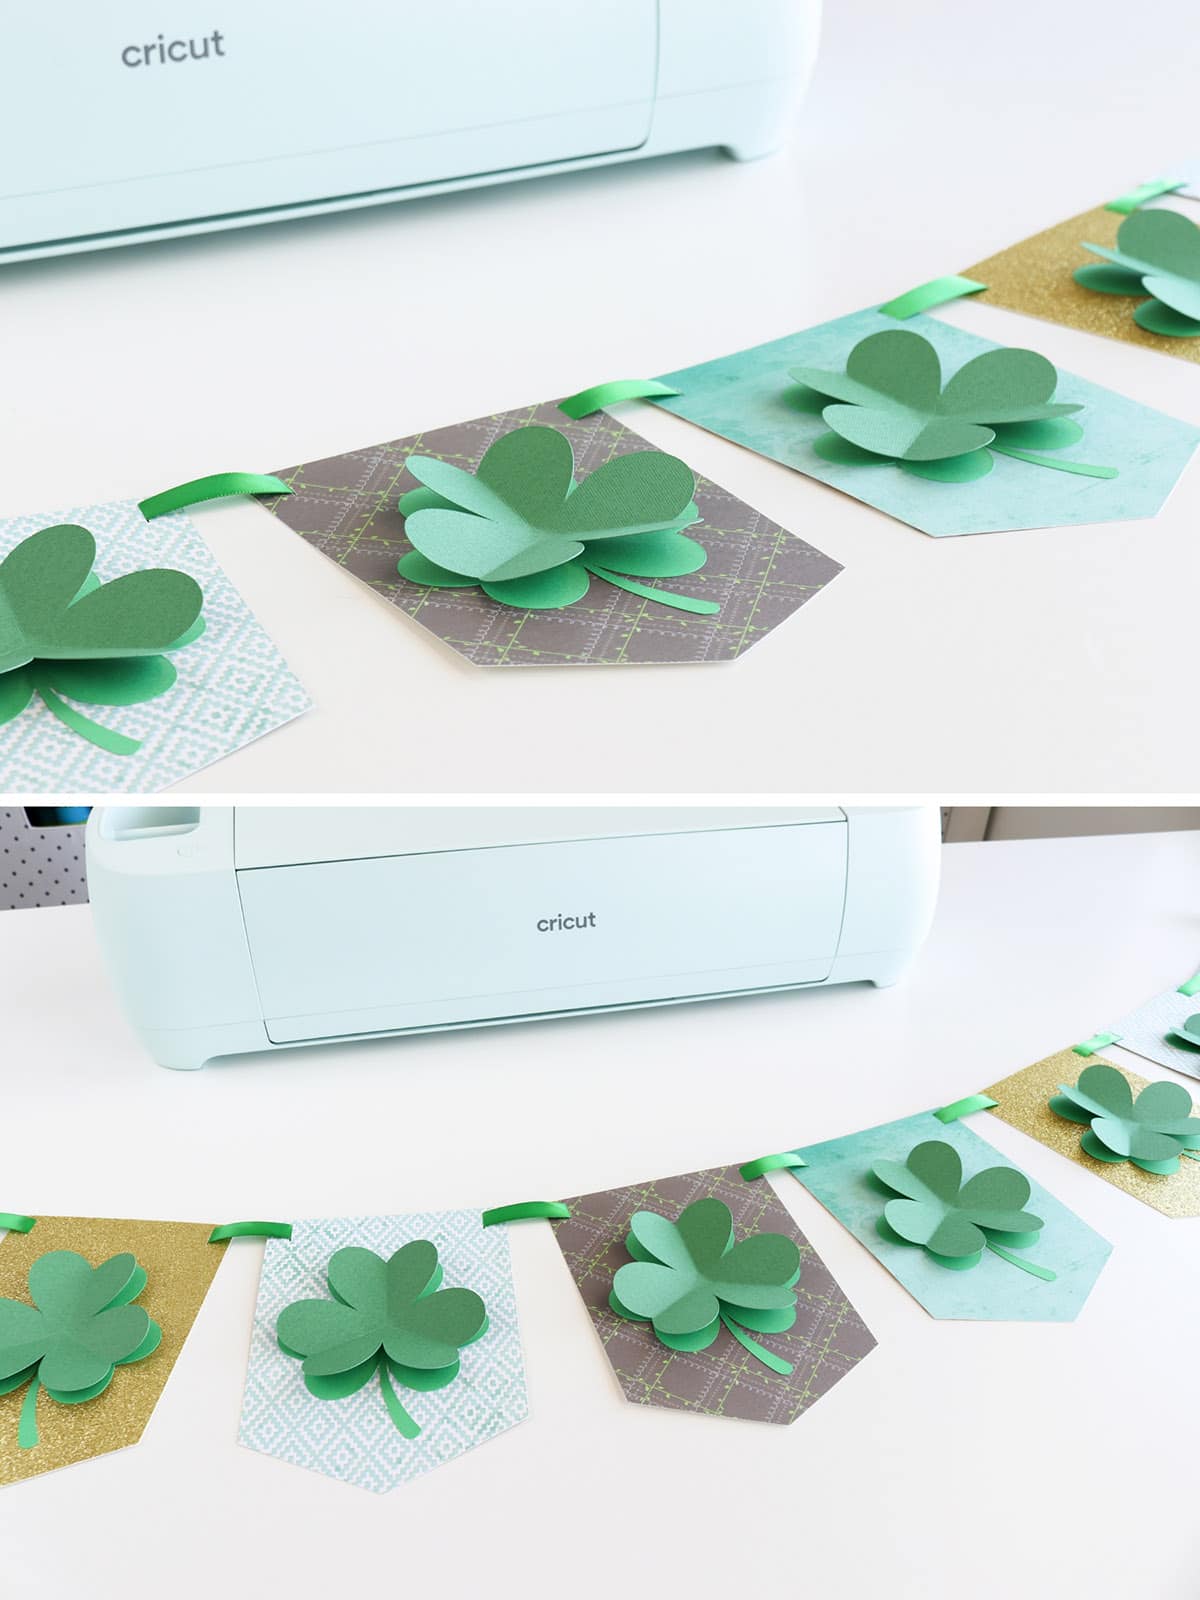
Leave extra ribbon on each end to tie a bow if you want (or loops if you’ll be hanging the banner on hooks).

Easy shamrock banner craft
I love how this banner turned out! I’m glad I went with the patterned and glitter cardstock, too–the extra texture made it that much more fun.
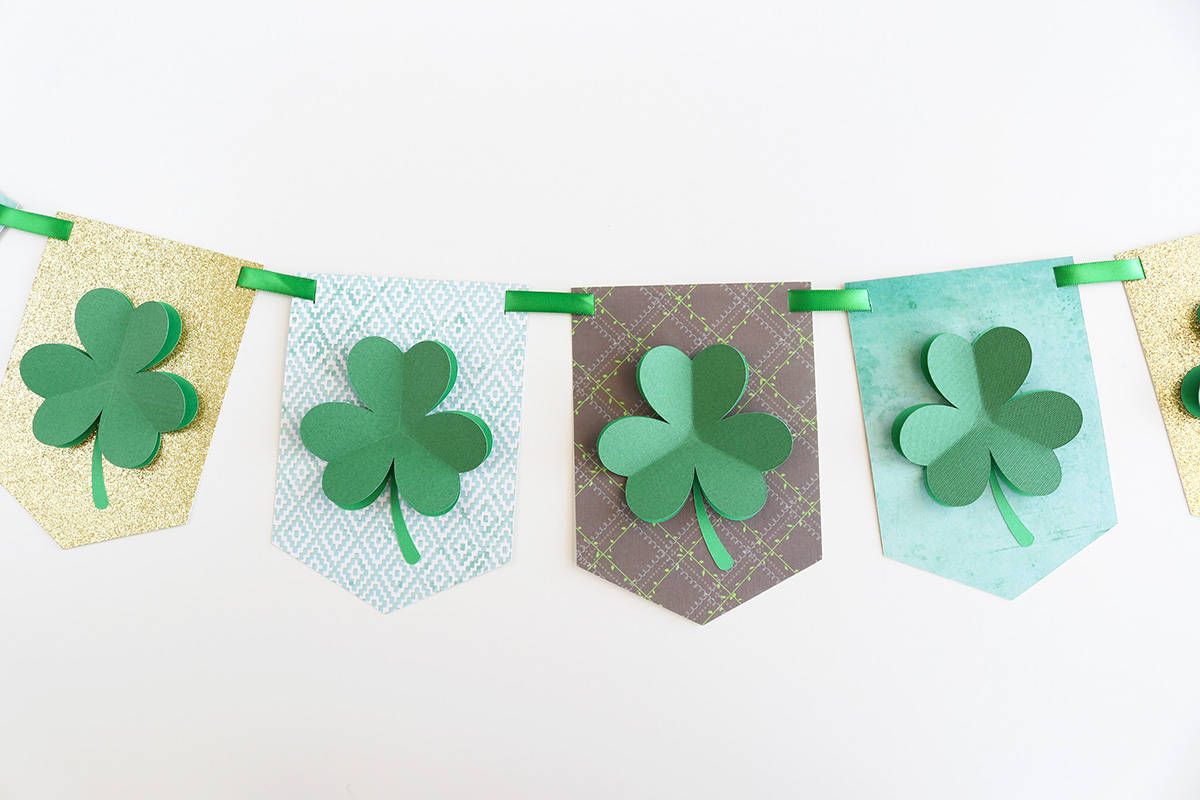
Happy crafting!

Don’t forget to pin and save for later!

