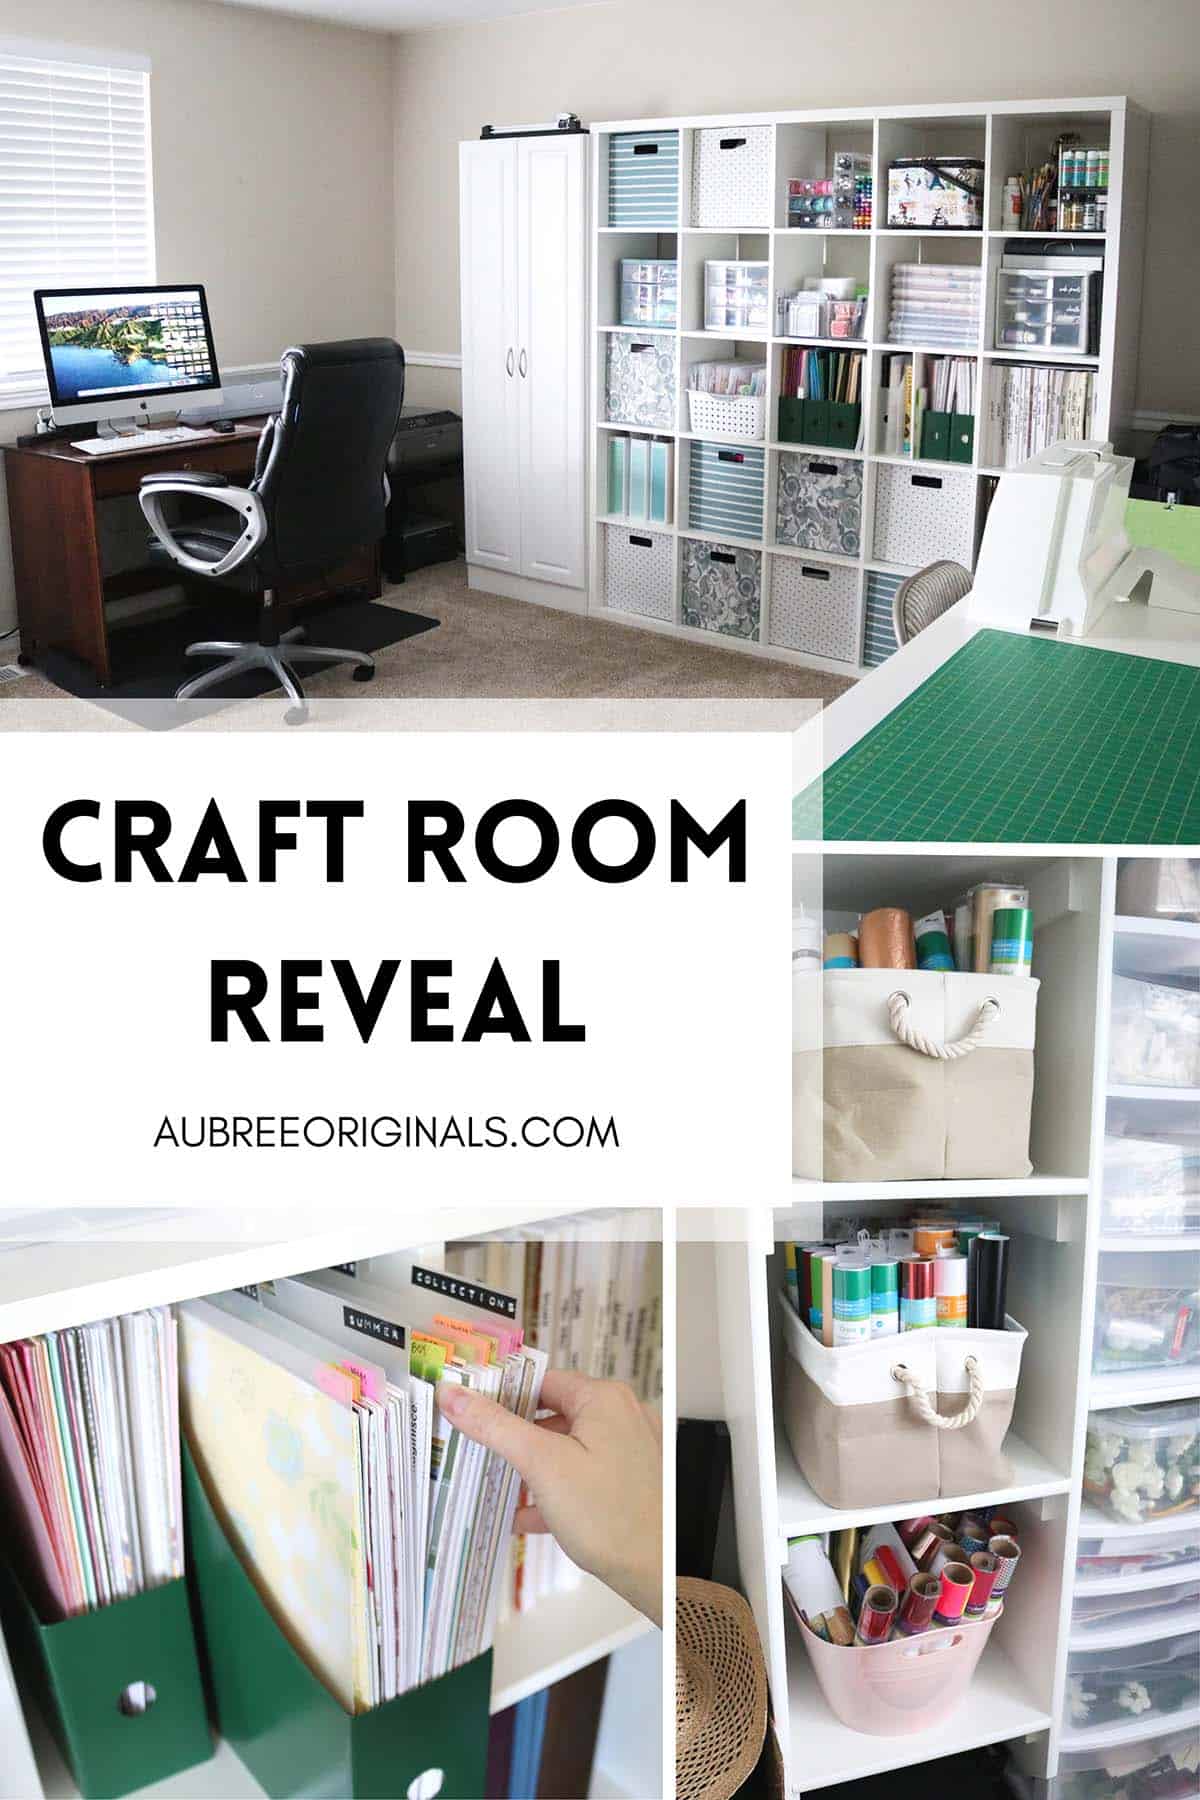
Craft Room Reveal and Organization Tips From My First Home
See exactly how I organized all my craft supplies in this craft room reveal from my first home! This was a dream crafting space!
We moved last year and one of the hardest parts was giving up my amazing craft room. This was such a great first home and even more amazing that I got to use a 13×16 foot craft room for the five years we lived there (thanks to my awesome and supportive hubby!). I was spoiled.
(We have plans to build a large craft room once we finish the basement in our new house, but for now I’m currently using a small 10×11″ bedroom so things are a little cramped…but I’m making it work and I’m happy. 😊)
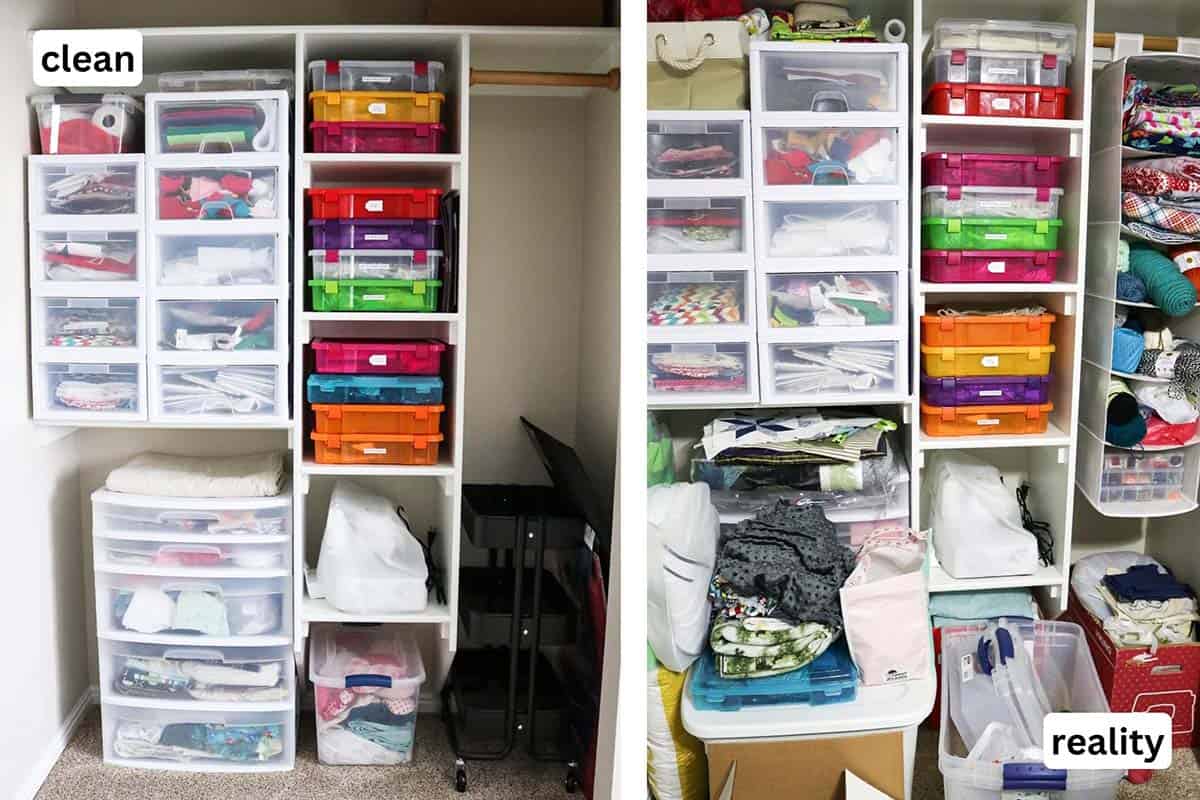
I’m clearly a little behind on posting this craft room reveal, but I never actually got around to getting it photo-ready…not until we HAD to make it photo-ready for house showings. These pictures were taken after I’d already decluttered a TON of stuff and packed a good part of the craft room, so these pictures are definitely the pretty and not necessarily realistic views—but hopefully it still gives you some good organization ideas for your own craft room!
This post contains affiliate links. For more information, see my disclosures here.
Aubree Originals craft room reveal
When you first walk into the craft room, there are two closets on the left:
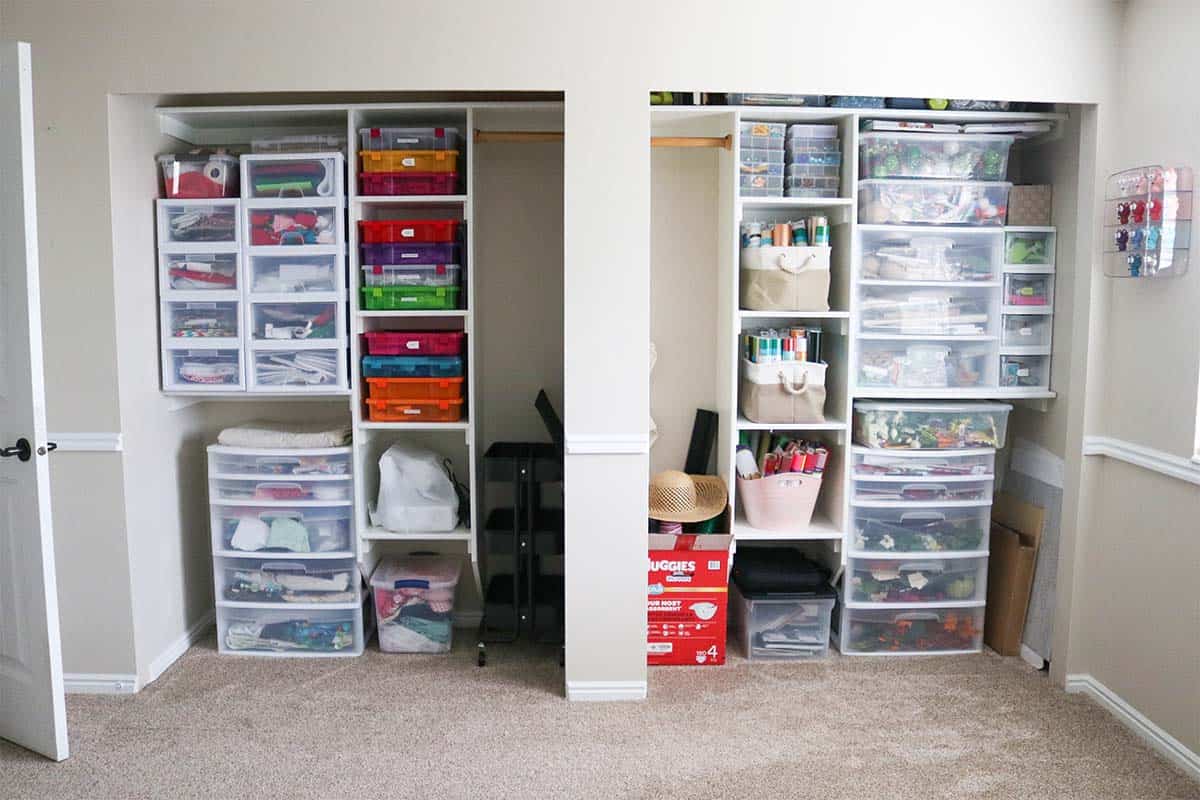
When we moved in, all the closet doors needed replacing…and then we never actually put them back on because it was so awesome having all this storage accessible!
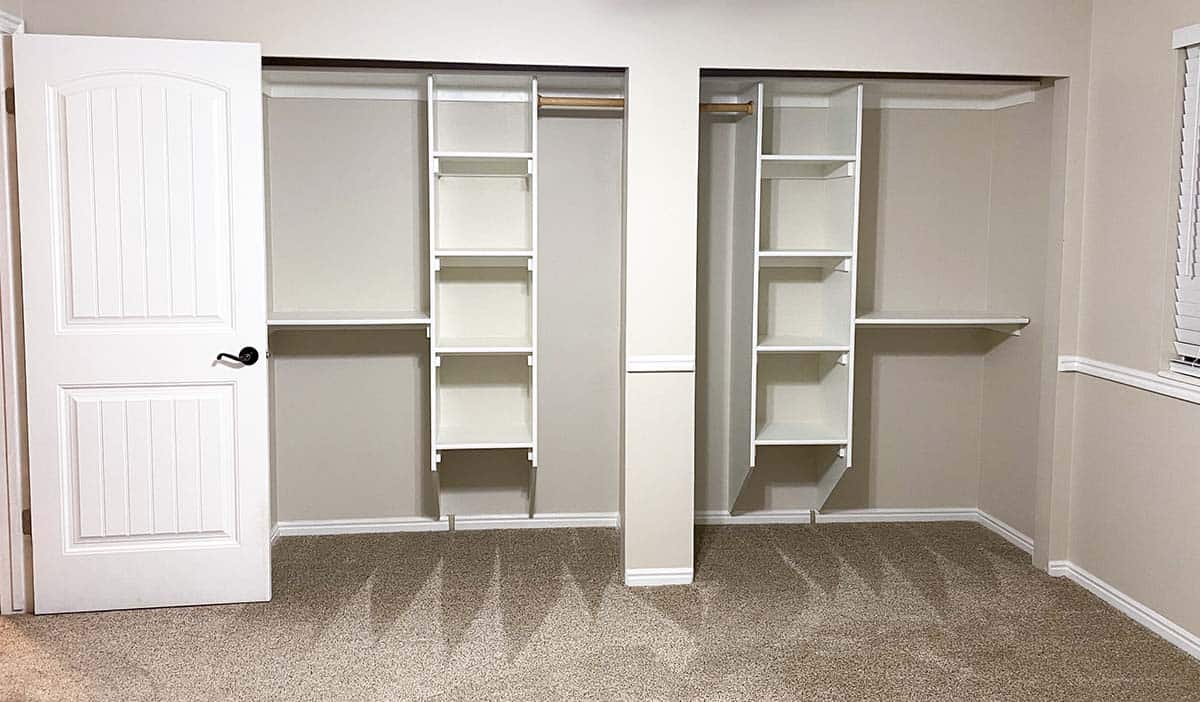
The shelving the previous owners had in the closets was very makeshift and kinda dilapidated, so we gutted the closets and my husband and brother-in-law built these shelves: we wanted them to be functional as clothing closets at some point, but I also wanted plenty of storage options for my current craft room needs. Here’s a better look at the shelving (picture taken right before I left the house for the last time…*tiny sob*).
Let’s talk about everything that I have stored in these closets.
In the left closet:
I used Sterilite stackable drawer units to store quilts in progress and other fabric projects. I used slightly larger drawers (since that’s what fit the space) to store felt, felt scraps, interfacing, zippers and other notions, and sewing patterns.
On the middle shelves, I have Creative Options project boxes (you can find them at Costco every once in awhile—watch for when they go on sale! They’re similar to these storage boxes). This is how I store most of my fabric scraps, sorted by color or theme. I wouldn’t say this is great for huge amounts of fabric scraps, but it’s working for me for now.
The bottom shelf holds my serger.
The large Sterilite storage drawer unit sitting on the floor stores more fabric and projects.
Normally, I hung closet shelf organizers like these from each rod (one in each closet) and that’s where I stored all my yarn, embroidery floss and button organizers, some vinyl, fabric, and other miscellaneous items (you can see in the “reality” photo).
At the top of this closet, I usually stored batting, pillow forms, and other items I didn’t need to use that often (since it was kind of tricky getting items in and out of that top shelf).
The empty black rolling cart from Ikea normally stored all my photography equipment.
In the right closet:
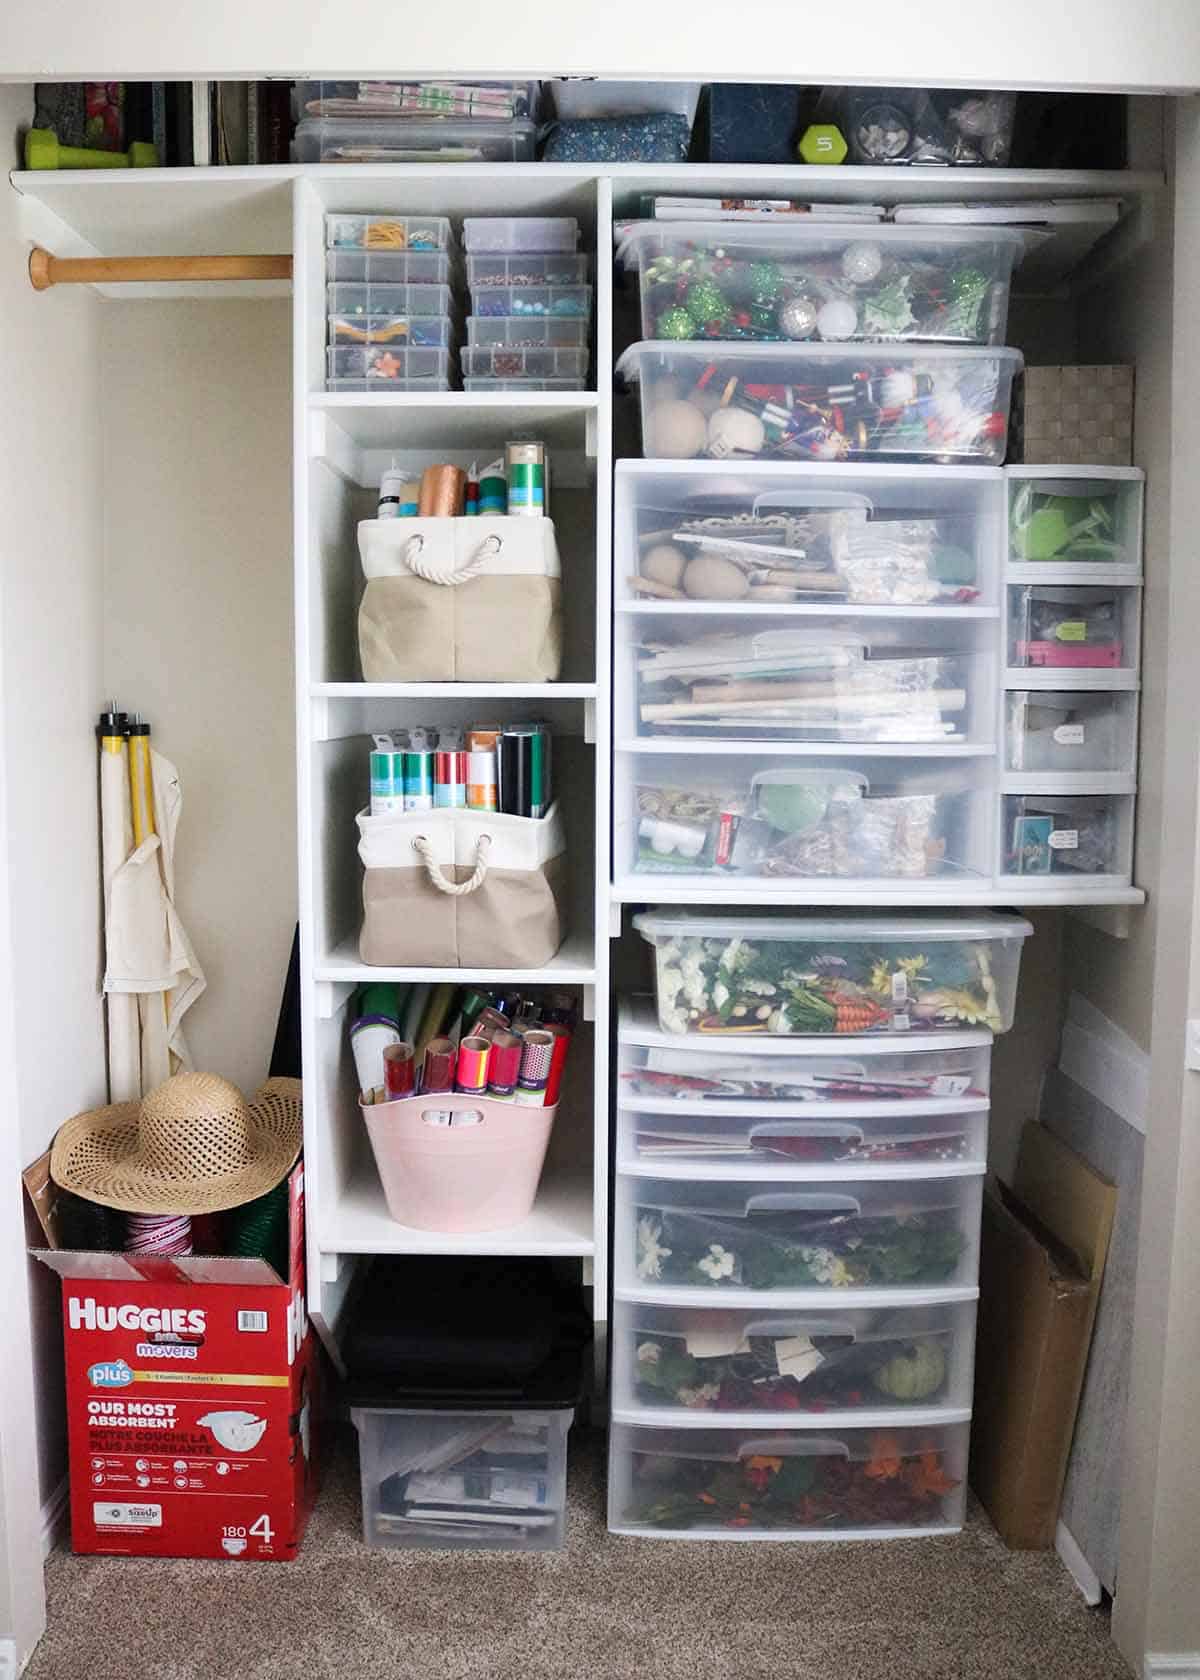
Diaper boxes make surprisingly great storage boxes: mine holds 21″ deco mesh rolls, wrapping paper, and other taller items (some was already packed in this photo). I had intentions to cover the box with paint or paper…but clearly that was a ways down my to-do list.
The top shelf in the middle holds my containers of beads (a craft I rarely do anymore but can’t seem to part with…I think they call that hoarding 😜).
The other shelves in the middle hold my vinyl, separated by permanent, removable, and iron-on. (The fabric totes were a gift from someone years ago and the pink plastic bin came from Dollar Tree.)
The right half of this closet is a mix of Sterilite organizers again. Top to bottom, they hold Christmas wreath picks, Christmas ornaments/crafts, wood crafts and blanks, canvases and painting supplies, styrofoam and other miscellaneous materials, Easter/spring picks, wreath supplies (wire, chenille stems), spring/fall/Halloween florals and picks. I have a lot more faux florals than this closet shows, but they were already packed away (on a normal day, they’d be spilling out the side of the closet 🙈.
Everything else you see in this closet is a whole lot of junk, including everything stashed on the very top shelf. Lots of memorabilia…and junk. Hopefully these items will get decluttered before my next craft room (a craft hoarder can dream…).
As you pivot around the room, there are two windows against a long wall (yay for natural lighting!) and this is where I’d usually have my Ikea craft table set up (the link takes you to the most similar product they currently sell, but my tabletop actually measures slightly bigger at 59″ x 29.5″). I usually put the table perpendicular to the window so I could stand on either side of the table to work and take pictures. (Sorry! No pictures of this!)
Next is my desk with my computer and my little Ikea table for my printers. I also had my Cricut machine on my desk (this was before I knew how to connect it via bluetooth).
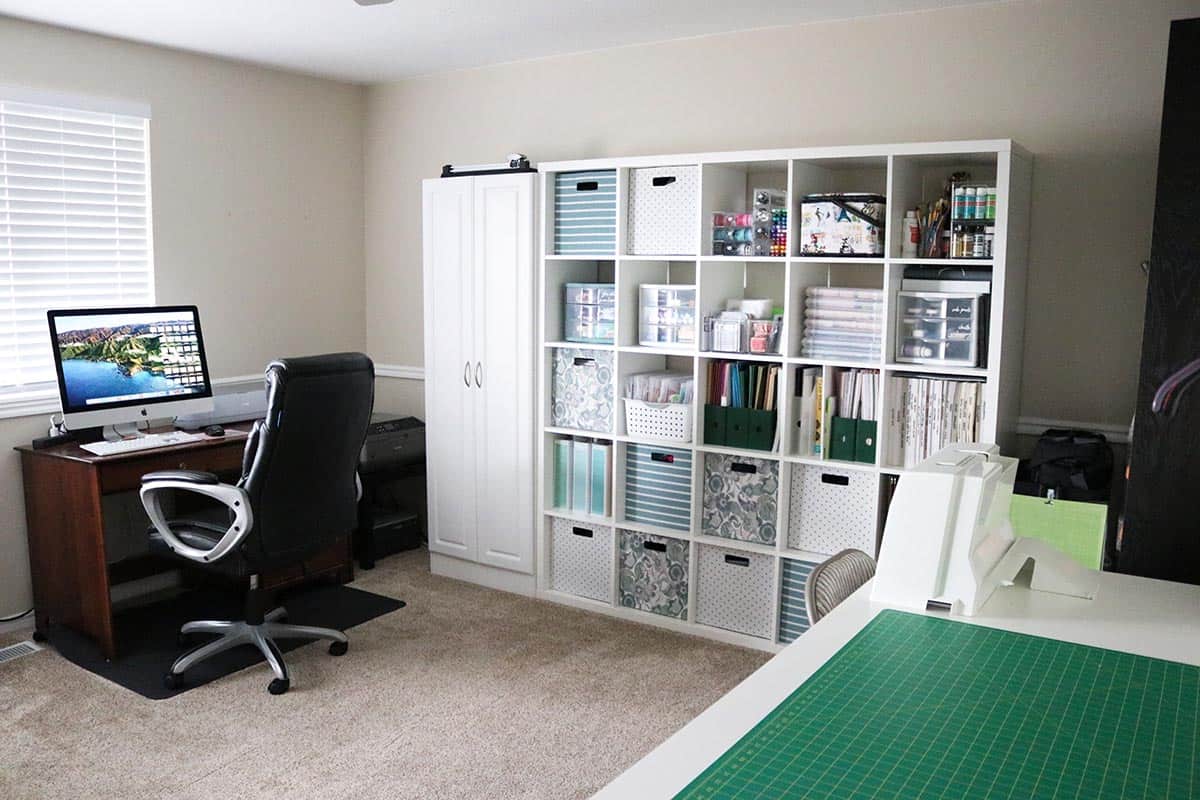
On the wall opposite the closets, I have an old white utility cupboard (that my parents had in their house for years) that stores a ton of miscellaneous craft supplies: soldering tools, colored pencils, art pads, watercolors, treat bags, kids craft supplies, etc. On top of the cupboard is where I like to keep my large paper cutter.
I cannot recommend the Ikea Kallax unit enough (and I’m definitely not the first craft room to have one). This shelving unit holds SO much and I love how tall it is to be able to utilize vertical storage as much as possible.

Here’s what I store in it, as pictured in the photo:
Top row: scrap ribbons and trim, miscellaneous computer supplies mostly, washi tape and pens (you can see how I organize my washi tape here), a sewing basket, paint supplies.
Row 2: Sterilite organizer with adhesives, Sterilite organizer with punches/glitter/miscellaneous items, clear stamps (see how I organize clear stamps here), wood/rubber stamps (see how I organize rubber stamps here), stamping/ink supplies.
Row 3: cardstock scraps, patterned paper scraps, cardstock, more cardstock and patterned paper, patterned paper pads. I still absolutely love how I’ve organized paper—check out that post for lots more details!
Row 4: stickers (see how I organize stickers here), more stickers/gems in these storage envelopes plus embellishments stored in these containers, more embellishments (brads, eyelets, flowers), card-making supplies (cards and envelopes mostly), scrapbooks.
Bottom row: Bind-It-All and accessories, chipboard, mm…I don’t remember what’s in the middle bin 😆, extra storage cases, memorabilia.
Next, I have another rolling cart with quick-reach sewing materials (usually), my Easy Presses, and my Cricut mats hung from a Command hook on front.
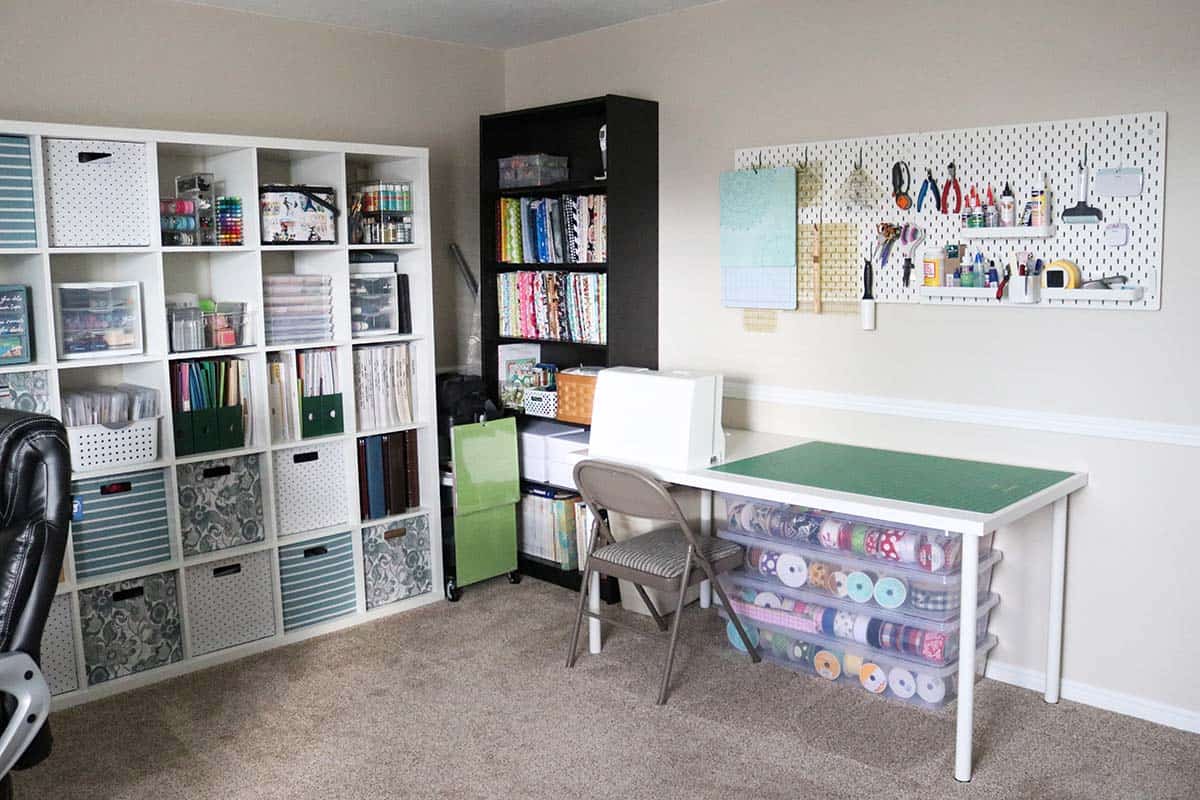
I store my ironing board in the corner behind a bookcase. The bookcase holds fabric on comic boards, another sewing basket, boxes with rolls of non-wired ribbon and other trim, craft books and magazines.
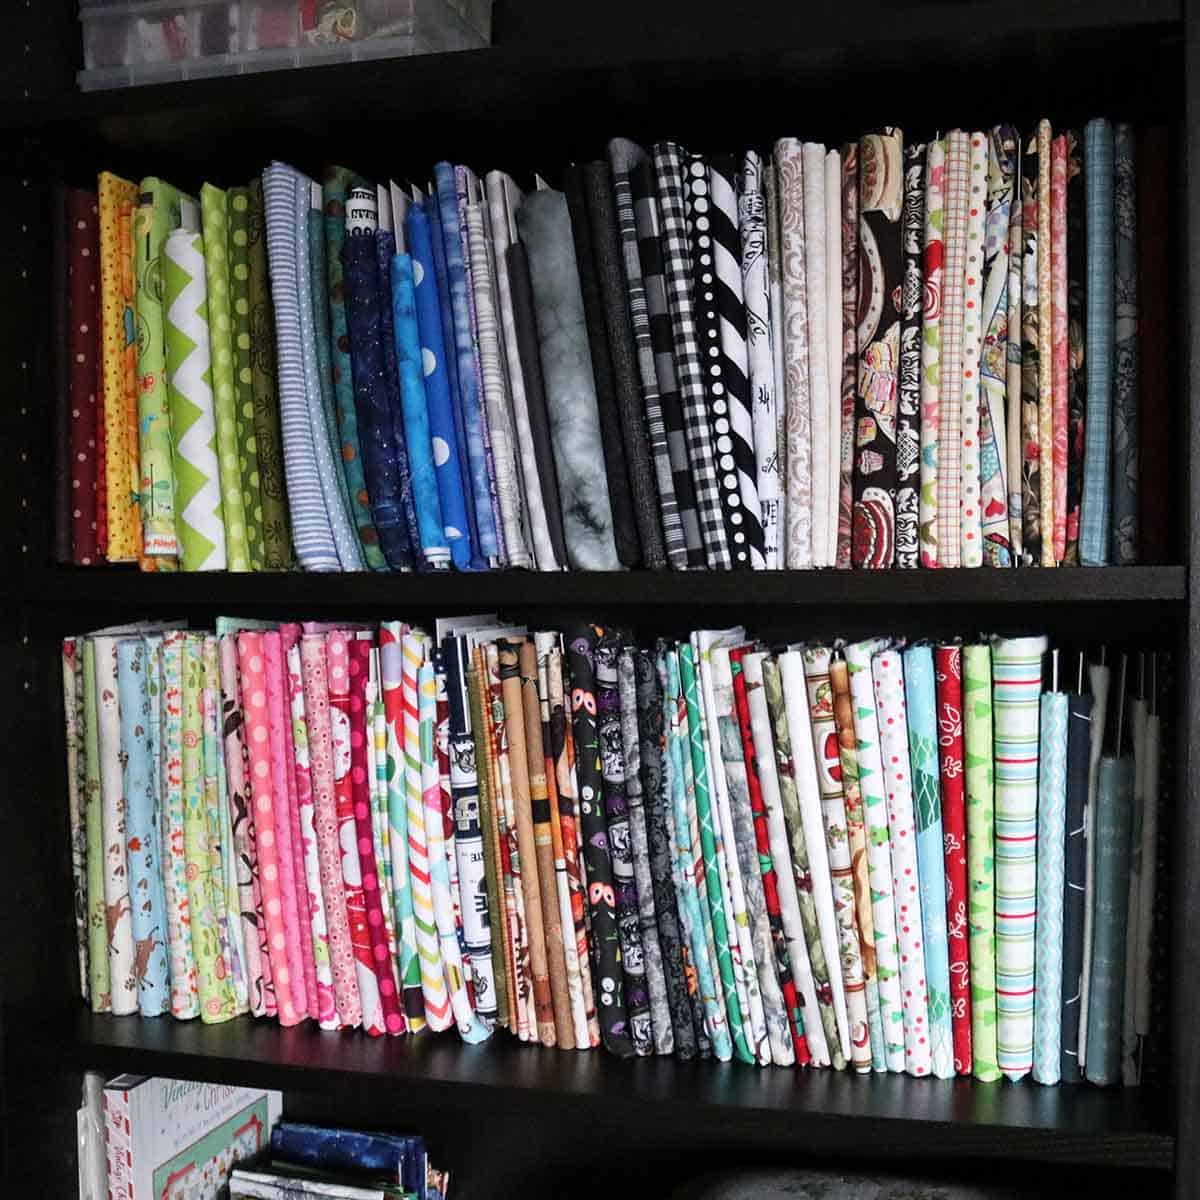
I have MUCH more fabric not pictured in this room currently, and I’m still working on the best storage solutions for it—you probably won’t see that until my basement craft room is completed.
On the final wall (opposite the windows), I have two large Ikea pegboards (LOVE these!) and another craft table underneath (usually a foldable Lifetime table). The pegboard holds my quilting rulers, mats, scissors, glue, punches, and other tools.
On the table, I have my sewing machine and large cutting mat.
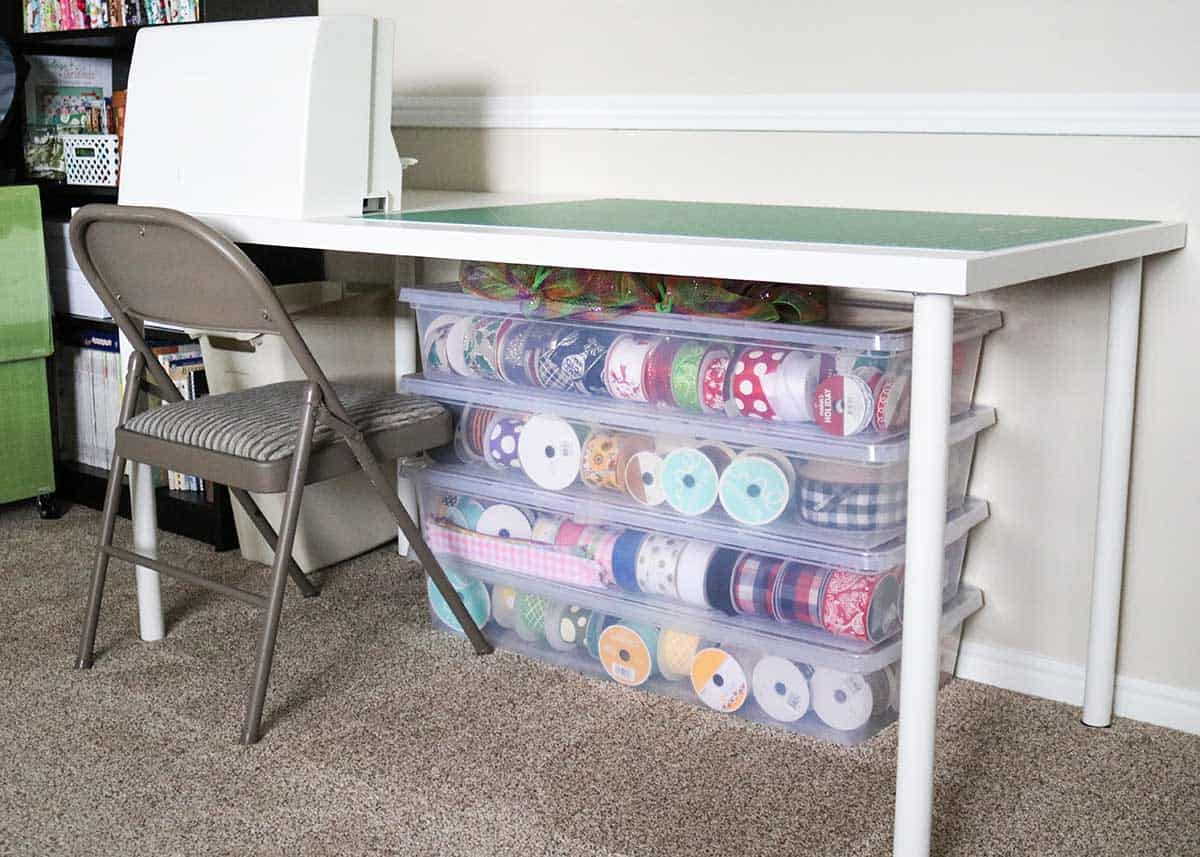
Underneath the table, I store wired ribbon for wreaths in large under-bed storage bins (you can find them at Costco every once in awhile at a great price!). These bins are bulky and hard to store (which is why they’re usually just under the table), but they’re still my favorite way to store wired ribbon: you can store them in a single layer and quickly see at a glance what ribbons you have. Plus, the bins keep dust out and keep your ribbons clean. Under-bed storage bins would be a great solution if you have a small craft room or your craft room doubles as a guest room!
And here we are, back around to the door and closets!
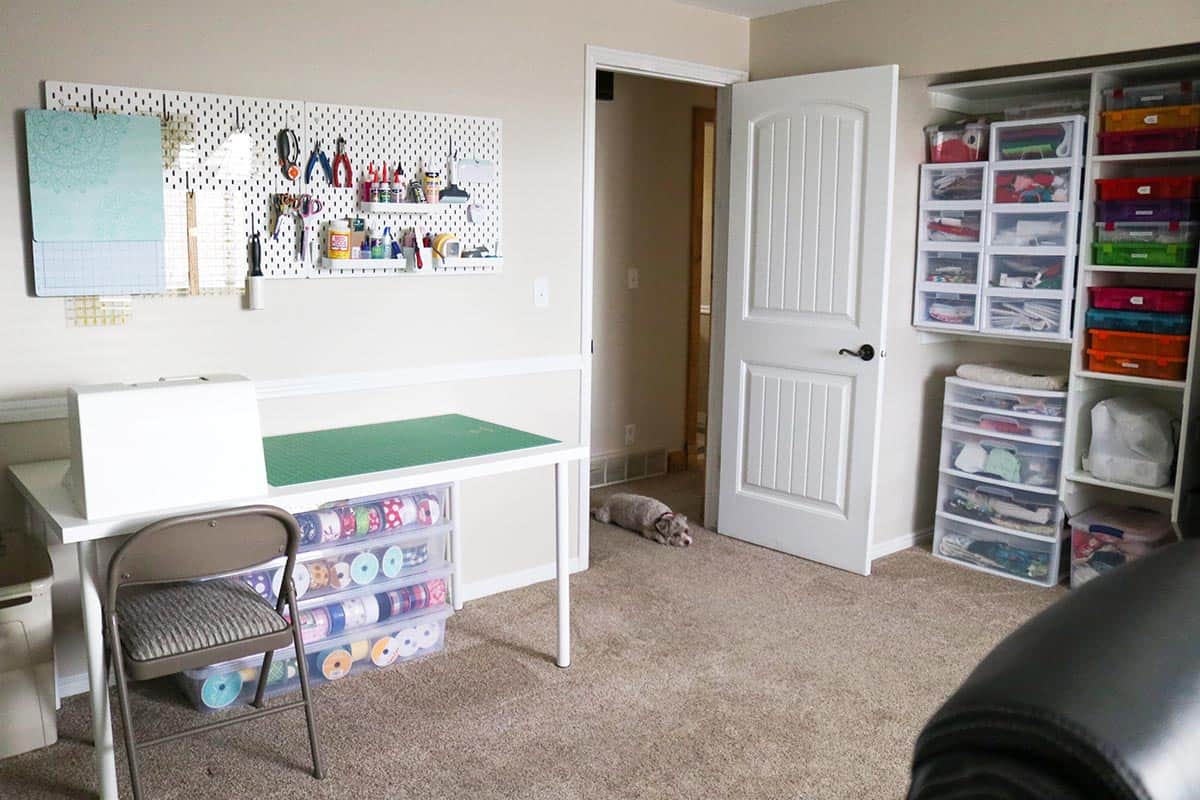
(This picture makes me want to cry every time…my sweet puppy in the doorway, the most loyal crafting companion there ever was. We recently had to re-home him due to him and my son not getting along (it was safer for both of them). I miss him every day and have the best memories of him sleeping at my feet while working in my craft room. I still love him like crazy, but I just try to be grateful that he’s with an awesome new family who can give him a safer home. And he’s on a whole new life adventure and I’m just so lucky I got to be his mom for the first five years of his life! I love that sweet dog. ❤️)
Craft room reveal and organization tips
I hope this craft room reveal was helpful (or at least interesting—I always love peeking into other people’s lives via their workspaces). I’ll be posting a reveal of my small bedroom craft room soonish, and then hopefully a really awesome reveal of my basement craft room in the future—can’t wait for that one!
Let me know if you have any questions in the comments!

Don’t forget to pin and save for later!

WOW that’s a beautiful craft room. And the dog is cute.
Thanks Barbara! It’s always satisfying to see an organized (and clean!) craft room. 🙂