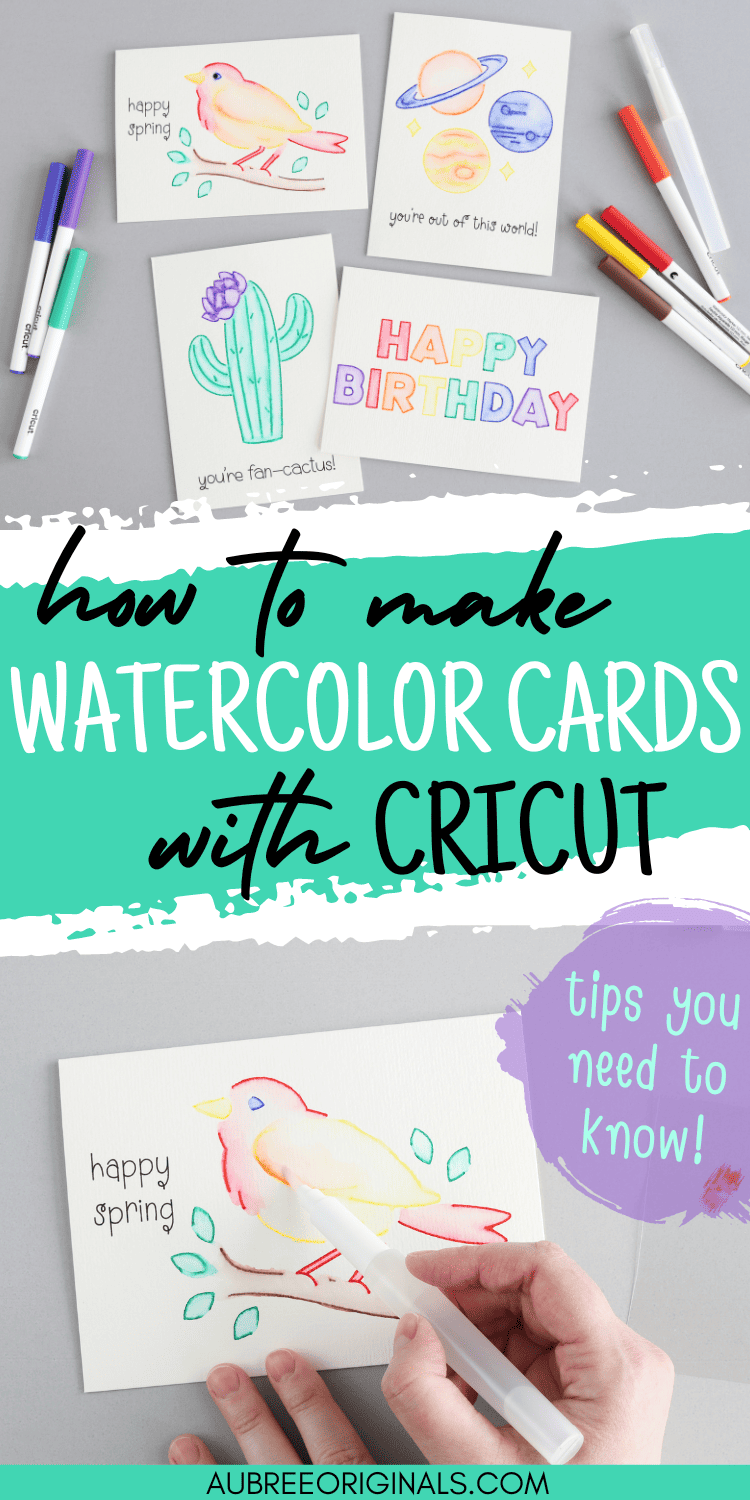
How to Use Cricut Watercolor Markers to Make Cards
Learn how to use Cricut watercolor markers to make watercolor cards. This is a great way to watercolor for beginners!
Cricut’s new watercolor markers are so much fun to use! Well, new-ish now…I suppose they’ve been out a while, but I’m just getting around to trying them. And they do not disappoint!
If you’ve always wanted to watercolor but were too intimidated, you should definitely try watercoloring with your Cricut. (Believe me, I get the intimidation…I once upon a time thought I’d watercolor my own wedding invitations by hand and…then quickly scratched that idea when realizing I had no idea what I was doing. 😆)
Cricut watercolor markers make watercoloring so much easier–it’s impossible to mess up! Which is great for beginners or anyone who wants to create something impressive like these simple watercolor cards.
Get my Design Space project below, and be sure to read my watercolor tips at the end!

This post contains affiliate links. For more information, see my disclosures here.
More posts you’ll like:

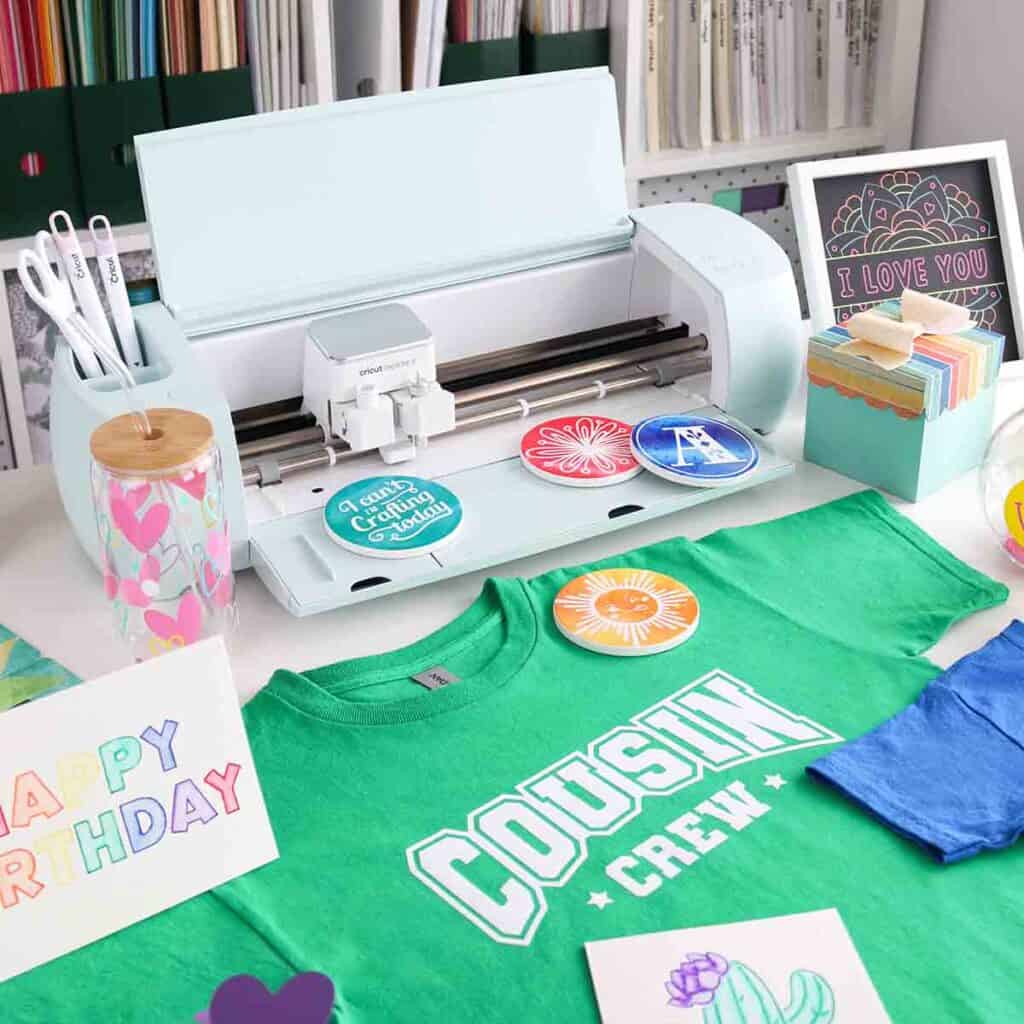

What you need to make watercolor cards

- Cricut watercolor markers: make sure you have the correct ones for your machine–I’m using the ones for Maker and Explore machines, use these ones if you’re using a Cricut Joy or Joy Xtra machine
- Cricut watercolor card blanks: These come in multiple sizes, I’m using the R40 size (4.75 x 6.6 in). Keep in mind that the R20 size is the only one that works with Cricut Joy.
- Cricut pen, optional (used to write the black text on my cards, I used a black 0.4 pen)
- Cricut machine: I’m using the Cricut Explore 3 but any machine will work
- Cricut card mat: I’m using the 2×2 card mat that works with Explore and Maker machines, use this one for Cricut Joy or this one for Joy Xtra
- Cricut Access subscription: The images and fonts I used for these cards require an Access subscription, otherwise you’d have to purchase them a la carte (which I don’t recommend). See why I love my Cricut Access subscription.
- paper towel
- water to fill the watercolor brush
Save $10 on any Cricut machine or heat press with the coupon code AUBREE-10
Can Cricut machines watercolor?
The Cricut machines themselves do not do the watercoloring (so don’t worry, you won’t be using water in your machine). The machine uses the Cricut watercolor markers to draw designs that you then fill in by hand with the included water brush afterwards.
This is such a fun process and it’s so satisfying to see your watercolor designs come to life!
Are Cricut watercolor markers good?
Yes! I’m super happy with the quality of these markers and they’re incredibly easy to use (way easier than traditional watercoloring!). The only downside is that there are only eight different colors, but there are ways to blend the markers to get more hues, which I’ll show you below!
I also found Cricut’s watercolor cards to be high quality. The thick paper limits the amount of warping you might experience with watercoloring, and my cards were mostly flat after drying (you could always press a dried card underneath a heavy book for a day if needed, though).
How to make watercolor cards with Cricut
Customize in Design Space
Open my Watercolor Cards project in the Cricut Design Space app and click Customize. Or, you can create your own watercolor card designs:
First, create a rectangle the same size as your card and change the Operation type to Guide in the top toolbar. (The shape won’t cut but will help you know how big to make your designs.)
Though you can use any images you want, Cricut has specifically designed images that are compatible with watercolor markers. To find these, you can filter the image library by Project Type – For Watercolor Markers.

These images have extra space between lines to help avoid bleeding of colors when watercoloring. Most of them have multiple layers, allowing you to use multiple marker colors (they should already be set to watercolor markers, but you can double check and adjust the colors in the top toolbar).
The watercolor images have a background layer that you’ll want to delete or hide.

Make sure each draw layer is set to Operation–Draw–Pen, then double check that they’re set to Marker (1mm) and one of the eight watercolor marker colors at the bottom of the dropdown.

The image will probably be grouped, but not attached, so select all draw layers and click Attach (this makes sure the image is drawn together).
If you want to use non-watercolor images, I recommend selecting ones with larger spaces between lines to avoid bleeding (in other words, skip images that are super detailed). You can also use images that are for Draw Only or Cut + Draw (filter under Operation Type).
I created my Happy Birthday design by choosing a chunky font (BFC Craft Table) and changed the operation type to Draw. To make each letter a different color, I ungrouped to letters so I could edit each individually (in the text toolbar, click Advanced–Ungroup to Letters). Adjust the colors to the watercolor marker colors. Then, select all and Attach so they draw together.
If you want to add additional text to be drawn with a regular pen, click Text and make sure the operation type is set to Draw. I selected both my image and the text and clicked Align–Center Horizontally, then Attach to keep the positioning on the card.

Note: Regular Cricut pens will bleed if they get wet, so leave plenty of space between any regular pen text and the watercolor images and don’t let them get wet when watercoloring. If you want to draw over watercolor images with a regular pen, do the watercolor part first and let it dry completely, then reload your card into your machine to add the regular pen elements (or draw by hand).
Draw with Cricut
Once you’re finished editing/designing, click Make.
Choose On Card Mat, For pre-folded cards and click Confirm.
Select your card size under Material Size (for me, R40). If needed, you can adjust the position of your images on the cards before clicking Continue.

Set your base material to Watercolor Cards.
To avoid track marks on your cards, move the white star wheels on your machine to the center of the rail so they’ll go down the center of the card mat and not over your material (applicable for all machines except Cricut Joy).
Load your card mat with watercolor cards (you can do up to 4 cards at a time with the 2×2 card mat). Slide the back of the card under the clear plastic of the card mat until the fold is flush against the edge. Press down firmly on the front of the card to adhere it to the card mat.

You can use the 10/20/30/40 lines as a guide to make sure your cards are straight, but you’ll notice that my cards don’t go quite to the 40 line, which is fine, because the watercolor card paper is quite thick.
Load your first marker into your machine (whichever one Design Space prompts you to), then load your mat into your machine.
I haven’t noticed this problem with other machines, but with my Explore 3, tool holder A likes to move down when I initially insert a pen/marker so I always insert that first so the movement doesn’t make an unwanted mark on my material. Then I load the mat afterwards. I haven’t noticed an issue when changing out pen colors mid-project, but you could place a piece of scratch paper over your loaded mat while changing pens if you’re concerned.


Push the start button when prompted. Then follow the Design Space prompts to switch out the markers and pen (the order will always be different, so pay attention to which color Design Space tells you to load).


Unload the mat when finished.
Remove the cards from the card mat by peeling up slowly.

(To avoid curling, it’s not recommended to watercolor while the cards are still attached to the mat. If you do choose to watercolor on the mat, just make sure the card is completely dry before removing it.)
Watercolor by hand
Remove the top of the watercolor brush and fill the base with water. Replace the top.
The bristles of the brush will be stiff at first. Squeeze the base until the bristles are wet and softened–you can test them on your finger. Wipe any excess water on a paper towel.

Begin watercoloring by brushing on the inside of the drawn lines, pulling the color to the middle. The amount of water you have on your brush will determine how much the color spreads and how pigmented the color will be. You might have to practice until you find how wet you like to keep the brush.
If you need more water while using the brush, squeeze the base until the bristles are moistened again. Similarly, to clean the water brush between colors, squeeze the base to moisten the bristles, then wipe the brush on a paper towel until it runs clear.

If you get too much water on the card or notice unwanted bleeding, use the corner of a paper towel to dab it and soak up the water.
Continue watercoloring until all images are complete. (Again, do your best to keep water away from any text drawn with regular Cricut pens to avoid bleeding.)
Add additional color by hand
Sometimes the watercolor images don’t have enough drawn lines and your image might look pale or unfinished after using the water brush–I especially noticed this with the large yellow area on my bird image.
You can actually draw with the watercolor markers on a piece of plastic (I used a scrap piece of acetate), then pick up the ink with your watercolor brush and transfer it to your card. This is a great way to add more color to your card and blend colors, too. Experiment with mixing colors to get different hues.
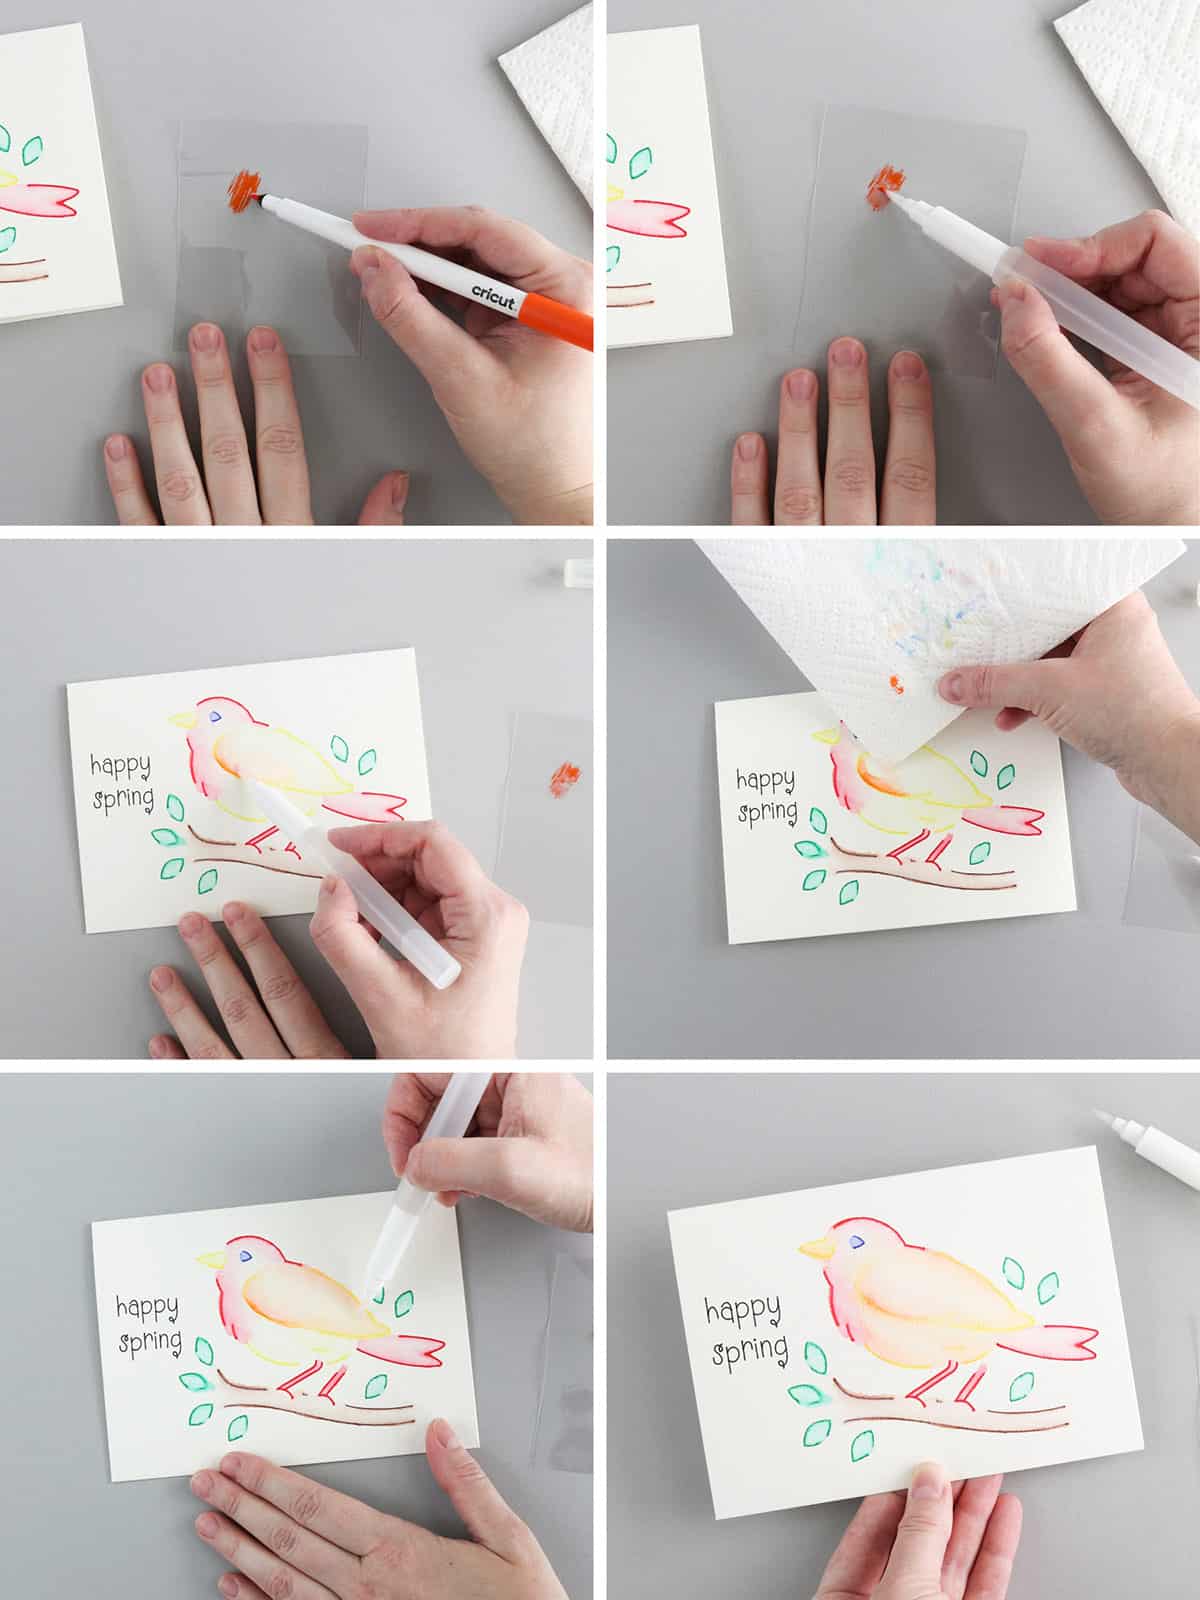
Add details with pen
Optionally, you can add finishing details with a pen, either by hand or you could reload your card into your Cricut machine to have it draw over the card. Make sure the watercolor is completely dry before doing so.
I decided the bird’s eye looked kinda funny so I drew in a pupil.

If you do want to add pen details, just make sure you do it after watercoloring. Not all Cricut pens are permanent so they might bleed if you watercolor on top of them.
Cricut watercolor marker tips
Follow these tips to get the best results with your Cricut watercolor markers:
- Choose designs with simple lines spaced far enough apart to avoid bleeding. Filter the Cricut image library by Project Type – For Watercolor Markers to find the most compatible images.
- To avoid curling of your material, remove cards from the card mat before watercoloring, or, if blending on the card mat, allow to dry completely before removing.
- Blend colors by using short strokes, pulling color from the outer lines to the inside spaces.
- To clean the water brush between colors, squeeze some water to the tip and wipe the excess on a paper towel.
- To add more color or additional colors, you can freehand color with the watercolor markers on a piece of acetate or plastic, then pick up the color with the water brush.
- If you accidentally get too much water on your card, use a corner of a paper towel to absorb the excess.
- If you want to add details or text over your watercolor images with a regular Cricut pen, do so after the watercoloring/blending is completely dry.
DIY Cricut watercolor cards
These Cricut watercolor cards were so much fun to make. I think the watercolor brush is so satisfying to use–it’s kind of therapeutic watching the colors spread and blend. And the results are so professional, even if I am an amateur watercolor-er!

I hope you try these! Happy card-making!

Don’t forget to pin and save for later!