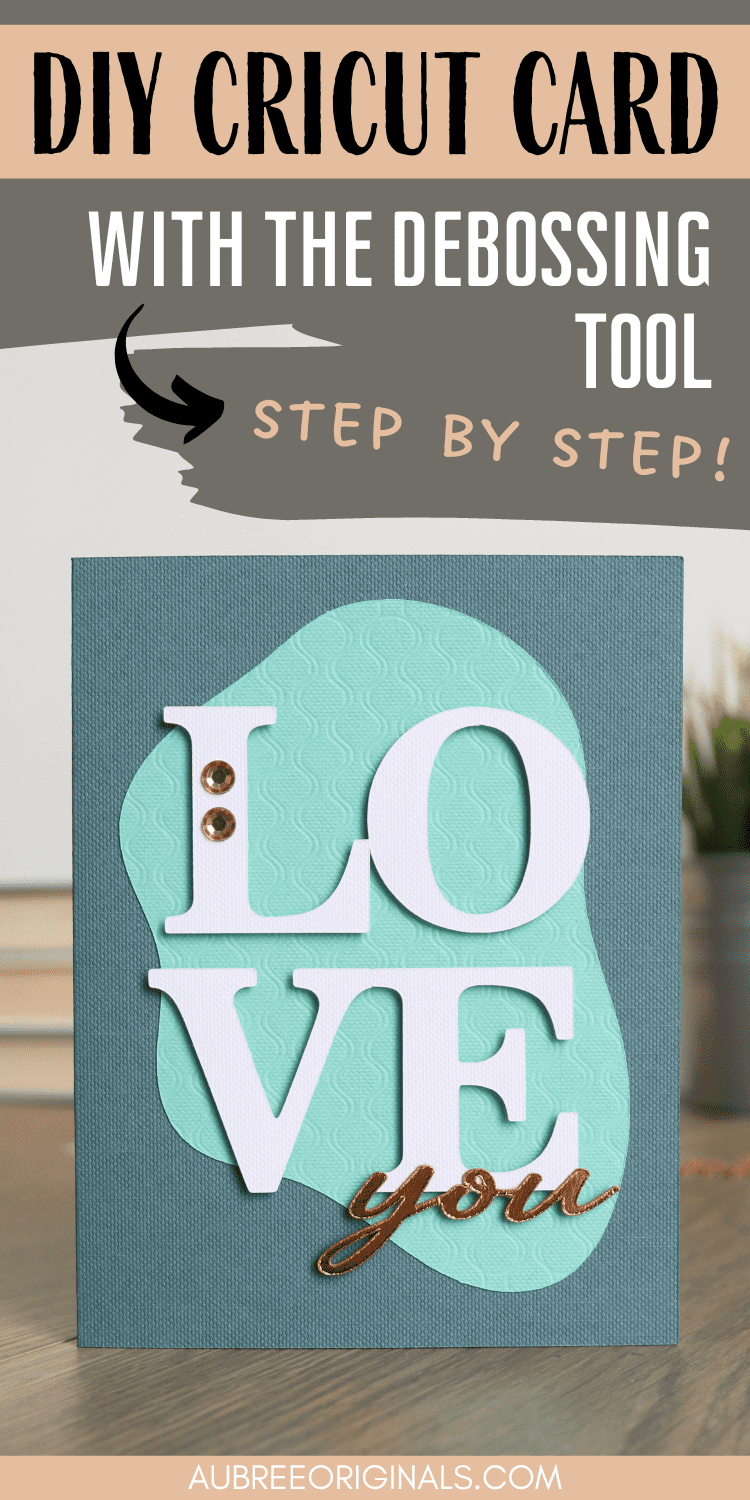
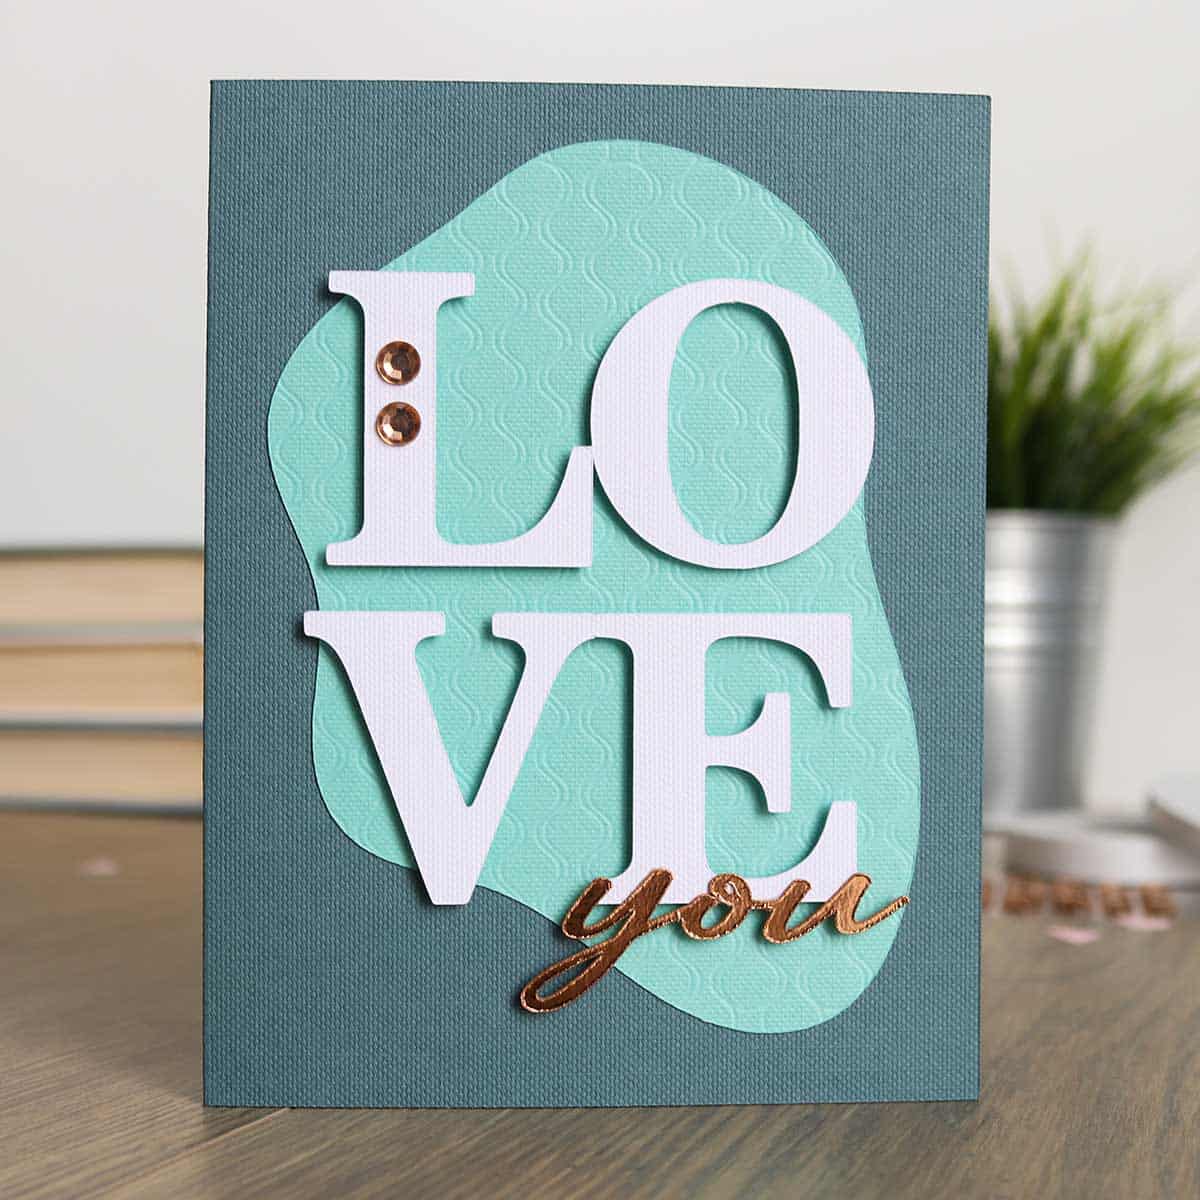
DIY “Love You” Debossed Cricut Card
Learn how to use your Cricut debossing tool and make this DIY Valentine’s card! Get the project in Cricut Design Space!
I bought all the Cricut QuickSwap tools a long time ago, but I seem to only ever use the scoring tool. Not anymore! I broke out the debossing tool for this cool Valentine’s card and had so much fun! (It’s way easier than you might think! And that added texture is “muah”–chef’s kiss!)
This card design is clean and simple and perfect for Valentine’s Day or any other occasion requiring a “love you” sentiment.
Let me show you how to make it!
This post contains affiliate links. For more information, see my disclosures here.
What you need to make this DIY debossed Valentine’s card
- Cricut machine
- Cricut Access subscription: This project uses Access images and fonts. If you’re not sure if Access is right for you, check out this post all about Cricut Access.
- cardstock in three contrasting colors (I chose a dark greyish/teal and a brighter turquoise, and then white for the “LOVE” letters)
- metallic kraft board (I used a copperish/rose gold color)
- LightGrip mat (the blue one, I use this for the cardstock)
- StandardGrip mat (the green one, I use this for the kraft board)
- QuickSwap debossing tool (you only need the tip if you already have the QuickSwap housing)
- foam tape: I love the foam tape from Dollar Tree! It’s super sticky and a great price. You just cut off what you need and can even cut it lengthwise if you need skinnier strips.
- craft glue: I love this glue, especially for the super fine point tip—you’re going to want that for the “you” phrase!
- adhesive gem embellishments, optional but it’s a pretty finishing touch
More posts you’ll like:

How to make a debossed cardstock Valentine’s card
Customize in Cricut Design Space
Open my Love You Debossed Card project in Cricut Design Space. If you want to make any changes, choose Customize (if you’re using different colors of cardstock, you may find it helpful to change those on the Canvas before cutting—it also helps you visualize what the final design will look like).
This project makes an A2 size card (4.25″ x 5.5″).
Cut with your Cricut machine
Click Make It. Choose your mat preferences. Set your base material to Medium Cardstock for the cardstock mats (and Kraft Board* for the “you” layer when you get to that mat). Load your mat with your material and load it into your machine. Press start.
When you get to the deboss mat, you’ll load the debossing tool into Clamp B. When it’s done, follow the prompts to replace the debossing tool with the fine point blade, but DO NOT unload the mat while doing this or you’ll lose your positioning.
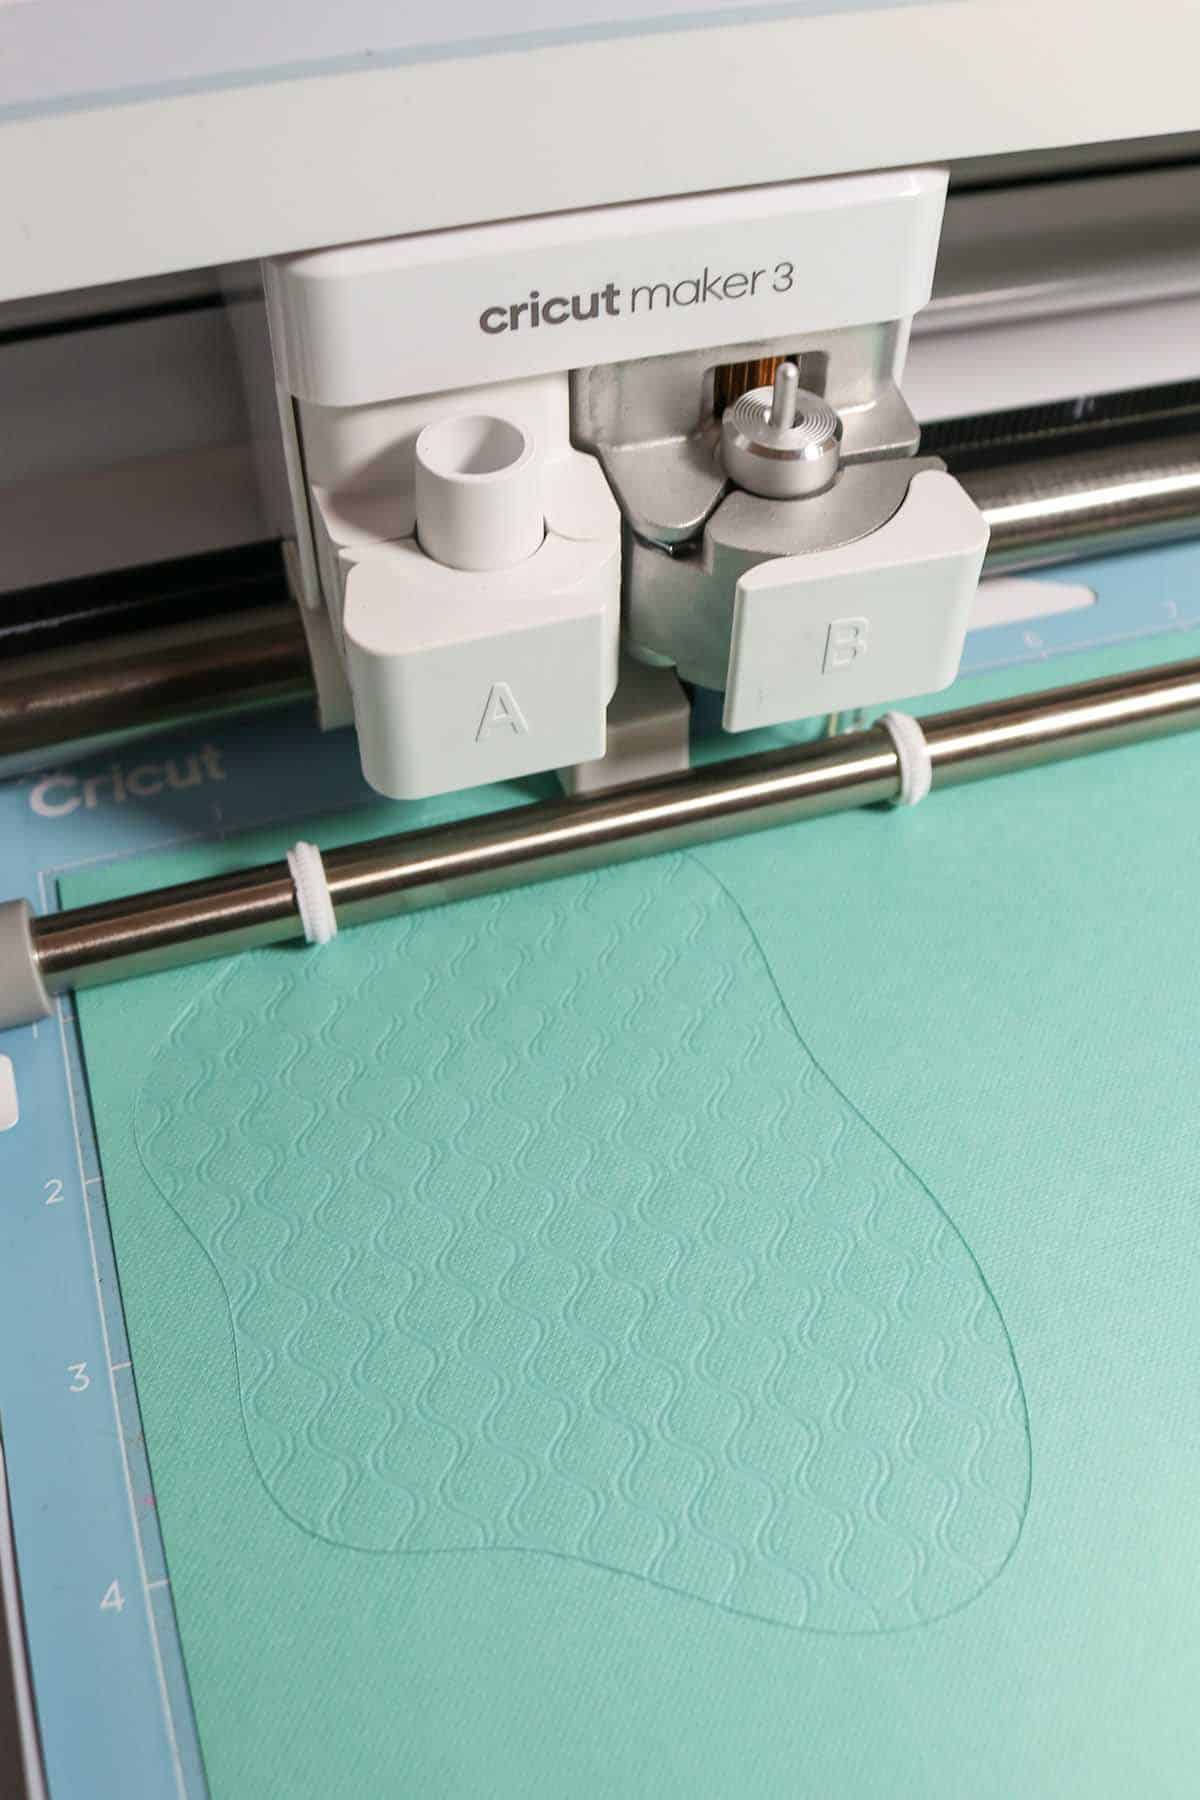
Continue following the Design Space prompts until all mats are finished cutting.
*Don’t be alarmed if your machine does two cuts for the kraft board—it’s thicker. Just let your machine do it’s thing.
Assemble card
Carefully fold the card on the score line.
Glue the debossed cardstock piece in the middle of card (do your best to line up the debossed pattern so the lines are straight).
Apply foam tape to the back of the “LOVE” letters (you want enough foam tape that the letters won’t collapse—you may need to cut it in tiny pieces to get the smaller parts). Gently adhere these pieces on top of the debossed cardstock, using my pictures as a guide for positioning.
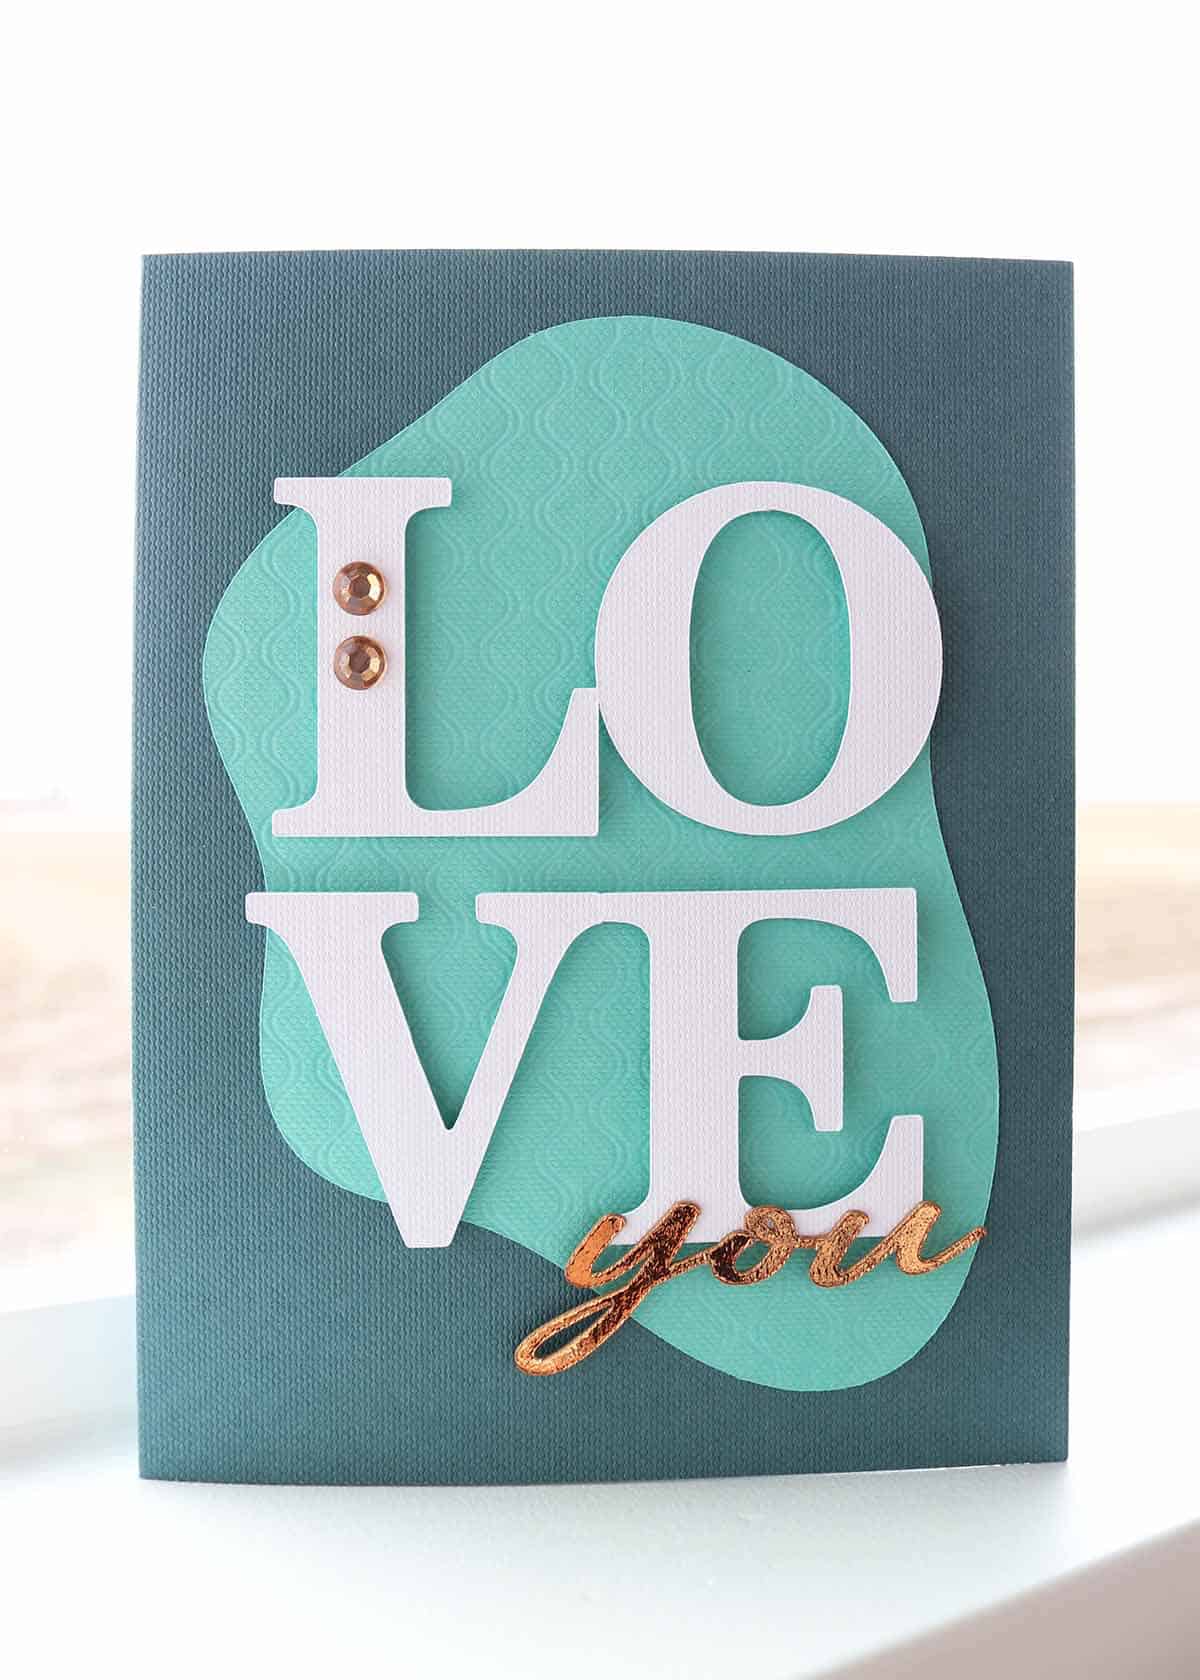
Next, lay the “you” on the bottom of the E so you can see where you need to put glue. Apply a tiny bit of glue and gently press the kraft board to the bottom of the E.
Stick two adhesive gems on the L or any other embellishments you want.
Note: This card does end up being a little fragile because of the foam tape and the way it’s assembled. If you’d rather, you can skip the foam tape and just glue all the layers on top of each other, but just know you’ll lose all that fun dimension (I promise, it’s just not as pretty without it!).
Easy DIY debossed Cricut card
I hope you found this Cricut Valentine’s card tutorial helpful. And, if you were like me, hopefully you’re not intimidated by the debossing tool now! I’m going to be using that a whole lot more when I need textured elements!

Don’t forget to pin and save for later!